In my previous posts, I’ve shown how you can set up CI for your .NET MAUI apps in Azure DevOps, both for iOS and Android. In this posts I’ll show you how you can do the same with GitHub Actions. We’ll be starting with .NET MAUI Android.
Prerequisites for this guide will be that you already have the source code for your .NET MAUI app hosted on GitHub.
Create your workflow
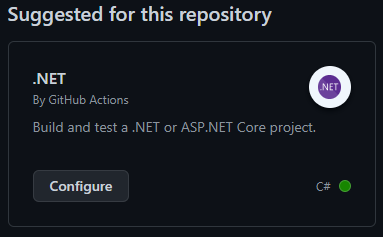
Create a new workflow under the Actions tab in your repository. Select the .NET workflow, which should be suggested to you (search it up if it isn’t suggested) and hit “Configure”.
Out of the box, the template will look like this:
Select your VM image
The first thing we want to change is what kind of virtual image this action will run on. The template sets it to ubuntu-latest, but we’ll want to change this to either a Windows or MacOS image, since Linux doesn’t support the installation of .NET 6 workloads. Let’s change it to windows-latest:
runs-on: windows-latestUse .NET 6
There’s already an action added to the workflow (actions/setup-dotnet@v1) which sets the job to use .NET 5. We’ll make a small edit to make this use .NET 6 instead:
    - name: Setup .NET
      uses: actions/setup-dotnet@v1
      with:
        dotnet-version: 6.0.x
Install the MAUI workload
Next we’ll remove the dotnet restore and dotnet test commands. In place of the dotnet restore command we’ll add a run where we will install the .NET MAUI workload:
    - name: Install MAUI workload
      run: dotnet workload install maui
Build it!
Finally we’ll modify the existing dotnet build command to build the .NET MAUI app for Android:
    - name: Build
      run: dotnet build -c Release -f:net6.0-android
And that’s it! Remember that if you have a keystore you want to sign your app with, you need to se that in the .csproj-file, as stated in in my other post. If you want to use your signed AAB file in f.ex. a release pipeline, you can use the Upload a Build Artifact action for this (actions/upload-artifact@v3.0.0).
Here’s the final YML file:
Final thoughts
Setting up the CI for this with GitHub Actions isn’t that different from setting it up in Azure DevOps. The syntax is a little different, but not too foreign. I’ve been meaning to test out GitHub Actions myself too, so making this guide was very helpful with that. I recommend that you play around with GitHub Actions too, as the possibilities are so much more than what I’ve explained here. As always, I hope this was useful!
Hi! Would you consider updating this post with:
1. How to store the key.keystore file and its passwords as a secret, and then add those values to the dotnetbuild command in the .yml file? So that we don’t have to keep the sensitive file and values in the repo?
2. How to publish the built .aab file to the playstore as the next step.
Thank you 🙂
I’ll consider it 😊 thanks for your comment!