
In this guide, we're going to create a simple app you can use to record and transcribe voice notes.
This includes:
- using the OpenAI API to transcribe speech to text
- using AlpineJS to manage state on the app frontend
- creating a CSS animation to display when recording audio
Here's a video of the voice notes app in action:
Previewing the project
Want to see a live version of the app? You can view all the code for this project and try the running app here.
View the VoiceNotesApp Project
Setting up the Django app
Install packages and create the Django application.
pip install --upgrade django faker
django-admin startproject voice_notes .
python3 manage.py startapp core
Add core to the INSTALLED_APPS list.
# settings.py
INSTALLED_APPS = [
  "core",
    ...
]
Adding the templates
- Create a directory named
templateswithin thecoreapp. - Create a file named
index.htmlwithin thetemplatesdirectory.
{% load static %}
<!doctype html>
<html>
  <head>
    <meta name="csrf-token" content="{{ csrf_token }}" />
    <script defer src="https://cdn.jsdelivr.net/npm/alpinejs@3.x.x/dist/cdn.min.js"></script>
    <link
      href="https://cdn.jsdelivr.net/npm/bootstrap@5.0.2/dist/css/bootstrap.min.css"
      rel="stylesheet"
      integrity="sha384-EVSTQN3/azprG1Anm3QDgpJLIm9Nao0Yz1ztcQTwFspd3yD65VohhpuuCOmLASjC"
      crossorigin="anonymous"
    />
    <link
      href="https://cdn.jsdelivr.net/npm/bootstrap-icons@1.10.0/font/bootstrap-icons.css"
      rel="stylesheet"
    />
    <link href="{% static 'core/css/index.css' %}" rel="stylesheet" />
  </head>
  <body>
    <div class="h-100 p-5" x-data="voiceNote" x-init="fetchVoiceNotes">
      <div id="voice-notes-container" class="mx-auto">
        <template x-for="voiceNote in voiceNotes" :key="voiceNote.id">
          <div class="bg-white rounded p-3 mb-3">
            <div x-text="voiceNote.text_content"></div>
            <div class="d-flex justify-content-end text-secondary mt-2">
              <small x-text="voiceNote.created_at"></small>
            </div>
          </div>
        </template>
        <div class="bg-white rounded p-4">
          <div class="d-flex justify-content-center">
            <button
              @click="handleRecording(); isRecording = !isRecording"
              :class="{'is-recording': isRecording}"
              class="btn mic-btn btn-primary rounded-circle"
            >
              <i
                x-show="!isSubmitting"
                :class="isRecording ? 'bi bi-mic-fill' : 'bi bi-mic-mute-fill'"
                style="font-size: 1.5rem"
              ></i>
              <span x-show="isSubmitting" class="spinner-border spinner-border-sm" role="status" aria-hidden="true"></span>
            </button>
          </div>
        </div>
      </div>
    </div>
    <script>
      let mediaRecorder;
      let audioChunks = [];

      document.addEventListener("alpine:init", () => {
        Alpine.data("voiceNote", () => ({
          isRecording: false,
          isSubmitting: false,
          voiceNotes: [],
          fetchVoiceNotes() {
            fetch("{% url 'voice_notes' %}")
              .then(response => response.json())
              .then(data => {
                this.voiceNotes = data;
              })
          },
          startRecording(stream) {
            mediaRecorder = new MediaRecorder(stream);
            mediaRecorder.ondataavailable = (event) => {
              audioChunks.push(event.data);
            };
            mediaRecorder.onstop = this.sendAudioToServer.bind(this);
            mediaRecorder.start();
          },
          stopRecording() {
            mediaRecorder.stop();
          },
          handleRecording() {
            if (!mediaRecorder || mediaRecorder.state === "inactive") {
              navigator.mediaDevices
                .getUserMedia({ audio: true })
                .then(this.startRecording.bind(this));
            } else if (mediaRecorder.state === "recording") {
              this.stopRecording();
            }
          },
          sendAudioToServer() {
            const audioBlob = new Blob(audioChunks, {
              type: "audio/webm",
            });
            audioChunks = [];

            const formData = new FormData();
            formData.append("audio_file", audioBlob, "recording.ogg");

            const csrfToken = document
            .querySelector('meta[name="csrf-token"]')
            .getAttribute("content");

            this.isSubmitting = true;

            fetch("{% url 'transcribe_audio' %}", {
              method: "POST",
              body: formData,
              headers: {
                "X-CSRFToken": csrfToken,
              },
              credentials: "same-origin",
            })
              .then((response) => response.json())
              .then((data) => {
              this.fetchVoiceNotes();
            })
              .finally(() => {
              this.isSubmitting = false;
            });
          }
        }))
      });
    </script>
  </body>
</html>
Adding the CSS
- Create the directory structure
static/core/csswithin thecoredirectory. - Create a new file named
index.cssand enter the following.
body {
  background-color: rgb(246, 247, 248);
}

#voice-notes-container {
  width: 100%;
  max-width: 650px;
}

.mic-btn {
  width: 50px;
  height: 50px;
  padding: 0;
}

.is-recording {
  animation: pulse-animation 2s infinite;
}

@keyframes pulse-animation {
  0%, 100% {
    transform: scale(1);
    opacity: 1;
  }

  50% {
    transform: scale(1.05);
    opacity: 0.85;
  }
}
Adding the OpenAI API Key
We need an API key in order to use the OpenAI transcription service.
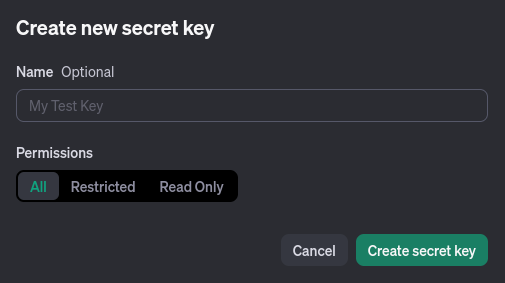
Go to the settings page on the OpenAI dashboard to create a new API key for the app.
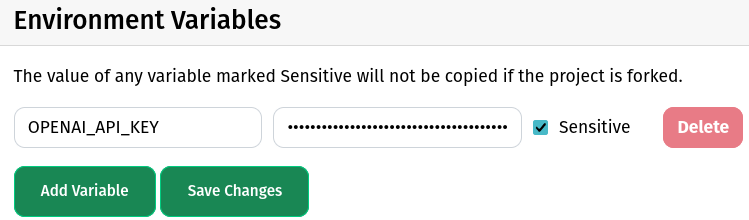
If you're using Circumeo, you'll need to add the API key to the Variables list.
Adding the views
Copy and paste the following into views.py within the core directory.
import tempfile
from openai import OpenAI

from django.conf import settings
from django.core import serializers

from django.http import JsonResponse
from django.shortcuts import render

from core.models import VoiceNote

client = OpenAI(api_key=settings.OPENAI_API_KEY)

def index_view(request):
    return render(request, "core/index.html")

def voice_notes_view(request):
    voice_notes = VoiceNote.objects.all()

    return JsonResponse(
        [
            {
                "id": voice_note.id,
                "text_content": voice_note.text_content,
                "created_at": voice_note.created_at.strftime('%Y-%m-%d %H:%M:%S'),
            }
            for voice_note in voice_notes
        ],
        safe=False
    )

def transcribe_audio_view(request):
    audio_file = request.FILES["audio_file"]

    with tempfile.NamedTemporaryFile(suffix=".webm", delete=True) as tmp_file:
        for chunk in audio_file.chunks():
            tmp_file.write(chunk)

        tmp_file.flush()
        with open(tmp_file.name, "rb") as file_for_transcription:
            transcription = client.audio.transcriptions.create(
                model="whisper-1",
                file=file_for_transcription,
            )

        voice_note = VoiceNote()
        voice_note.text_content = transcription.text
        voice_note.save()

        return JsonResponse({"transcription": transcription.text})
Updating URLs
Create urls.py in the core directory.
from django.urls import path
from core.views import index_view, voice_notes_view, transcribe_audio_view

urlpatterns = [
    path("", index_view, name="index"),
    path("notes", voice_notes_view, name="voice_notes"),
    path("transcribe", transcribe_audio_view, name="transcribe_audio")
]
Update the existing urls.py within the project voice_notes directory.
from django.contrib import admin
from django.urls import include, path

urlpatterns = [
    path("admin/", admin.site.urls),
    path("", include("core.urls")),
]
Adding the database models
Overwrite the existing models.py with the following:
from django.db import models

class VoiceNote(models.Model):
    text_content = models.TextField(null=False)
    created_at = models.DateTimeField(auto_now_add=True, null=False)
You're ready to take notes
That's all it takes to build a speech-to-text note taking app! Of course, there are many features you could extend this with.
- Real-time transcribing of longer voice notes.
- Sharing voice notes with other users.
- Kanban board style stages for notes such as To Do, In Progress, and Done.