Depending on how you look at it, the fact that the MSAL library uses webviews to perform authentication and authorization through Azure AD B2C is either a great thing or a not so great thing. I say it's a great thing because the OAuth2 standard requires that webviews must be used. I say not so great because by shelling out to web pages, we lose some of native look and feel of our app.
Luckily, however, Azure AD B2C provides a means by which we can customize the webpages shown during every interaction the user has with Azure AD B2C. Including the sign-in (both local and social authentication), sign-up, multi-factor authentication, password reset, profile editing, and error display.
In this article I will give you a rundown of how Azure AD B2C page customization works, how to set custom pages within the Azure portal, the stucture of the HTML pages, some best practices for making the pages look exactly the way you want, and some other tips and tricks (including how to turn off email validation during the sign-up process!).
How Azure AD B2C Page Customization Works
Azure AD B2C returns a custom UI for various functionalites like signing-in by looking at the respective policy that's getting invoked by a client app, then seeing where in the workflow the user currently is within that policy (like MFA), and then returning a custom HTML page that's assigned to that portion of the workflow.
In theory, that's very simple, and it is, but let's step through the some of the prerequisites needed in order for everything to work properly.
First and foremost that HTML page which is being returned by Azure AD B2C isn't fully specified by you, the developer. In other words for a sign-in page - you do not specify the input elements for the username and password. Rather you only provide a general look and feel for that page (colors, background, y'know CSS-y stuff) and Azure AD B2C injects the HTML elements it uses to collect user information.
This means that the HTML page you provide to Azure AD B2C must be static and the server on which you host it must serve that page over HTTPS.
Furthermore, because Azure AD B2C is injecting HTML elements which will be posting back to a different server from which the most of the page originated from, your server needs to be setup to allow CORS. Here's how to do it with IIS, and Azure Functions, and even Azure Storage!
Finally - and I'll talk more about this below - the HTML must be structured in a specific way to allow Azure AD B2C to inject it's elements in the correct spot. And, so the resulting HTML can be styled appropriately to your brand, there are a set of CSS selectors which can be used as well.
Specifying Custom Pages in the Azure Portal
This is the easy part! Which custom page to use is determined by the policy being invoked. So if the user is signing-in to an app, we'll find the options to customize the look and feel of that particular page in the Sign-up or sign-in policy that our app uses.
It should be noted that you cannot customize the experience of the sign-in only policy. That's one of the reasons to stick with the Sign-up or sign-in policy.
In order to customize the page, login to the Azure portal, go into your Tenant, and edit the policy. From there you'll see an option that says Page UI Customization. Click on that.
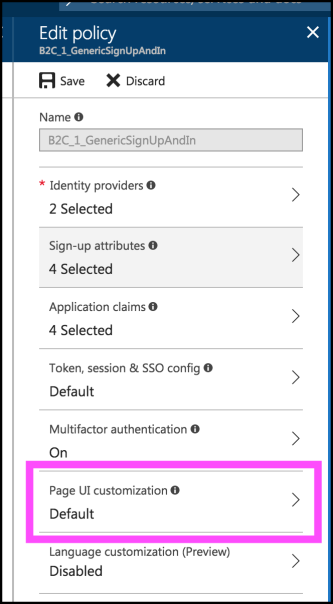
Assuming you're editing the Sign-up or sign-up policy, you'll see the following potential steps in the policy's workflow that can be customized.
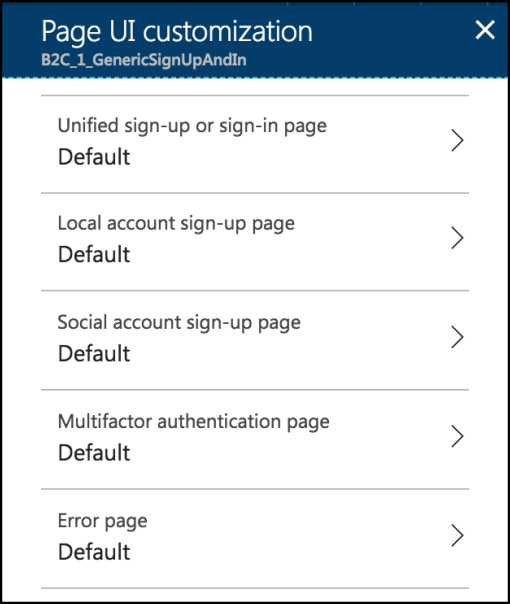
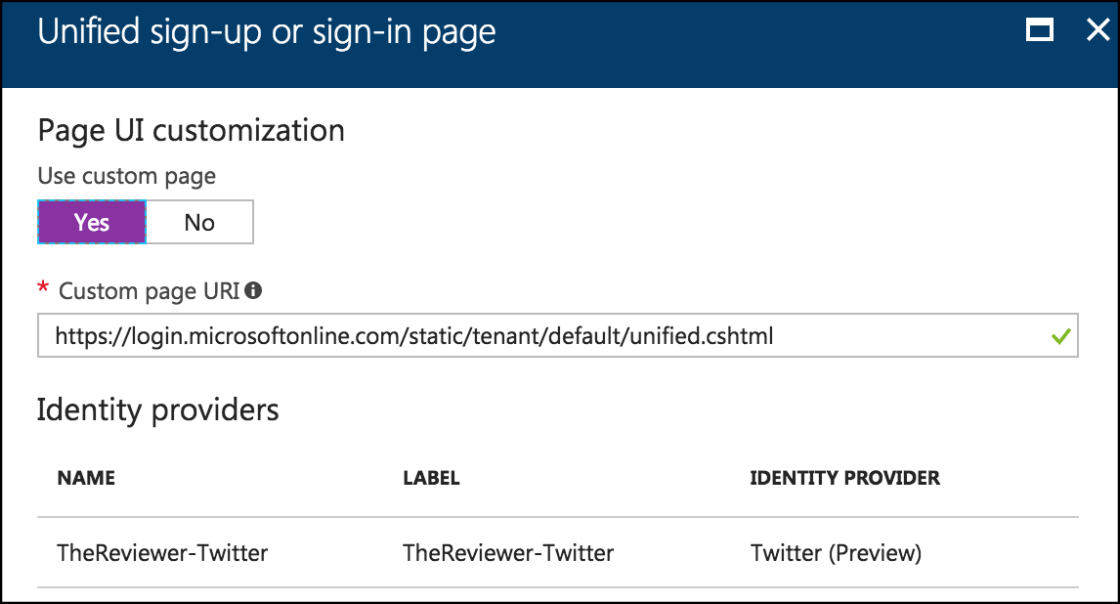
Here you can click on any of those options, and in the resulting page specify that you want a custom page to be used to style the workflow step and a URL to find that page.
HTML Structure
Great - we know how to tell Azure AD B2C to use a custom HTML page for a workflow step, but how in the world should that page be structured - since Azure AD B2C is injecting its code into it, and is going to expect things to be setup a certain way?
Again - super easy. All you need is this somewhere in your HTML:
<div id="api">

</div>
That's it. Azure AD B2C see's that <div> tag and it knows exactly where it needs to inject its code.
Sweet.
Getting the Most From Your CSS
While putting that <div> tag surrounded by your own HTML content is enough to start using custom pages - it's not going to look all that great yet.
That's because none of the elements which are injected are actually styled. Fortunately, we are able to style them via various CSS selectors and classes. Unfortunately we have to use CSS.
Most of the information can be found on the main documentation site, so I won't rehash everything.
One interesting note is that any custom user attribute field that you decide to collect during the sign-up process will have an ID of the following format:
extension/_FIELD-NAME Here the FIELD-NAME is what you called the attribute while creating it in the portal. (See this post for more info.)
Of course, once you have all of your CSS the way you want it - make sure you reference it from the page you set in the policy and you should be good to go.
Before you go off and start customizing every page to look exactly like your app - there are a couple of tips and tricks...
Tips and Tricks
There are a couple of tips and tricks that you'll probably stumble across while setting everything up, but it's good to know about them up front so you don't have to find them on your own.
The first is to make sure you have CORS enabled on your server. This will save some debugging heartache later. :)
Customizing User Sign-Up Fields
It's possible to customize what type of HTML elements are used for the user attribute fields during the sign-up process through tweaking the policy in the portal.
In order to do this, go into the page customization portion of a Sign-Up or sign-in policy and select Local account sign-up page or Social account sign-up page.
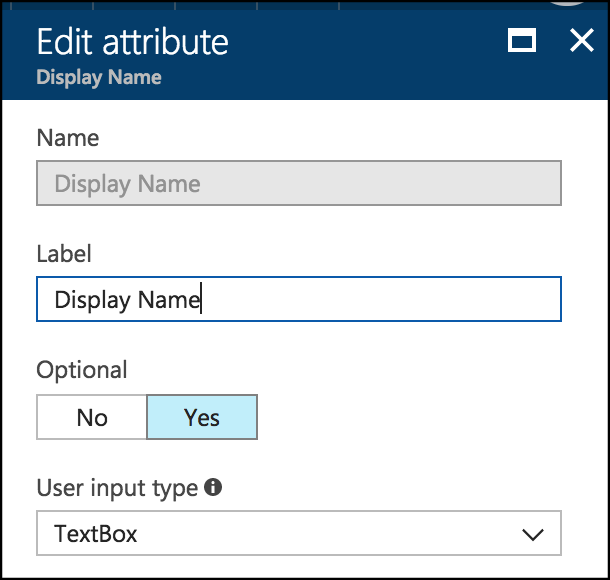
That will display the page which allows you to set the URL of the custom HTML page, but it also shows you the user attributes which are collected.
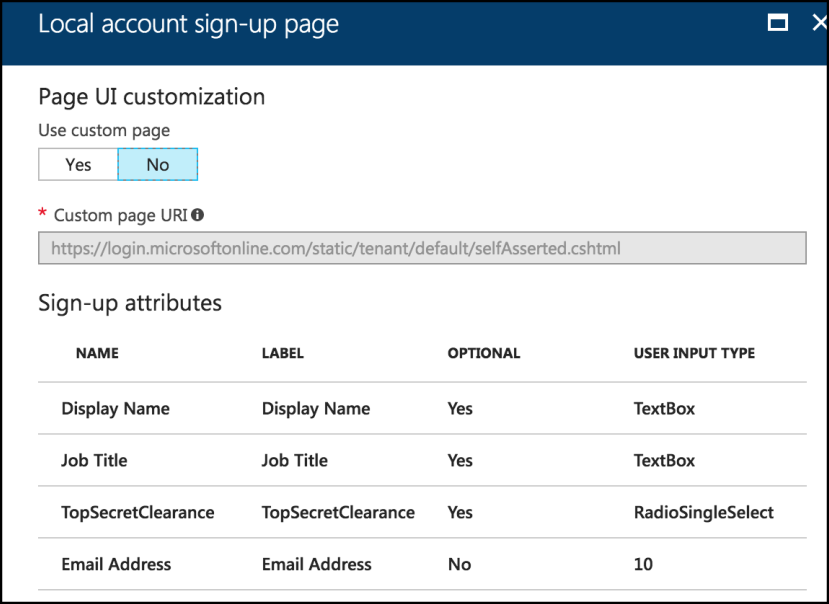
By selecting each one of those attributes, you'll be able to not only change the text of the label that appears next to the field, but also whether the field is required or not, and also the type of field that is used to collect the information!
In fact, whenever you change a user attribute in the User Attributes section of the Tenant - the portal will warn you to update any policies that are referencing them - and this is what it's talking about.
Disabling Email Verification
The last tip I want to mention is how to disable email verification. This happens during the new user sign-up process. By default the user is prompted to enter their email, then they have to enter a validation code that is sent to their email address.
Normally a good thing - but it can be a pain point - and it's up to you whether it's worth it or not.
To disable it, edit the sign-up or sign-in policy, go into Page UI Customization and then edit the Local account sign-up page.
In here, click on the Email Address row. From there you'll be able to set the Require verification value to either No or Yes depending on what you want.
More info on the process can be found here.
Summary
That's it! There's not a whole lot of work to setup custom pages for various user interaction points with Azure AD B2C - head on over into the portal and set the workflow point to the appropriate HTML page.
The real work comes in when designing the appropriate look and feel for the HTML page and styling it with CSS. Being mobile developers - that's out of our paygrade! But that's why we hire designers for!
Comments