Something that Flips! Flipity Flippy Flippin’ Flip View right out of Xamarin.Forms yol! 😀
Sometime back while I was trying to push the limits of Xamarin.Forms Views, I came across this requirement of Flipping a View with a cool animation. So let me share the story of it right here as usual…
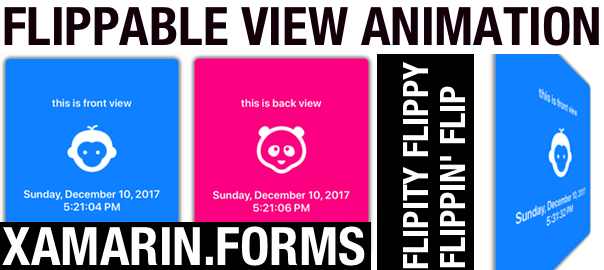
I wanted to create a control that would have a Front View and a Back View, whilst being able to switch between those two Views in with a cool Flip animation!
Behold ze me effortz… 😀


TADAAA! 😀 How cool it is eh! 😉
And its all pure Xamarin.Forms, without a single line of native code… Say whuut! 😀 lol
So yeah let’s see how I did it.
The Golden Recipe…
So the solution here is to simply use a View which can hold two layouts (where we will be placing out child elements in) on top of each other, and rotate the View with the easy use of Xamarin.Forms Animations, whitest swapping the two layouts on top of each other accordingly.
Ok so let me elaborate step by step.
- Prepare a MainLayout View to hold two child Layouts (FrontView and BackView) in it
- Add the FrontView and BackView on top of each other inside the MainLayout View
- Rotate the MainLayout 90 degrees using Xamarin.Forms Animations API
- Swap the FrontView and BackView
- Then Rotate the MainLayout another 90 degrees
- And Repeat the same…
That’s it!
The Golden Control…
Alright let’s start of with creating a custom control, which we shall call the golden XFFlipView which would derive from a ContentView. Then myself be using a RelativeLayout as the Parent Layout View of this control,
I’m using bindable FrontViewProperty and BackViewProperty inside the XFFlipView control to hold the reference of the two child Layout Views that we are going to be using as FrontView and BackView of this Flippin’ Flippity Flippy thing! 😀
Additionally we are going to use a bindable boolean, IsFlippedProperty to handle the flipping of this flip view 😉
Well why all the “bindable properties” you might ask? Oh come on, why not silly! So we can monitor the changes of those properties at run time and react accordingly, such as the IsFlipped property, whereas whenever the value changes we shall be activating the Flip View animation functionality.
public class XFFlipView : ContentView
{
	private readonly RelativeLayout _contentHolder;

	public XFFlipView()
	{
		_contentHolder = new RelativeLayout();
		Content = _contentHolder;
	}

	public static readonly BindableProperty FrontViewProperty =
	BindableProperty.Create(...);

	public static readonly BindableProperty BackViewProperty =
	BindableProperty.Create(...);

	public static readonly BindableProperty IsFlippedProperty =
	BindableProperty.Create(...);

	private static void IsFlippedPropertyChanged(BindableObject bindable, object oldValue, object newValue)
	{
		if ((bool)newValue)
		{
			((XFFlipView)bindable).FlipFromFrontToBack();
		}
		else
		{
			((XFFlipView)bindable).FlipFromBackToFront();
		}
	}

	/// <summary>
	/// Performs the flip
	/// </summary>
	private async void FlipFromFrontToBack()
	{
		...
	}

	/// <summary>
	/// Performs the flip
	/// </summary>
	private async void FlipFromBackToFront()
	{
		...
	}
}
There you have it as we just discussed earlier. Ops I may have forgotten about those two methods at the bottom, so those are the methods we are going to use the actual Flip Animation logic, as you can see they’re are being called every time the IsFlipped property is changed.
Oh for them lazy fellas, here grab the full implementation above on my github: XFFlipView.cs
Ze Animationalization…
Alright time for the reveal of the animation thingy, which has been completely done through the easy to use Xamarin.Forms Animations API. Surprise!!?? 😛
...
private async void FlipFromFrontToBack()
{
	await FrontToBackRotate();

	// Change the visible content
	this.FrontView.IsVisible = false;
	this.BackView.IsVisible = true;

	await BackToFrontRotate();
}
...
So basically that’s the implementation of the above said mystery two methods, as you can clearly see, inside there I’m calling another method called FrontToBackRotate() which is the actual method that performs the animation. And right after that we are swapping the Visibility of the FrontView and BackView. Then continue with the rest of animation in BackToFrontRotate() call, just like how we discussed at the beginning.
Let’s see the actual animation implementation, shall we…
#region Animation Stuff

private async Task<bool> FrontToBackRotate()
{
	ViewExtensions.CancelAnimations(this);

	this.RotationY = 360;

	await this.RotateYTo(270, 500, Easing.Linear);

	return true;
}

private async Task<bool> BackToFrontRotate()
{
	ViewExtensions.CancelAnimations(this);

	this.RotationY = 90;

	await this.RotateYTo(0, 500, Easing.Linear);

	return true;
}

#endregion
Oh look at that simplicity eh! Thank you Xamarin.Forms animation! 😀 lol
So what happen over there is first we cancel any pending animation and the do initial Y axis rotate property of the parent View and then actually call on the RotateYTo() of Xamarin.Forms Animations, causing it the parent Layout to rotate around the Y Axis with the given value of degrees.
Then when the parent View is flipping from Back To Front View, the same process’s opposite will be executed. 😀 Simples!
Try it out eh! 😀
Since its full on Xamarin.Forms without a single line of native Xamarin code, you could straightaway use this in your XAML or C# code behind anywhere in your PCL.
<xfFlipViewControl:XFFlipView
        x:Name="XFFlipViewControl1">

    <xfFlipViewControl:XFFlipView.FrontView>
        <Frame
            Margin="10"
            Padding="0"
            BackgroundColor="#0080ff"
            CornerRadius="10"
            HasShadow="True">
            <Grid>
                <Label
                 Grid.Row="0"
                 FontAttributes="Bold"
                 FontSize="Large"
                 HorizontalTextAlignment="Center"
                 Text="this is front view"
                 TextColor="White"
                 VerticalTextAlignment="Center" />
            </Grid>
        </Frame>
    </xfFlipViewControl:XFFlipView.FrontView>

    <xfFlipViewControl:XFFlipView.BackView>
        <Frame
            Margin="10"
            Padding="0"
            BackgroundColor="#ff0080"
            CornerRadius="10"
            HasShadow="True">
            <Grid>
                <Label
                 Grid.Row="0"
                 FontAttributes="Bold"
                 FontSize="Large"
                 HorizontalTextAlignment="Center"
                 Text="this is back view"
                 TextColor="White"
                 VerticalTextAlignment="Center" />
            </Grid>
        </Frame>
    </xfFlipViewControl:XFFlipView.BackView>

</xfFlipViewControl:XFFlipView>
Woot! Such simplicity! 😀 So you can see how I have directly used our awesome XFFlipView control right inside XAML and defined the Front and Back Views. Also I have used a Frame View to make it look cooler 😉 lol
So now to execute the awesome Flip Animation, simply change the value of the IsFlipped as follows.
XFFlipViewControl1.IsFlipped = !XFFlipViewControl1.IsFlipped;
As you can see in code behind, we’re changing the value of the control’s IsFlipped property, Simples eh! 😀 This is fully bindable as well, so you can directly bind this to a ViewModel property as well.
...
<xfFlipViewControl:XFFlipView
     x:Name="XFFlipViewControl1"
          IsFlipped="{Binding IsViewFlipped}">
...

</xfFlipViewControl:XFFlipView>
So you can directly use this in your beautifully crafted MVVM Xamarin.Forms app as well. 😀
Some Live Action…
Here we go baby! iOS and Android running side by side…

Oh hold on… there’s more coolness… 😀

Ohhh! Eye Candy! 😀
And the craziest thing about it is that, all of this awesomeness is right from Xamarin.Forms, without a single line of native Xamarin code. 😉
Woot!
This whole awesome project i hosted up in my Github repo : https://github.com/UdaraAlwis/XFFlipViewControl
Oh BTW, you might ask me why on Android during the Animation, the view seem to be expanding out of the view? Yes its basically how the Android native flip animation executes, since Xamarin.Forms directly maps its Animation rendering calls down to native level. But we could easily tweak it up by implementing our own native renderer for the Animation, which we will be looking into in the next post. 🙂
Cheers! 😀 Keep on going my fellow devs!
Spread the love…

Hi Udara! Firstly. thank you for always sharing such awesome stuff! It is appreciated :). Recently, I got a task to create a flip effect on my tile layout in xamarin.forms so your post on Flipity flippable views could not have come at a better time :D. I’ve tried your code and it worked like a charm, I wanted to know how can I make a specific tile to flip after every 5 secs maybe without pressing the “Flip em!” button. Thanks
LikeLike
Thank you so much for your response 🙂 I’m truly humbled.
Getting to your requirement, you could actually use a XF Timer, Device.StartTimer() specifically and call the flipViewControl1.IsFlipped = !flipViewControl1.IsFlipped; line, so that specific flip control will keep flipping itself until the timer stops.
Cheers! 🙂
LikeLike
Can you upload the flip effect with dynamic binding. There is app called flipboard i want to achieve the same effect in xamarin forms.Please help me to do that.
LikeLike