
As a developer, CRUD operations are one of the most basic concepts to know. Today, I'll show you how to build a REST API using Django and Django Rest and a SPA with React, which we'll use to perform the CRUD operations.
Requirements
For this tutorial, you’ll need to have a basics understanding of Django models, Django Rest serializers, and ViewSets.
Project Setup
First of all, we must set up the development environment. Pick up your favorite terminal and make sure you have virtualenv installed.
Once it’s done, create an environment and install Django and Django rest framework.
virtualenv --python=/usr/bin/python3.8 venv
source venv/bin/activate
pip install django django-rest-framework
Once the installation is finished, we can now create the project and start working.
django-admin startproject restaurant .
Note: Don’t forget the dot at the end of this command. It will generate the directories and files in the current directory instead of generating them in a new directory restaurant.
To make sure that the project has been well initiated, try python manage.py runserver. And hit 127.0.0.1:8000.
Now let’s create a Django app.
python manage.py startapp menu
So make sure to add the menu app and rest_framework in the INSTALLED_APPS in settings.py file.
#restaurant/settings.py
INSTALLED_APPS = [
    'django.contrib.admin',
    'django.contrib.auth',
    'django.contrib.contenttypes',
    'django.contrib.sessions',
    'django.contrib.messages',
    'django.contrib.staticfiles',
    'rest_framework',
    'menu'
    ]
Good. We can start working on the logic we want to achieve in this tutorial. So, we’ll write Menu :
- Model
- Serializer
- ViewSet
- And finally, configure routes.
Model
The Menu model will only contain 5 fields.
#menu/models.py
from django.db import models

class Menu(models.Model):
    name = models.CharField(max_length=255)
    description = models.TextField()
    price = models.IntegerField()
    created = models.DateTimeField(auto_now_add=True)
    updated = models.DateTimeField(auto_now=True)

    def __str__(self):
        return self.name
Once it’s done, let’s create a migration and then apply it.
Migrations are Django’s way of propagating changes you make to your models (adding a field, deleting a model, etc.) into your database schema.
python manage.py makemigrations
python manage.py migrate
Serializers
Serializers allows us to convert complex Django complex data structures such as querysets or model instances in Python native objects that can be easily converted JSON/XML format.
Here, we’ll create a serializer to convert our data into JSON format.
#menu/serializers.py

from rest_framework import serializers
from menu.models import Menu

class MenuSerializer(serializers.ModelSerializer):
    class Meta:
        model = Menu
        fields = ['id', 'name', 'description', 'price', 'created', 'updated']
Viewsets
Viewsets here can be referred to in Django as Controllers if you are coming from another framework.
ViewSet is a concept developed by DRF which consists of grouping a set of views for a given model in a single Python class. This set of views corresponds to the predefined actions of CRUD type (Create, Read, Update, Delete), associated with HTTP methods. Each of these actions is a ViewSet instance method. Among these default actions, we find:
- list
- retrieve
- update
- destroy
- partial_update
- create
#menu/viewsets.py
from rest_framework import viewsets
from menu.models import Menu
from menu.serializers import MenuSerializer

class MenuViewSet(viewsets.ModelViewSet):
    serializer_class = MenuSerializer

    def get_queryset(self):
        return Menu.objects.all()
Great. We have the logic set, but we must add the API endpoints.
First create a file, routers.py.
#./routers.py
from rest_framework import routers
from menu.viewsets import MenuViewSet
router = routers.SimpleRouter()
router.register(r'menu', MenuViewSet, basename='menu')


#restaurant/urls.py
from django.contrib import admin
from django.urls import path, include
from routers import router

urlpatterns = [
    # path('admin/', admin.site.urls),
    path('api/', include((router.urls, 'restaurant'), namespace='restaurant'))
]
If you haven’t started you server yet.
python manage.py runserver
Then hit http://127.0.0.1:8000/api/menu/ in your browser.
Your browsable API is ready. 🙂

Let’s add CORS responses. Adding CORS headers allows your resources to be accessed on other domains.
pip install django-cors-headers
Then, add it to the INSTALLED_APPS.
# restaurant/settings.py
INSTALLED_APPS = [
    ...
    'corsheaders',
    ...
]
You will also need to add a middleware class to listen in on responses.
#restaurant/settings.py
MIDDLEWARE = [
    'corsheaders.middleware.CorsMiddleware',
    'django.middleware.security.SecurityMiddleware',
    'django.contrib.sessions.middleware.SessionMiddleware',
    'django.middleware.common.CommonMiddleware',
    ...
]
For this tutorial, we’ll allow all origins to make cross-site HTTP requests.
However, it’s dangerous and you should never do this in production.
# restaurant/settings.py
CORS_ORIGIN_ALLOW_ALL = True
In a production environment, you can use CORS_ALLOWED_ORIGINS instead.
CORS_ALLOWED_ORIGINS = [
    "https://example.com",
    "https://sub.example.com",
    "http://localhost:3000",
    "http://127.0.0.1:3000",
]
For more information, you can refer to the documentation.
React.js CRUD REST API Consumption
Make sure you have the latest version of create-react-app installed.
yarn create-react-app restaurant-menu-front
cd restaurant-menu-front
yarn start
Then open http://localhost:3000/ to see your app.
We can add now the dependencies of this project.
yarn add axios bootstrap react-router-dom
With this line of command, we installed :
- axios : a promised based HTTP client
- bootstrap: a library to quickly prototype an app without writing too much CSS
- react-router-dom : a React library for routes in our application.
Inside the src/ folder, make sure you have the following files and directories.
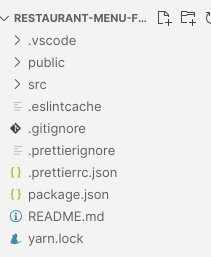
In the src/components/ directory, we have three components :
AddMenu.jsUpdateMenu.jsMenuList.js
And in src/services/ directory, create menu.service.js and the following lines :
    export const baseURL = "http://localhost:8000/api";
    export const headers = {
      "Content-type": "application/json",
    };
Make sure to import react-router-dom in your index.js file and wrap App in BrowserRouter object.
    import React from "react";
    import ReactDOM from "react-dom";
    import { BrowserRouter } from "react-router-dom";
    import "./index.css";
    import App from "./App";
    ReactDOM.render(
      <BrowserRouter>
        <App />
      </BrowserRouter>,
      document.getElementById("root")
    );
Once it’s done, we can modify the App.js file by importing bootstrap, writing routes, and build the home page and the navigation bar.
    import React from "react";
    import "bootstrap/dist/css/bootstrap.min.css";
    import { Switch, Route, Link } from "react-router-dom";
    import { AddMenu } from "./components/AddMenu";
    import { MenuList } from "./components/MenuList";
    import { UpdateMenu } from "./components/UpdateMenu";
    function App() {
      return (
        <div>
          <nav className="navbar navbar-expand navbar-dark bg-info">
            <a href="/" className="navbar-brand">
              Restaurant Menu
            </a>
            <div className="navbar-nav mr-auto">
              <li className="nav-item">
                <Link exact to={"/add/"} className="nav-link">
                  Add
                </Link>
              </li>
            </div>
          </nav>
          <div className="container m-10">
            // Add the routes
          </div>
        </div>
      );
    }
    export default App;
The navbar is done and we have imported bootstrap and the components we’ll need to write the routes that should map to a component we created.
    <Switch>
          <Route exact path={["/", "/menus"]} component={MenuList} />
          <Route exact path="/add/" component={AddMenu} />
          <Route path="/menu/:id/update/" component={UpdateMenu} />
    </Switch>
The next step is to write the CRUD logic and the HTML for our components.
Let’s start by listing the menu from the API in MenuList.js.
For this script, we’ll have two states :
-
menuswhich will store the response object from the API -
deletedthat will contain a Boolean object to show a message
And three methods :
-
retrieveAllMenus()to retrieve all menus from the API and set the response objects in menus by usingsetMenus. -
deleteMenu()to delete a menu and set thedeletedstate totrue, which will help us show a simple message every time a menu is deleted. -
handleUpdateClick()to navigate to a new page to update a menu.
    import axios from "axios";
    import React, { useState, useEffect, useRef } from "react";
    import { baseURL, headers } from "./../services/menu.service";
    import { useHistory } from "react-router-dom";
    export const MenuList = () => {
      const [menus, setMenus] = useState([]);
      const history = useHistory();
      const countRef = useRef(0);
      const [deleted, setDeleted] = useState(false);
      useEffect(() => {
        retrieveAllMenus();
      }, [countRef]);
      const retrieveAllMenus = () => {
        axios
          .get(`${baseURL}/menu/`, {
            headers: {
              headers,
            },
          })
          .then((response) => {
            setMenus(response.data);
          })
          .catch((e) => {
            console.error(e);
          });
      };
      const deleteMenu = (id) => {
        axios
          .delete(`${baseURL}/menu/${id}/`, {
            headers: {
              headers,
            },
          })
          .then((response) => {
            setDeleted(true);
            retrieveAllMenus();
          })
          .catch((e) => {
            console.error(e);
          });
      };
      const handleUpdateClick = (id) => {
        history.push(`/menu/${id}/update/`);
      };
    return (
        // ...
      );
    };
Once it’s done, let’s implement the render() method:
<div className="row justify-content-center">
<div className="col">
{deleted && (
<div
className="alert alert-danger alert-dismissible fade show"
role="alert"
>
Menu deleted!
<button
type="button"
className="close"
data-dismiss="alert"
aria-label="Close"
>
<span aria-hidden="true">×</span>
</button>
</div>
)}
{menus &&
menus.map((menu, index) => (
<div className="card my-3 w-25 mx-auto">
<div className="card-body">
<h2 className="card-title font-weight-bold">{menu.name}</h2>
<h4 className="card-subtitle mb-2">{menu.price}</h4>
<p className="card-text">{menu.description}</p>
</div>
<div classNameName="card-footer">
<div
className="btn-group justify-content-around w-75 mb-1 "
data-toggle="buttons"
>
<span>
<button
className="btn btn-info"
onClick={() => handleUpdateClick(menu.id)}
>
Update
</button>
</span>
<span>
<button
className="btn btn-danger"
onClick={() => deleteMenu(menu.id)}
>
Delete
</button>
</span>
</div>
</div>
</div>
))}
</div>
</div>

Add a menu
The AddMenu.js component has a Form to submit a new menu. It contains three fields : name, description & price .
    import axios from "axios";
    import React, { useState } from "react";
    import { baseURL, headers } from "./../services/menu.service";
    export const AddMenu = () => {
      const initialMenuState = {
        id: null,
        name: "",
        description: "",
        price: 0,
      };
      const [menu, setMenu] = useState(initialMenuState);
      const [submitted, setSubmitted] = useState(false);
      const handleMenuChange = (e) => {
        const { name, value } = e.target;
        setMenu({ ...menu, [name]: value });
      };
      const submitMenu = () => {
        let data = {
          name: menu.name,
          description: menu.description,
          price: menu.price,
        };
        axios
          .post(`${baseURL}/menu/`, data, {
            headers: {
              headers,
            },
          })
          .then((response) => {
            setMenu({
              id: response.data.id,
              name: response.data.name,
              description: response.data.description,
              price: response.data.price,
            });
            setSubmitted(true);
            console.log(response.data);
          })
          .catch((e) => {
            console.error(e);
          });
      };
      const newMenu = () => {
        setMenu(initialMenuState);
        setSubmitted(false);
      };
    return (
        // ...
      );
    };
For this script, we’ll have two states :
-
menuwhich will contain by default the value ofinitialMenuStateobject -
submittedthat will contain a Boolean object to show a message when a menu is successfully added.
And three methods :
-
handleInputChange()to track the value of the input and set the state for change. -
saveMenu()to send aPOSTrequest to the API. -
newMenu()to allow the user to add a new menu again once the success message has been shown.
<div className="submit-form">
{submitted ? (
<div>
<div
className="alert alert-success alert-dismissible fade show"
role="alert"
>
Menu Added!
<button
type="button"
className="close"
data-dismiss="alert"
aria-label="Close"
>
<span aria-hidden="true">×</span>
</button>
</div>
<button className="btn btn-success" onClick={newMenu}>
Add
</button>
</div>
) : (
<div>
<div className="form-group">
<label htmlFor="name">Name</label>
<input
type="text"
className="form-control"
id="name"
required
value={menu.name}
onChange={handleMenuChange}
name="name"
/>
</div>
<div className="form-group">
<label htmlFor="description">Description</label>
<input
type="text"
className="form-control"
id="description"
required
value={menu.description}
onChange={handleMenuChange}
name="description"
/>
</div>
<div className="form-group">
<label htmlFor="price">Price</label>
<input
type="number"
className="form-control"
id="price"
required
value={menu.price}
onChange={handleMenuChange}
name="price"
/>
</div>
<button onClick={submitMenu} className="btn btn-success">
Submit
</button>
</div>
)}
</div>
Update a Menu
The component will be a little bit identical to AddMenu component, however, it will contain a get method to retrieve the current value of the object by making a GET request to the API with the id of the object.
We use the useHistory() hook to pass the id to the UpdateMenu component and retrieve it with useParams hook.
    import axios from "axios";
    import React, { useState, useEffect, useRef } from "react";
    import { useParams } from "react-router-dom";
    import { baseURL, headers } from "./../services/menu.service";
    export const UpdateMenu = () => {
      const initialMenuState = {
        id: null,
        name: "",
        description: "",
        price: 0,
      };
      let { id } = useParams();
      const [currentMenu, setCurrentMenu] = useState(initialMenuState);
      const [submitted, setSubmitted] = useState(false);
      const countRef = useRef(0);
      useEffect(() => {
        retrieveMenu();
      }, [countRef]);
      const handleMenuChange = (e) => {
        const { name, value } = e.target;
        setCurrentMenu({ ...currentMenu, [name]: value });
      };
      const retrieveMenu = () => {
        axios
          .get(`${baseURL}/menu/${id}/`, {
            headers: {
              headers,
            },
          })
          .then((response) => {
            setCurrentMenu({
              id: response.data.id,
              name: response.data.name,
              description: response.data.description,
              price: response.data.price,
            });
            console.log(currentMenu);
          })
          .catch((e) => {
            console.error(e);
          });
      };
      const updateMenu = () => {
        let data = {
          name: currentMenu.name,
          description: currentMenu.description,
          price: currentMenu.price,
        };
        axios
          .put(`${baseURL}/menu/${id}/`, data, {
            headers: {
              headers,
            },
          })
          .then((response) => {
            setCurrentMenu({
              id: response.data.id,
              name: response.data.name,
              description: response.data.description,
              price: response.data.price,
            });
            setSubmitted(true);
            console.log(response.data);
          })
          .catch((e) => {
            console.error(e);
          });
      };
      const newMenu = () => {
        setCurrentMenu(initialMenuState);
        setSubmitted(false);
      };
      return (
          // ...
      );
    };
And this is the code inside the return :
<div className="submit-form">
{submitted ? (
<div>
<div
className="alert alert-success alert-dismissible fade show"
role="alert"
>
Menu Updated!
<button
type="button"
className="close"
data-dismiss="alert"
aria-label="Close"
>
<span aria-hidden="true">×</span>
</button>
</div>
<button className="btn btn-success" onClick={newMenu}>
Update
</button>
</div>
) : (
<div>
<div className="form-group">
<label htmlFor="name">Name</label>
<input
type="text"
className="form-control"
id="name"
required
value={currentMenu.name}
onChange={handleMenuChange}
name="name"
/>
</div>
<div className="form-group">
<label htmlFor="description">Description</label>
<input
type="text"
className="form-control"
id="description"
required
value={currentMenu.description}
onChange={handleMenuChange}
name="description"
default
/>
</div>
<div className="form-group">
<label htmlFor="price">Price</label>
<input
type="number"
className="form-control"
id="price"
required
value={currentMenu.price}
onChange={handleMenuChange}
name="price"
/>
</div>
<button onClick={updateMenu} className="btn btn-success">
Submit
</button>
</div>
)}
</div>
And we are set now.
If you click on Update button on a menu card, you’ll be redirected to a new page, with this component, with the default values in the fields.

Conclusion
In this article, We learned to build a CRUD application web with Django and React. And as every article can be made better so your suggestion or questions are welcome in the comment section. 😉
Check the code of all this article in this repo.
This article has been originally posted on my blog


Top comments (11)
As someone with a security research background it really hurts to see you noticed the cors problem, but still used the bad solution anyways.
My suggestion for the future: implement a secure version in your tutorials and point people at the documentation for how to change it.
Bonus points: You might get more interaction with your tutorials when people who modify it get stuck at the security and ask you for what they might have done wrong 😉
Other than that this is a really great tutorial for getting started with react and drf.
I've learned both on the job and only in an already existing project. I would've been glad for such an entry level tutorial 2 years ago.
Thanks for your comment.
And I knew it would embarrass some readers to see that I’ve consciously neglect this CORS problem. Actually I love your suggestion and I think that I’ll modify the article to fit it, because it will help beginners to learn too.
Thanks a lot. 😉
It might be a good idea to update the react router to its new version :)
Great idea! Ty
Great tutorial thanks, I just get one small issue and I am not sure why.
when I include the headers on the axios requests:
...axios
.get(
${baseURL}/menu/, {headers: {
headers,
},
})....
I get the below error:
Access to XMLHttpRequest at 'localhost:8000/api/menu/4/' from origin 'localhost:3000' has been blocked by CORS policy: Request header field headers is not allowed by Access-Control-Allow-Headers in preflight response.
As soon as I remove the headers from the axios requests:
...axios
.get(
${baseURL}/menu/).then(...
all is working 100%, what am I doing wrong lol ?
A little bit strange. Have you install the CORS package on the Django server side?
I got the same issue. When I changed the headers to not use the variable (and just put the "Content-type": "application/json" in directly), it worked.
This solution did not work for the add menu function with the post request. There, I had to remove the header completely to get it to work.
This is a great post!!
You can serialize all the fields without mentioning all of them in your serializer class like :
Still stuck with cors problem
Can you show me your CORS configuration on
settings.py?Also, on which address the react server is running?
Hi, I'm starting to code and I want to know why do you use django instead of node.js? Thanks.