macOS Environment Setup for MAUI Development

With the latest release of JetBrains Rider 2022.2 EAP, we’ve added preview support for .NET Multiplatform App UI, more commonly referred to as MAUI. It is the spiritual successor to the popular Xamarin.Forms framework and evolution in ideas and implementation.
MAUI lets you build native apps using a .NET cross-platform UI toolkit with multiple target environments, such as mobile and desktop running on operating systems like Android, iOS, macOS, Windows, and Tizen. The goal of MAUI is to unify platform-native APIs for Android, iOS, macOS, and Windows into a single API for a write-once, run-anywhere developer experience, with the option to access native aspects of each environment.
This post will walk you through all the steps you need to take to prepare your environment for MAUI development on macOS. If you follow the steps, you’ll have a development environment ready to write MAUI apps targeting macOS, iOS, and Android. Let’s get started.
Installing .NET 6.0.300
The very first step is installing .NET 6.0.300 SDK. Find the installer for your environment on the .NET download page. If you’re running an Intel-based macOS, select the x64 installer; otherwise, choose the Arm64 installer for newer Macs. If you’re unsure which processor your environment uses, you can click the Apple icon at the start of your desktop’s toolbar and choose About This Mac to see which Processor your machine is currently using. Once you have the latest SDK installed, you can move on to the next step.
Note: It’s important you install at least the 6.0.300 version of the SDK, as that will allow you to install the General Availability (GA) versions of the MAUI workloads. These include the latest set of APIs and bug fixes that are supported by Microsoft.
Installing MAUI Check
MAUI Check is a tool that determines if your environment is ready for MAUI development. While you could go about installing MAUI using the dotnet CLI exclusively, the tool makes sure you have all the appropriate workloads available to build towards a target environment and more. It will also install any necessary templates for MAUI apps that you can use later in JetBrains Rider.
Before installing the global tool, let’s ensure your terminal can find globally installed .NET tools. First, open your .bashrc or .zshrc files and add the following line to the end.
# .NET Core
export PATH="$PATH:/Users/$USER/.dotnet/tools"
Restart your terminal to reload your profile. Now you should be able to install maui-check.
dotnet tool install -g Redth.Net.Maui.Check
You can now run maui-check, and we’ll walk through each step. The process may take a while.
Running Maui Check
Once you have MAUI Check installed, run the following command from your terminal:
maui-check
The process will install the following dependencies into your environment:
- OpenJDK – For building Android
- Android SDK and Emulator
- .NET SDK Workloads for MAUI (Android, macOS, MacCatalyst, iOS, and tvOS)
Maui Check will also recommend you install XCode from the App Store. You will need XCode to build Apple-focused apps as the IDE will include the required Simulator to test your iOS-focused apps.
Running maui-check will take a while. So grab a coffee ☕️, eat a croissant 🥐, or go for a run 🏃♀️. Note that you may need to provide admin credentials during the process. Once the process is complete, check the output and note where the OpenJDK installer is located on your local machine. You’ll need this value in the next step, where we set up Rider.
🔎 OpenJDK 11.0 Checkup...
  – 1.8.0-25 (/Users/khalidabuhakmeh/Library/Developer/Xamarin/jdk/microsoft_dist_openjdk_1.8.0.25)
  ✔ 11.0.15 (/Library/Java/JavaVirtualMachines/microsoft-11.jdk/Contents/Home/bin/..)
Finally, in this step, let’s end with one more workload install of WASM tools. You need this workload because MAUI supports hosting Blazor inside a MAUI app.
dotnet workload install wasm-tools
OK, we’re ready to move on to setting up JetBrains Rider.
Skipping MAUI Check
If you don’t want to install MAUI Check, you can try to install the environmental dependencies of Xcode, OpenJDK, and Android SDK yourself. Once you have those dependencies in place, you can run the following command in a terminal to install the necessary workloads.
sudo dotnet workload install maui
Again, be mindful that your current .NET SDK version is 6.0.300 to get the GA versions of the workloads. You’re likely on the wrong SDK version if you see the terminal output make any mention of rc* (ex. 6.0.200-rc.1.5152) during workload installation. Try running dotnet --version to see what SDK you are currently using and be sure it’s not lower than 6.0.300.
Setting up Rider for Android and macOS development
You’ll need to install another plugin for Android development and ensure the JDK is appropriately set. First, open the Preferences window of Rider and go to Plugins. Next, you’ll search for and install Rider Xamarin Android Support. Finally, Rider may ask you to restart the IDE.
With the IDE restarted, go back to Preferences | “Build, Execution, Deployment” and choose Android. Here you’ll want to make sure the Java Development Kit Location has the value you saved from running maui-check. If you don’t have it, rerun maui-check and get the SDK location. Don’t worry; it will be speedy.
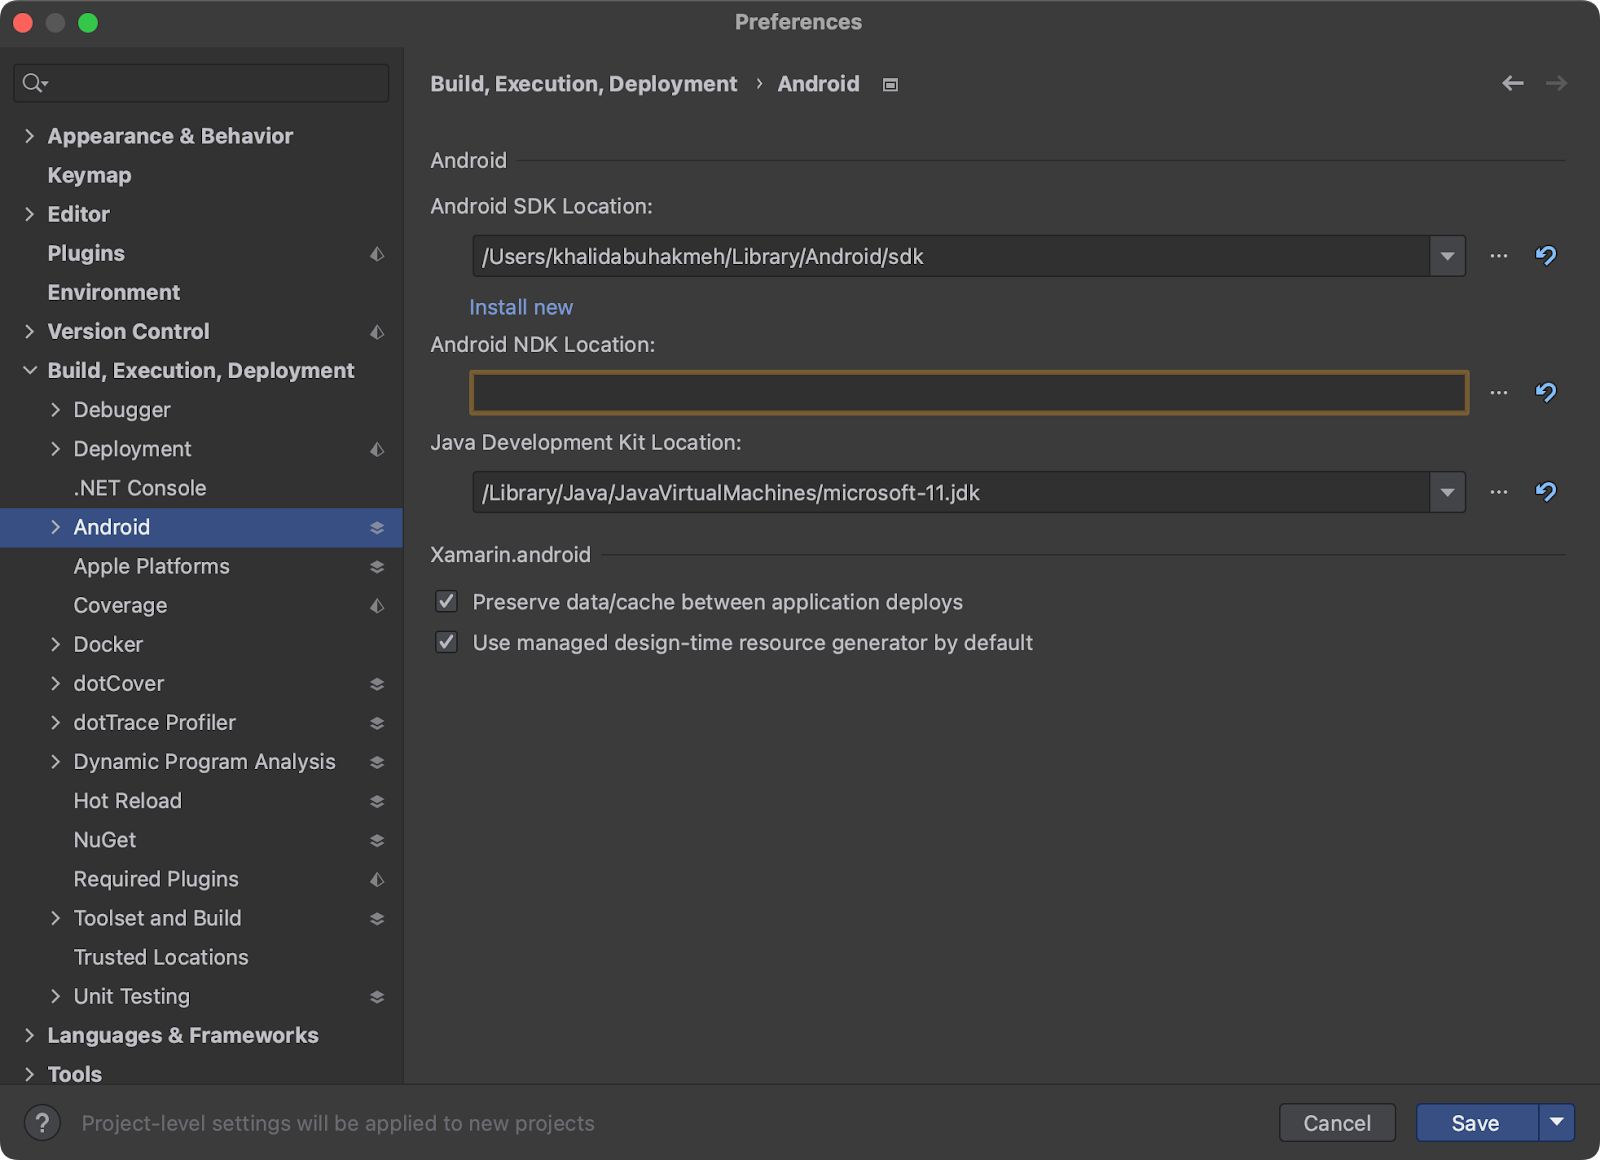
Next, go to SDK Components and choose your SDK Platforms and Tools. You can update your dev tools to the latest now or even later as the Android team releases updates. You’re doing great!
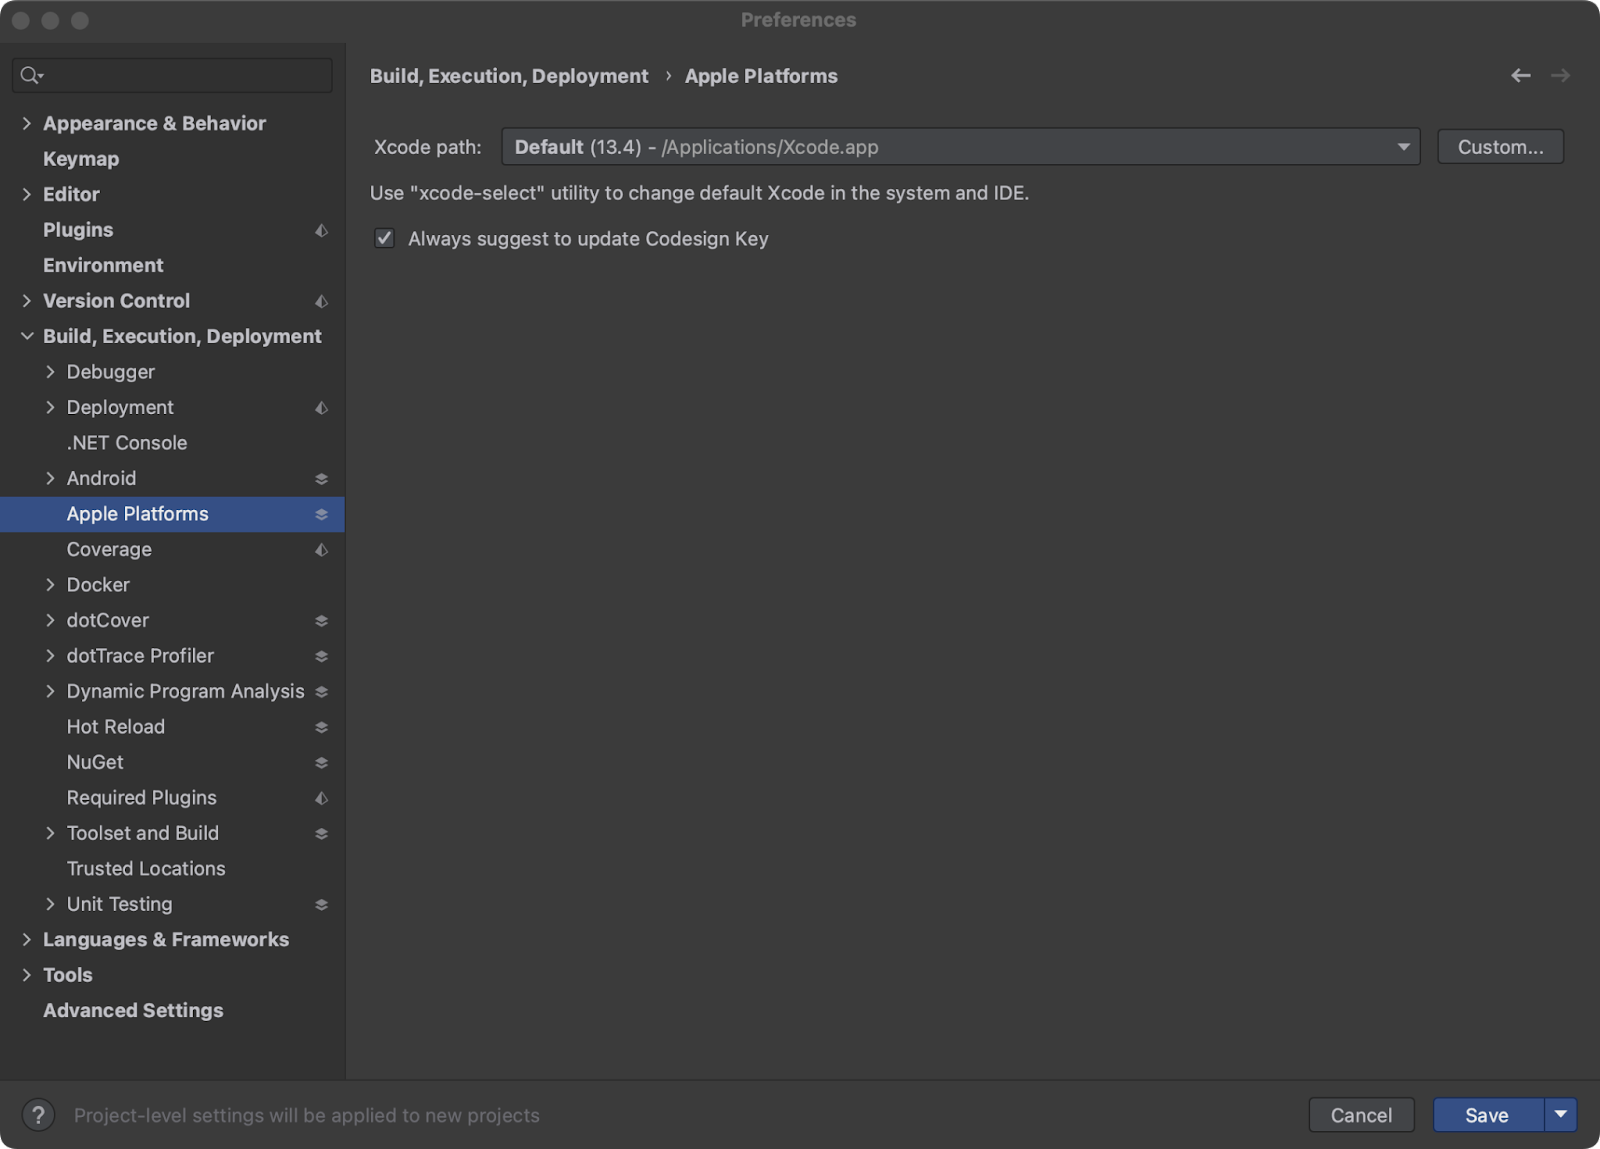
Let’s make sure JetBrains Rider recognizes Apple Platforms. You’ll notice Apple Platforms under the Preferences | Build, Execution, Deployment section. Select it, and you should see a value set for Xcode Path. If the value is missing, you’ve likely not installed Xcode. Go back to the App Store and install XCode. If you have installed Apple’s IDE, you can click Custom… and choose the installation path.
Your first MAUI app with JetBrains Rider
Phew! That was a lot of steps to get set up, but you’re ready to start using Rider and MAUI. Starting up Rider, some new MAUI templates are now available in the New Solution window.
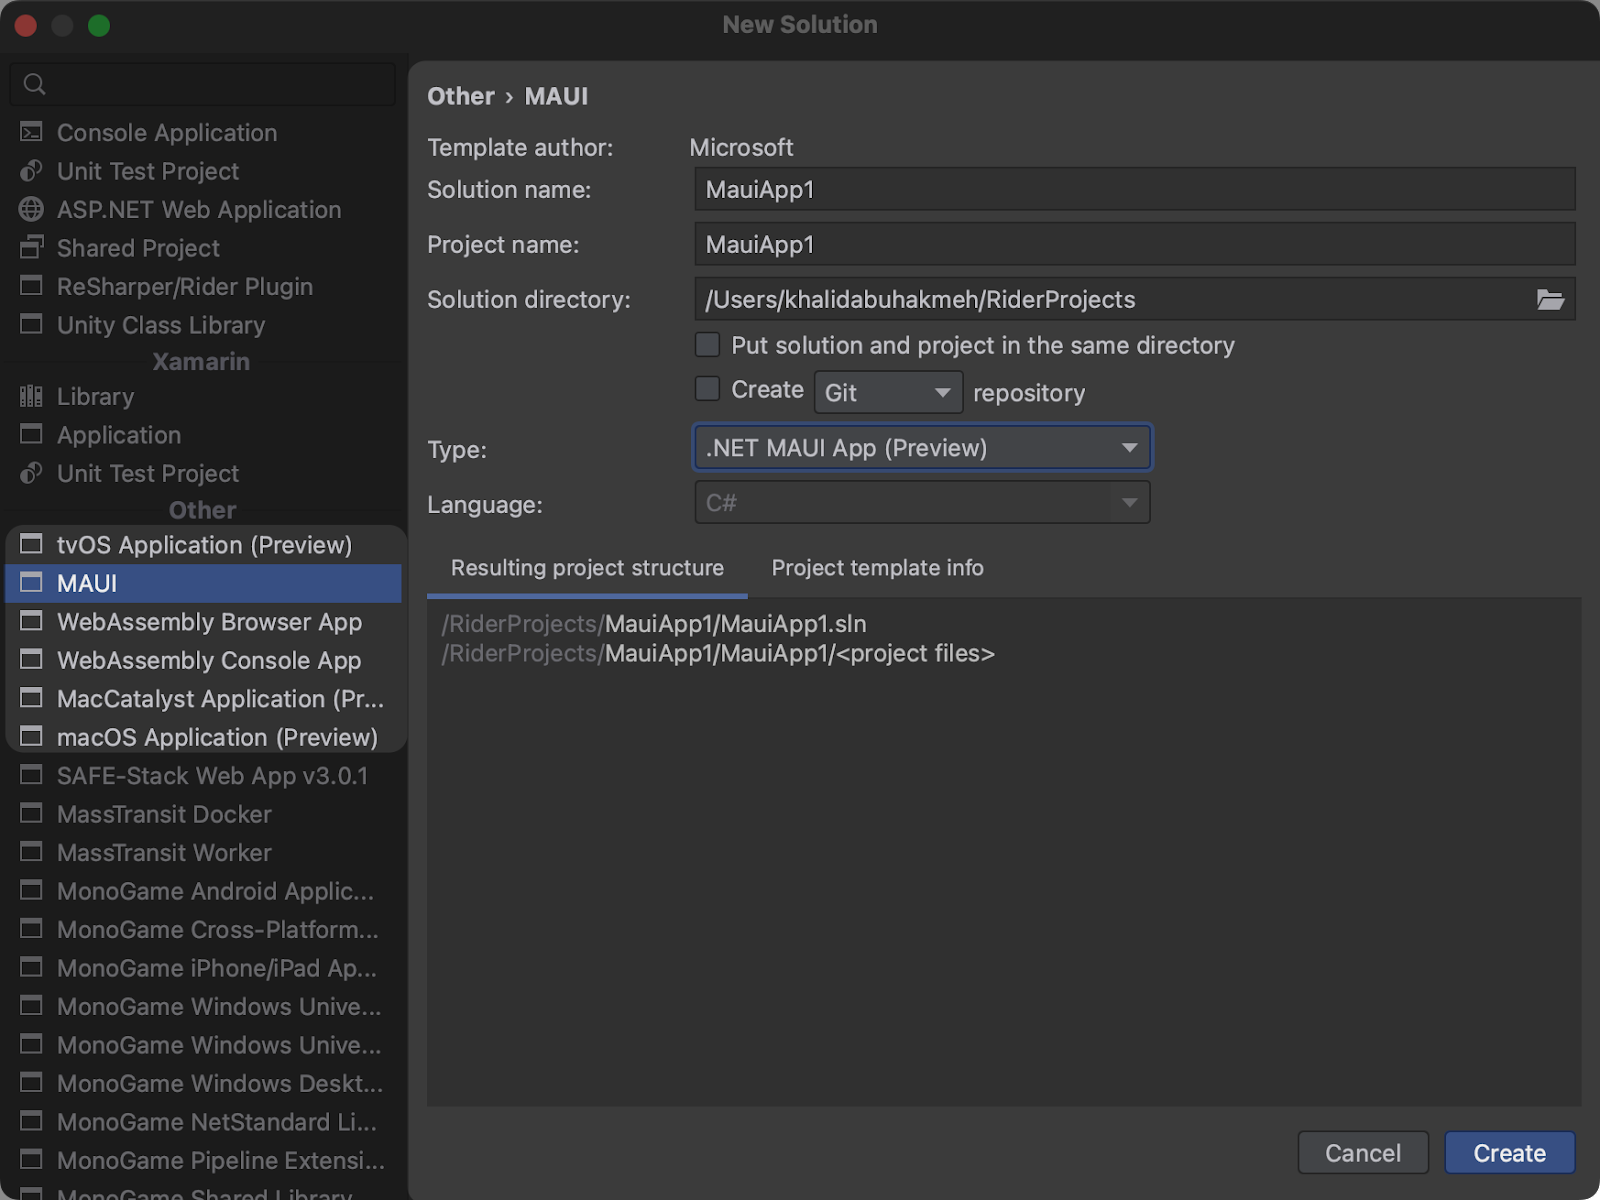
Under Other, you’ll see MAUI. Choose that template option, then under the Type dropdown, choose .NET MAUI App (Preview). Name your solution and project and click Create.
When Rider finishes loading the project, you should notice the run configurations in the Run toolbar at the top.
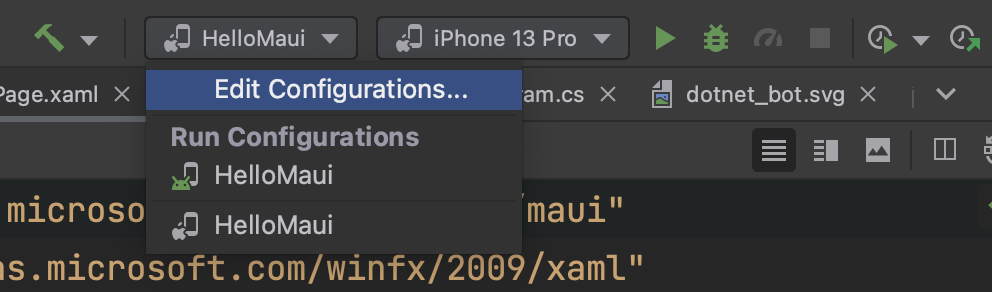
If for some reason, the run configurations are missing, you can add the appropriate Xamarin.Android and Xamarin.iOS run configurations and choose the MAUI project in the configuration settings.

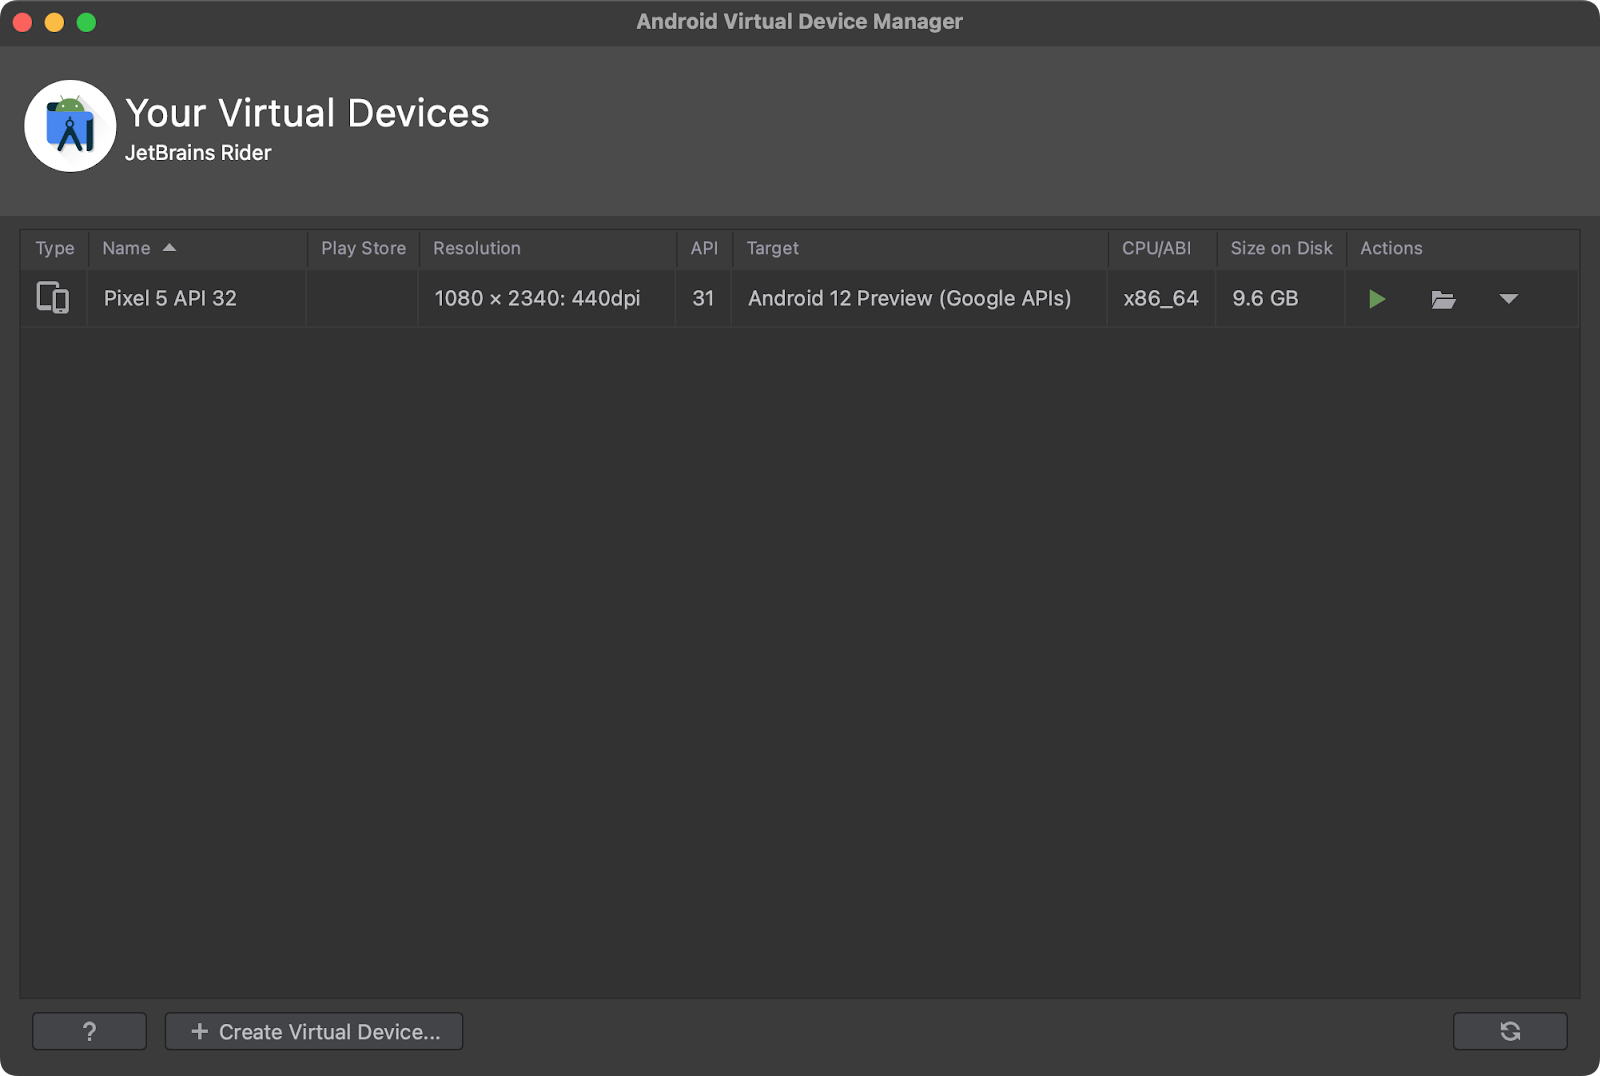
If this is your first time doing Android development, you may need to set up an Android Virtual Device using the AVD Manager. You can create a virtual device using any of the latest images from Google.
Now you can run your first MAUI app targeting Android or iOS devices. Note the default MAUI template currently also has targets for Windows and MacCatalyst. Unfortunately, you can’t run Windows apps on macOS, and Catalyst apps still require work on our end. Still, you can build and run Catalyst apps by going to the output directory on disk and double-clicking the <projectname>.app executable.
Troubleshooting tips and tricks
There are a few head-scratching issues you may encounter that might not be immediately obvious. Lucky for you, I’ve already experienced this pain and hopefully can help you through common issues.
Administrator Permissions
At certain points in the process, the installation process may ask you to escalate administrator permissions. You can add a sudo to a command to install the dependency. The command should inform you of the need to escalate access.
The right SDK version with Global.json
MAUI support and workloads are currently only available for .NET 6 SDK versions. If you’ve installed preview builds of .NET 7 you’ll likely get warnings about missing workloads. You can add a global.json to your project and pin the SDK version.
{
  "sdk": {
    "version": "6.0.300",
    "rollForward": "latestMinor"
  }
}
Any workload commands will now use the .NET 6 SDK and the workloads will be installed to that version of the .NET SDK. Also, you can pin the version to 6.0.300 if you plan to use the GA workloads.
Missing workloads and NuGet packages
If you’re working with an existing MAUI project, you may still be seeing a lot of error messages in the build output. You’re likely missing workloads specific to your existing project. You can resolve any missing workloads by running the following dotnet-cli command under your project directory using Rider’s terminal:
sudo dotnet workload restore && dotnet restore
This will restore any and all workloads missing from your development environment, in addition to restoring missing NuGet packages. You may have to restart Rider as there is a lot happening here.
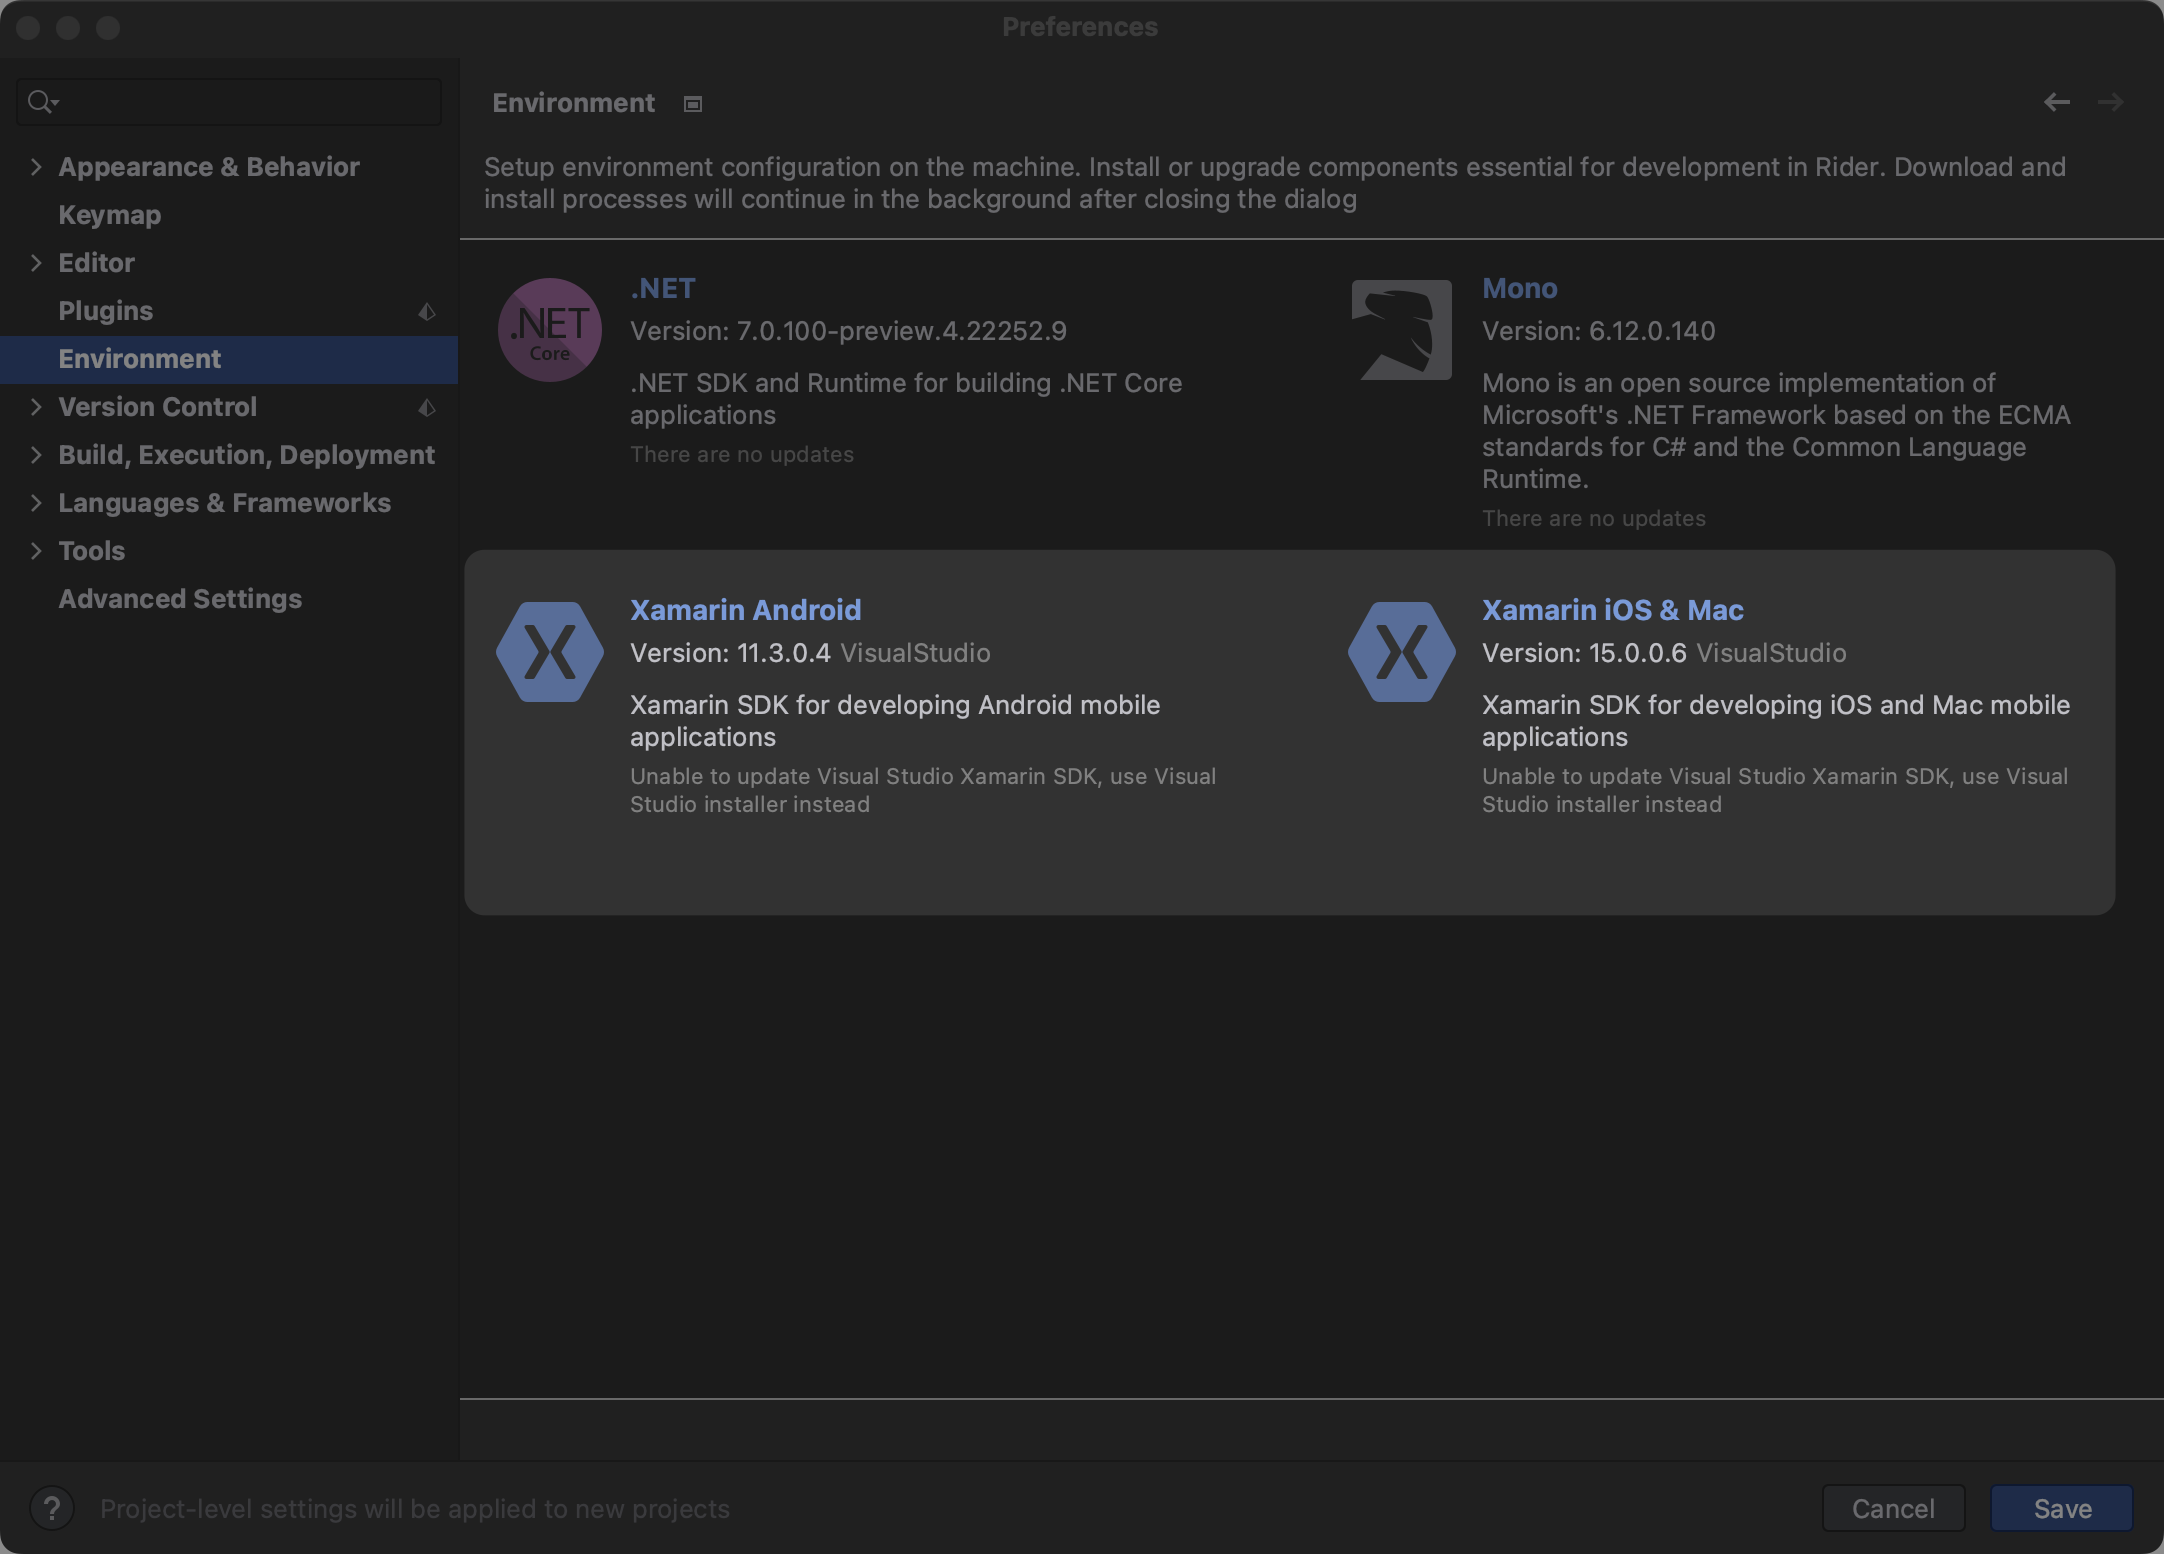
Missing run configurations for iOS and Android
If you’re still unable to find any of the run configurations for iOS or Android, be sure to check your Environments section under preferences. You should have both Xamarin Android and Xamarin iOS & Mac installed. If not, you can install them from this window.
Conclusion
There you have it. If you followed along in this post, you should have an environment ready to build Android, iOS, and macOS apps using MAUI.
As this is still a preview, there’s still a lot of work left to do and your feedback is valuable in shaping the development experience. Please leave comments on this post, file issues in our issue tracker, and reach out to us on social media @JetBrainsRider. Thank you so much, and we hope to see your MAUI apps in the future.
Subscribe to a monthly digest curated from the .NET Tools blog: