
Table of Contents
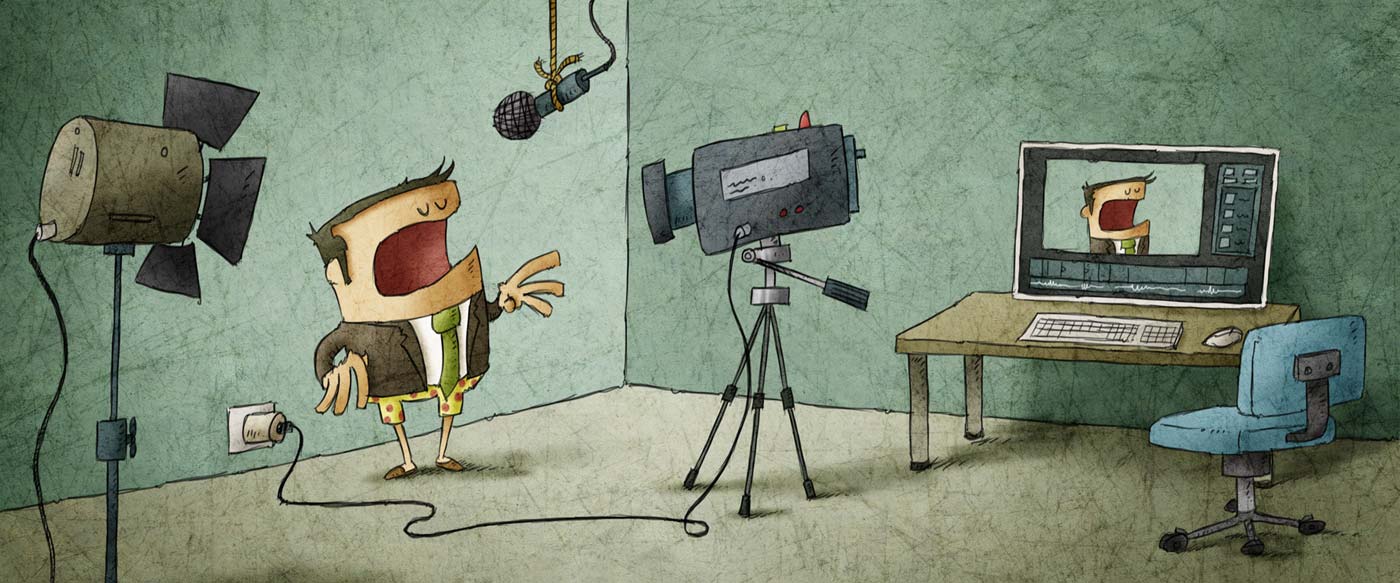
If a picture says a thousand words, then a 30 second video at 30 frames per second can literally say 900,000 words. That’s a lot of words! Follow along and learn how to make short videos to promote your business.
For many of our product launches, an animated GIF has been our go to way to show it off. But recently we launched Dunning, a feature and idea that couldn’t really be distilled down to a short GIF. So we went the video route instead.
Pretty neat, eh? Though it may seem daunting, this is absolutely something any small startup founder or employee can whip up in a few hours.
I can’t stress this enough: a few months ago I had no idea what I was doing when it came to video and audio production. Only after many many hours of reading and watching tutorials from tons of separate resources did I start to feel like I knew what was going on.
My goal with this post is to save you guys a ton of time by sharing some of the most valuable things that I’ve learned along the way.
Writing the script
The perfect script allows you to convey everything you need in as few words as possible. You need to strike a balance between brevity and getting the message across.
A minute and a half is the absolute maximum length you want for your video. Beyond that folks start skipping through or dropping off altogether.
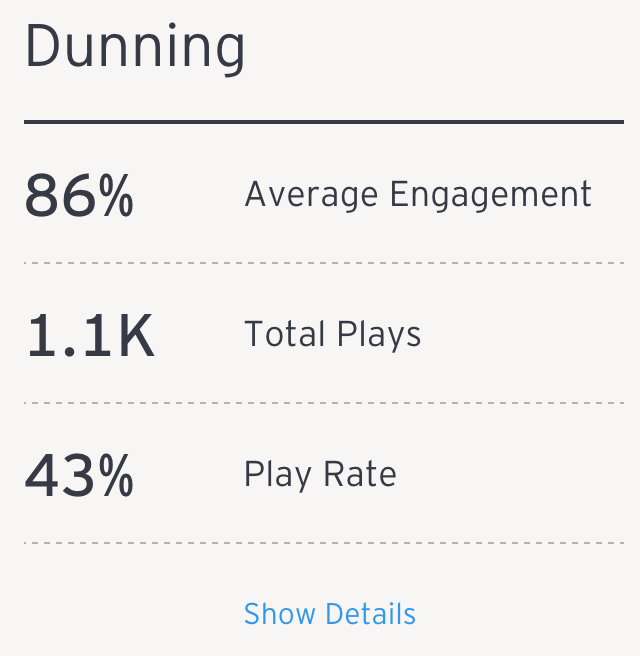
Keeping our Dunning video short helped it get a high engagement rate. In other words, most people watched it all the way through.
If you can swing it, aim for a video 30 seconds or under. The benefit of this is if you tweet a video of this length, it will autoplay when folks scroll past it, which increases engagement hugely.
When you first get started, it’s hard to know how long your script should be, so my recommendation is to write, read it out loud and record it, and repeat until you get it just right. This’ll also give you a chance to fine-tune sections that are awkward to say as well as practice your recording skills.
Here’s the script for the Dunning video. Each sentence can be said in a single breath, and lends itself to showing a particular part of the new feature with a screencast.
Failed payments mean lost money for your business, but now there’s an easy way to recover that revenue. Introducing: Baremetrics Dunning. We can now automatically email your customers before their cards expire and if one their payments fail. Each of these emails is fully customizable and includes a bunch of helpful variables. You can even add your own HTML to match the look and feel of the emails to your brand identity. And that’s it! Once it’s all setup you’ll be recovering lost revenue in no time.
As you practice, record and refine, don’t worry about getting the perfect audio recording—this will be a template for you to edit your video around, and you’ll do a final recording at the end.
Editing the video
Take your favorite cut of the audio and drop it into your editor of choice. If you have a Mac, I recommend Screenflow. If you’re on a PC, I’ve heard good things about Camtasia.
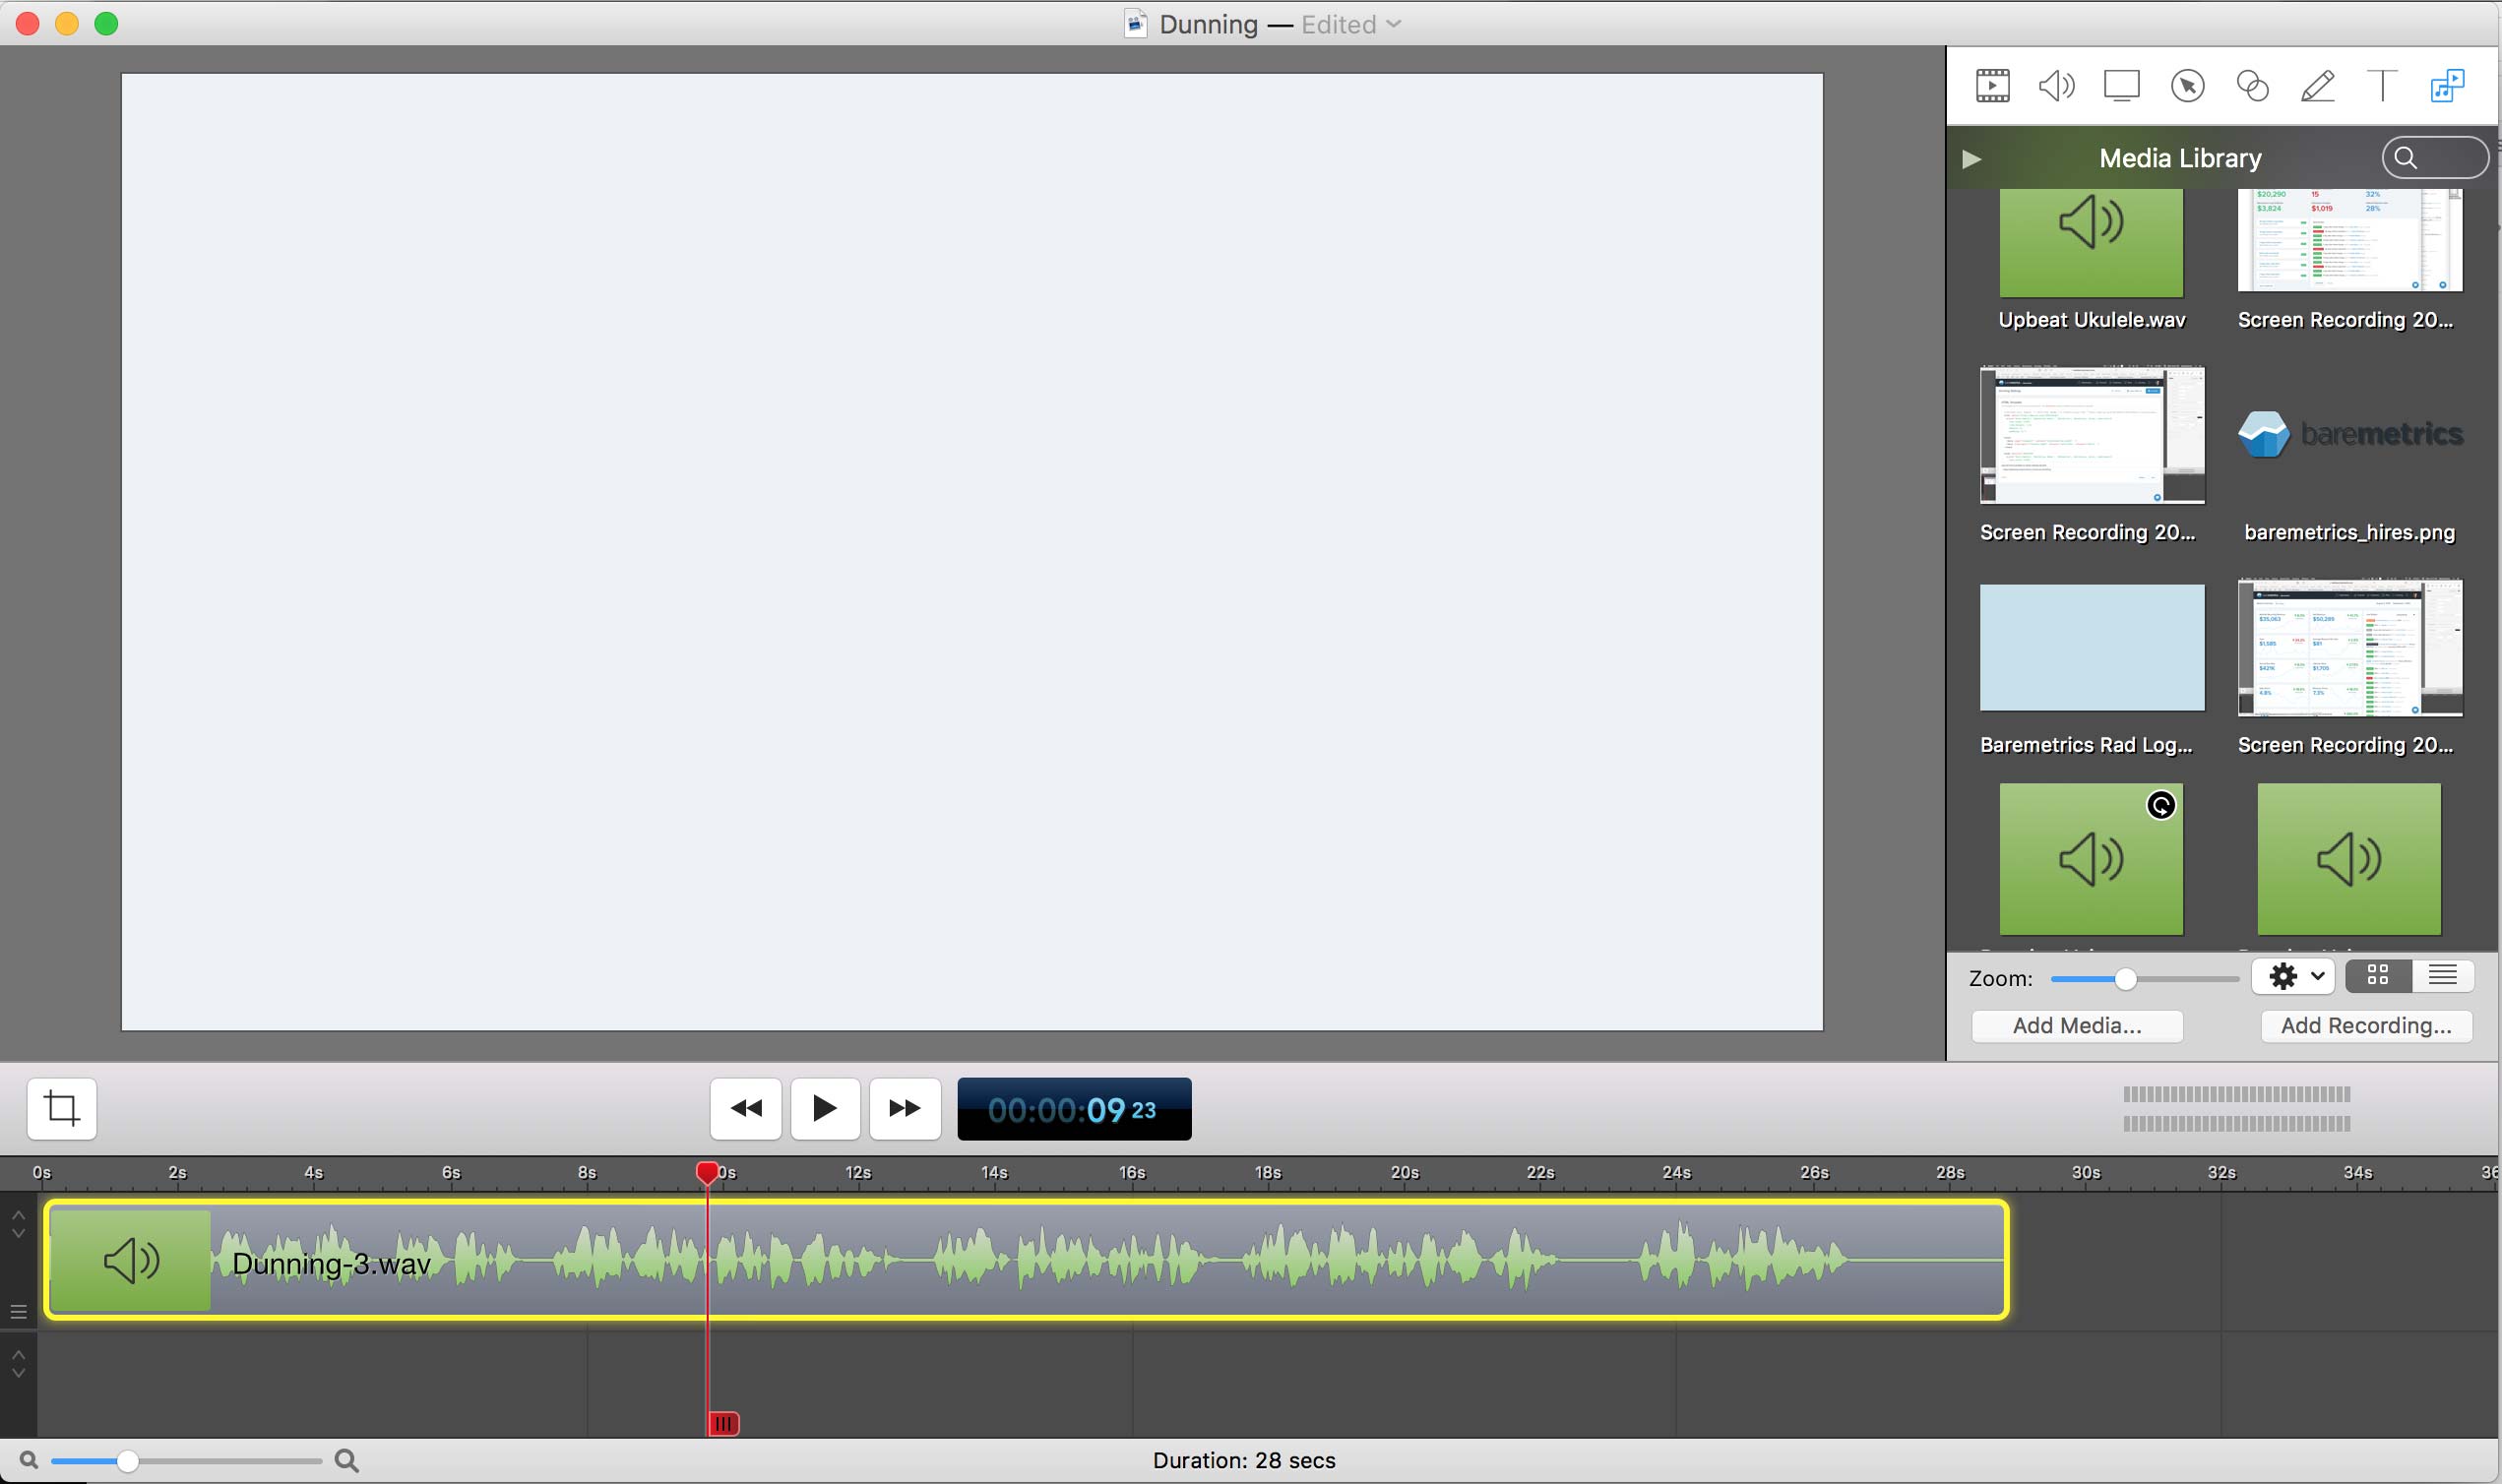
Once you’ve done that, it’s time to start screen capturing and editing. Getting started can be overwhelming, but if you broke your script up into single breath, concise sentences, you can break your editing flow up in the same way.
Take the line “Failed payments mean lost money for your business, but now there’s an easy way to recover that revenue.” Watch the clip below to see how I put together the video for that particular section.
A lot of the video effects I detailed in my post about making animated GIFs can be used here.
Getting great audio
Great audio is one of the main difference between your video sounding professional and sounding amateur. Here are a few tips to help you get started.
It’s going to be weird at first
If you’re not used to hearing your own voice, it’s going to be awkward at first. You’re going to nit pick over everything, but you’ll have to get used to it—you’ll be hearing it a lot.
The key is to realize that no one is going be as critical about your voice as you are. Folks are going to hear your voiceover and just think, “Oh, hey, some person is talking. Cool.” and that’ll be that.
Avoid overcompensating for things you don’t like about your voice. If you start questioning your pitch or cadence too much, you’ll wind up sounding a bit robotic. In my case, I was always concerned that my voice strayed too high and I would try to compensate by deliberately keeping it lower. This resulted in my earlier recordings sounding rather monotonous and uninspired.
Relax and be yourself. Talk to your microphone like it’s your friend—a very microphone shaped friend.
The setup
Now, the fun bit: getting set up with some sweet but relatively affordable equipment. Sorry to tell you, your computer microphone or headset won’t cut it here (I tried and failed). You have to be willing to spend a bit of money to get a professional sound.
My kit consists of the Audio Technica AT875R Shotgun Microphone ($170) and a Zoom H4N Audio Recorder ($250).
An external recorder isn’t strictly necessary. If you want to minimize your expenses and the size of your kit, snag the similar Audio Technica AT897 Shotgun Mic which has built in power and can be used with an XLR to 3.5 adapter to plug right into your camera or computer.
Though not traditionally used for voiceovers, shotgun microphones are recommended by none other than Ira Glass of This American Life. He likes shotgun mics because “they isolate the voice of the interviewee better than omnidirectional mics,” which is a plus if you don’t have a fully soundproofed space.
If you ever start making live action videos as part of product announcements, a shotgun mic is can be used to record your vocals from a distance, outside of the camera’s frame. Yay, multipurpose!
Alternately, if you want to go a bit more budget-friendly, our founder uses the Audio Technica ATR2100-USB mic ($60) to record the Founder’s Journey podcast and he’s been happy with the quality.
Getting the sound just right
This is where you need to take some time to experiment. Different microphones perform better or worse at different distances from the speaker, and different voices lend themselves to different microphone placement as well.
As a rule of thumb, the closer you are to the microphone, the more you’ll need to lower the gain or input volume to compensate and avoid peaking. Getting right up on top of the microphone can give a great “full” sound, but it also can introduce more pops and lick smacking sounds as well.
As you move away from the microphone, you’ll need to increase the gain, but this comes with a greater chance for ambient room noises and echoes being picked up by the increased mic sensitivity. So you definitely need to strike a balance, and the only way to do that is to experiment. I try to get as close to the microphone as possible.
You also want to minimize room noise and echoes as much as possible. A carpeted room with lots of tapestry is your best friend, and in a pinch, you can isolate the microphone a bit with some pillows.
Tweaking it
Next step is to tweak your audio recording ever so slightly. I’m using GarageBand for this, but most audio editing programs should have the same functionality available.
There are a few things I alter.
* Bass: I raise the bass a little bit to add more “presence” to my voice.
* Treble: I also lower the treble ever so slightly to soften any points where my voice strays a bit higher.
* Compression: Compression takes the quiet parts and makes them as loud as the rest. If your voice has a tendency to get louder and quieter, this is a great way to equalize it. It’ll also ensure that your voice is easily heard over the background music track.
Don’t worry too much about subtle background hums and those sorts of things—the music you add to the project will mask a lot of that stuff anyway.
Final audio and music
Once you have your audio, export it from GarageBand or your audio editor of choice, and drag into your Screenflow project.
At this point, listen very closely to the audio—you may hear some clipping where parts are a bit too loud. It’s sometimes a good idea to lower the volume on your voiceover track to around 90%.
As for background music, I’m a big fan of AudioJungle. You can use their advanced search parameters to include only results of a certain length. I used this to find a background track that was exactly 30 seconds long for the Dunning video.
When you add it to your project, you want to make sure it’s loud enough to be heard but not so loud that it makes it hard to understand your narration. I found the sweet spot to be a volume level of between 10-12%, but feel free to experiment here.
Additional Resources
More than any resource, the thing I found that helped more than anything else: practice. After a while, no amount of tutorial videos and articles are going to help you. You just gotta get out that microphone and see what works and what doesn’t.
That being said, along the way I’ve stumbled on a few resources that helped me out more than any other. Check them out.