Update: Sitebulb now provides email updates of its own. They don’t insert handy-dandy links to your CSVs, though, so I’m leaving this post up. Also, my ego just won’t let me take it down.
You know what would make Sitebulb perfect? If it ran hands-free, didn’t melt my laptop, and sent email notifications upon crawl completion.
You know why I’d open my post with a passive-aggressive feature request like that? Because you can make Sitebulb do all these things. This is my hacked-together process for scheduling and automating Sitebulb crawls and then receiving email notifications.
This process may look terrifying. Don’t worry! I’ve been very detailed. It only takes a few minutes to set up, and you only have to do it once.
To follow along, you need:
- Sitebulb
- A free Zapier account
- A free Dropbox account (or any other file sharing tool Zapier supports)
- A Gmail account or an account on another email service Zapier supports
- Optional: A spare computer to run your crawls
Optional: A Separate Crawl Server
Note that “server” just means “computer that only crawls stuff.” I like to say “server” because it justifies spending money on a computer with neon lights in it. Also, “crawl server” strikes fear in the hearts of webmasters everywhere. “Crawl computer” sounds like a bad Star Trek reference.
Sitebulb is resource-intensive. Crawling a large site requires that I leave my laptop running all night, fan screaming. I feel like I’m torturing it.
So I bought a gaming PC and stuck it in my somewhat-finished garage. It uses Sitebulb and Screaming Frog to crawl gigantic sites without breaking a sweat, and I access it remotely from my laptop. I plunked down $3,000, but you can buy something cheaper or use any spare computer that you can leave on. Speed isn’t as important as capacity.
I access it remotely using RealVNC and store files on Dropbox (as you’ll see shortly).
A crawl server is not required, but I highly recommend one if you’re crawling multiple sites of 50k URLs or more. You don’t need a fancy gaming machine. Any spare computer will probably do the trick. Speed isn’t critical—it just has to free up your primary day-to-day computer for other stuff. Like Starcraft.
Step 1: Setting Your Crawl Computer, er, Server
Whether you’re using your laptop, desktop, or a separate machine, you need to do a couple things:
- Get Dropbox or another file-sharing service Zapier supports. Whatever you choose, Zapier must support auto-notifications for folder creation. (Note that Google Drive will not work, because Sitebulb won’t auto-export crawl results to Google Drive)
- If you’re using Dropbox, turn on Smart Sync. No need to eat up hard drive space
Step 2: Set Up The New Client Folder
In the Dropbox directory, create a subdirectory called crawl-exports or whatever else you like.
If you have multiple clients, create a new directory inside the crawl-exports directory for each client. Here’s what I did:
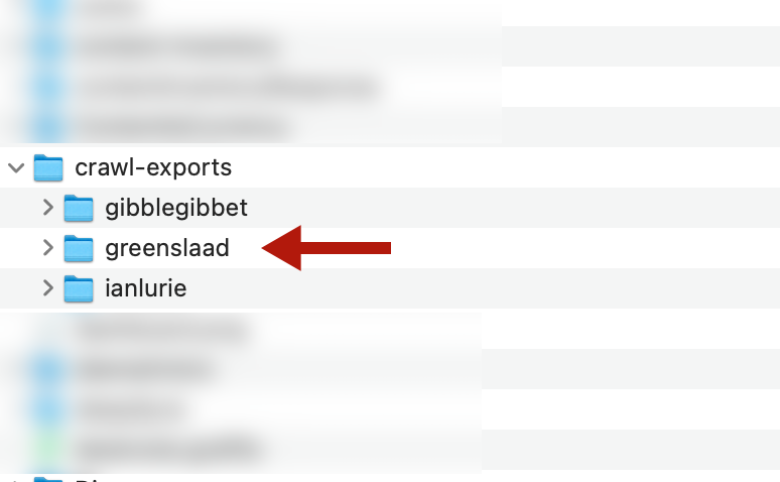
Sitebulb Export Folder Structure
“Greenslaad” is my pretend client so I don’t get fired. Alas, I don’t have any clients paying me to create Dungeons & Dragons content.
Now, I have:
- A Dropbox home for all my crawls
- And a subdirectory just for greenslaad
Time to set up the crawl that will fill that subdirectory with cool stuff.
Step 3: Configure A Scheduled Crawl
You’re thinking: “Oh come on, Ian, I know how to set up a scheduled crawl!!”
True. But you want these crawls to run while you’re asleep, playing Starcraft, or trying to prevent your children from licking light sockets. These crawls need to obtain and deliver all the data you need without intervention.
Here’s how I set it up:
- Set up a project and audit. Don’t know how? No problemo! See Sitebulb’s documentation
- Consider site size. My fancy-schmancy crawl server can handle up to 250,000 URLs without too much trouble. Anything larger than that, and I’m going to do a Sample audit instead of a Standard audit. See Sitebulb’s docs about crawling large sites
- I always use the Chrome Crawler. There are too many screwy— er, unique javascript implementations these days, and I want to look at rendering issues. Your Audit Setup should look like this:

Your Sitebulb Audit Is Born
- Next, pick your additional data and extraction options. Remember, every checked box slows your crawl and adds URLs. If you have a fast crawl server and select every option you can cause brownouts. It’s fun, but even on a fast computer, it can slow a crawl to a, well, crawl
- Check “Schedule Audit”
- Select frequency, etc. etc.
- OK, this is important. Click “Advanced Settings:”
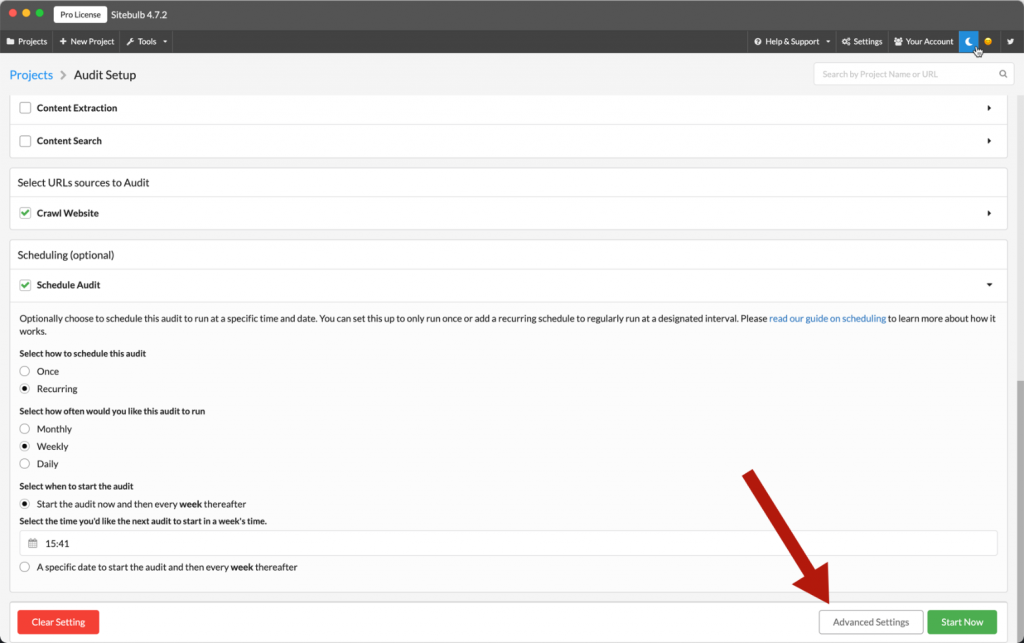
Sitebulb Advanced Settings: You’ll love ’em
- Now click “Data” and select the client folder you created above. That tells Sitebulb to automatically export all relevant reports upon audit completion:
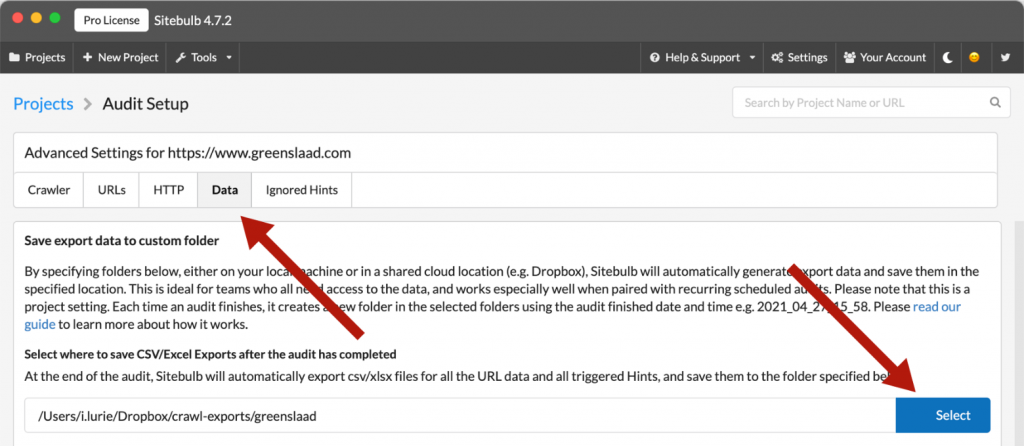
Configure Data Export
- Be sure to check out the other Advanced tabs. There are some cool gadgets in there.
- Click “Back To Crawler Settings” or “Start Crawl.” Don’t go back to Projects. You’ll lose all your hard work
Wait! You’re not done with Sitebulb. Remember what I said about the details? Right now, if you reboot the crawl computer and forget to restart Sitebulb, you’re outta luck. Go back to Projects. Click “Scheduled.” Then click “schedule settings here” and check “Load On Startup” and “Run Missed Audits.” Not sure why these settings are so hard to find. Here’s a map:
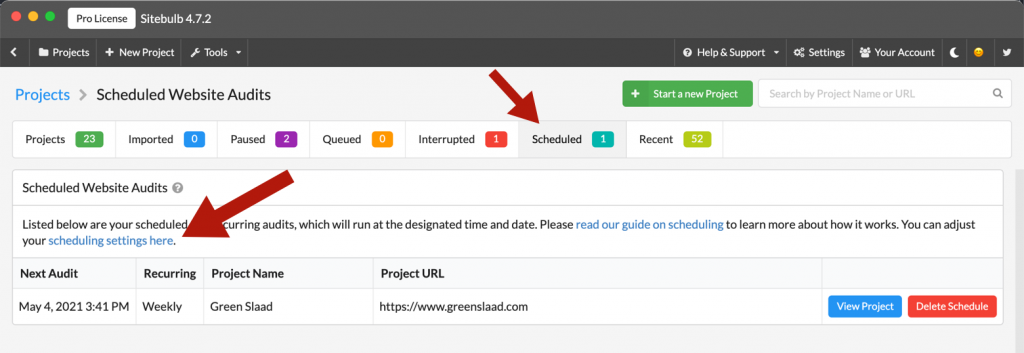
I don’t know why this is so hard to find, but here you go.
Phew. OK, Sitebulb is all set. It will now:
- Run your crawl at a scheduled date/time
- Export standard reports like 404 errors, pages with missing title tags, etc.
- Automatically start if you reboot your computer
- Run any scheduled crawls missed while your computer or Sitebulb was off
Now it’s time for the cool stuff.
Setting Up Email Notifications
Sitebulb can’t send you an email notification. But it can export files to a folder. And Zapier can email you if a new file or folder appears in a specified folder. Put those together and BOOM email notifications.
First, create the trigger:
- Log into Zapier
- Create a new Zap
- Choose Dropbox as your trigger
- Choose “New Folder” (or new file if you want a different workflow, but I use folders)
- Choose your Dropbox account (connect it if you haven’t)
- Pick the client folder you created way back near the start of this post:
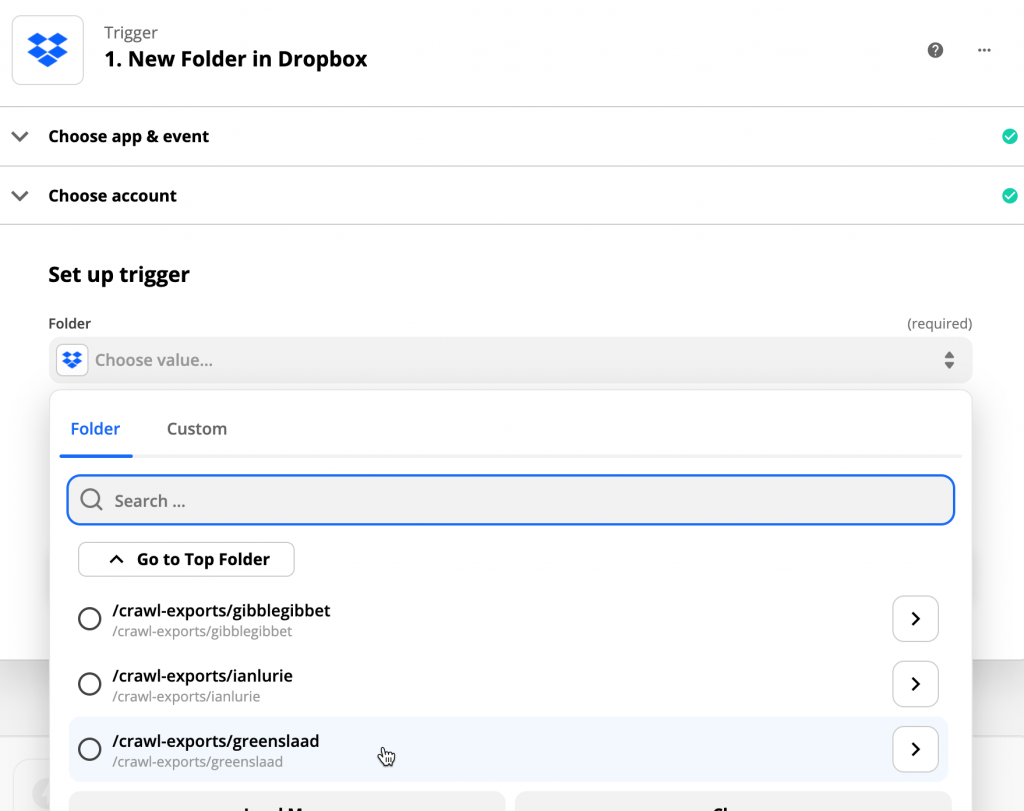
Setting Up The Zapier Trigger
- Now, Zapier will fire every time a new folder appears in the “/crawl-exports/greenslaad” folder
- Try it: Create a folder inside the client folder, then click “Test Trigger”
- For your Action, choose “Gmail” (or another email service if you prefer, or a custom script so you can leave a comment below that implies you’re smarter than me, which you probably are, but did you really need to point it out?!)
- Select “Send Email” as the event, choose your account, blah blah blah
- Enter your email in the To field blah blah blah
- Write something useful for your subject. I usually use something like “[Sitebulb] CLIENT NAME”
- Create informative body text. I usually include the path and a share link
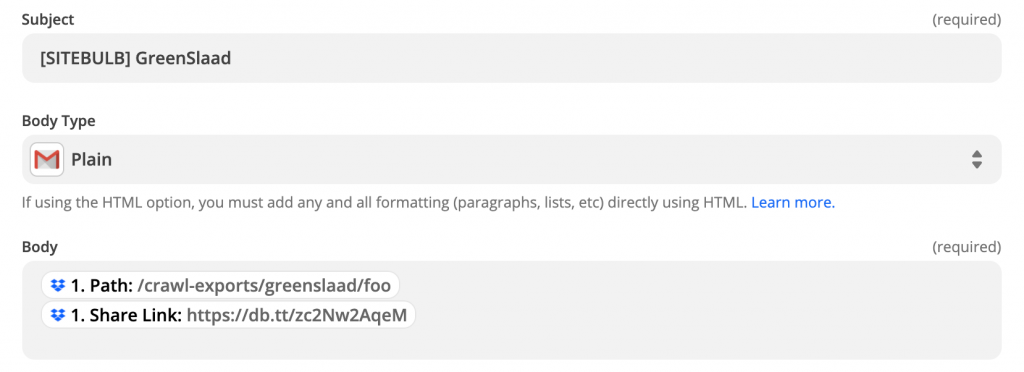
Use A Message That Makes Sense
- Test it if you want
I use a separate Zap and folder for every client. It’s neater and lets me organize files. If you have hundreds of clients, may I recommend using a single Zap and folder?
That’s it! Zapier will now monitor your client Dropbox folder and email you when a new folder appears.
Drumroll, Please…
If this works:
- Sitebulb will run a scheduled crawl
- Which will create a new folder
- Triggering a Zap
- Which then sends you an email
I’ve got Sitebulb set to crawl my site in five minutes. I’m going to go grab a cookie and check back in a few…
…The cookie was great.
So is Zapier. Email arrived right on time:
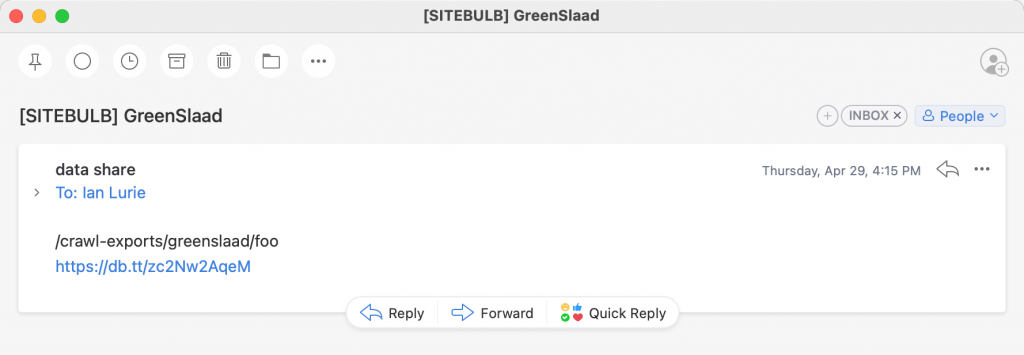
Sitebulb + Dropbox + Zapier = Email Notifications.
That’s it! Automatic email notifications, scheduled crawls, all in Sitebulb.
If you’re disappointed at the lack of sexiness, I apologize. I don’t do sexy. But this works, every time.
Note 1: No Zaps, crawlers, or Slaads were harmed in the writing of this post. The cookie, however, had a really bad day.
Note 2: Greenslaad.com is purely a sample site. I take no responsibility for bad art, typos, or a third-rate WordPress implementation.
Note 3: I use Sitebulb, Screaming Frog, and a bespoke powerhouse crawler built by Portent’s Matthew Henry. Obligatory parental I-love-you-all-equally statement here.
As always, tweet me questions: @ianlurie.