In
the first part of this post series, I described how to set up a Svelte Kit project to load data
from the
DevExpress Web API service. The
second part
described how I queried metadata from the service, in order to
display captions customized in the Model.
You can find source code for each stage of the demo in the
GitHub repository. Here is a GitHub sample for the current sample: Stage 3 — Sort and filter data.
Please also do not miss a bonus post (with a survey inside) on a very trending topic for every productive developer nowadays: Develop a DevExpress XAF and Web API Solution in Docker.
Table of Contents
Sort and Filter Data
Wherever data is displayed in tabular form, users have grown
accustomed to certain standard features, including sorting and
filtering of data. On the level of the data retrieval protocol,
OData defines how
sort
and
filter
parameters should be passed. If you follow one of these links,
you’ll see that the complete documentation describes most other
common convenience features used in typical grid controls like
the
DevExtreme DataGrid. The Web API service with configured
CRUD endpoints
for your business objects uses OData and can therefore support
all this interactive functionality.
Since the goal of this blog series is to work directly with the
functionality provided by the service, I will not simply
use the DataGrid/OData binding functionality. Instead, I will take on the two features of sorting and
filtering data, as examples to demonstrate how a JavaScript
application can interface with the Web API service. This
approach can be useful as a pure learning experience, but it
can also be practical in cases where binding to a fully
automatic component is not an option.
Introduce Display State to the DataTable Component
Sorting and filtering data are interactive features that a user
can take advantage of to adjust the way data is displayed at
runtime. A data view usually has a preconfigured state for
aspects such as sorting and filtering — perhaps a default sort
is applied, or perhaps both features are not active to begin
with. Sometimes the default on startup may be a persistent
state from a previous run.
From a control’s point of view, interactive features require a
cycle like this:
- Control is initialized, features are in default state
- Data is supplied and displayed by the control
-
The user changes an interactive setting, for instance by
clicking a column header to sort
-
The control notifies its parent of the change to display
state
Depending on your experience with different application
architectures and UI component structures, you may think that a
control could handle its own data loading and re-loading,
instead of involving its parent in the cycle. However, this is
certainly not a good idea in a web application where data is
usually loaded from remote services.
We should assume that data loading is coordinated on the page
level rather than that of an individual control, or even higher
up in the hierarchy of application building blocks. In the case
of tabular data views, you will often find that the URL of a
specific page reflects details like the sort order currently
used by the view. The URL is a detail of the page, not the
control, so this supports the understanding that coordination
between a control and its parent page is needed.
Svelte Kit supports flexible mechanisms to load data, and they
are so easy to understand that the approaches will translate to
other JavaScript environments. Please
check out the documentation for Svelte Kit
if you are interested in details.
As you will see, the introduction of display state to the
DataTable control in the demo application is also
a very useful encapsulation of the functionality, keeping it
completely separate from the mechanisms that supply data to the
control. Begin by adding the property
displayState to the component:
export let displayState = {
	sort: undefined,
	desc: false
};
Use the information from the state object to display a marker
in the column header if sorting has been applied to a column.
While you’re editing this block, also add a
click handler to the column header.
<table class="border-separate w-full">
	<tr>
		{#each Object.keys(fields) as f}
			<th class={fields[f].class} on:click={headerClick(f)}>
				{schema[f] || f} {displayState.sort === f ? (displayState.desc ? '↓' : '↑') : ''}
			</th>
		{/each}
	</tr>
...
Now implement the function headerClick. It uses a
small helper function — abstracted for future reuse — to
dispatch an event using Svelte’s standard event dispatcher.
<script>
	import { createEventDispatcher } from 'svelte';

	const dispatch = createEventDispatcher();
	const refresh = (newState) => {
		dispatch('displayStateChanged', newState);
	};

	...

	const headerClick = (field) => () => {
		const newSort = field;
		const newDesc = displayState.sort === newSort ? !displayState.desc : false;
		refresh({ ...displayState, sort: newSort, desc: newDesc });
	};
</script>
Svelte and other frameworks may support other mechanisms to
allow data to flow out of a component, such as variations of
data binding. However, the event metaphor works very well in
this case, and either events or callbacks would be an option in
most frameworks, so I chose to use this approach.
At this point you have encapsulated logic in the control. It
can accept a display state from the outside and reflect this in
its rendering output. It allows the user to sort a column by
clicking its header, and to revert the sort order by clicking a
second time, and it notifies the parent or other interested
parties of state changes through the event.
Handle State Changes by Reloading Data
A quick refactoring step first. Currently, the code that loads
data from the Web API service resides in
src/routes/saleProducts/+page.server.js. In order
to reuse this and provide better abstraction, you should move
it now into a new file src/lib/dataLoading.js.
Change the signature to receive a short and a long type name, a
reference to the fetch function (Svelte Kit uses a
“special” fetch function to accommodate code
running on server and client,
see here for details), and for the upcoming implementation a string that
represents the current URL. Replace the static occurrences of
the SaleProduct type name by the new variables:
export async function loadData(fetch, currentUrl, shortTypeName, longTypeName) {
	const odataUrl = `http://webapi:5273/api/odata/${shortTypeName}`;

	...

	const schemaUrl = `/api/schema/${longTypeName}`;
	...
}
Now change the file
src/routes/saleProducts/+page.server.js to call
into the newly abstracted loadData function:
import { loadData } from '$lib/dataLoading.js';

export function load({ fetch, url }) {
	return loadData(fetch, url, 'SaleProduct', 'XAFApp.Module.BusinessObjects.SaleProduct');
}
In order to react to state changes on the level of the
DataTable component, I decided to reflect the
state in the page URL. There are other possible solutions, but
in this case the overview page displays the list of all data
for a specific type (SaleProduct for now), and it
makes sense that the page URL would accommodate the display
state. This allows a user to bookmark a particular view, and
the URL query parameters configure the exact view that was
visible at the time.
The good news is that this approach also makes it easy to
change state, because this can be done by navigating to a new
URL. You have already implemented the logic in the
DataTable that dispatches an event when the user
changes state. Now a handler is needed to react to this event,
and you can add this to the new code file
src/lib/dataLoading.js:
import { goto } from '$app/navigation';
import { pickBy } from 'lodash';

...

const displayStateQueryString = (s) =>
	new URLSearchParams({
		...pickBy(s), // only those properties that contain something
	}).toString();

export const displayStateChanged =
	(path) =>
	({ detail: state }) => {
		goto(`${path}?${displayStateQueryString(state)}`);
	};
The second parameter to the
displayStateChanged event handler is the
displayState block that you dispatch with the
event in DataTable.svelte. So you can now add this
event handler to the DataTable in
src/routes/saleProducts/+page.svelte:
<script>
	import { displayStateChanged } from '$lib/dataLoading.js';
	import { page } from '$app/stores';

	...
</script>

...

<DataTable
	{dataSource}
	{fields}
	{schema}
	on:displayStateChanged={displayStateChanged($page.url.pathname)}
/>
At this point, you can try to click one of the column headers
in the running application. You will see that the URL reflects
your “sort column”, although of course no sorting takes place
so far. For instance, you may see this URL:
http://localhost:5173/saleProducts?sort=Name
The remaining implementation that completes the circle of the
display state must be added to the function
loadData. This code accepts the query parameters,
adjusts the fetch URL accordingly, and returns the
valid display state to be reflected again by the component.
The first part is easily done — by accessing the
currentUrl value, you can extract the query
parameters supported at this stage:
export async function loadData(fetch, currentUrl, shortTypeName, longTypeName) {
	let sort = currentUrl.searchParams.get('sort');
	let desc = currentUrl.searchParams.get('desc') === 'true';
	...
To apply parameters such as the sort order to the
OData-compatible fetch URL, you should use an
existing package instead of implementing it yourself. Add
odata-query to the project:
> pnpm i -D odata-query
Then you can take advantage of the library functionality to
create the URL for the fetch call:
import queryBuilder from 'odata-query';

...

	const params = {};
	if (sort) params.orderBy = `${sort} ${desc ? 'desc' : 'asc'}`;
	const queryString = queryBuilder(params).toString();

	const odataUrl = `http://webapi:5273/api/odata/${shortTypeName}`;
	const fetchUrl = `${odataUrl}${queryString}`;

	const dataSource = fetch(fetchUrl)
		.then(...)
Finally, change the return value from loadData to
incorporate the displayState:
...

	return await Promise.all([dataSource, schema])
		.then(([ds, sc]) => ({ dataSource: ds, schema: sc, displayState: { sort, desc } }))
		.catch((err) => {
			console.log(err);
			return { error: err.message };
		});
Now you can close the circle. In
src/routes/saleProducts/+page.svelte, receive the
updated displayState from the
load function and pass it on to the
DataTable:
<script>
	...
	export let data;
	$: ({ dataSource, schema, displayState, error } = data);
	...
</script>

	<DataTable
		{dataSource}
		{fields}
		{schema}
		{displayState}
		on:displayStateChanged={displayStateChanged($page.url.pathname)}
	/>
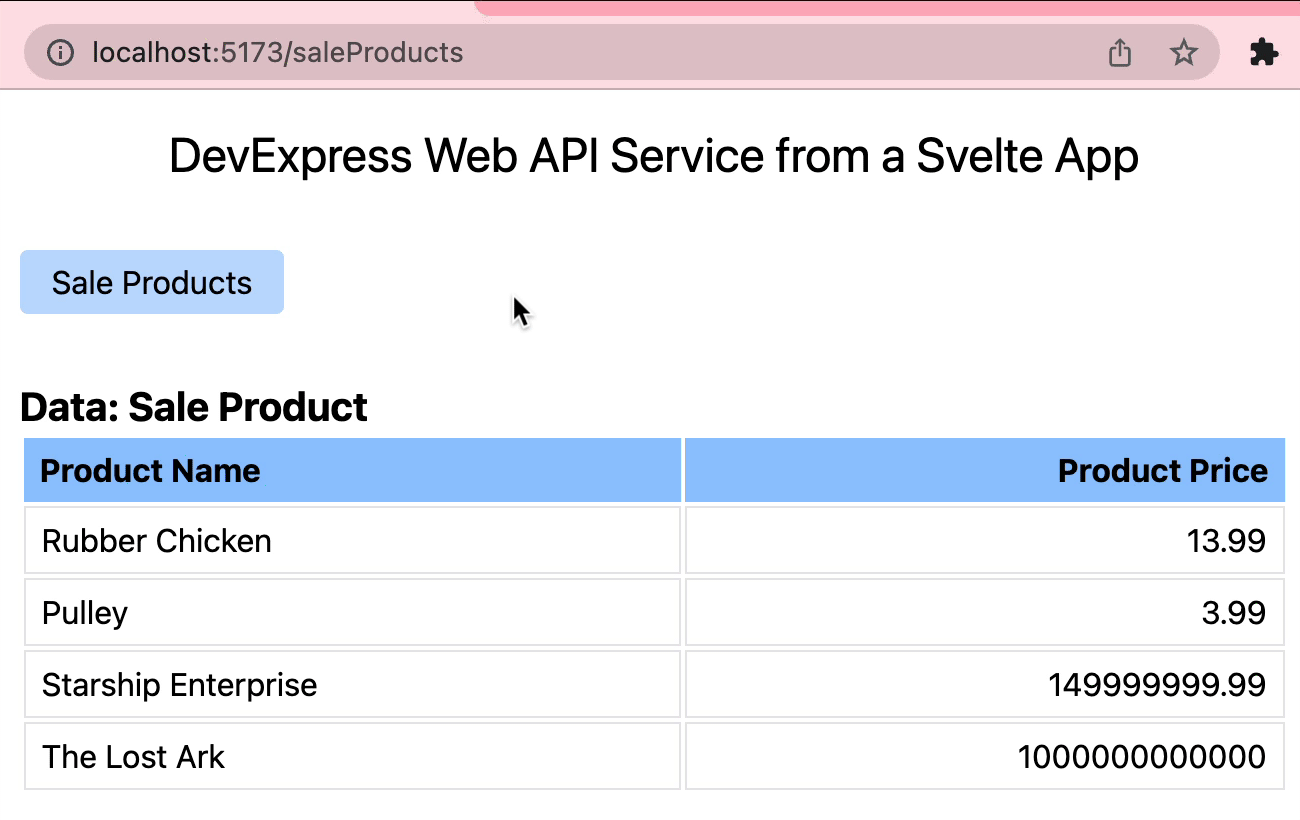
Success! At runtime, click the column headers for the
SaleProduct data overview. Observe the URL, it
should now change correctly, include the
desc parameter as well as sort. The
sort order of the data changes, and the indicators are
displayed correctly.
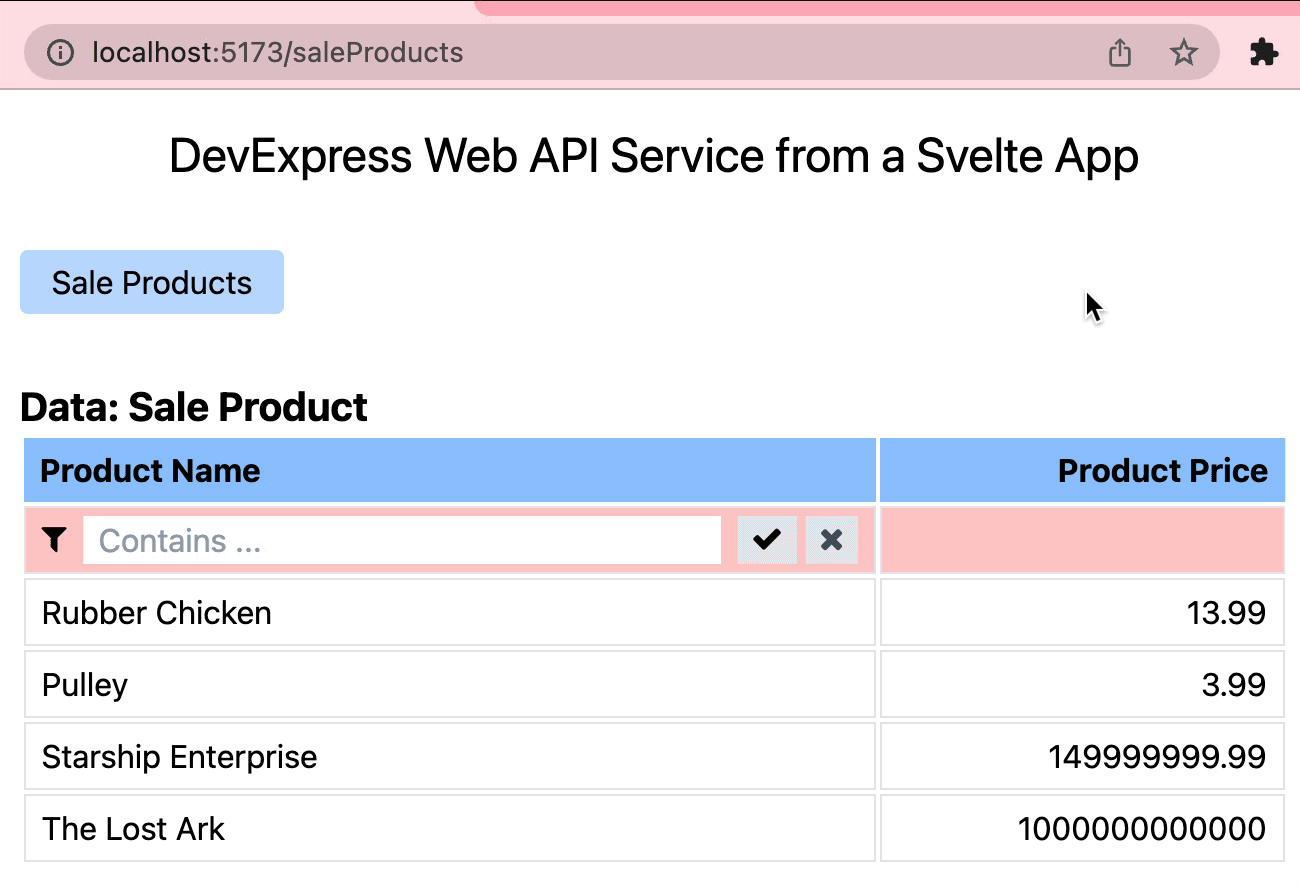
Add Filter Support
The filtering feature works along similar lines as sorting, so
I’ll use it to outline the approach one more time. The filter
editor implementation uses a few icons from
the fork-awesome project, so add this first:
> pnpm i -D fork-awesome
Add an import line to
src/routes/+layout.svelte:
<script>
	import '../app.css';
	import 'fork-awesome/css/fork-awesome.css';
</script>
Now add the file src/lib/FilterEditor.svelte. It’s
a technically simple component, you can find the source code
at this URL in the GitHub repo.
This editor supports only string filters. It can be seen as a
placeholder implementation for similar editors that support
other data types, and of course extra features such as string
filter types could be added there easily.
The type of filter can be configured per column, and this
happens in the field definition in
src/routes/saleProducts/+page.svelte. In the
sample I added a filter for each field, although the
number type is not actually supported by the
implementation and meant for illustrative purposes only.
const fields = {
	Name: { class: 'text-left', filter: 'string' },
	Price: { class: 'text-right', filter: 'number' }
};
What remains is to integrate the editor in the
DataTable component, and to add handling of filter
information to the data fetching cycle, as you did before for
the sort operations.
Edit src/lib/DataTable.svelte. Import the
FilterEditor component and add the block that
renders the filter row.
<script>
	import { createEventDispatcher } from 'svelte';
	import FilterEditor from './FilterEditor.svelte';
	...
</script>

<table class="border-separate w-full">
	<tr>
		...
	</tr>
	<tr class="filterRow">
		{#each Object.keys(fields) as f}
			{@const field = fields[f]}
			{@const filter = field.filter}
			<td class={field.class}>
				{#if filter && filter !== 'none'}
					<FilterEditor
						{filter}
						value={displayState.filters[f]?.value}
						on:newValueConfirmed={newFilterValue(f)}
					/>
				{/if}
			</td>
		{/each}
	</tr>
	{#await dataSource}
	...
</table>

<style lang="postcss">
	...
	tr.filterRow > td {
		@apply bg-red-200;
	}
</style>
As you can see, the rendering code assumes that the
displayState object now includes a
filters field. Additionally, an event handler
function is used for the newValueConfirmed event.
Add both these items to the script block now.
export let displayState = {
	sort: undefined,
	desc: false,
	filters: {}
};

...

const newFilterValue =
	(fieldName) =>
	({ detail: newValue }) => {
		refresh({
			...displayState,
			filters: {
				...displayState.filters,
				[fieldName]: { filter: fields[fieldName].filter, value: newValue }
			}
		});
	};
Finally, edit src/lib/dataLoading.js. The filter
parameter will be read from the query string exactly like
sort and desc, and an extra piece of
code converts the filter representation into the required OData
structure. Make sure to include the filters field
in the return value from the final promise.
export async function loadData(fetch, currentUrl, shortTypeName, longTypeName) {
	let sort = currentUrl.searchParams.get('sort');
	let desc = currentUrl.searchParams.get('desc') === 'true';
	const filterParam = currentUrl.searchParams.get('filters');
	let filters = filterParam ? JSON.parse(decodeURIComponent(filterParam)) : {};

	const params = {};
	if (sort) params.orderBy = `${sort} ${desc ? 'desc' : 'asc'}`;

	const filter = {
		and: []
	};
	for (const f of Object.keys(filters)) {
		if (filters[f].filter === 'string' && filters[f].value) {
			filter.and.push({ [f]: { contains: filters[f].value } });
		}
	}
	if (filter.and.length > 0) params.filter = filter;

	const queryString = queryBuilder(params).toString();

	const odataUrl = `http://webapi:5273/api/odata/${shortTypeName}`;
	const fetchUrl = `${odataUrl}${queryString}`;

	...

	return await Promise.all([dataSource, schema])
		.then(([ds, sc]) => ({ dataSource: ds, schema: sc, displayState: { sort, desc, filters } }))
		.catch((err) => {
			console.log(err);
			return { error: err.message };
		});
}
The last step is to encode the filters in the
query string that is generated for the goto call,
when the user changes the filter interactively and navigation
is triggered.
const displayStateQueryString = (s) =>
	new URLSearchParams({
		...pickBy(s),
		filters: encodeURIComponent(JSON.stringify(s.filters))
	}).toString();
With these changes in place, you can now test the combined
filter and sort functions in the UI. You’ll see the query
string adjust each time a setting changes, and everything
should work together correctly!
Conclusion
Here is the link to
the branch “stage-3” in the GitHub repository
again. This branch includes the sort and filter functionality
described in this post.
Thank you for reading, or following along! Next time I will
implement data editing, of course using the Web API service,
and taking advantage of the Validation module.
Your Feedback Matters!
Please take a moment to reply to the following questions – your
feedback will help us shape/define future development
strategies.
Free DevExpress Products - Get Your Copy Today
The following free DevExpress product offers remain available. Should you have any questions about the free offers below, please submit a ticket via the
DevExpress Support Center at your convenience. We'll be happy to follow-up.