Did that just move? Is that real? That’s augmented reality. Welcome back to the fourth installment of the ARKit tutorial series. In this tutorial, we will be looking at the basics of physics inside of ARKit. We shall launch a rocketship by the end of this tutorial then celebrate like it’s the 4th of July because we can. Let’s go!
First, let’s begin by downloading the starter project here. Build and run. You should be prompted to allow camera access in the App.

Tap OK. If all goes well, you should be able to see your camera’s view.
Also just a note, this tutorial is built on top of previous knowledge from previous tutorials. If you happen to get stuck, feel free to check out the ARKit tutorial series to help you out as much as possible when needed.
Physics Body Explained
First things first, physics body. This is one of the fundamentals. In order for SceneKit to know how to simulate a SceneKit node(s) inside of our app, we need to attach it a SCNPhysicsBody. A SCNPhysicsBody is an object which adds physics simulation to a node.
SceneKit performs physics calculations to nodes with attached physics bodies in a scene before rendering a frame. These calculations include gravity, friction, and collisions with other bodies. You can also apply forces and impulses to a body. After these calculations, it updates the positions and orientations of the nodes, then renders the frame.
Basically, before each rendered frame, physics calculation.
Physics Body Types
To construct a physics body, you’d first need to specify the physics body type. A physics body determines how a physics body interacts with forces and other bodies. The three physics body types are static, dynamic, and kinematic.
Static
You’d want to use a static physics body type for SceneKit objects like floors, walls, and terrain. A static physics body type is unaffected by forces or collisions and cannot move.
Dynamic
You’d want to use a dynamic physics body type for SceneKit objects like a flying fire-breathing dragon, Steph Curry shooting a basketball, or a blasting off rocketship. Dynamic physics body is a physics body that can be affected by forces and collisions.
Kinematic
You’d want to use a kinematic physics body say when you create a game where you need to push a block with your finger. So you create an “invisible” block pusher which is triggered by your finger movement. The “invisible” block is not affected by other blocks, however the “invisible” block moves other blocks when in contact. Kinematic physics body is a physics body that is unaffected by forces or collisions, but it can cause collisions affecting other bodies when moved. Can move others, can’t be moved.
Creating a Physics Body
Let’s begin by giving our detected horizontal plane a static physics body. This way, we have a solid ground for our rocketship to stand on.
Add the following method below renderer(_:didUpdate:for:) of ViewController.swift:
|
1 2 3 4 5 |
func update(_ node: inout SCNNode, withGeometry geometry: SCNGeometry, type: SCNPhysicsBodyType) { let shape = SCNPhysicsShape(geometry: geometry, options: nil) let physicsBody = SCNPhysicsBody(type: type, shape: shape) node.physicsBody = physicsBody } |
In this method, we created a SCNPhysicsShape object. A SCNPhysicsShape object represents the shape of a physics body. When SceneKit detects contact for the SCNPhysicsBody objects of your scene, it uses the physics shapes you defined instead of the rendered geometry of visible objects.
Next, we created a SCNPhysicsBody object by passing .static into the type parameter and our SCNPhysicsShape object into the shape parameter.
Then, we set the node’s physics body to the physics body we created together.
Attaching a Static Physics Body
We are now going to attach a static physics body to the detected plane inside of the renderer(_:didAdd:for:) method. Call the following method right before adding planeNode as the child node:
|
1 |
update(&planeNode, withGeometry: plane, type: .static) |
After the change, your renderer(_:didAdd:for:) method should now look like this:
|
1 2 3 4 5 6 7 8 9 10 11 12 13 14 15 16 17 18 19 20 21 |
func renderer(_ renderer: SCNSceneRenderer, didAdd node: SCNNode, for anchor: ARAnchor) { guard let planeAnchor = anchor as? ARPlaneAnchor else { return } let width = CGFloat(planeAnchor.extent.x) let height = CGFloat(planeAnchor.extent.z) let plane = SCNPlane(width: width, height: height) plane.materials.first?.diffuse.contents = UIColor.transparentWhite var planeNode = SCNNode(geometry: plane) let x = CGFloat(planeAnchor.center.x) let y = CGFloat(planeAnchor.center.y) let z = CGFloat(planeAnchor.center.z) planeNode.position = SCNVector3(x,y,z) planeNode.eulerAngles.x = -.pi / 2 update(&planeNode, withGeometry: plane, type: .static) node.addChildNode(planeNode) } |
When our detected plane is updated with new information, it may change in geometry. Hence, we need to call the same method inside of render(_:didUpdate:for:):
|
1 |
update(&planeNode, withGeometry: plane, type: .static) |
The render(_:didUpdate:for:) method should now look like this after the modification:
|
1 2 3 4 5 6 7 8 9 10 11 12 13 14 15 16 17 18 19 |
func renderer(_ renderer: SCNSceneRenderer, didUpdate node: SCNNode, for anchor: ARAnchor) { guard let planeAnchor = anchor as? ARPlaneAnchor, var planeNode = node.childNodes.first, let plane = planeNode.geometry as? SCNPlane else { return } let width = CGFloat(planeAnchor.extent.x) let height = CGFloat(planeAnchor.extent.z) plane.width = width plane.height = height let x = CGFloat(planeAnchor.center.x) let y = CGFloat(planeAnchor.center.y) let z = CGFloat(planeAnchor.center.z) planeNode.position = SCNVector3(x, y, z) update(&planeNode, withGeometry: plane, type: .static) } |
Ground solid work!
Attaching a Dynamic Physics Body
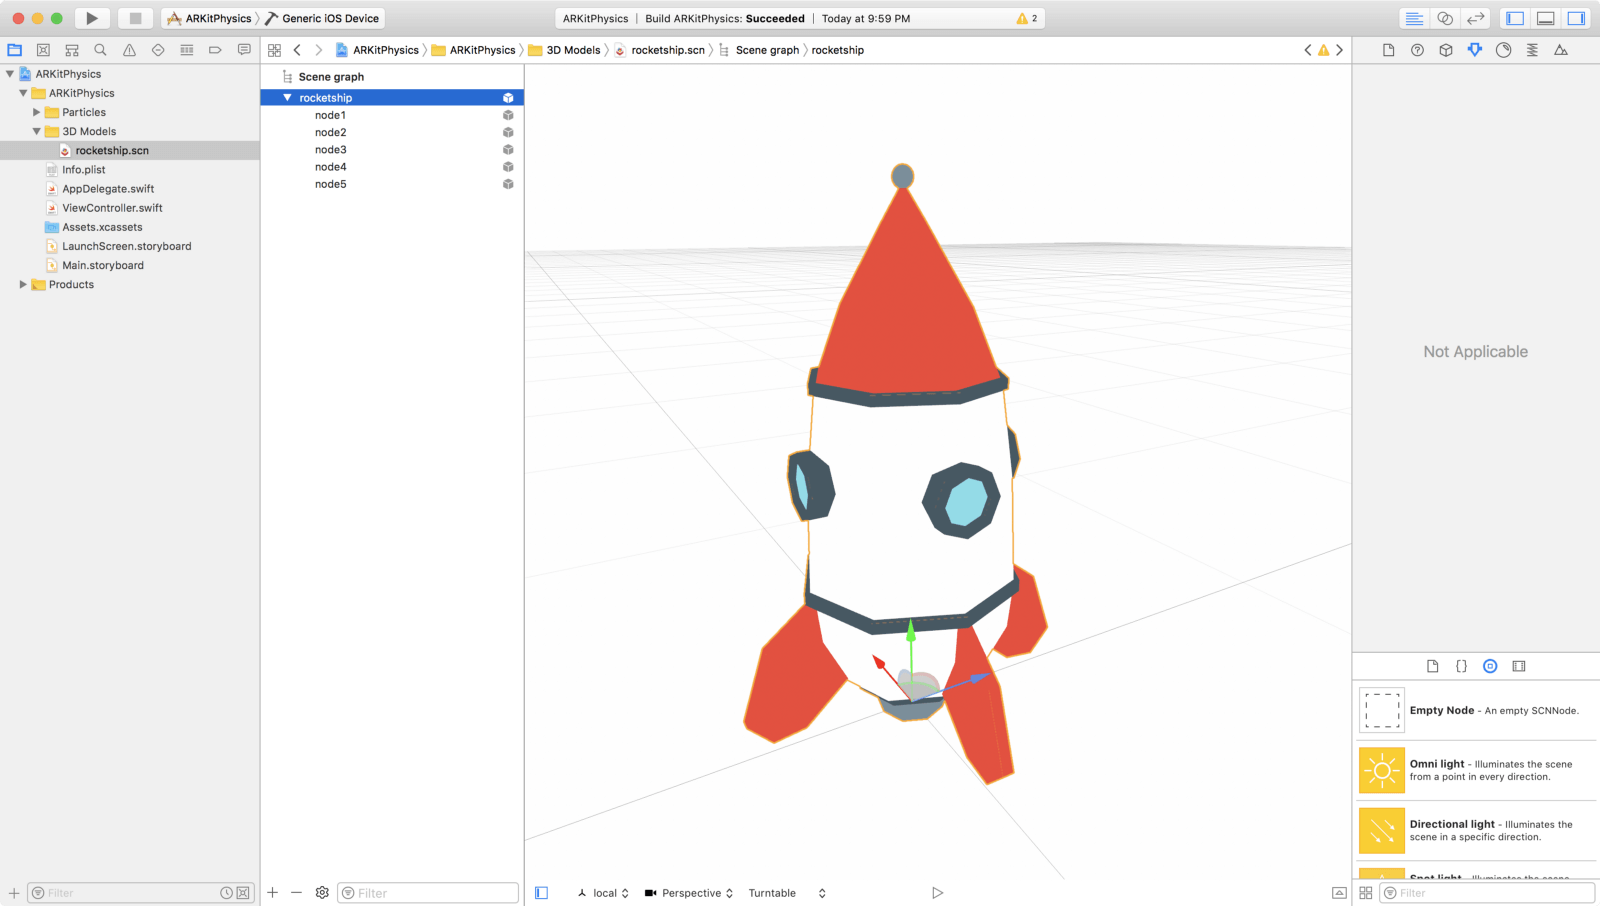
Now let’s give our rocketship node a dynamic physics body because we want this node to be affected by forces and collisions. Declare a rocketship node name constant inside of the ViewController class:
|
1 |
let rocketshipNodeName = "rocketship" |
Then inside the addRocketshipToSceneView(withGestureRecognizer:) method, add the following code right after adjusting the rocketship node’s position:
|
1 2 3 |
let physicsBody = SCNPhysicsBody(type: .dynamic, shape: nil) rocketshipNode.physicsBody = physicsBody rocketshipNode.name = rocketshipNodeName |
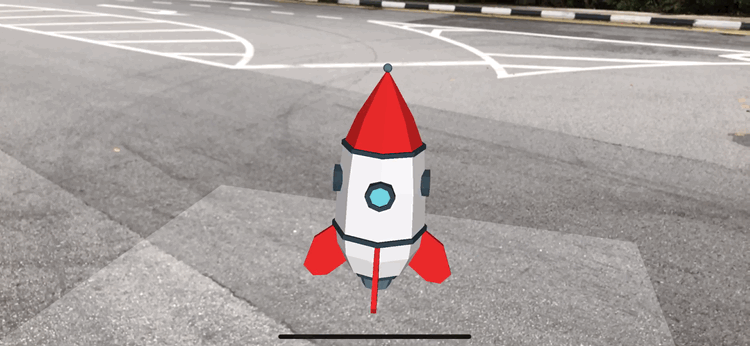
We gave our rocketshipNode static physics body and a name. We’ll see the name be used to identify the rocketshipNode later on. Build and run. And you should be able to see something like:
Applying Force
We are now going to apply force onto our rocketship.
Before we do that, we need a way of triggering the action. We can do this with the help of aUISwipeGestureRecognizer. First, add the following method below the addRocketshipToSceneView(withGestureRecognizer:) method:
|
1 2 3 4 5 6 7 8 9 |
func getRocketshipNode(from swipeLocation: CGPoint) -> SCNNode? { let hitTestResults = sceneView.hitTest(swipeLocation) guard let parentNode = hitTestResults.first?.node.parent, parentNode.name == rocketshipNodeName else { return nil } return parentNode } |
This method above will help us get the rocket ship node from the swipe location of the swipe gesture. You may be wondering why we safely unwrapped the parent node. The reason is the returned node from the hit test result could be any one of the five nodes that make up the rocketship.
Right below the previous method, add the following method:
|
1 2 3 4 5 6 7 8 9 10 11 12 13 |
@objc func applyForceToRocketship(withGestureRecognizer recognizer: UIGestureRecognizer) { // 1 guard recognizer.state == .ended else { return } // 2 let swipeLocation = recognizer.location(in: sceneView) // 3 guard let rocketshipNode = getRocketshipNode(from: swipeLocation), let physicsBody = rocketshipNode.physicsBody else { return } // 4 let direction = SCNVector3(0, 3, 0) physicsBody.applyForce(direction, asImpulse: true) } |
From the code above, we:
- Made sure the swipe gesture state is ended.
- Get hit test results from the swipe location.
- See if the swipe gesture was acted on the rocketship.
- We apply a force in the y direction to the parent node’s physics body. If you notice, we also set the impulse argument to true. This applies an instantaneous change in momentum and accelerates the physics body immediately. Basically, this option allows you to simulate an instantaneous effects like a projectile launch when set to true.
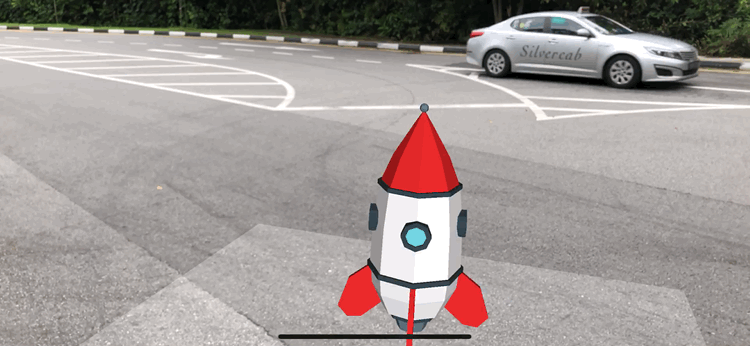
Great! Build and run. Swipe up on the rocketship. And you should be able to apply a force onto your rocketship!
Adding SceneKit Particle System and Changing Physics Properties
The starter project comes with a reactor SceneKit particle system under the “Particles” folder.

In this tutorial, we will not go over how to create a SceneKit particle system. We will go over how to add a SceneKit particle system onto a node and some its physics properties.
Open up ViewController.swift. Declare the following variable inside of the ViewController class:
|
1 |
var planeNodes = [SCNNode]() |
Inside of the renderer(_:didAdd:for:) method, add the following as the method’s last line of code:
|
1 |
planeNodes.append(planeNode) |
Simply, when a new plane is detected, we append it onto our plane nodes array. We are referencing the plane nodes for the reactor SceneKit particle system’s collider nodes property later on.
Right below the renderer(_:didAdd:for:) method, add implement the following delegate method:
|
1 2 3 4 5 6 |
func renderer(_ renderer: SCNSceneRenderer, didRemove node: SCNNode, for anchor: ARAnchor) { guard anchor is ARPlaneAnchor, let planeNode = node.childNodes.first else { return } planeNodes = planeNodes.filter { $0 != planeNode } } |
This delegate method gets called when a SceneKit node corresponding to a removed AR anchor has been removed from the scene. At this time, we will filter the plane nodes array to only the ones that does not equal to the removed plane node.
Next, add the following method right below the applyForceToRocketship(withGestureRecognizer:) method:
|
1 2 3 4 5 6 7 8 9 10 11 12 13 14 15 16 17 18 19 20 21 22 |
@objc func launchRocketship(withGestureRecognizer recognizer: UIGestureRecognizer) { // 1 guard recognizer.state == .ended else { return } // 2 let swipeLocation = recognizer.location(in: sceneView) guard let rocketshipNode = getRocketshipNode(from: swipeLocation), let physicsBody = rocketshipNode.physicsBody, let reactorParticleSystem = SCNParticleSystem(named: "reactor", inDirectory: nil), let engineNode = rocketshipNode.childNode(withName: "node2", recursively: false) else { return } // 3 physicsBody.isAffectedByGravity = false physicsBody.damping = 0 // 4 reactorParticleSystem.colliderNodes = planeNodes // 5 engineNode.addParticleSystem(reactorParticleSystem) // 6 let action = SCNAction.moveBy(x: 0, y: 0.3, z: 0, duration: 3) action.timingMode = .easeInEaseOut rocketshipNode.runAction(action) } |
In the code above, we:
- Made sure the swipe gesture state is ended.
- Safely unwrapped the rocket ship node and its physics body like before. Also, we safely unwrapped the reactor SceneKit particle system and the engine node. We want to add the reactor SceneKit particle system onto the rocketship’s engine. Hence, the interest in the engine node.
- Set the physics body’s *is affected by gravity *property to false and its effect is as it sounds. Gravity will no longer affect the rocketship node. We also set the damping property to zero. The damping property simulates the effect of fluid friction or air resistance on a body. Setting it it zero will result in zero effect from fluid friction or air resistance on the rocketship node’s physics body.
- Set the reactor particle system to collide with the plane nodes. This will make the particles from the particle system to bounce off of the detected planes when in contact instead of flying right through them.
- Add the reactor particle system onto the engine node.
- We move the rocketship node up by 0.3 meters with a ease in and ease out animation effect.
Adding Swipe Gestures
Before we can apply force and launch our rocketship, we need to add swipe gesture recognizers onto our scene view. Add the following below addTapGestureToSceneView():
|
1 2 3 4 5 6 7 8 9 |
func addSwipeGesturesToSceneView() { let swipeUpGestureRecognizer = UISwipeGestureRecognizer(target: self, action: #selector(ViewController.applyForceToRocketship(withGestureRecognizer:))) swipeUpGestureRecognizer.direction = .up sceneView.addGestureRecognizer(swipeUpGestureRecognizer) let swipeDownGestureRecognizer = UISwipeGestureRecognizer(target: self, action: #selector(ViewController.launchRocketship(withGestureRecognizer:))) swipeDownGestureRecognizer.direction = .down sceneView.addGestureRecognizer(swipeDownGestureRecognizer) } |
A swipe up gesture will apply force onto the rocketship node. A swipe down gesture will launch the rocketship. Nice!
Last but not least, call the method inside of viewDidLoad():
|
1 |
addSwipeGesturesToSceneView() |
That’s it!
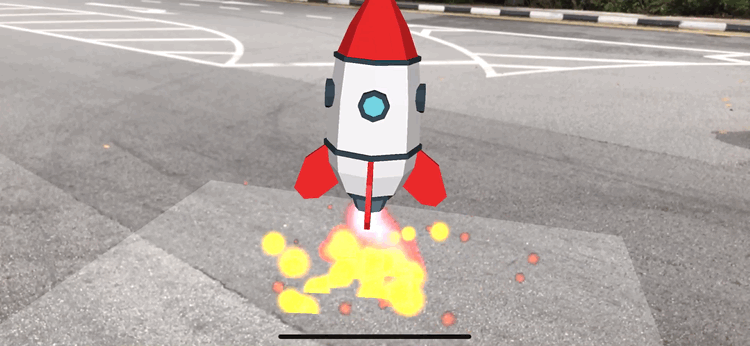
Showtime!
Congratulations, it’s showtime. Try to swipe down and see what you get!
And, try to swipe down then up. Off the rocketship goes!
Final Words
I hope you have enjoyed and learned something valuable from my tutorial. Feel free to share this tutorial on your social networks so that your circle can make some knowledge gains too!
For reference, you can download the sample project on GitHub.
