
.NET MAUI Progressing From a Default Project Part 1 - Adding the View Model
2022-06-28 13:00
The Series
Level: Moderate
This series assumes the developer is familiar with .NET MAUI, the Model-View-ViewModel pattern, and has worked through one or more tutorials such as the excellent James Montemagno's Workshop.
Source: https://github.com/bladewolf55/net-maui-progression
- Part 1 - Adding the View Model
- Part 2 - (The Problem With) Basic Unit Testing
- Part 3 - Adding the Model
- Part 4 - Putting the View in Its Place
- Part 5 - Restyling From Scratch
- Part 6 - Revisiting Unit Testing
- Part 7 - Deploying, the Other People's Links Edition
The Problem .NET MAUI Solves
Cross-platform development is hard, usually requiring maintaining a project per platform. Any feature must be added to each code base. .NET MAUI uses a single project with the majority of the UI code using XAML, and the business code in C#. This code is then transpiled to the native platforms. The result is less maintenance, fewer errors, and reduced knowledge needed to build cross-platform applications.
(Brief) Getting Started: The Default App
These instructions assume running in Windows 10/11. You can follow the instructions below, which are brief and aren't intended as a beginner's guide. Or, better yet, use Microsoft's official documents.
The Project
- Install and open Visual Studio 2022 Preview
- Create a new project
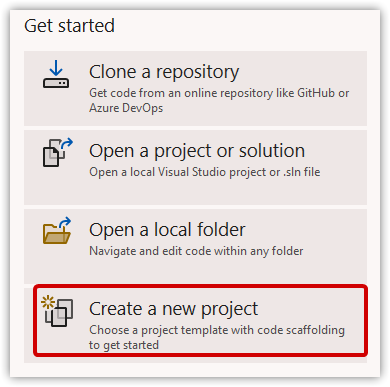
- Filter for C# MAUI, or search for ".NET MAUI App"
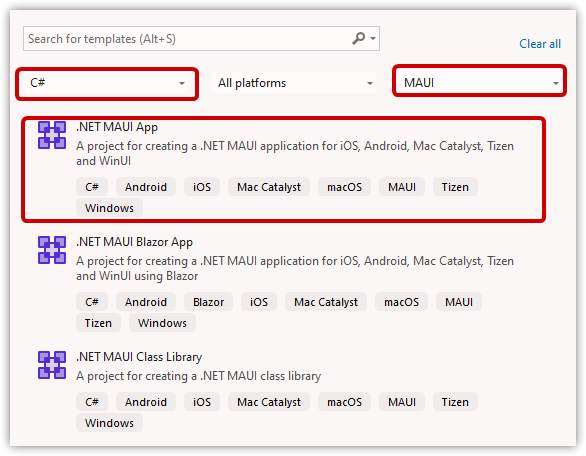
- Create a .NET MAUI App using the defaults. Change the name to match mine if you want.
The Android Emulator
Important
You'll need to enable either Hyper-V or HAXM.
Note
I had trouble with Hyper-V the first time I tried .NET MAUI on my laptop even though it's supported, and had to use HAXM for a while. The problem went away when I did a clean install of Windows 11. Presumably, that would have been true in Windows 10.
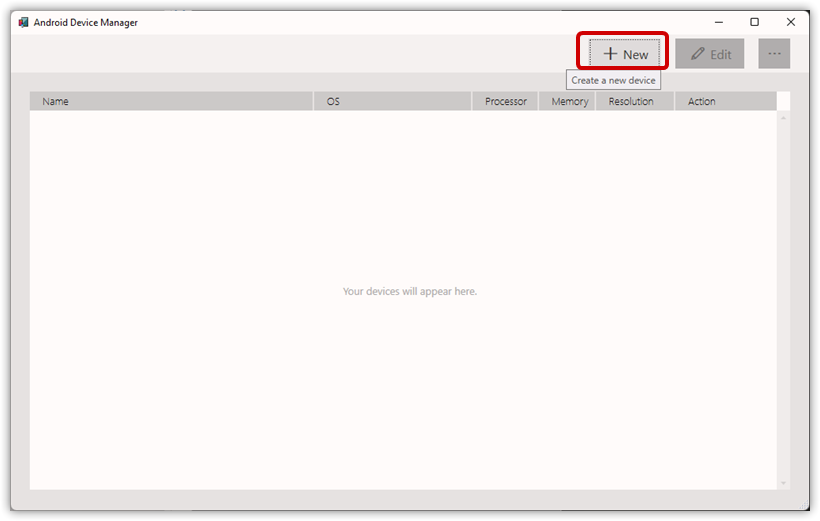
- Choose Debug Target > Android Emulator

- Click to start the emulator. The Android Device Manager starts. Answer Yes to allow changes.
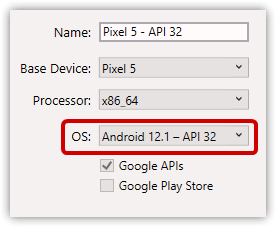
- You can accept the default Pixel 5 Android 12.0 (Level 31). However, I recommend canceling at this point and manually creating a Pixel 5 Android 12.1 (Level 32) or later. There are some behavior differences worth seeing, specifically in how the splash screen is treated.
- You don't need to explicitly start the emulator. Running the app will do that. So . . .
- Run the app!

This should start the emulator, then install and run the default app. On my machine, this takes a couple of minutes.
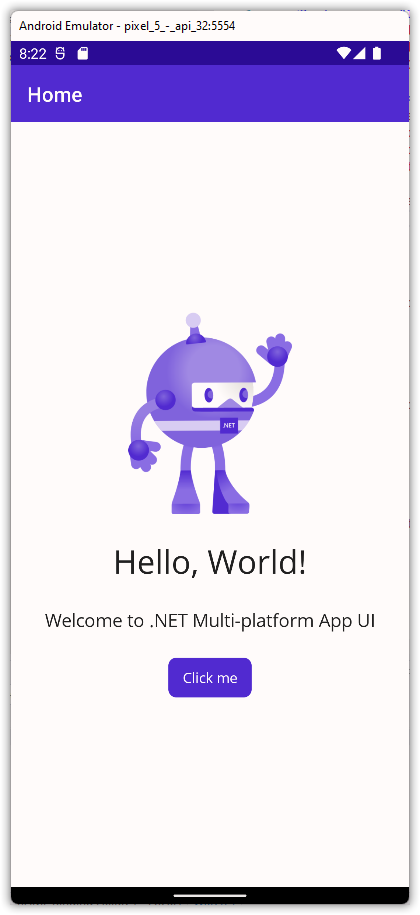
Clicking the button increases a counter.
Warning
As of 2022-06-20, using Android 12.1 as configured above, clicking the button doesn't display the number of clicks. I'm not sure what in the style sheets is preventing this, but you can work around it this way:
- Open Resources > Styles > Styles.xslt
- Add "MinimumWidthRequest". This forces a wide button.
<Style TargetType="Button">
    <Setter Property="MinimumWidthRequest" Value="200" />
    <Setter Property="TextColor" Value="{AppThemeBinding Light={StaticResource White}, Dark={StaticResource Primary}}" />
MVVM Basics
Great, we have a working app! And the .NET MAUI team have included lots of boilerplate to understand. But one thing not included is implementing the Model-View-ViewModel "MVVM" pattern.
We need to separate our code to improve maintenance and testing (more on testing in a later post!). One pattern for doing this is MVVM. Similar to Model-View-Controller (MVC), MVVM says,
- The Model contains our raw domain information and business behaviors, which may come from various data sources. (See Domain-Driven Design.)
- The View Model typically retrieves the Model via a service. The View Model then prepares the information for display.
- The View displays whatever's in the View Model.
The separation of concerns here is that
- The View doesn't know how the View Model gets its information.
- The View Model doesn't know how the Model gets its information.
This allows us to make changes to the View, View Model, and Model mostly independently. We strive for loose coupling.
An important aspect of MVVM is how to bind the View to the View Model. The user interacts with the View, for example clicking a button to increment a counter. This updates the data stored in the View Model (and possibly gets passed to the Model).
However, we can also update the values programmatically directly in the View Model, and we want those values to display in the View. This is two-way binding.
Creating the View Model
Right now, when we click the app's button it runs code in the MainPage.xaml.cs class. If this looks familiar to some of you1, it's because it's the same code-behind approach used in ASP.NET WebForms.
It works, but is too tightly coupled. Let's pull that simple functionality into a View Model.
- Add the NuGet package
CommunityToolkit.MvvmCommunityToolkit.Mvvm.This is the same package asCommunityToolkit.Mvvm. Only the namespace differs.
A reader kindly informed me that the Microsoft version of the toolkit should no longer be used. Instead, use the Community version. - Add a folder named
ViewModels, and a file namedCounter.cs.Some developers append their view models with "VM" or "ViewModel". That's fine, but I don't, 'cause that's what namespaces are for!
- Add the following code
using CommunityToolkit.Mvvm.ComponentModel;
using CommunityToolkit.Mvvm.Input;

namespace Maui.Progression.ViewModels;

public partial class Counter : ObservableObject
{
    [ObservableProperty]
    [AlsoNotifyChangeFor(nameof(CountText))]
    int count;

    public string CountText
    {
        get
        {
            string text = "Click me";
            if (count > 0)
            {
                text = $"Clicked {count} " + (count == 1 ? "time" : "times");
            }
            SemanticScreenReader.Announce(text);
            return text;
        }
    }

    [ICommand]
    void IncreaseCounter()
    {
        Count++;
    }
}
The CommunityToolkit.Mvvm package includes code generators to create all of the two-way binding code using the attributes. Here we've
- Created an observable property named
Count(the generator capitalizes the property name for us based on the backing field) - Created a read-only property named CountText. This is what we'll display.
- Told the framework "when you notify of a change in Count, also notify there was a change in CountText."
- Created a bindable command named IncreaseCounter to do the work.
Notes
- Must be a partial class
- Must inherit from ObservableObject
- The
Countproperty must be incremented, not the backing field.
Let's modify the MainPage view. Change the declarations.
<ContentPage xmlns="http://schemas.microsoft.com/dotnet/2021/maui"
             xmlns:x="http://schemas.microsoft.com/winfx/2009/xaml"
             x:Class="Maui.Progression._01.MainPage"
             xmlns:ViewModels="clr-namespace:Maui.Progression._01.ViewModels"
             x:DataType="ViewModels:Counter"
             >
This code allows Intellisense to work. It doesn't perform the binding. That's done in the code-behind as shown later.
- Adds the ViewModels namespace
- Declares the view is of type Counter.
Change the button code.
            <Button
                Text="{Binding CountText}"
                SemanticProperties.Hint="Counts the number of times you click"
                Command="{Binding IncreaseCounterCommand}"
                HorizontalOptions="Center" />
- Binds the button text to our CountText property
- Binds the button click to the IncreaseCounter command.
Important The toolkit code generator automatically appends "Command" to methods decorated with
ICommand.
Finally, in the MainPage.xaml.cs code-behind, replace with this.
using Maui.Progression._01.ViewModels;

namespace Maui.Progression._01;

public partial class MainPage : ContentPage
{
	public MainPage()
	{
		InitializeComponent();
		BindingContext = new Counter();
	}
}
This is what actually binds the View to the View Model.
Running the code should behave as before.
Tricks
Building for multiple platforms takes awhile. If you're willing to develop mostly for Windows, and check progress on Android/iOS/Mac occasionally, you can comment out the mobile targets.
<PropertyGroup>
    <!--<TargetFrameworks>net6.0-android;net6.0-ios;net6.0-maccatalyst</TargetFrameworks>-->
    <TargetFrameworks Condition="$([MSBuild]::IsOSPlatform('windows'))">$(TargetFrameworks);net6.0-windows10.0.19041.0</TargetFrameworks>
Troubleshooting
If you get a message "The namespace already contains a definition for 'Counter'," double check you defined Counter as a partial class. You may then have to close Visual Studio, delete the project's bin and obj folders, restart Visual Studio, and build the project.
Sometimes I've seen the MVVM Toolkit generators/code get "stuck," probably due to some files being cached. Even if I comment out most of the class code, the error doesn't go away until I restart Visual Studio.
In some cases, I've cleaned up the VS generated documents. (But I don't know if this matters.)
- Open %LocalAppData%\Temp\VSGeneratedDocuments
- Delete all the folders
AND, if you're told you can't delete files because they're locked!!
Important
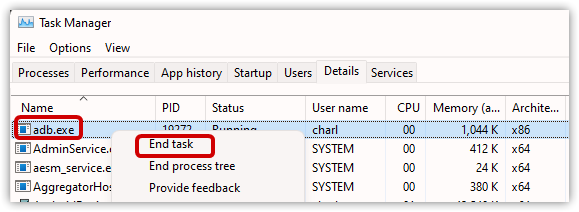
This is probably the most useful troubleshooting step I've found. When you close Visual Studio, it does not closeadb.exe, which is used by the Android emulator. I'm betting this will be corrected in the future.
- Close Visual Studio
- Close any open Android Emulator and the Android Device Manager
- Open Task Manager (Ctrl+Shift+Esc)
- Open the Details tab
- End the adb.exe process
AND IF THAT DOESN'T WORK!!!
Restart and try clearing those files again. And delete the project's obj/bin again. Sheesh!
If you get this error
Argument 1: cannot convert from 'System.ComponentModel.PropertyChangedEventArgs' to 'int'
double check your View Model class is inheriting from ObservableObject, not BindableObject.
Wrap Up
We've actually done quite a bit here to implement the MVVM pattern.
- Created a View Model with bindable properties and commands
- Updated the View to use the View Model
- Bound the two together
Next up: unit testing!
Resources
-
The ancient ones↩