
This fifth part of the Advanced SwiftUI Animations series will explore the Canvas view. Technically, it is not an animated view, but when combined with TimelineView from Part 4, it brings a lot of interesting possibilities, as shown in this digital rain example:
I had to delay this article several weeks because the Canvas view was a little unstable. We are still in the beta period, so that was to be expected. However, the crashes produced by the view made some of the examples here not ready for sharing. Although not all issues were resolved, every example now runs smoothly. At the end of the article, I will point out some of the workarounds I found.
A Simple Canvas
In a nutshell, the canvas is a SwiftUI view that gets drawing instructions from a rendering closure. Unlike most closures in the SwiftUI API, it is not a view builder. This means there are no restrictions to the swift language we can use.
The closure receives two parameters: context and size. The context uses a new SwiftUI type GraphicsContext, which packs a lot of methods and properties that will let us draw just about anything. Here’s a basic example of how a Canvas can be arranged:
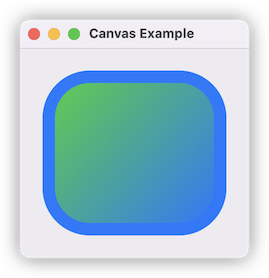
struct ContentView: View {
    var body: some View {
        Canvas { context, size in
            let rect = CGRect(origin: .zero, size: size).insetBy(dx: 25, dy: 25)

            // Path
            let path = Path(roundedRect: rect, cornerRadius: 35.0)

            // Gradient
            let gradient = Gradient(colors: [.green, .blue])
            let from = rect.origin
            let to = CGPoint(x: rect.width + from.x, y: rect.height + from.y)

            // Stroke path
            context.stroke(path, with: .color(.blue), lineWidth: 25)

            // Fill path
            context.fill(path, with: .linearGradient(gradient,
                                                     startPoint: from,
                                                     endPoint: to))
        }
    }
}
The Canvas initializer has other parameters (opaque, colorMode and rendersAsynchronously). Refer to Apple’s documentation to learn more about them.
The GraphicsContext
The GraphicsContext is full of methods and properties, but it is not my intention to make this post a reference where I list every one of them. It is a long list that can be a little overwhelming. However, when I was updating the Companion for SwiftUI app, I did have to go through all of them. That gave me an overall view. I will try to categorize what’s available, so you get the same picture.
- Drawing Paths
- Drawing Images and Text
- Drawing Symbols (aka SwiftUI views)
- Mutating the Graphics Context
- Reusing CoreGraphics Code
- Animating the Canvas
- Canvas Crashes
Paths
The first thing you need to do to draw a path, is to create it. Since the first version of SwiftUI, a path can be created and modified in many ways. Some of the available initializers are:
let path = Path(roundedRect: rect, cornerSize: CGSize(width: 10, height: 50), style: .continuous)let cgPath = CGPath(ellipseIn: rect, transform: nil)
let path = Path(cgPath)let path = Path {
let points: [CGPoint] = [
.init(x: 10, y: 10),
.init(x: 0, y: 50),
.init(x: 100, y: 100),
.init(x: 100, y: 0),
]
$0.move(to: .zero)
$0.addLines(points)
}
Paths can also be created from a SwiftUI shape. The Shape protocol has a path method you may use to create one:
let path = Circle().path(in: rect)Of course, this also works with custom shapes:
let path = MyCustomShape().path(in: rect)Filling a Path
To fill a path, use the context.fill() method:
fill(_ path: Path, with shading: GraphicsContext.Shading, style: FillStyle = FillStyle())The shading indicates how to fill the shape (with a color, a gradient, a tiled image, etc.). Use the FillStyle type if you need to indicate the style to use (i.e., even odd/antialiased properties).
Stroking a Path
To stroke a path, use one of these GraphicsContext methods:
stroke(_ path: Path, with shading: GraphicsContext.Shading, style: StrokeStyle)
stroke(_ path: Path, with shading: GraphicsContext.Shading, lineWidth: CGFloat = 1)
You may specify a shading (color, gradient, etc) to indicate how to stroke the line. Use style if you need to specify dash, line cap, join, etc. Alternatively, you can just specify a line width.
For a full example of how to stroke and fill a shape, see the example above (section A Simple Canvas).
Images and Text
Images and Text are drawn using the context draw() method, in one of its two versions:
draw(image_or_text, at point: CGPoint, anchor: UnitPoint = .center)
draw(image_or_text, in rect: CGRect)
In the case of images, there is an additional optional parameter for the second draw() version, style:
draw(image, in rect: CGRect, style: FillStyle = FillStyle())Before one of these elements can be drawn, they must be resolved. By resolving, SwiftUI will take into account the environment (e.g., color scheme, display resolution, etc.). In addition, resolving these elements expose some interesting properties that may be further used in our drawing logic. For example, the resolved text will tell us the final size of the text for the specified font. Or we can also change the shading of the resolved element before drawing it. To learn more about the available properties and methods, check ResolvedImage and ResolvedText.
Use the context resolve() method to get a ResolvedImage from Image, and ResolvedText from Text.
Resolving is optional, the draw() method also accepts Image and Text (instead of ResolvedImage and ResolvedText). In that case, draw() will resolve them automatically. This is convenient if you don’t have any use for the resolved properties and methods.
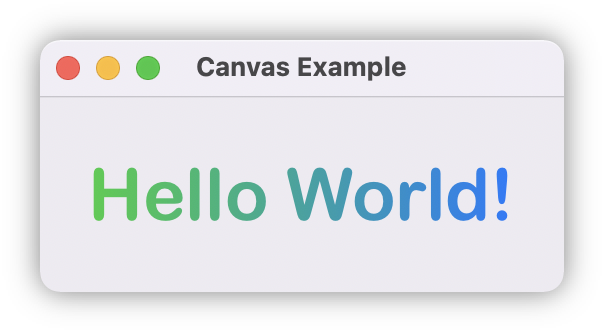
In this example, text is resolved. We use its size to figure out the gradient, and the shading to apply such gradient:
struct ExampleView: View {
    var body: some View {
        Canvas { context, size in

            let midPoint = CGPoint(x: size.width/2, y: size.height/2)
            let font = Font.custom("Arial Rounded MT Bold", size: 36)

            var resolved = context.resolve(Text("Hello World!").font(font))

            let start = CGPoint(x: (size.width - resolved.measure(in: size).width) / 2.0, y: 0)
            let end = CGPoint(x: size.width - start.x, y: 0)

            resolved.shading = .linearGradient(Gradient(colors: [.green, .blue]),
                                               startPoint: start,
                                               endPoint: end)

            context.draw(resolved, at: midPoint, anchor: .center)
        }
    }
}
Symbols
When talking about Canvas, symbols refer to just any SwiftUI. Do not confuse with SF Symbols, which is a completely different thing. The Canvas view has a way of referencing a SwiftUI view, resolve it into a symbol, and then draw it.
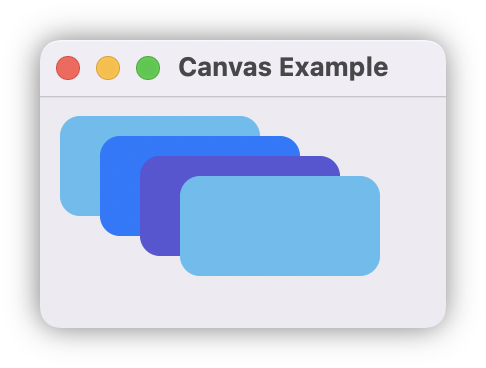
Views to resolved, are passed in a ViewBuilder closure, as shown in the example below. In order to reference a view, it needs to be tagged with a unique hashable identifier. Note that a resolved symbol can be drawn more than once on a Canvas.
struct ExampleView: View {
    var body: some View {
        Canvas { context, size in

            let r0 = context.resolveSymbol(id: 0)!
            let r1 = context.resolveSymbol(id: 1)!
            let r2 = context.resolveSymbol(id: 2)!

            context.draw(r0, at: .init(x: 10, y: 10), anchor: .topLeading)
            context.draw(r1, at: .init(x: 30, y: 20), anchor: .topLeading)
            context.draw(r2, at: .init(x: 50, y: 30), anchor: .topLeading)
            context.draw(r0, at: .init(x: 70, y: 40), anchor: .topLeading)

        } symbols: {
            RoundedRectangle(cornerRadius: 10.0).fill(.cyan)
                .frame(width: 100, height: 50)
                .tag(0)

            RoundedRectangle(cornerRadius: 10.0).fill(.blue)
                .frame(width: 100, height: 50)
                .tag(1)

            RoundedRectangle(cornerRadius: 10.0).fill(.indigo)
                .frame(width: 100, height: 50)
                .tag(2)
        }
    }
}
The ViewBuilder can also use a ForEach. The same example can be rewritten like this:
struct ExampleView: View {
    let colors: [Color] = [.cyan, .blue, .indigo]

    var body: some View {
        Canvas { context, size in

            let r0 = context.resolveSymbol(id: 0)!
            let r1 = context.resolveSymbol(id: 1)!
            let r2 = context.resolveSymbol(id: 2)!

            context.draw(r0, at: .init(x: 10, y: 10), anchor: .topLeading)
            context.draw(r1, at: .init(x: 30, y: 20), anchor: .topLeading)
            context.draw(r2, at: .init(x: 50, y: 30), anchor: .topLeading)
            context.draw(r0, at: .init(x: 70, y: 40), anchor: .topLeading)

        } symbols: {
            ForEach(Array(colors.enumerated()), id: \.0) { n, c in
                RoundedRectangle(cornerRadius: 10.0).fill(c)
                    .frame(width: 100, height: 50)
                    .tag(n)
            }
        }
    }
}
Animated Symbols
I was pleasantly surprised when I tested what would happen if the View resolved as a symbol, is animated. Guess what, the Canvas will continuously redraw it to keep the animation going:
struct ContentView: View {
    var body: some View {
        Canvas { context, size in

            let symbol = context.resolveSymbol(id: 1)!

            context.draw(symbol, at: CGPoint(x: size.width/2, y: size.height/2), anchor: .center)

        } symbols: {
            SpinningView()
                .tag(1)
        }
    }
}

struct SpinningView: View {
    @State private var flag = true

    var body: some View {
        Text("🏐")
            .font(.custom("Arial", size: 72))
            .rotationEffect(.degrees(flag ? 0 : 360))
            .onAppear{
                withAnimation(.linear(duration: 1.0).repeatForever(autoreverses: false)) {
                    flag.toggle()
                }
            }
    }
}
Mutating the Graphic Context
The graphics context can be mutated, using one of the following methods:
If you are familiar with AppKit’s NSGraphicContext, or CoreGraphic’s CGContext you may be used to pushing (saving) and popping (restoring) graphics context states from a stack. The Canvas GraphicsContext works a little differently. If you want to make a temporary change to the context, you have several options.
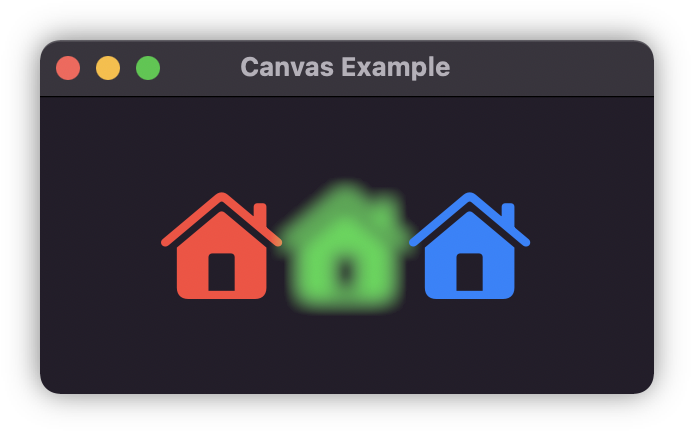
To illustrate that, let’s see the following example. We need to draw three houses in three colors. Only the house in the middle, needs to be blurred:
All the examples below will use the following CGPoint extension:
extension CGPoint {
    static func +(lhs: CGPoint, rhs: CGPoint) -> CGPoint {
        return CGPoint(x: lhs.x + rhs.x, y: lhs.y + rhs.y)
    }

    static func -(lhs: CGPoint, rhs: CGPoint) -> CGPoint {
        return CGPoint(x: lhs.x - rhs.x, y: lhs.y - rhs.y)
    }
}
Here are three ways of achieving the same result:
Sort Operations Accordingly
When possible, you may choose to sort draw operations in a way that works for you. In this case, drawing the blurred house last, solves the problem. Otherwise, as soon as you add the blur filter, all draw operations will continue to blur.
Sometimes this may not be possible, and even if it is, it may turn into code that is hard to read. If that’s the case, check the other options.
struct ExampleView: View {
    var body: some View {
        Canvas { context, size in

            // All drawing is done at x4 the size
            context.scaleBy(x: 4, y: 4)

            let midpoint = CGPoint(x: size.width / (2 * 4), y: size.height / (2 * 4))

            var house = context.resolve(Image(systemName: "house.fill"))

            // Left house
            house.shading = .color(.red)
            context.draw(house, at: midpoint - CGPoint(x: house.size.width, y: 0), anchor: .center)

            // Right house
            house.shading = .color(.blue)
            context.draw(house, at: midpoint + CGPoint(x: house.size.width, y: 0), anchor: .center)

            // Center house
            context.addFilter(.blur(radius: 1.0, options: .dithersResult), options: .linearColor)
            house.shading = .color(.green)
            context.draw(house, at: midpoint, anchor: .center)

        }
    }
}
Work On a Copy
Since the graphics context is a value type, you can simply create a copy. All changes made on the copy, will not affect the original context. As soon as you’re done, you can resume drawing on the original (unchanged) context.
struct ExampleView: View {
    var body: some View {
        Canvas { context, size in

            // All drawing is done at x4 the size
            context.scaleBy(x: 4, y: 4)

            let midpoint = CGPoint(x: size.width / (2 * 4), y: size.height / (2 * 4))

            var house = context.resolve(Image(systemName: "house.fill"))

            // Left house
            house.shading = .color(.red)
            context.draw(house, at: midpoint - CGPoint(x: house.size.width, y: 0), anchor: .center)

            // Center house
            var blurContext = context

            blurContext.addFilter(.blur(radius: 1.0, options: .dithersResult), options: .linearColor)
            house.shading = .color(.green)
            blurContext.draw(house, at: midpoint, anchor: .center)

            // Right house
            house.shading = .color(.blue)
            context.draw(house, at: midpoint + CGPoint(x: house.size.width, y: 0), anchor: .center)

        }
    }
}
Use Layers
Finally, you may use the context method drawLayer. The method has a closure that receives a copy of the context you can work with. All changes to the layer context will not affect the original context:
struct ExampleView: View {
    var body: some View {
        Canvas { context, size in

            // All drawing is done at x4 the size
            context.scaleBy(x: 4, y: 4)

            let midpoint = CGPoint(x: size.width / (2 * 4), y: size.height / (2 * 4))

            var house = context.resolve(Image(systemName: "house.fill"))

            // Left house
            house.shading = .color(.red)
            context.draw(house, at: midpoint - CGPoint(x: house.size.width, y: 0), anchor: .center)

            // Center house
            context.drawLayer { layerContext in
                layerContext.addFilter(.blur(radius: 1.0, options: .dithersResult), options: .linearColor)
                house.shading = .color(.green)
                layerContext.draw(house, at: midpoint, anchor: .center)
            }

            // Right house
            house.shading = .color(.blue)
            context.draw(house, at: midpoint + CGPoint(x: house.size.width, y: 0), anchor: .center)


        }
    }
}
Reusing CoreGraphics Code
If you already have CoreGraphics drawing code, you may use it. The Canvas context has a withCGContext method to rescue you in such case:
struct ExampleView: View {

    var body: some View {
        Canvas { context, size in

            context.withCGContext { cgContext in

                // CoreGraphics code here

            }
        }
    }
}
Animating the Canvas
By wrapping the Canvas inside a TimelineView, we can achieve some pretty interesting animations. Basically, with each timeline update, you get the chance to draw a new frame of the animation.
The rest of the article asumes you are already familiar with TimelineView, but If you are not, you may check Part 4 of this series to learn more.
In the following example, our Canvas draws an analog clock for a given date. By putting the Canvas inside a TimelineView, and using the timeline update date, we get the animated clock. A part of the following screen capture is accelerated, to show how the minute and hour clock hands move, which otherwise would not be noticeable.
When we create animations with Canvas, it is common to use the TimelineSchedule .animation. This updates as fast as possible, redrawing our Canvas several times per second. However, when possible, we should use the minimumInterval parameter to limit the number of updates per second. This will be less demanding on the CPU. For example, in this case there is no visually noticeable difference between using .animation, and .animation(minimumInterval: 0.06). However, on my testing hardware, CPU usage goes down from 30% to 14%. Using a higher minimumInterval may start to become visually noticeable, so you may have to do some trial an error, to find the best value.
To further improve performance, you should consider if there are parts of the Canvas that do not need constant redrawing. In our example, only the clock hands move, the rest remains static. It is wise then, to split it into two overlapping canvases. One that draws everything except the clock hands (outside the TimelineView), and another just for the clock hands, inside the TimelineView. By implementing that change, CPU goes down from 16% to 6%:
struct Clock: View {
    var body: some View {
        ZStack {
            ClockFaceCanvas()

            TimelineView(.animation(minimumInterval: 0.06)) { timeline in
                ClockHandsCanvas(date: timeline.date)
            }
        }
    }
}
By careful analyzing our Canvas, and with little changes, we managed to improved CPU usage to be 5 times less demanding (from 30% to 6%). By the way, if you can live with a seconds clock hand that updates every second, you would further reduce CPU usage to less than 1%. You should experiment to find the best trade-off for your view.
The full code for the clock can be found here.
Divide and Conquer
Once we learn about Canvas, we might be tempted to draw everything in it. However, sometimes the best option is to choose what to do and where. A good example is this Matrix Digital Rain animation below:
The full code for the digital rain can be found here.
Let’s analyze what’s in it. We have columns of characters appearing, growing in numbers of characters, slowly sliding down and finally reducing its characters until they disappear. Each column is drawn with a gradient. There is also a sense of depth, by making the columns near to the observer slide faster and slightly larger. To increase the effect, the further back a column is, the more out of focus (blurred) it appears.
Implementing all these requirements inside the Canvas is absolutely possible. However, the task becomes much easier, if we split these tasks (divide and conquer). As we have seen already in the Animated Symbols section of this article, an animated SwiftUI view can be drawn into the Canvas with a single draw() call. So not everything has to be dealt with inside the Canvas.
Each column is implemented as a separate SwiftUI view. Stacking character and drawing with a gradient is handled by the view. When we use a gradient on the Canvas, the starting/ending point or any other geometry parameter is relative to the entire Canvas. For the column gradient, it is easier to implement it inside the view, as it will be relative to the view’s origin.
Each column has many parameters: position (x, y, z), characters, how many characters from the top are removed, etc. These values are advanced after each TimelineView update.
Finally the Canvas is in charge of resolving each view, drawing them in their (x, y) positions, and adding a blur and scale effect based on its z value. I added some comments to the code to help you navigate through it, should you be interested.
Canvas Crashes
Unfortunately, at the time of this writing, I have experienced some crashes with the Canvas. Fortunately, they improved a lot with each beta release. I’m hoping they all get sorted out by the time iOS15 is officially released. The message is usually something like this:
-[MTLDebugRenderCommandEncoder validateCommonDrawErrors:]:5252: failed assertion `Draw Errors Validation
Fragment Function(primitive_gradient_fragment): argument small[0] from buffer(3) with offset(65460) and length(65536) has space for 76 bytes, but argument has a length(96).
I managed to workaround these crashes, using at least one of these actions:
- Reduce the amount of drawing. In the digital rain example, you may reduce the number of columns.
- Use simpler gradients. Originally, the digital rain columns had three color gradients. The crash disappeared when I reduced it to two.
- Update that Canvas less frequently. Using a slower TimelineView, can prevent the crash.
I am not saying you cannot use gradients with more than two colors, but that is just one place where you can look, if you find yourself in a situation where the Canvas crashes. If that does not fix your problem, I suggest you start to remove drawing operations until the app no longer crashes. That can lead you to find what is causing the crash. Once you know what it is, you may try to do it differently.
If you encounter this problem, I encourage you to report it to Apple. If you want, you can reference my own report: FB9363322.
Summary
I hope this post helped you add a new tool to your SwiftUI animation toolbox. This concludes the fifth part animations series. At least for this year… Who knows what WWDC’22 will bring!
Feel free to follow me on twitter, if you want to be notified when new articles are published. Until then!