


Introduction
Software Defined Networking (SDN) in Windows Server 2016 provides a method to centrally configure and manage physical and virtual network devices such as routers, switches, load balancers and gateways in your datacenter. Virtual network elements such as Hyper-V Virtual Switch, Hyper-V Network Virtualization, and RAS Gateway are designed to be integral elements of your SDN infrastructure.
Please note that you must install Windows Server 2016 Datacenter edition for Hyper-V hosts and virtual machines (VMs) that run SDN infrastructure servers, such as Network Controller and Software Load Balancing nodes. However, you can run Windows Server 2016 Standard edition for Hyper-V hosts that contain only tenant workload virtual machines that are connected to SDN-controlled networks.
More information about Software Defined Networking (SDN) technologies in Windows Server 2016 can be found at the following link:
https://technet.microsoft.com/windows-server-docs/networking/sdn/software-defined-networking
In this series of blog posts, we will walk you through how to deploy and manage Software Defined Networking (SDN) in Windows Server 2016 using System Center Virtual Machine Manager 2016.
In Part I of this series, we will be creating the tenant virtual network and connecting two VMs to it.
The diagram below gives you a high-level view of the topology that we will be using in this example.
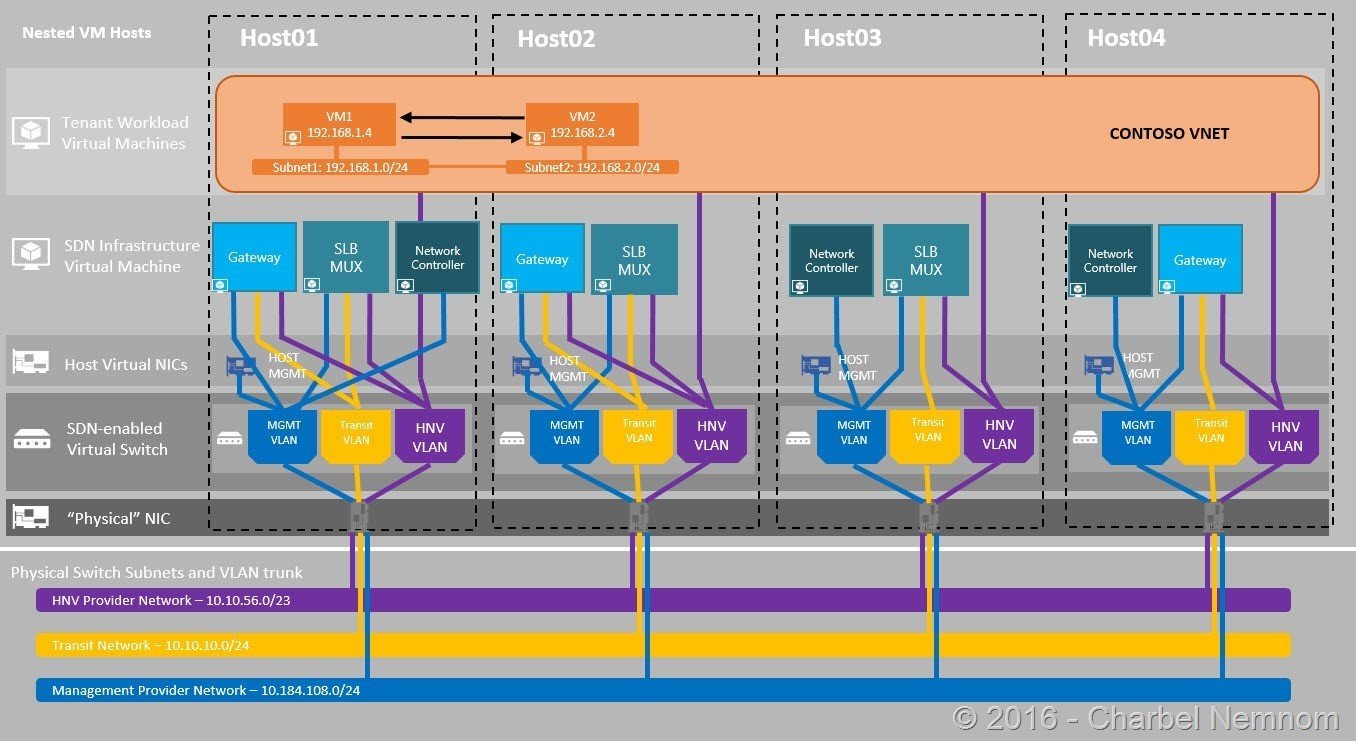
Infrastructure Overview
We have the following servers deployed in this example:
- Domain controller and DNS server.
- System Center Virtual Machine Manager 2016 with Cumulative Update 1.
- 4 Nested Hyper-V hosts running Windows Server 2016 Datacenter Edition.
- 3 VMs running the Load balancer role (MUX).
- 3 VMs running the Gateway manager role (GW).
- 1 VM running the Network Controller role (NC) as a single node. However, for production deployment, the Network Controller should be highly available as well.
- Routing and Remote Access Service (RRAS).
- Remote Site (workgroup machine).
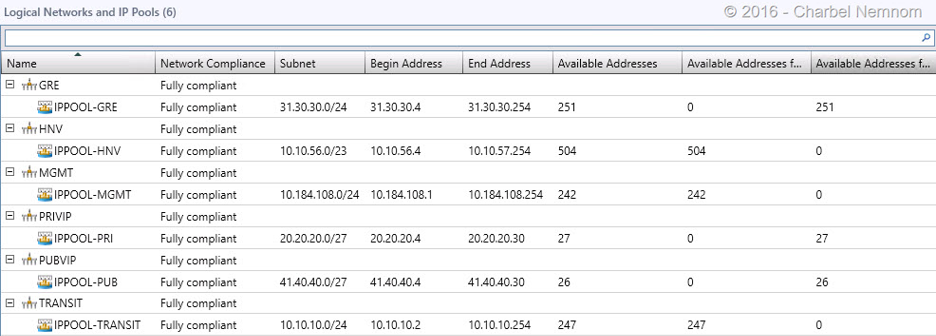
VMM Logical Network Overview
We have the following logical network created in this environment:
- GRE – This logical network is a connected network and managed by Microsoft Network Controller.
- IP Pool = 31.30.30.0/24
- HNV – This logical network is a connected network and managed by Microsoft Network Controller. All VM networks created on this logical network use network virtualization.
- IP Pool = 10.10.56.0/23
- MGMT – This logical network is a connected network
- IP Pool = 10.184.108.0/24
- PRIV VIP – This logical network is a connected network and managed by Microsoft Network Controller.
- IP Pool = 20.20.20.0/27
- PUB VIP – This logical network is a connected network, managed by Microsoft Network Controller and has access to Public IP address network.
- IP Pool = 41.40.40.0/27
- TRANSIT – This logical network is a connected network and managed by Microsoft Network Controller.
- IP Pool = 10.10.10.0/24
Create a Virtual Network
In the following steps, we will create an isolated virtual network using Hyper-V network virtualization and create two IP Subnets:
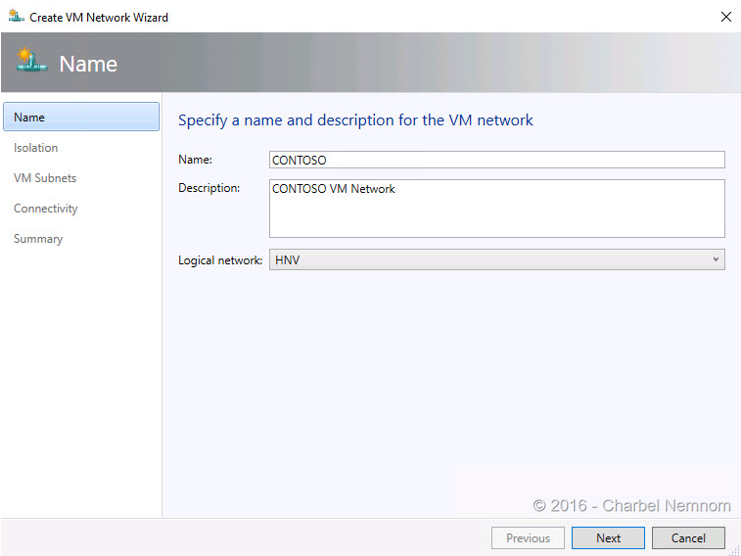
- Open System Center Virtual Machine Manager (SCVMM) Console and navigate to “VMs and Services”, select “VM Networks” and then in the Ribbon click on “Create VM Networks”.
- Enter the “Name”, “Description” and make sure the Logical network is set to “HNV” as shown in the following screenshot. Click “Next”.
- Leave the default radio button selection “Isolate using Hyper-V network virtualization” and click “Next”.
- In the VM Subnets window, click “Add” button.
- Enter “Subnet1” as the name for the first VM Subnet, and enter the subnet (IP Prefix) – 192.168.1.0/24.
- Enter “Subnet2” as the name for the second VM Subnet, and enter the subnet (IP Prefix) – 192.168.2.0/24.

- Click “Next”. Skip the “Connectivity” section. We will not be providing external connectivity for this virtual network through a VPN tunnel, direct routing, or NAT in this example. Click “Next”.
- In the “Summary” page, click “Finish”.
- Right-click the Virtual Network you just created and select “Create IP Pool”. We will be creating a separate IP Pool for each VM Subnet, and make sure the VM Network listed is the VM Network you just created as shown in the next screenshot. Click “Next”.
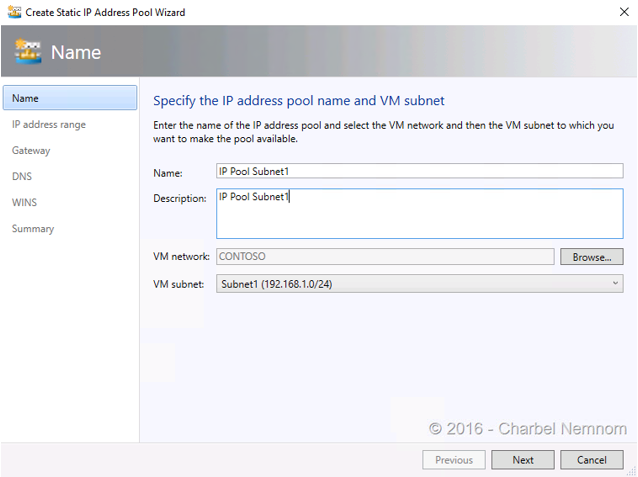
- In the specify an IP address range. Leave the “Starting” and “Ending” IP addresses as the default and click “Next”.
- In the specify a Gateway. Click “Next”. The lowest IP address in the subnet is the default gateway – this will be chosen automatically if the field is left blank. Click “Next”.
- Skip Specify a DNS and WINS server and click “Next”.
- In the “Summary” page. Click “Finish” to confirm settings and create the IP Pool for “Subnet1”.
- Repeat Steps 7-11 above to create the IP Pool for “Subnet2”. Please make sure to select “Subnet2” as the VM subnet.
Create a Virtual Machine
In the following steps, we will deploy a virtual machine template using the virtual network created in the previous step.
- Navigate to “VMs and Services”, select “All Hosts” and then right click and select “Create Virtual Machine”. Click “Next”.
- Use the default option “Use an existing virtual machine…” and then click “Browse”. In this example, I have already Windows Server 2016 Datacenter VM template with IIS role in “VHDX” type. I will select it, then click “OK”, and then Click “Next”.
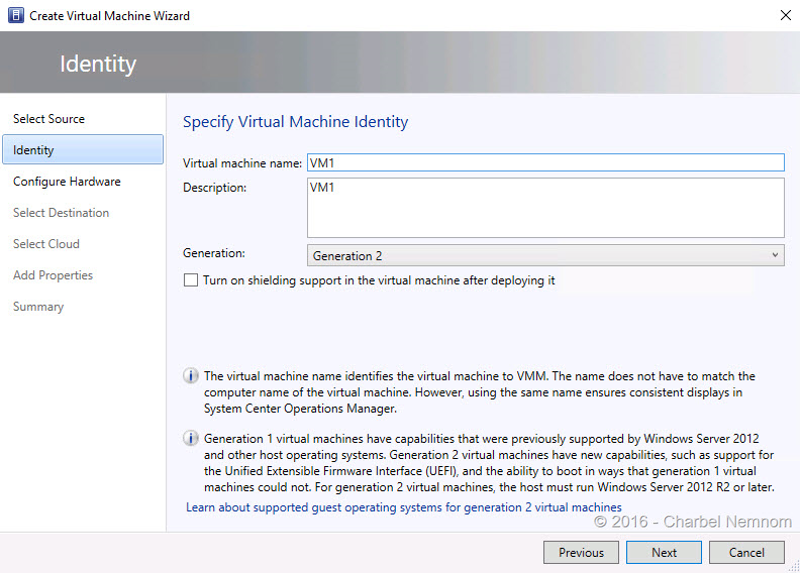
- Specify the Virtual machine name, Description and Generation. Click “Next”.
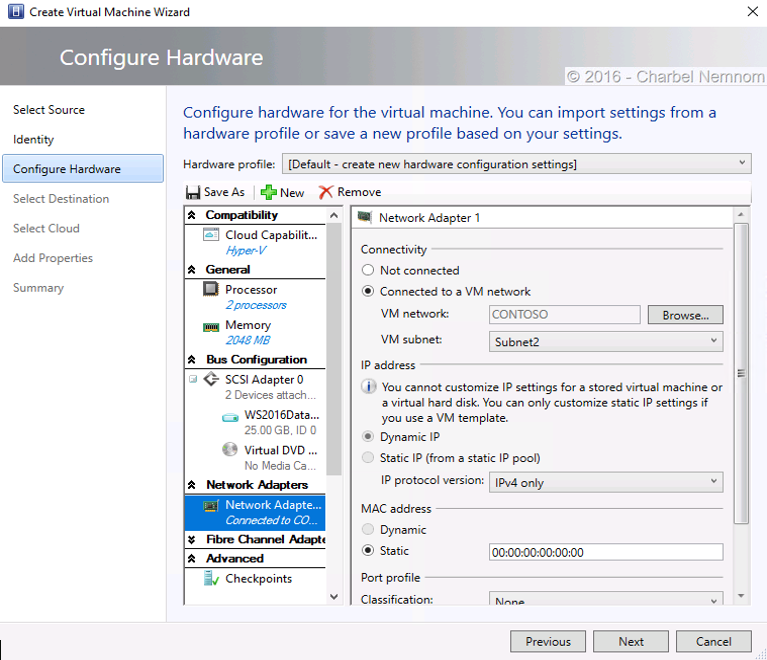
- In “Configure Hardware” page, under “Compatibility,” click the “Hyper-V” profile. Under “General” in the left menu pane, select “Processor” and ensure “number of processors” is set to 2. Select “Memory” and ensure the virtual machine memory is set to static with 2048 MB. Under “Network Adapters,” select “Network Adapter 1”. On the right-hand side of the window under “Connectivity,” select “Connected to a VM network”. Browse to the “CONTOSO” VM Network that we previously created, then select a VM Subnet attached to the “Subnet1”. Click “Next”.
- Skip the “Select Destination” step to place the virtual machine on a host (Assuming you have enough capacity to place this VM, feel free to select a different Hyper-V host). Click “Next”.
- Skip “Configure Settings”, and “Add Properties Section”. Click “Next”.
- In the “Summary” page, select the “Start the virtual machine after deploying it” checkbox, and then click “Create”.
- Repeat Steps 1-7 above to create another Virtual Machine with a different VM Name “VM2” and different Subnet using “Subnet2”.
It will take a few minutes to create the virtual machine. Check the Jobs pane to see when
deployment is completed before you move to the next step. - Check the Status of your Virtual Machines has changed to “Running” (as opposed to “Creating…”). Right-click on any of the VMs you just deployed and select “Connect or View” => “Connect via Console”. Log in with the password defined during the deployment.
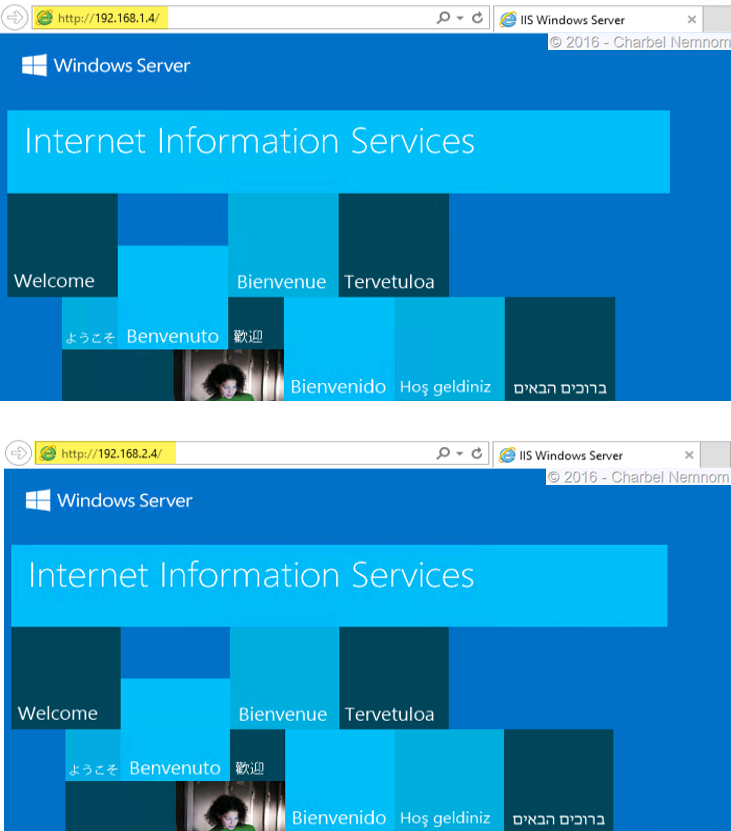
- In this step, we will validate the Virtual Network Connectivity in each of the created VMs. Upon logging in, right-click the Windows Icon in the Start Menu and click on a “Command prompt (Admin)”. Type “ipconfig” and press “Enter”. Record the IP Address of the VM. In my case, the IP for VM2 is 192.168.2.4. Open a Console Session to the second VM and open its command prompt. Type “ipconfig” and press “Enter”. Record the IP Address of the VM. In my case, the IP for VM1 is 192.168.1.4. Ping the first VM from the second VM (and vice-versa). You should receive several replies.
- In the final step, we will use Internet Explorer. Open IE, then, type the first VM IP address in the address bar (i.e. http://192.168.1.4 ). Press “Enter” to visit the first VM to access the default IIS web page (and vice-versa). You should see the default IIS Welcome Page which is hosted on both VMs.
Summary
In Part I, we attached two VMs on different subnets to a new virtual VM network. And then we validated both VMs can route between each other. In a larger deployment, you can create separate virtual networks for different apps and tenants, and they will be completely isolated from each other even if they are using the same address space.
In Part II, we will be creating an external facing public VIP that load balances across multiple web server VMs, and we will create Site-to-site (S2S) VPN to a Remote site.
Until then… see you in Part II.
Thanks for reading!
