
Let me share my little adrenaline filled panic adventure into earning some awesome Xamarin Swag! from the Xamarin + Cognitive Challenge hosted by Microsoft, the TravelMonkey Challenge! 😀
Well it’s come to 2020, in the middle of a pandemic, a lock down, and it’s been a while since I took up on an actual challenge outside my work and personal coding experiments! Then I suddenly came across this little challenge posted by Microsoft, TravelMonkey – the Cognitive Services + Xamarin Combo Challenge! (https://devblogs.microsoft.com/xamarin/cognitive-services-xamarin-challenge/)
Backstory…
As usual, the first thing I checked, what’s in it for me, you know what I mean! 😉 YES! they had promised some awesome Microsoft swag! Xamarin t-shirts, monkeys, and stickers!?! Say no more, I was in! 😀 well at least I thought to myself… their Submission deadline was April 30, 2020 11:59 PM PDT!
The days went by, one by one, without even any second thoughts, yeah I’d do it tomorrow, or day after or some time… I’ll get it done!
Then suddenly, it was 29th April, the Friday night, oh shoot! tomorrow’s the deadline for submission of the awesome TravelMonkey challenge! Yeah well I could say it was my own procrastination that got me in that situation, I had waited till the last day!
Procrastination is bad!
Just like in that GTA San Andreas scene, in my head I was like, “Ah sh*t, here we go again!” it was literally a moment of panic, and I was the fence about giving it up. But then it was Friday night, the day I usually watch a good night movie and fall asleep to wake up very late on Saturday! 😦
But then again, it was middle of a pandemic lock down, and I haven’t really had this kind of a fun challenge in a while, so I thought of pulling an all nighter and getting it done! at least something worth while before the next 24 hours ended… 😮
At this point, I didn’t have a plan of what I’m going to be building or expand up on, so I thought of simply exploring the current implementation and figure out where are the points in which I could improve as for the challenge. Once again, it was a bad idea to start working on it, at a time when it was less than 24 hours before the submission! lol 😀
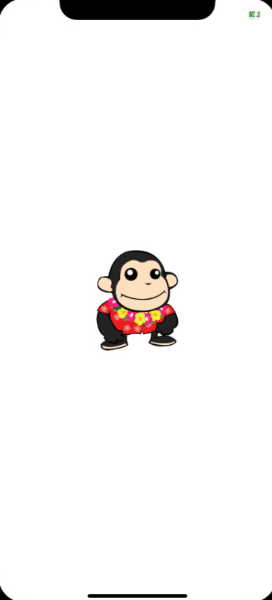
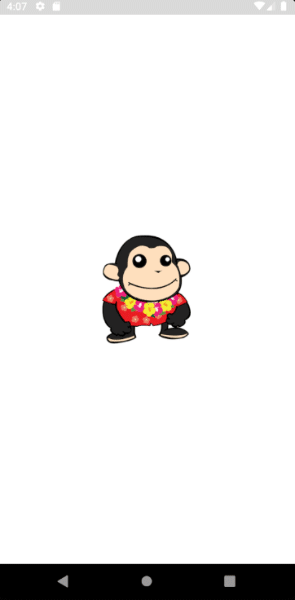
Sneak Peek!
But at the end, here the beauty I ended up building…
I know right.. gorgeous!
Yeah well behind all that eye-candy glamour there was a painful sleepless all-nighter experience, waiting to be unraveled…
Getting started…
So first, I forked the github repo from https://github.com/jfversluis/TravelMonkey into my own github repo: https://github.com/UdaraAlwis/TravelMonkey and set up the Azure Cognitive services in Free tier with the following,
- Azure Computer Vision
- Bing Translation
- Bing Image Search
Then I got the API keys and hooked up into the Xamarin Mobile app project.
New Featurettes!
This is a travel related app! even though it is fictional. lol So I wanted to think of it as being used by smart Monkeys like us, who would love to see beautiful scenic photos of the top travel destinations in the world.
Why stop there? I should allow the users to search for a destination and view the top scenic photos of that destination, as a little cherry on top! 😉
Also how about letting the user translate any text into any language they choose? That would definitely come in handy for any traveller!
Bing Image Search FTW!
So I picked up the most visited destinations by international tourist arrivals data from Wikipedia, https://en.wikipedia.org/wiki/World_Tourism_rankings and hooked it up into the Bing Search Service to load images of those destinations. Each destination would be taken up with 10 images and we would randomize through them in the Home page carousel.
var client = new ImageSearchClient(
new Microsoft.Azure.CognitiveServices.Search.
ImageSearch.ApiKeyServiceClientCredentials(ApiKeys.BingImageSearch));

var imageResult = await client.Images.
SearchAsync(
	$"{destination} attractions",
	minWidth: 500,
	minHeight: 500,
	imageType: "Photo",
	license: "Public",
	count: 10,
	maxHeight: 1200,
	maxWidth: 1200);
See how I modified the Bing Image search query there, {destination} attractions where as it would be executed as “France attractions”, “Thailand attractions”, and etc. So just like that I refined the search terms for scenic tourist photos from Bing Images.
Destination scenic Gallery!
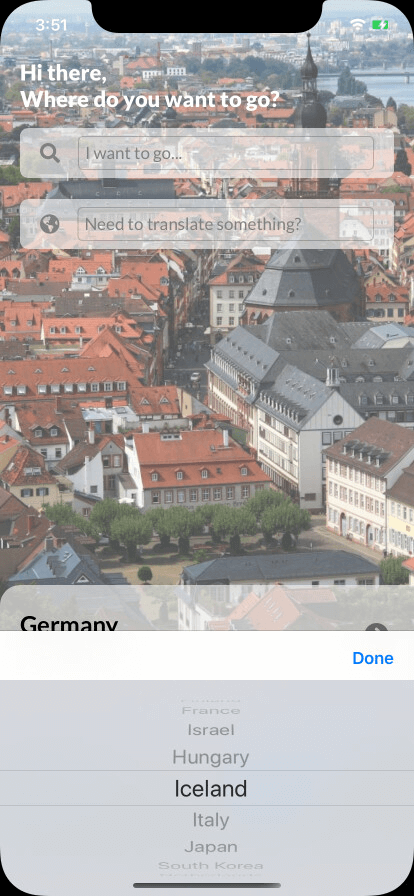
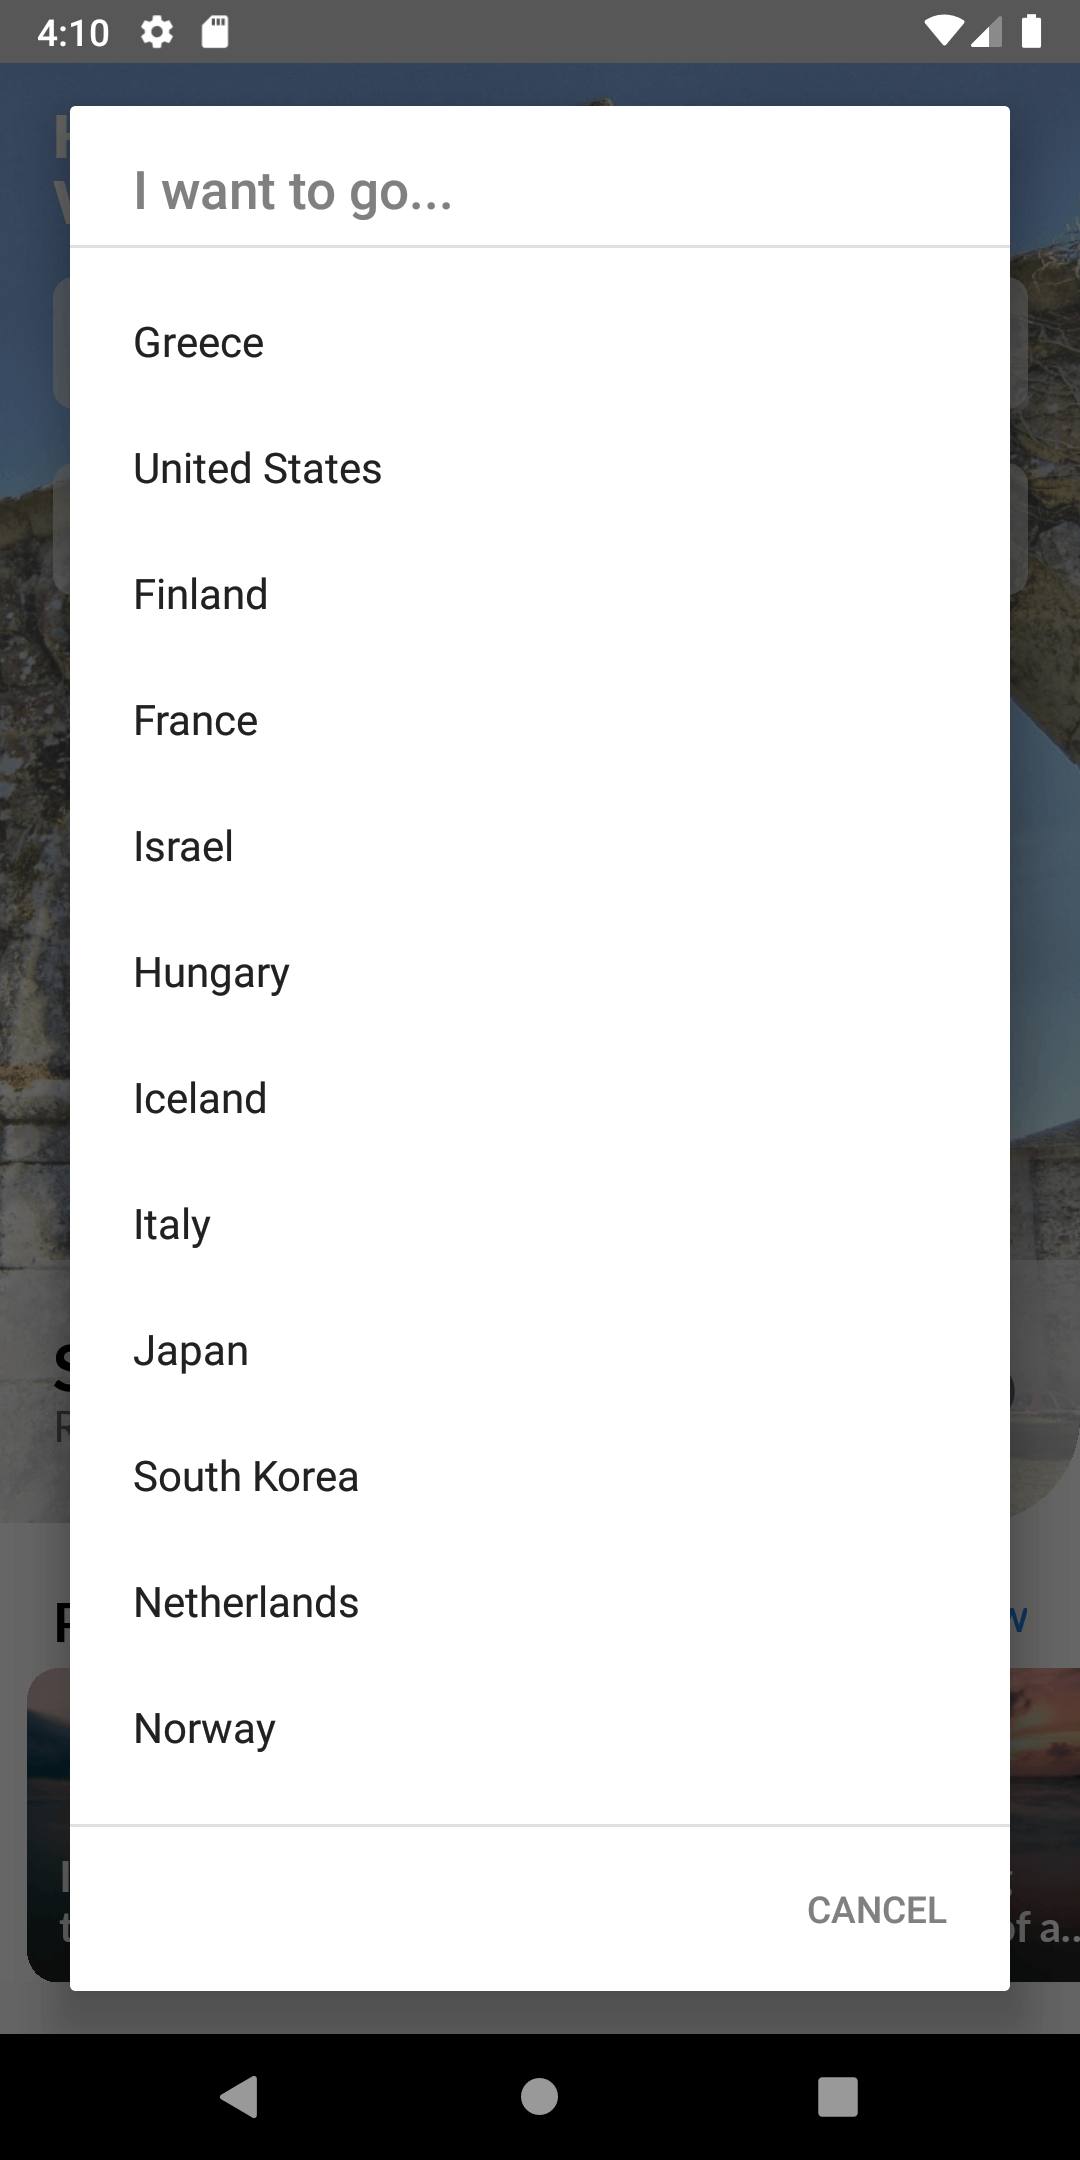
I decided to add a travel destination Gallery page, consisting of scenic travel photos from Bing. User would be able to pick a destination from a presented list of countries in the Home page itself, and then navigate to its Gallery page to view the top 10 most scenic photos from Bing.
Here I did a little trick to load a list of countries in C# by tapping into CultureInfo object provided by .NET framework, pretty handy!
private static List<string> GetCountries()
{
	List<string> countryList = new List<string>();

	var getCultureInfo = CultureInfo.GetCultures(CultureTypes.SpecificCultures);

	foreach (var getCulture in getCultureInfo)
	{
		var regionInfo = new RegionInfo(getCulture.LCID);
		if (!countryList.Contains(regionInfo.EnglishName))
		{
			countryList.Add(regionInfo.EnglishName);
		}
	}

	return countryList;
}
This would return the list of countries in the world which I will be presenting to the user to choose from! I will use the Bing Image Search that I had already modified to load the scenic travel images set on the go.
Bing Translation FTW!
So I thought of adding some improvements to the Translation features, where currently they had a pre-set of languages they would translate to given the input text. I wanted to make it completely dynamic, by getting the list of languages available in Bing Translation service, and letting the user pick the languages they want to translate to.
Here’s how I got the list of supported languages Bing Translation,
public async Task<List<AvailableLanguage>> GetLanguageList()
{
	string endpoint = ApiKeys.TranslationsEndpoint;
	string route = "/languages?api-version=3.0";

	using (var client = new HttpClient())
	using (var request = new HttpRequestMessage())
	{
		...
		request.RequestUri = new Uri(endpoint + route);
		// Send request, get response
		var response = client.SendAsync(request).Result;
		...
	}

	List<AvailableLanguage> availableLanguages = new List<AvailableLanguage>();
	foreach (var item in translationStatsResult.Translation)
	{ ... }
	return availableLanguages;
}
Once I got the available languages list, I would present them to the user to pick from for translating their input text. But during the app’s first time launch I would randomly pick 5 languages and show the translations.
So here’s how I extended the Translation service call with the dynamic request language list,
public async Task<List<AvailableTranslation>>
TranslateText(string inputText, List<AvailableLanguage> listOfLanguages)
{
	// build the translate url chunk
	string requiredTranslationsString = "";
	foreach (var item in listOfLanguages)
	{
		requiredTranslationsString = requiredTranslationsString + $"&to={item.Key}";
	}

	...
	request.RequestUri = new Uri(ApiKeys.TranslationsEndpoint + "/translate?api-version=3.0" + requiredTranslationsString);
	...

	translations.Add( new AvailableTranslation()
	{
		InputLanguage = bestResult.DetectedLanguage.Language,
		InputText = inputText,
		TranslatedLanguageKey = t.To,
		TranslatedLanguageText = t.Text,
		TranslatedLanguageName = MockDataStore.Languages.FirstOrDefault(x => x.Key == t.To).Name,
	});

	return translations;
}
I’m dumping them all into a list of AvailableTranslation objects which I will be unpacking in the UI for displaying the results of the input text translation.
Caching a bit of data!
Now this is something I had kept till the last minute, hence I couldn’t complete it as I expected, but I still managed to store some data in the app memory during run time to reduce repetitive duplicate queries to Bing services, which will also help me reduce the free tier quota usage.
I managed to store the list of destination scenic image result data and translation text in memory as a simple static singleton data object.
Emoji Support 😀
It would be nice to have some Emoji support for our text labels in the app, I thought. So I added it with the following nice little snippet I came across, https://github.com/egbakou/EmojisInXamarinForms
So with that nice little snippet I could insert emojis into a text and bind them to any Label element in Xamarin.Forms, nice and easy!
Title =
$"Something went wrong
{new Emoji(0x1F615).ToString()}
Here is a cat instead!"
It will display the given emoji natively to the run time platform hence we’re using unicode representation of that emoji! 😉
No more icon files!
I really don’t like using physical image files for representing icons, so I got rid of them and introduced full Font Awesome based icons to the entire app. Setting it up in Xamarin.Forms is pretty easy now!
[assembly: ExportFont("fa-regular.otf", Alias = "FontAwesomeRegular")]
[assembly: ExportFont("fa-solid.otf", Alias = "FontAwesomeSolid")]
Like this label that shows a little globe icon using Font Awesome!
<Label
Margin="0,0,12,0"
FontFamily="FontAwesomeSolid"
FontSize="20"
Text=""
TextColor="Gray"
VerticalOptions="Center" />
Yeah Font Awesome is pretty handy!
https://montemagno.com/xamarin-forms-custom-fonts-everywhere/
https://dev.to/codingcoach/using-font-awesome-in-xamarinforms–3mh
Fix Android Status bar…
I know its annoying to deal with Android Status bar styling, and most of the time devs don’t even bother fixing it accordingly to their app theme. They end up leaving the ugly blue color bar at the top of the app.
But I wanted to make it right. May be I am too much of a perfectionist! 😛
<resources>
    <style name="MainTheme.Base"
			parent="Theme.AppCompat.Light.DarkActionBar">
        ...
        <item name="colorPrimary">#bfbfbf</item>
		...
        <item name="colorPrimaryDark">#d9d9d9</item>
        ...
        <item name="colorAccent">#808080</item>
		...
    </style>
</resources>
So I updated the Android Status bar styling values accordingly to my intended color scheme for the app.
PancakeView is yummy!
Yo this right here is a gem, such an awesome element to have in your app, provides loads of features and customization. https://github.com/sthewissen/Xamarin.Forms.PancakeView
It’s super simple to use, where I’ve used it as a container for many elements to provide a beautiful Shadow effect.
<yummy:PancakeView
	Margin="7"
	BackgroundColor="White"
	CornerRadius="20,0,0,40"
	HasShadow="True">
	<Grid Margin="0">
		<Image Aspect="AspectFill" Source="{Binding ImageUrl}" />
	</Grid>
</yummy:PancakeView>
I’ve used this beauty across the entire app in all pages to give a gorgeous gradient effect of Page background as shown below…
<yummy:PancakeView
	BackgroundGradientAngle="40"
	BackgroundGradientEndColor="White"
	BackgroundGradientStartColor="#d9d9d9">
	<Grid>
	...
	</Grid>
</yummy:PancakeView>
I’m so glad I came across this awesome nugget thanks to this challenge! 😀
Beautify XAML…
One thing I noticed in the original project was that the XAML wasn’t properly formatted and it was inconsistent with different tabs and spacing.
I would recommend using any XAML formatting tool in Visual Studio like XAMLStyler which automatically formats your XAML properly while you code. Something nice to have I assume. 😉
Let me make it prettier…
On top of my head, I did not like the UI, not at all. Not blaming the original devs, who’s done a great job putting it together, but I wanted to re-skin it my way, and sprinkle a bit of eye-candy awesomeness… 😉
One thing I love for sure, is building sleek, responsive, minimalistic and yummy looking Mobile App UIs. So that’s what I did. 😀 I decided to implement a minimalistic unified-white color based gradient-ized sleek UI, which called for a whole bunch of restructures in the UI.
So I changed all the color schemes they used and replace them with a white and dark-gray based gradient style in almost all the elements across the app.
Let’s look at those one by one…
Gradient-zing!
Who doesn’t love some good old gradient effects, at least when its well done!
Thanks to the PancakeView we can now easily add this effect to Xamarin.Forms elements, which I have used extensively in my UI design changes as well…
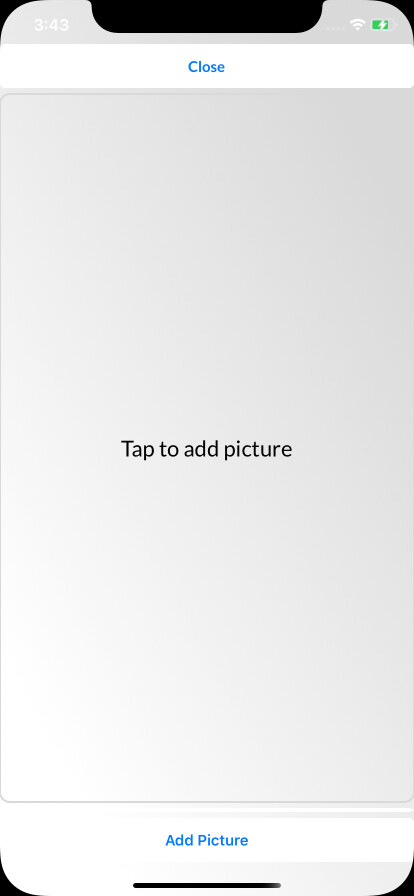
Here’s one example where I modified the AddPicture page with my new color scheme.
Splash it up!
One of the first things I wanted to get rid of was the original splash screen, I did not like it at all, and it was honestly scaring to see a cute little monkey exploding in a high speed animation on the screen. lol
So I change the whole splash screen animation into a smooth zoom-in and fade-out effect as shows in the code below…
private async Task AnimateTransition()
{
	...
	await Task.Delay(1000);

	// Scaling up smoothly upto 5x and Fading out as the next page comes up.
	var explodeImageTask = Task.WhenAll(
		Content.ScaleTo(5, 300, Easing.CubicOut),
		Content.FadeTo(0, 300, Easing.CubicInOut));
	...
}
Once it completes we navigate to the MainPage. Now that animation was much pleasing to look at…
I felt like that cute little monkey got some justice! lol
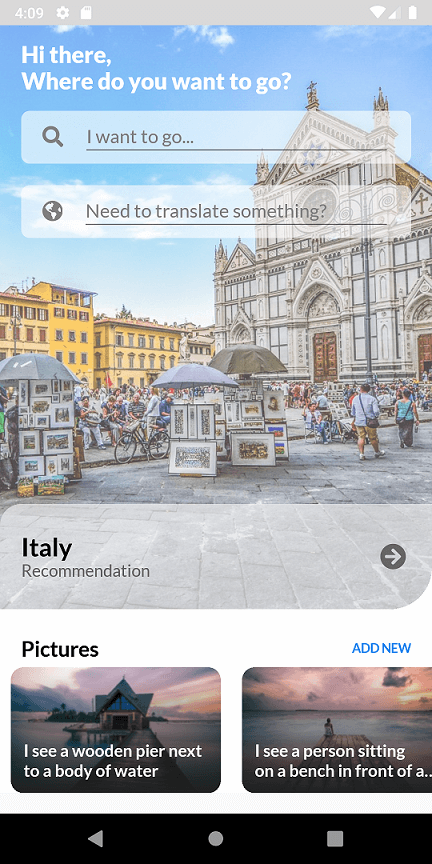
Home page!
So like I mentioned before I laid out a full layout design restructure and one of the main pages was the Home page.
- Getting rid of confusing layout
- Focusing on the travel photo background
- Getting rid of the empty space
- Making sure content properly fills the page
This is a travel related app, so it should be focused on giving such experience for the user so I decided to maximize on the scenic travel photos in the home page, thus resizing the Image element to take up to 70% of the page space.
Also I’ve added navigation for the user to click on the destination name to and to be navigated to that travel destination’s scenic travel photo gallery page.
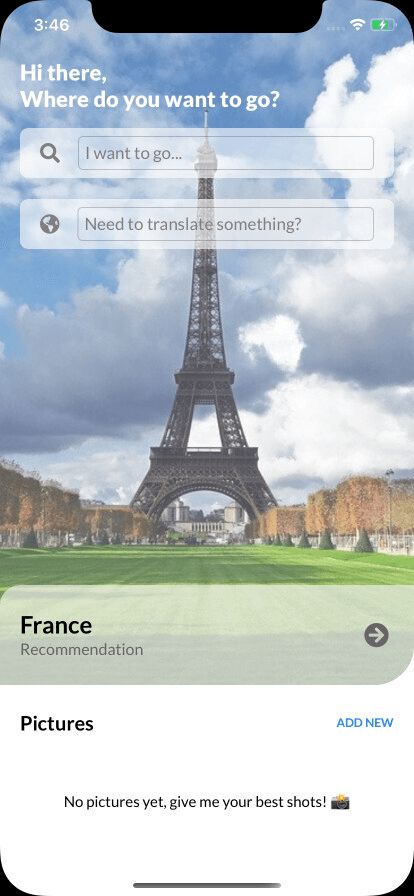
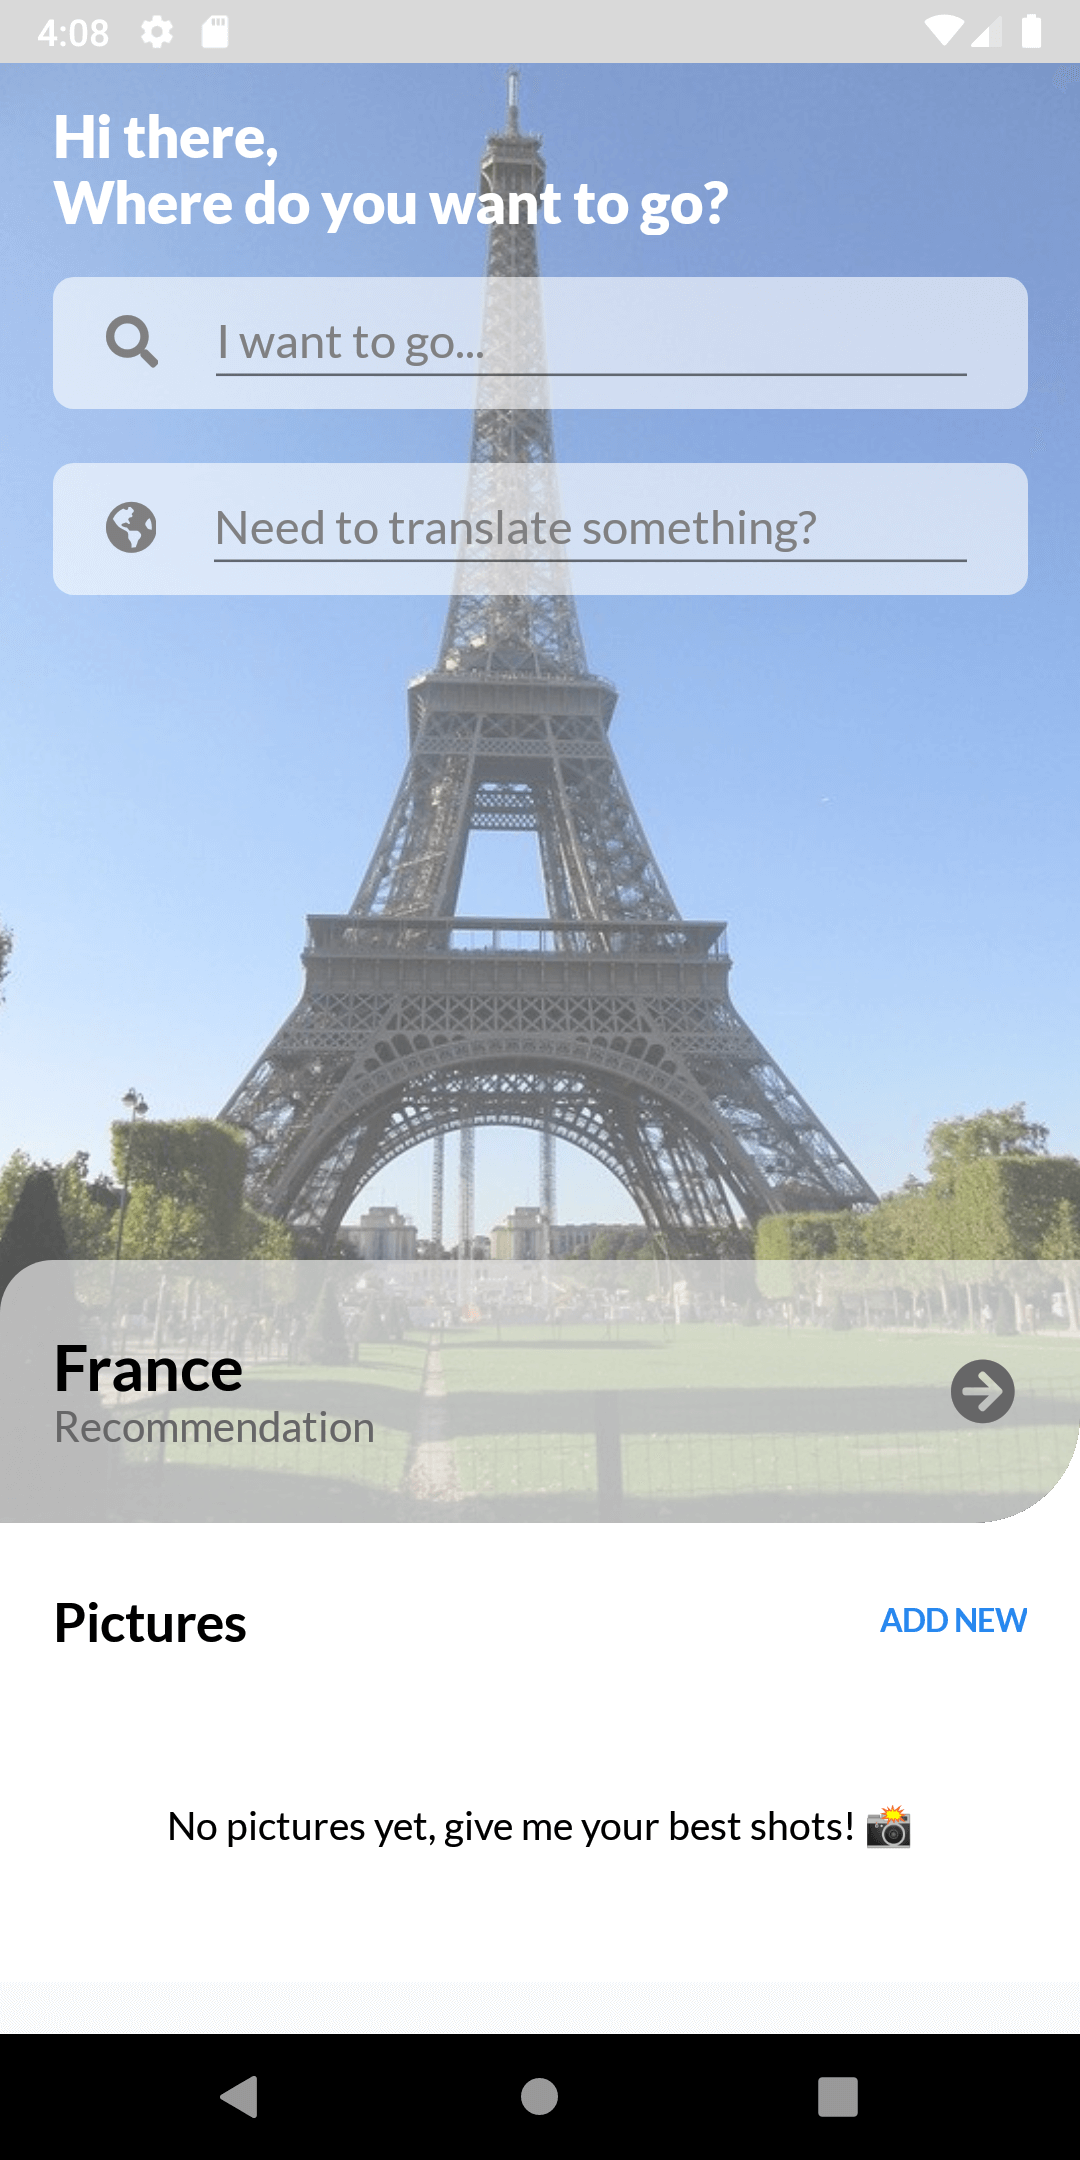
Look at that beauty eh! 😉
The user picture grid at the bottom, while giving it a fixed height, I managed to fix a whole bunch of alignment issues inside the template container as well.
I added a new element above the translation text element for the user, to select a destination where they would like to view, and navigate to that page from home page itself.
Woot! woot!
Next’s let’s see that beauty in action…
Travel Destination Page…
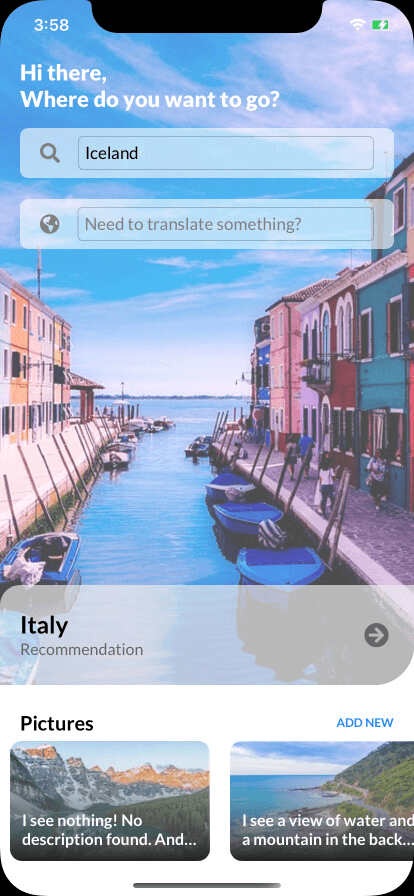
So from the home page once User selects a travel destination to view, then they get navigated to this gorgeous page filled with scenic travel photos of that destination, pulled from Bing Image Search results…
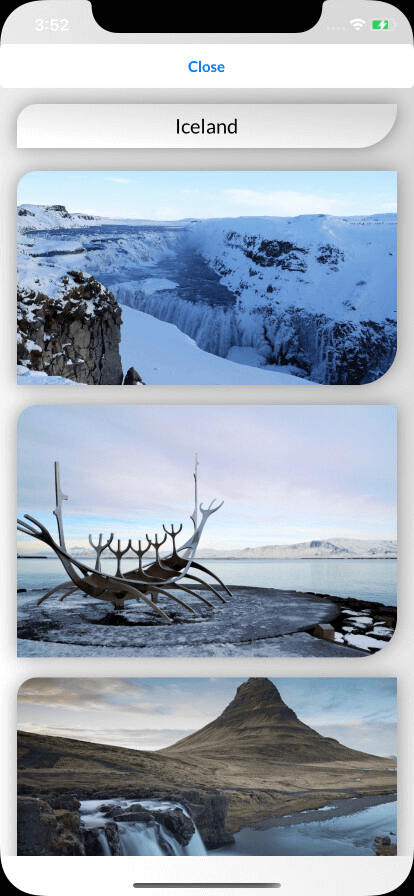
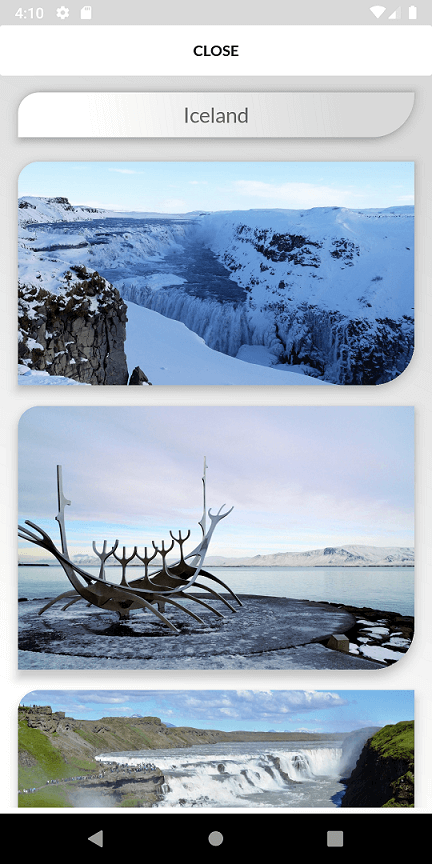
It gets even better, here’s what you see when you select Italy…
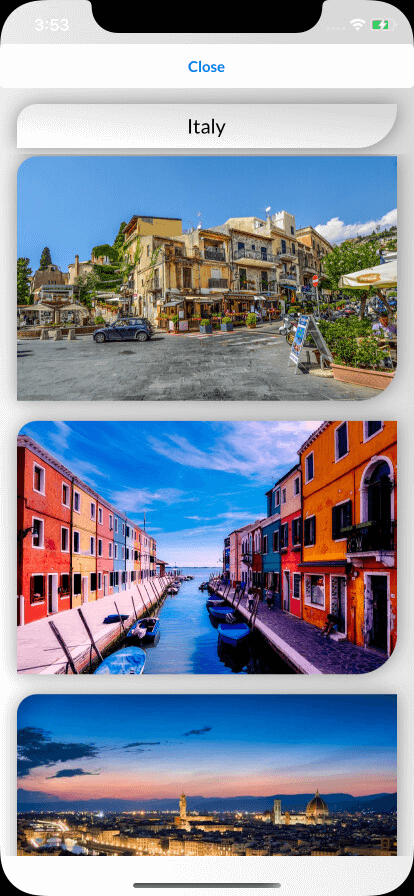
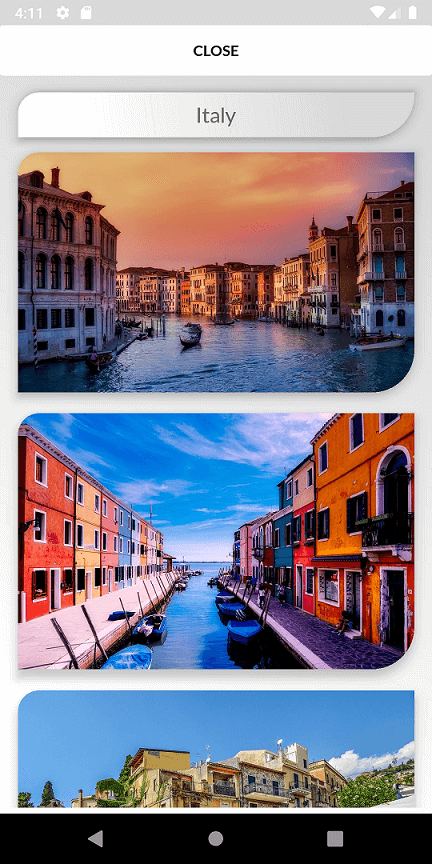
Truly gorgeous… Well I’ve used Pancake View here for the full page background for the gradient effect and shadow effect for the Image containers.
<DataTemplate>
	<yummy:PancakeView
		... >
		<Grid Margin="0">
			<Image Aspect="AspectFill" Source="{Binding ImageUrl}" />
		</Grid>
	</yummy:PancakeView>
</DataTemplate>
Bingo!
Translation revamped!
So as I mentioned before I’ve implemented a new feature extending Bing Translation, allowing the user to pick the languages they want to have their input text translated into.
Here’s the new Page I implemented for it, where I load the list of languages for the user to choose from. I love how Bing translation actually provides the native word for the languages in their own language. 🙂 pretty neat eh!
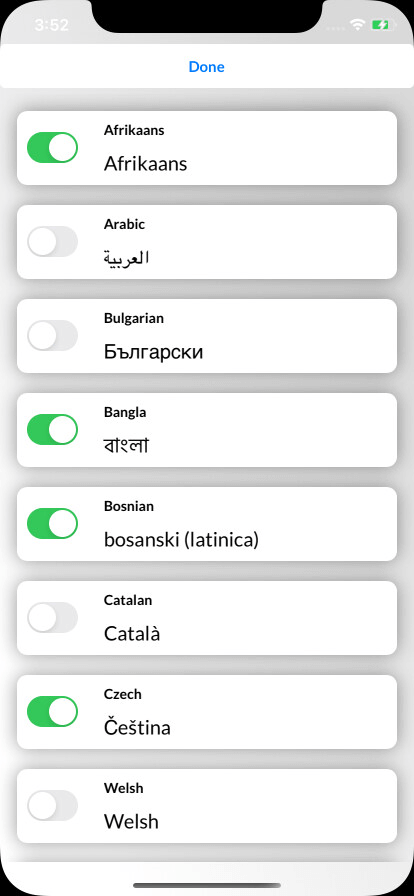
Once the user selects the languages, I will be saving that in the memory as user preferences. Then next time User enters any text for translation, I would be showing them the list of translations according to their preferred languages. 😀
Now ain’t that handy! 😉
Last minute Pull requested!
Yes, literally last minute! So after all that panic filled sleepless all-nighter effort, I manged to finish up some good looking app with cool features added, and trust me when I say, I literally submitted the Pull Request at the very last minute, exactly at 11:58 PM on April 30, 2020 PDT. Just one minute before the deadline! 😀
Here’s my Pull Request on github: https://github.com/jfversluis/TravelMonkey/pull/25
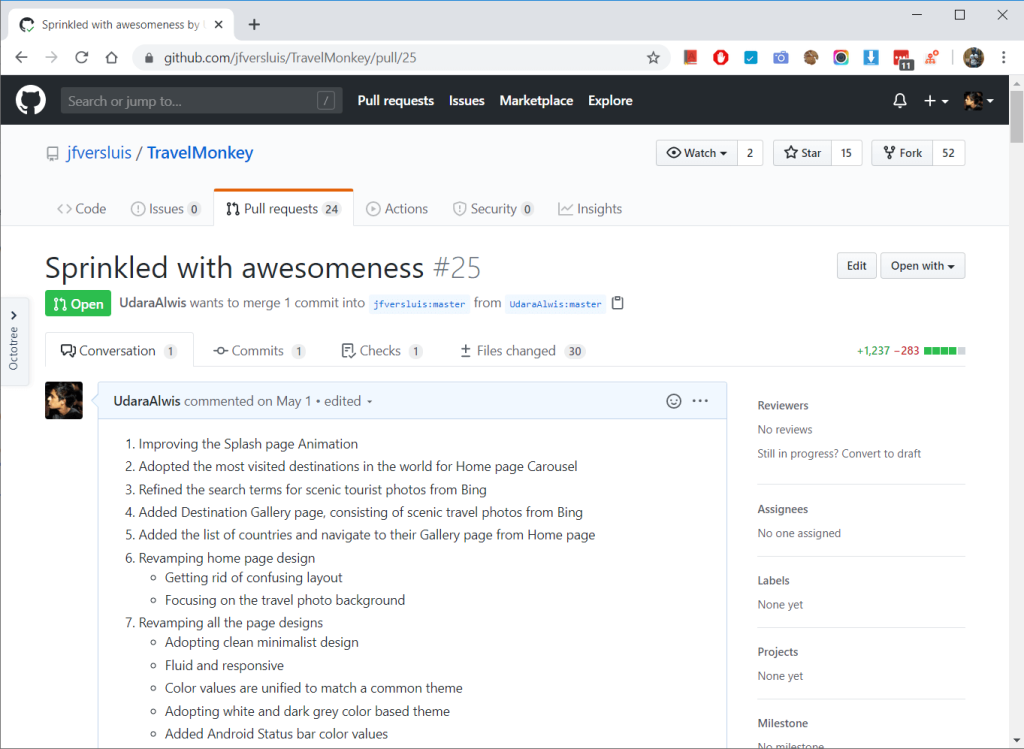
That was such an adventure, I think this was the first time I stayed up all night for coding, after many years since graduation! 😀
Here’s the repo in my github: https://github.com/UdaraAlwis/TravelMonkey
Well I could have done a much better job, in terms of features, code refactoring and standards, if I hadn’t procrastinated till last minute. I wouldn’t blame someone, if they looked at the code and complained, hence its not the cleanest considering my usual quality standards! but I would consider it was a satisfying completion, given the whole last minute stress and staying up a whole night! 😛
We got Swag!
So as they promised we got them swags yo! 😀
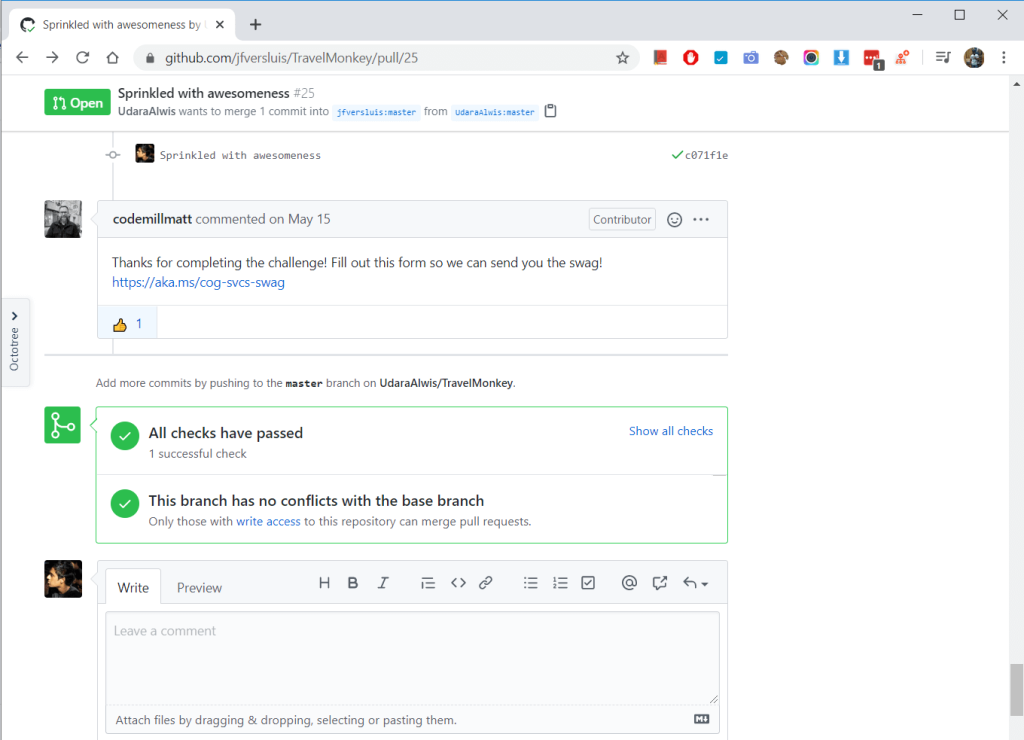
But but… later I got even a better news,
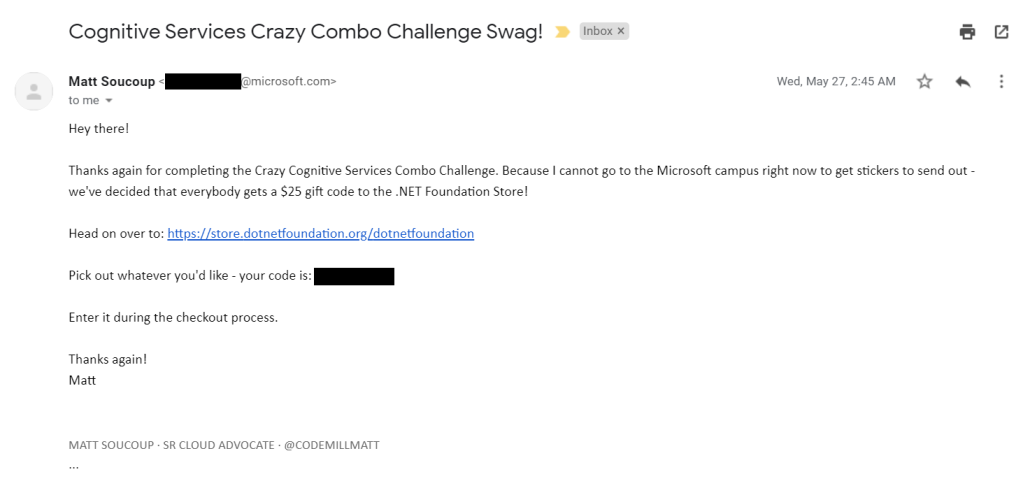
Well at the end all the participants got $25 gift codes to spend at .NET Foundation store! 😀 yaay! 😍
Oh well.. what an adventure! Thank you Microsoft! ❤️
Conclusion
This was such an awesome opportunity, and I’m glad I pulled through somehow even if it was last minute effort! It was actually fun! Learned another lesson not to procrastinate stuff like these till last minute, at least not till 24 hours prior to submission deadline. lol
Sharing a bit of Azure bits, it was surprisingly easy to integrate all these kinds of cool features with Azure Cognitive Services without having to deal with any complicated computing. If it was few years back I would have to deal with all these language translation and image processing stuff all by myself.
So glad I found the new PancakeView thanks to this challenge, it was quite handful, specially in crafting those beautiful gradient and shadow effects.
Finally I should send special thanks to Microsoft and @jfversluis @codemillmatt for this awesome opportunity!
Share the love! 😀 Cheers yol!

You solved the OutOfMemoryError problems in PancakeDrawable.draw ?
https://github.com/sthewissen/Xamarin.Forms.PancakeView/issues/96
LikeLike