
Introduction
Push Notifications have been around since iOS 9, so they have been a part of our iOS application development since the early days. As a result, users have been used to receiving notifications.
This article will explain the basics of Push Notifications and how to implement, test, and understand their history.
What is a Push Notification?
A Push Notification is an alert that will appear on the user’s home screen, and they’re designed to keep users informed of something happening in your application. For example, a Push Notification can display a message, play a sound or update a count on the App Icon on the home screen.

There are specific rules for sending a push notification to a user:
- Push Notifications must not be required for the app to function and should not be used to send sensitive personal or confidential information. Push Notifications should not be used for promotions or direct marketing purposes unless customers have explicitly opted in to receive them via consent language displayed in your app’s UI, and you provide a method in your app for a user to opt-out from receiving such messages. Abuse of these services may result in revocation of your privileges.
Therefore, you should be careful when choosing when to send a notification to a user; also, it’s worth noting that when you send a push notification, you’re effectively disturbing the user and abuse of this could result in the user deleting your app.
Handling Push Notifications in iOS
You have now explored the basics of what Push Notifications are, so you’re now going to explore the steps to integrate Push Notifications into your application.
There are two steps for integrating Push Notifications:
- Integrate push notifications in your iOS application
- Setup an APNS backend service to trigger the push notifications.
Push Notifications are sent via the APNS (Apple Push Notification Service) service provided by Apple. To send a Push Notification, you have to implement a service that will communicate to the APNS, verifying the user and triggering the sending of the notification.
To identify a user, you’ll be required to collect the Push Device Token, unique to each iOS device. You’re going to explore this further.
iOS Integration
Start by creating a brand new iOS application (we’ll assume you know how to do that)!
Your first step is to add the Push Notification capability to your project.
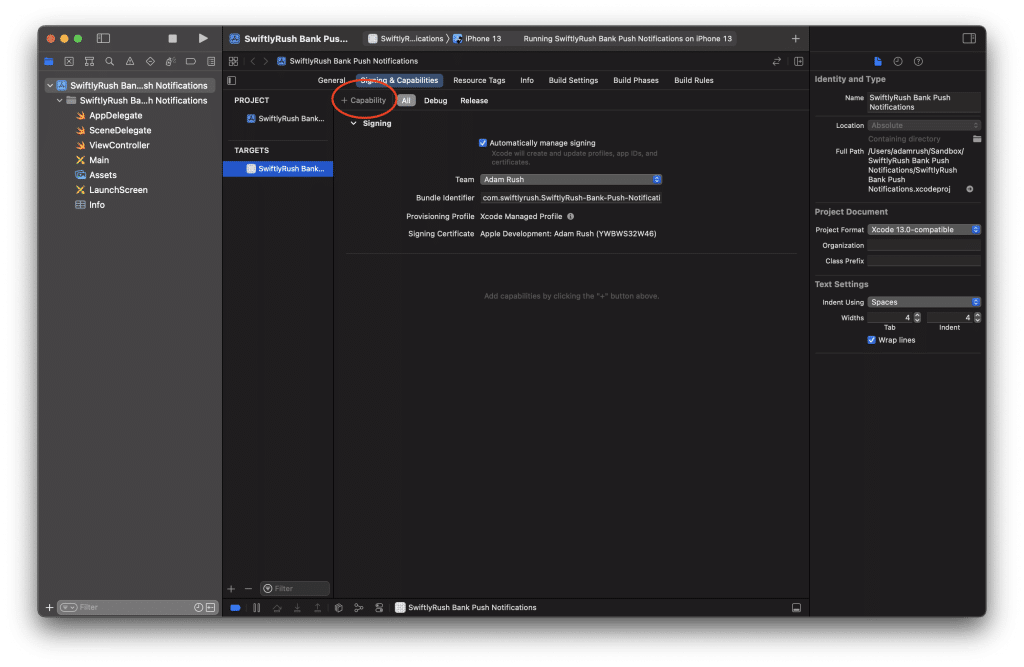
Click on the Add Capability and select the Push Notifications capability to add to your project.
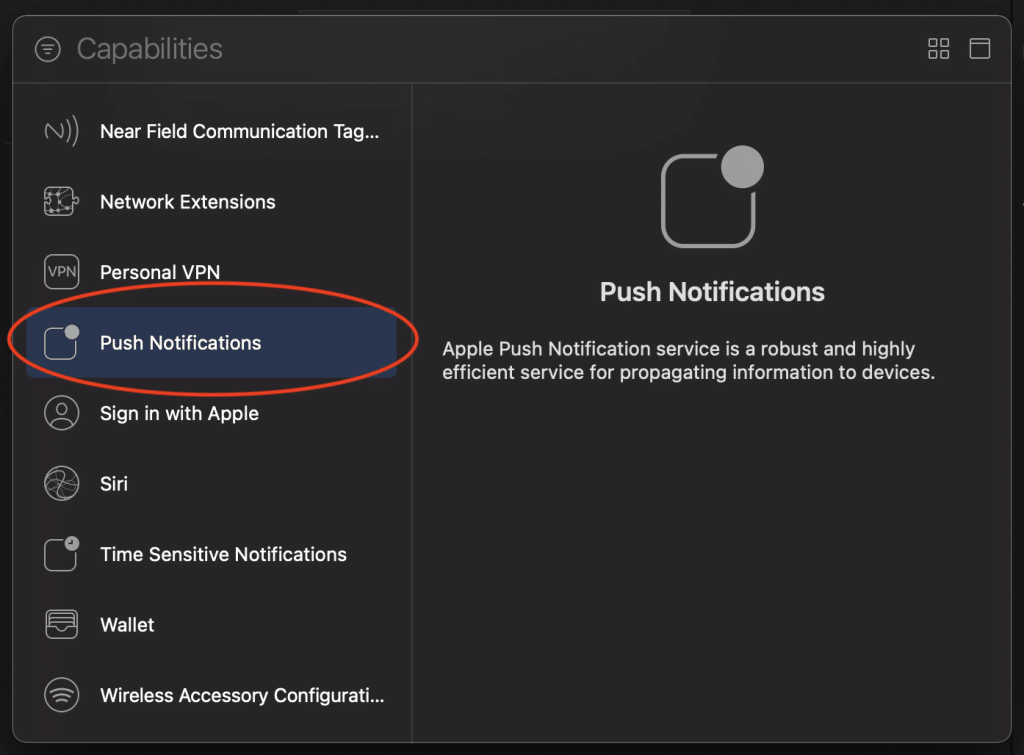
Your iOS application now has Push Notifications registered as a capability, and this will sync with your bundle ID within the App Store Connect website. Previously, we had to do this manually, but we have moved a long way now :]!
Your next step is to add some code.
Navigate to your AppDelegate file.
import UserNotificationsYou have now imported the UserNotifications Apple framework so you can hit the APIs required to handle Push Notifications.
func application(_ application: UIApplication, didFinishLaunchingWithOptions launchOptions: [UIApplication.LaunchOptionsKey: Any]?) -> Bool {
    registerForPushNotifications()
    return true
}
You are going to create a new function called registerForPushNotifications() and you will call this within the didFinishLaunchingOptions() of course, you can call this anywhere in your iOS application and it is preferred to call this with some user onboarding.
private func registerForPushNotifications() {
    UNUserNotificationCenter.current().delegate = self
    UNUserNotificationCenter.current().requestAuthorization(options: [.alert, .sound, .badge]) {
        (granted, error) in
        // 1. Check to see if permission is granted
        guard granted else { return }
        // 2. Attempt registration for remote notifications on the main thread
        DispatchQueue.main.async {
            UIApplication.shared.registerForRemoteNotifications()
        }
    }
}
In your code example above, you’re setting the delegate to the UNUserNotificationCenter so that you can receive delegate callbacks. Secondly, you’re requesting authorisation from the user. This will present an alert to the user asking for permission. Finally, you’re registering for remote notifications, which will tell the system you want to fire remote notifications.
You will be receiving a compiler error right now, and that is because you’re setting the delegate to this class but not conforming to anything.
extension AppDelegate: UNUserNotificationCenterDelegate {
    func application(_ application: UIApplication, didRegisterForRemoteNotificationsWithDeviceToken deviceToken: Data) {
        print(deviceToken)
    }

    func application(_ application: UIApplication, didFailToRegisterForRemoteNotificationsWithError error: Error) {
        print(error)
    }
}
You can listen for both a successful registration and a failure. For now, you’re going to print the contents of both of these.

You can see that you will receive the permission check, and you can Allow or Don’t Allow push notifications. So go ahead and click on Allow.
Did you check your Xcode console? I know some sad news – registration for Push Notification is only available on real devices 😭 so, unfortunately, you’ll receive the following error:
Error Domain=NSCocoaErrorDomain Code=3010 "remote notifications are not supported in the simulator" UserInfo={NSLocalizedDescription=remote notifications are not supported in the simulator}Testing Push Notifications
Unfortunately, testing Push Notification is only available on real devices, which is such a shame, but I have a tiny little hack further down in this article. So go ahead and plug in an actual device (if you have one)!
You will notice that running your application will trigger the permission check, and when you tap on Allow again, you will see that the size of the Data object for deviceToken will be printed.
This token is what uniquely identifies your user’s device, and you will be required to send this token to your backend server, ready to send to the APNS service.
Of course, this article isn’t going to explore creating an APNS service. You can use a third-party service to handle this for you:
- Firebase
- Urban Airship
To name just a couple but there are many great providers on the market, and many of them will be free for you to use. However, you could also spin up a minimal, lightweight service using this amazing template.
Testing Locally
You have now done everything required to do on your iOS application. If you would like to test receiving a push notification, you can simply do the following.
Create a new file on your computer NotificationTest.apns with the following contents:
{
    "aps" : {
        "alert" : {
            "title" : "SwiftlyRush Bank 🏦",
            "body" : "You have some more money!"
        },
    },
    "Simulator Target Bundle": "com.swiftlyrush.SwiftlyRush-Bank-Push-Notifications"
}
Remember I said earlier about testing notifications on the iOS Simulator? If you drag this file to your simulator, you’ll receive the notification directly ;]!
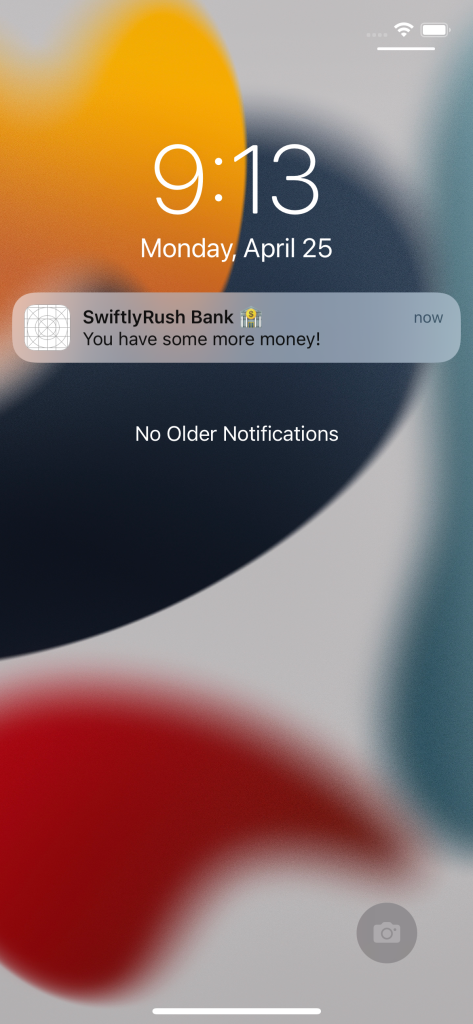
So, you can test push notifications in the simulator, after all! Of course, you can’t get the device token and test via your server, but you can quickly try all the variations of opening your application and passing through data.
Another way of testing your Push Notification is using any of the mac applications provided by our great community.
Knuff app is one that I have used for many years, but there are also many others available free or paid.
What Next?
You have explored the basics of adding the capability to your iOS application, making sure you get permission from your users, grab the unique device token ready to send to your APNS server and finally, testing Push Notifications to be displayed within your application.
There are many things you can do with push notifications, for example, you could create a Push Notification Extension which allows you to handle images, videos or even sounds to make your push notifications more interactive, and you can even trigger a push notification based on your user’s location.
Let me know what you’re doing with iOS Push Notifications!

