
Are you a regular Django user? Do you find yourself wanting to decouple your back end and front end? Do you want to handle data persistence in the API while you display the data in a single-page app (SPA) in the browser using a JavaScript framework like React or Vue?
If you answered yes to any of these questions, then you’re in luck. This tutorial will take you through the process of building a Django blog back end and a Vue front end, using GraphQL to communicate between them.
Projects are an effective way to learn and solidify concepts. This tutorial is structured as a step-by-step project so you can learn in a hands-on way and take breaks as needed.
In this tutorial, you’ll learn how to:
- Translate your Django models into a GraphQL API
- Run the Django server and a Vue application on your computer at the same time
- Administer your blog posts in the Django admin
- Consume a GraphQL API in Vue to show data in the browser
You can download all the source code you’ll use to build your Django blog application by clicking the link below:
Get Your Code: Click here to download the free sample code that you’ll use to build a blog using Django, GraphQL, and Vue.
Demo: A Django Blog Admin, a GraphQL API, and a Vue Front End
Blog applications are a common starter project because they involve create, read, update, and delete (CRUD) operations. In this project, you’ll use the Django admin to do the heavy CRUD lifting and you’ll focus on providing a GraphQL API for your blog data.
You’ll use Vue.js 3 and its composition API for the front end of your blog. Vue lets you create dynamic interfaces pretty smoothly, thanks to its reactive data binding and easy-to-manage components. Plus, since you’re dealing with data from a GraphQL API, you can leverage the Vue Apollo plugin.
Here’s a demonstration of the completed project in action:
Next, you’ll make sure you have all the necessary background information and tools before you dive in and build your blog application.
Project Overview
For this project, you’ll create a small blogging application with some rudimentary features:
- Authors can write many posts.
- Posts can have many tags and can be either published or unpublished.
You’ll build the back end of this blog in Django, complete with an admin for adding new blog content. Then you’ll expose the content data as a GraphQL API and use Vue to display that data in the browser.
You’ll accomplish this in several high-level steps. At the end of each step, you’ll find a link to the source code for that stage of the project.
If you’re curious about how the source code for each step looks, then you can click the link below:
Get Your Code: Click here to download the free sample code that you’ll use to build a blog using Django, GraphQL, and Vue.
Prerequisites
You’ll be best equipped for this tutorial if you already have a solid foundation in some web application concepts. You should understand how HTTP requests and responses and APIs work. You can check out Python & APIs: A Winning Combo for Reading Public Data to understand the details of using GraphQL APIs vs REST APIs.
Because you’ll use Django to build the back end for your blog, you’ll want to be familiar with starting a Django project and customizing the Django admin. If you haven’t used Django much before, you might also want to try building another Django-only project first. For a good introduction, check out Get Started with Django Part 1: Build a Portfolio App.
And because you’ll be using Vue on the front end, some experience with JavaScript will also help. If you’ve only used a JavaScript framework like jQuery in the past, the Vue introduction is a good foundation.
Familiarity with JSON is also important because GraphQL queries are JSON-like and return data in JSON format. You can read about Working with JSON Data in Python for an introduction.
Step 1: Set Up the Django Blog
Before going too far, you’ll need a directory in which you can organize the code for your project. Open a new terminal session and navigate to a folder on your operating system where you store your projects. Then, create a new project directory. For example, dvg/, which is short for Django-Vue-GraphQL:
$ mkdir dvg/
$ cd dvg/
You’ll also be completely splitting up the front end and back end code, so it’s a good idea to create that separation right off the bat. Create a back_end/ directory inside your project directory:
$ mkdir back_end/
$ cd back_end/
You’ll put your Django code in this directory, so it’s completely isolated from the Vue front end code you’ll create later in this tutorial.
Install Django
Now you’re ready to start building the Django application. To separate the dependencies for this project from your other projects, create a virtual environment in which you’ll install your project’s requirements.
In your terminal, make sure that you’re inside the back_end/ folder you just created. Then, select your operating system below and use your platform-specific command to set up a virtual environment:
With the above commands, you create and activate a virtual environment named venv by using Python’s built-in venv module. The parenthetical (venv) in front of the prompt indicates that you’ve successfully activated the virtual environment.
Note: The rest of the tutorial assumes you will run commands related to Python and Django within your active virtual environment.
Now that you have a virtual environment in which to install requirements, create a requirements.txt file in the back_end/ directory and define the first requirement you’ll need:
(venv) $ echo "Django==5.0.2" > requirements.txt
Once you’ve created the requirements.txt file, use it to install Django:
(venv) $ python -m pip install -r requirements.txt
Now, you’re ready to start creating your Django project.
Create the Django Project
Now that Django is installed, use the django-admin command to initialize your Django project:
(venv) $ django-admin startproject backend .
Don’t forget to add the dot (.) at the end of the command above.
The dot prevents Django from creating a nested project directory for your backend project.
Note: By naming the Django project backend, you indicate the purpose of the Django project. But since you’re already working with a back_end/ folder, you’re naming the Django project folder backend/ without an underscore (_) to differentiate these folders.
At this point, your project directory structure should now look like this:
dvg/
└── back_end/
    ├── manage.py
    ├── requirements.txt
    └── backend/
        ├── __init__.py
        ├── asgi.py
        ├── settings.py
        ├── urls.py
        └── wsgi.py
In your dvg/ project root, there is a back_end/ folder that contains your Django project. Inside back_end/ there is a backend/ folder, a manage.py file, and the requirements.txt file. Not shown in the directory tree above is the venv/ folder for your virtual environment.
Run Django Migrations
Before you add anything specific to your application, it’s time to run Django’s initial migrations. If you haven’t dealt with migrations before, then check out Django Migrations: A Primer. Run the migrations with the migrate management command:
(venv) $ python manage.py migrate
You should see a long list of migrations, each with an OK after it:
Operations to perform:
  Apply all migrations: admin, auth, contenttypes, sessions
Running migrations:
  Applying contenttypes.0001_initial... OK
  Applying auth.0001_initial... OK
  Applying admin.0001_initial... OK
  Applying admin.0002_logentry_remove_auto_add... OK
  Applying admin.0003_logentry_add_action_flag_choices... OK
  Applying contenttypes.0002_remove_content_type_name... OK
  Applying auth.0002_alter_permission_name_max_length... OK
  Applying auth.0003_alter_user_email_max_length... OK
  Applying auth.0004_alter_user_username_opts... OK
  Applying auth.0005_alter_user_last_login_null... OK
  Applying auth.0006_require_contenttypes_0002... OK
  Applying auth.0007_alter_validators_add_error_messages... OK
  Applying auth.0008_alter_user_username_max_length... OK
  Applying auth.0009_alter_user_last_name_max_length... OK
  Applying auth.0010_alter_group_name_max_length... OK
  Applying auth.0011_update_proxy_permissions... OK
  Applying auth.0012_alter_user_first_name_max_length... OK
  Applying sessions.0001_initial... OK
Running the Django migrations will also create an SQLite file named db.sqlite3. This is the database of your project. As the name suggests, it’ll store the data for your project. All the blog posts you’ll create during the tutorial will be saved in this file.
Create a Superuser
Now that you have the database, you can create a superuser. You’ll need this user so you can eventually log in to the Django admin interface. Use the createsuperuser management command to create one:
(venv) $ python manage.py createsuperuser
Running the createsuperuser management command prompts you to choose a username, provide an email address, and set a password. Use your own data for these fields and make sure to remember them. You’ll need these credentials to log in to the Django admin interface in a moment.
Step 1 Summary
Now that you’ve installed Django, created the Django project, run the Django migrations, and created a superuser, you have a fully functioning Django application. You should now be able to start the Django development server and view it in your browser. Start the server using the runserver management command, which will listen to port 8000 by default:
(venv) $ python manage.py runserver
Next, visit http://localhost:8000 in your browser. You should see the Django splash page, indicating that the installation worked successfully:
You should also be able to visit http://localhost:8000/admin, where you’ll see a login form:
Use the username and password you made for your superuser to log in to the Django admin. If everything’s working, then you’ll be taken to the Django admin interface. This page will be pretty bare for the moment, but you’ll make it much more interesting in the next step.
Get Your Code: Click here to download the free sample code that you’ll use to build a blog using Django, GraphQL, and Vue.
Step 2: Create the Django Blog Admin
Now that you have the foundations of your Django project in place, you’re ready to start creating some of the core logic for your blog. In this step, you’ll create the data models and the administrative configuration for authoring and managing blog content.
Create the Django Blog Application
Keep in mind that a single Django project can contain many Django applications. You should separate your blog-specific behavior into its own Django application so that it remains distinct from any future applications you build into your project. Create the application using the startapp management command:
(venv) $ python manage.py startapp blog
This will create a blog/ directory with several files, similar to the ones you already have in backend/:
dvg/
└── back_end/
    ├── manage.py
    ├── requirements.txt
    ├── db.sqlite3
    ├── backend/
    │    └── ...
    └── blog/
        ├── __init__.py
        ├── admin.py
        ├── apps.py
        ├── migrations/
        │   └── __init__.py
        ├── models.py
        ├── tests.py
        └── views.py
You’ll make changes and additions to some of these files later in this tutorial. First, you need to make some adjustments in the backend/ project app.
Enable the Django Blog Application
Creating a Django application doesn’t make it available in your project by default. To make sure the project knows about your new blog application, you’ll need to add it to the list of installed applications. Update the INSTALLED_APPS variable in backend/settings.py:
back_end/backend/settings.py
# ...

INSTALLED_APPS = [
    "django.contrib.admin",
    "django.contrib.auth",
    "django.contrib.contenttypes",
    "django.contrib.sessions",
    "django.contrib.messages",
    "django.contrib.staticfiles",
    "blog.apps.BlogConfig",
]

# ...
Adding "blog" to the INSTALLED_APPS list is sufficient to let Django know about the app. When you explicitly point to the configuration class of your app, then INSTALLED_APPS will help Django discover information about your application, such as the data models and URL patterns it may contain.
Create the Django Blog Data Models
Now that Django can discover your blog application, you can create the data models. You’ll create three models to start:
Profilestores additional information about blog users.Tagrepresents a category in which blog posts can be grouped.Poststores the content and metadata of each blog post.
You’ll add each of these models to blog/models.py. Each of your models will inherit from Django’s models.Model class.
The Profile Model
The Profile model will have three fields that contain user information:
useris a one-to-one association to the Django user with which the profile is associated.websiteis an optional URL where you can learn more about the user.biois an optional short text about the user.
Open blog/models.py and add an import for the settings module:
back_end/blog/models.py
from django.db import models
from django.conf import settings
Then create the Profile model, which should look like the following snippet:
back_end/blog/models.py
from django.db import models
from django.conf import settings

class Profile(models.Model):
    user = models.OneToOneField(
        settings.AUTH_USER_MODEL,
        on_delete=models.PROTECT,
    )
    website = models.URLField(blank=True)
    bio = models.CharField(max_length=240, blank=True)

    def __str__(self):
        return self.user.get_username()
The .__str__() method will make the Profile objects you create show the username on the admin site.
The Tag Model
When creating a blog post, you’ll be able to add tags to the post. These tags will allow your readers to filter blog posts by a specific tag later.
The Tag model has just one field, name, which stores a short, unique name for the tag. Create the Tag model, which should look like the following snippet:
back_end/blog/models.py
# ...

class Tag(models.Model):
    name = models.CharField(max_length=50, unique=True)

    def __str__(self):
        return self.name
Again, .__str__() will make the Tag objects you create appear in a more human-friendly way on the admin site.
The Post Model
The heart and center of any blog are the blog posts. The Post model is the most involved because it represents the actual blog post with the content you write and the meta information you add. It will have several fields:
| Field Name | Purpose |
|---|---|
title |
The unique title of the post to display to readers |
subtitle |
An optional clarifier of the post’s content to help readers decide if they want to read it |
slug |
A unique, readable identifier for the post to use in URLs |
body |
The post’s content |
meta_description |
An optional description to use for search engines like Google |
date_created |
A timestamp of the post’s creation |
date_modified |
A timestamp of the post’s most recent edit |
publish_date |
An optional timestamp when the post goes live |
published |
Shows whether the post is currently available to readers |
author |
A reference to the profile of the user who wrote the post |
tags |
The list of tags associated with the post, if any |
Because blogs usually show the most recent posts first, you’ll also want the ordering to be by published date, showing the most recent first. Create the Post model, which should look like the following snippet:
back_end/blog/models.py
# ...

class Post(models.Model):
    title = models.CharField(max_length=255, unique=True)
    subtitle = models.CharField(max_length=255, blank=True)
    slug = models.SlugField(max_length=255, unique=True)
    body = models.TextField()
    meta_description = models.CharField(max_length=150, blank=True)
    date_created = models.DateTimeField(auto_now_add=True)
    date_modified = models.DateTimeField(auto_now=True)
    publish_date = models.DateTimeField(blank=True, null=True)
    published = models.BooleanField(default=False)

    author = models.ForeignKey(Profile, on_delete=models.PROTECT)
    tags = models.ManyToManyField(Tag, blank=True)

    class Meta:
        ordering = ["-publish_date"]
The on_delete=models.PROTECT argument for author ensures that you won’t accidentally delete an author who still has posts on the blog. The ManyToManyField relationship to Tag allows you to associate a post with zero or more tags. Each tag can be associated to many posts.
Create the Model Admin Configuration
Now that your models are in place, you’ll need to tell Django how they should be displayed in the admin interface. In blog/admin.py, start by importing Django’s admin module and your models:
back_end/blog/admin.py
from django.contrib import admin
from blog.models import Post, Profile, Tag
Then, create and register the admin classes for Profile and Tag, which only need the model specified:
back_end/blog/admin.py
from django.contrib import admin
from blog.models import Post, Profile, Tag

@admin.register(Profile)
class ProfileAdmin(admin.ModelAdmin):
    model = Profile

@admin.register(Tag)
class TagAdmin(admin.ModelAdmin):
    model = Tag
Just like the model, the admin class for Post is more involved. Posts contain a lot of information, so it helps to be more judicious about what information you display to avoid crowding the interface:
back_end/blog/admin.py
# ...

@admin.register(Post)
class PostAdmin(admin.ModelAdmin):
    model = Post

    list_display = (
        "id",
        "title",
        "subtitle",
        "slug",
        "publish_date",
        "published",
    )
    list_filter = (
        "published",
        "publish_date",
    )
    list_editable = (
        "title",
        "subtitle",
        "slug",
        "publish_date",
        "published",
    )
    search_fields = (
        "title",
        "subtitle",
        "slug",
        "body",
    )
    prepopulated_fields = {
        "slug": (
            "title",
            "subtitle",
        )
    }
    date_hierarchy = "publish_date"
    save_on_top = True
To make browsing and editing posts more fluid, you customize a post’s details with these special variables:
list_display: Only show the specific information about each post.list_filter: Allow filtering the post list by posts that are published or unpublished, and by publish date.list_editable: Allow editing of all the displayed fields, with the exception of the ID.search_fields: Allow searching for posts using the title, subtitle, slug, and body.prepopulated_fields: Prepopulate the slug field using the title and subtitle fields.date_hierarchy: Use the publish date of all posts to create a browsable date hierarchy.save_on_top: Show a button at the top of the list to save changes.
You can read more about all the options the Django admin has to offer in Customize the Django Admin With Python.
Create the Model Migrations
Django has all the information it needs to administer and persist your blog content, but you’ll need to update the database to support these changes. Earlier in this tutorial, you ran Django’s migrations for its built-in models. Now, you’ll create and run migrations for your models.
First, create the migrations using the makemigrations management command:
(venv) $ python manage.py makemigrations
Migrations for 'blog':
  blog/migrations/0001_initial.py
    - Create model Tag
    - Create model Profile
    - Create model Post
This creates a migration whose name is 0001_initial.py by default. Run this migration using the migrate management command:
(venv) $ python manage.py migrate
Operations to perform:
  Apply all migrations: admin, auth, blog, contenttypes, sessions
Running migrations:
  Applying blog.0001_initial... OK
You now have all of your data models in place, and you’ve configured the Django admin so that you can add and edit those models.
Start Blogging
Start the Django development server again if you stopped it before to run the migrations. Then, visit the admin interface at http://localhost:8000/admin, and explore what’s changed.
You should see links to the list of tags, profiles, and posts, as well as links to add or edit each of them. Try to add your own posts now and edit a few to see how the admin interface responds:
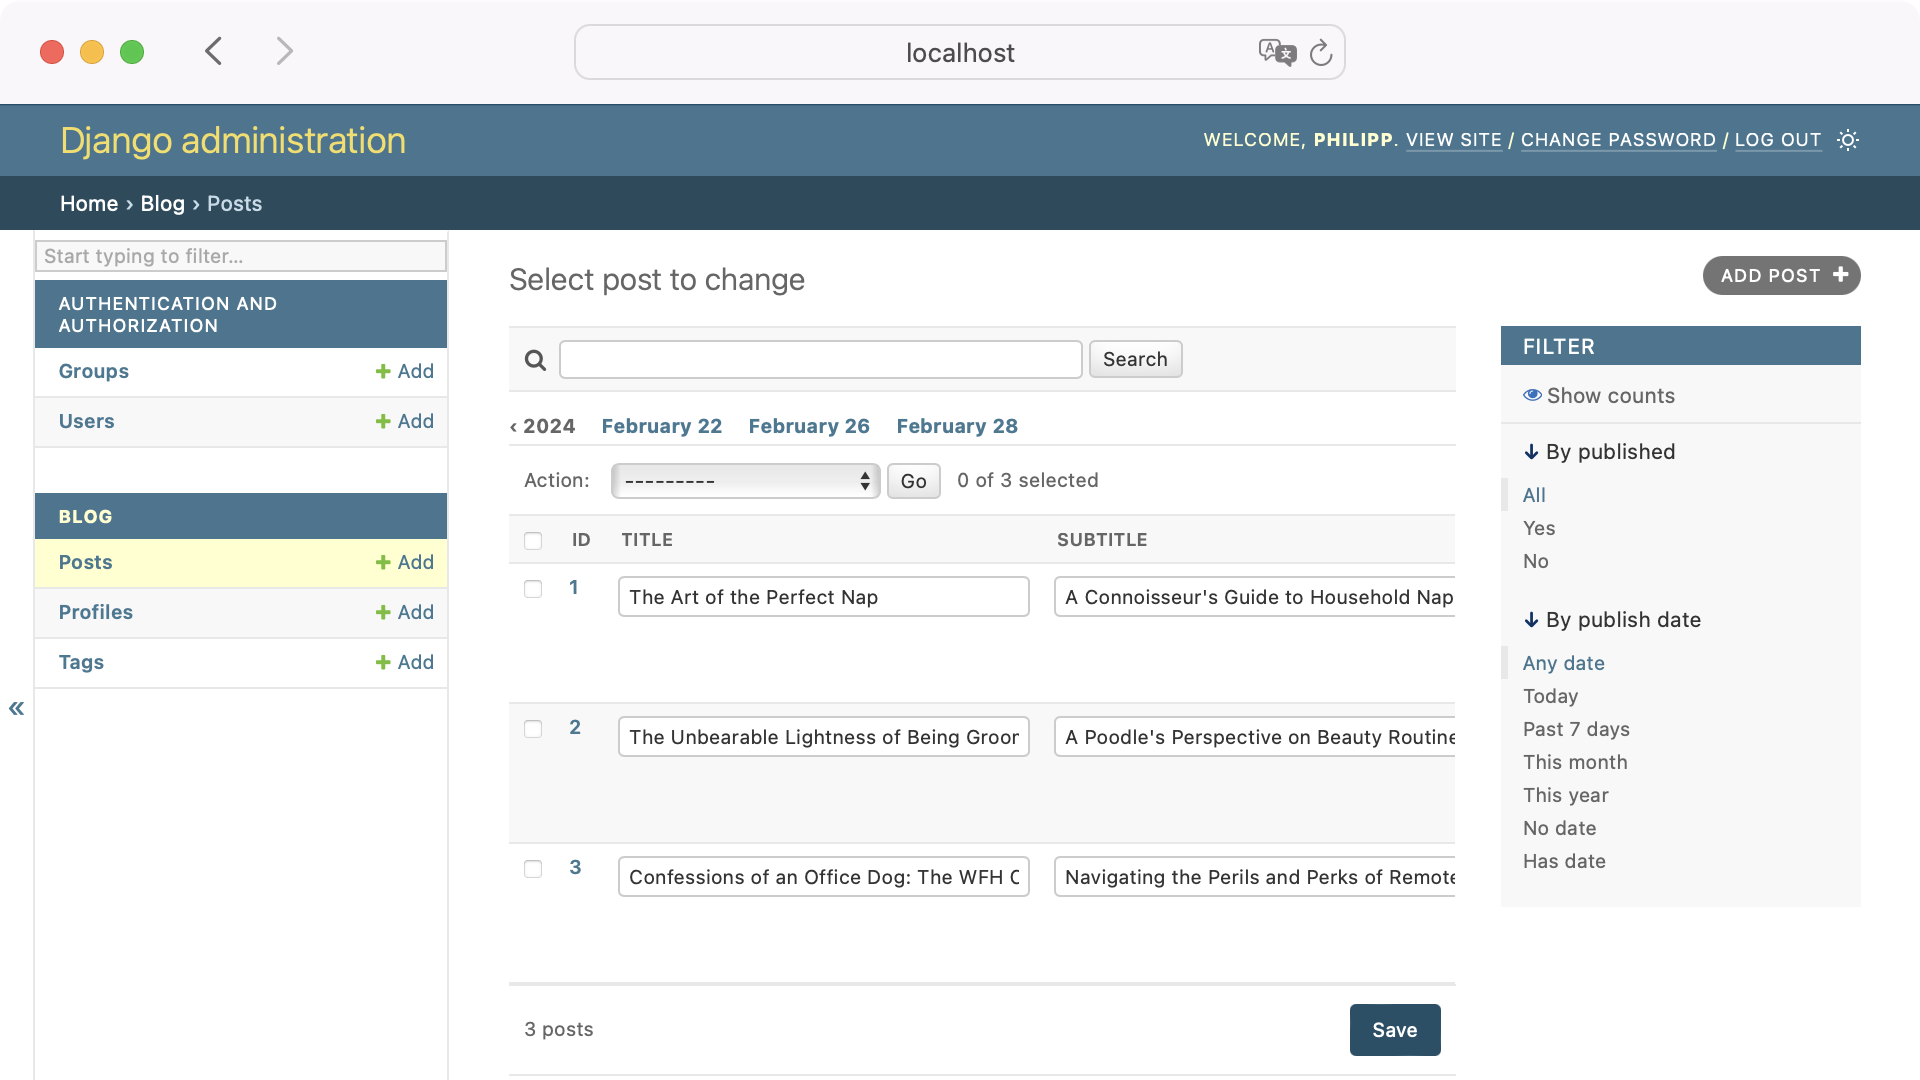
Before you continue with the next steps, you should have around three blog posts saved in your blog. Make sure that you also have a few tags attached to them.
Step 2 Summary
At this point, you’ve completed enough of the back end that you could decide to go headlong in the Django direction. You could use Django’s URL routing and templating engine to build pages that would show all the post content you create in the admin to readers.
Instead, you’ll wrap the back end you’ve created in a GraphQL API so you can eventually consume it from the browser and provide a richer client-side experience.
Get Your Code: Click here to download the free sample code that you’ll use to build a blog using Django, GraphQL, and Vue.
Step 3: Set Up Graphene-Django
GraphQL allows you to retrieve only the data you need, which can be useful compared to very large responses that are common in RESTful APIs. GraphQL also provides more flexibility in projecting data, so you can often retrieve data in new ways without changing the logic of the service providing the GraphQL API.
You’ll use Graphene-Django to integrate what you’ve created so far into a GraphQL API.
Install Graphene-Django
To get started with Graphene-Django, first add it to your project’s requirements file:
back_end/backend/requirements.txt
Django==5.0.2
graphene-django==3.2.0
Then install it using the updated requirements file:
(venv) $ python -m pip install -r requirements.txt
Add "graphene_django" to the INSTALLED_APPS variable in your project’s settings.py module so Django will find it:
back_end/backend/settings.py
# ...

INSTALLED_APPS = [
    "django.contrib.admin",
    "django.contrib.auth",
    "django.contrib.contenttypes",
    "django.contrib.sessions",
    "django.contrib.messages",
    "django.contrib.staticfiles",
    "blog.apps.BlogConfig",
    "graphene_django",
]

# ...
After installing third party Django apps like Graphene-Django with pip, you need to add it to your project by listing it in your INSTALLED_APPS. Now that Django knows about "graphene_django", you’ve got some configuration to do.
Configure Graphene-Django
To get Graphene-Django working in your project, you’ll need to configure a few pieces:
- Update
settings.pyso the project knows where to look for GraphQL information. - Add a URL pattern to serve the GraphQL API and GraphiQL, GraphQL’s explorable interface.
- Create the GraphQL schema so Graphene-Django knows how to translate your models into GraphQL.
Update Django Settings
The GRAPHENE setting configures Graphene-Django to look in a particular place for your GraphQL schema. In settings.py, point SCHEMA to the blog.schema.schema Python path, which you’ll create shortly:
back_end/backend/settings.py
# ...

GRAPHENE = {
  "SCHEMA": "blog.schema.schema",
}
Note that this addition may cause Django to produce an import error, which you’ll resolve when you create your GraphQL schema.
Add a URL Pattern for GraphQL and GraphiQL
To let Django serve the GraphQL endpoint and the GraphiQL interface, you’ll add a new URL pattern to backend/urls.py. You’ll point the URL at Graphene-Django’s GraphQLView. Because you’re not using the Django template engine’s cross-site request forgery (CSRF) protection features, you’ll also need to import Django’s csrf_exempt decorator to mark the view as exempt from CSRF protection:
back_end/backend/urls.py
from django.contrib import admin
from django.urls import path
from django.views.decorators.csrf import csrf_exempt
from graphene_django.views import GraphQLView

urlpatterns = [
    path("admin/", admin.site.urls),
    path("graphql/", csrf_exempt(GraphQLView.as_view(graphiql=True))),
]
The graphiql=True argument tells Graphene-Django to make the GraphiQL interface available.
Create the GraphQL Schema
Now you’ll create the GraphQL schema, which should feel similar to the admin configuration you created earlier. The schema consists of several classes that are each associated with a particular Django model and one to specify how to resolve a few important types of queries you’ll need in the front end.
Create a new schema.py module in the blog/ directory. Import Graphene-Django’s DjangoObjectType, your blog models, and get_user_model(), which gives you access to the Django User model:
back_end/blog/schema.py
from django.contrib.auth import get_user_model
from graphene_django import DjangoObjectType

from blog import models
Then, create a corresponding class for each of your models and the User model. They should each have a name that ends with Type because each one represents a GraphQL type. Your classes should look like the following:
back_end/blog/schema.py
# ...

class UserType(DjangoObjectType):
    class Meta:
        model = get_user_model()

class AuthorType(DjangoObjectType):
    class Meta:
        model = models.Profile

class PostType(DjangoObjectType):
    class Meta:
        model = models.Post

class TagType(DjangoObjectType):
    class Meta:
        model = models.Tag
Additionally, you need a Query class that inherits from graphene.ObjectType. This class will bring together all the type classes you created. To set this up, import graphene and add methods to Query to indicate how your models can be queried:
back_end/blog/schema.py
 1import graphene
 2from django.contrib.auth import get_user_model
 3from graphene_django import DjangoObjectType
 4
 5from blog import models
 6
 7# ...
 8
 9class Query(graphene.ObjectType):
10    all_posts = graphene.List(PostType)
11    author_by_username = graphene.Field(AuthorType, username=graphene.String())
12    post_by_slug = graphene.Field(PostType, slug=graphene.String())
13    posts_by_author = graphene.List(PostType, username=graphene.String())
14    posts_by_tag = graphene.List(PostType, tag=graphene.String())
15
16    def resolve_all_posts(root, info):
17        return (
18            models.Post.objects.prefetch_related("tags")
19            .select_related("author")
20            .all()
21        )
22
23    def resolve_author_by_username(root, info, username):
24        return models.Profile.objects.select_related("user").get(
25            user__username=username
26        )
27
28    def resolve_post_by_slug(root, info, slug):
29        return (
30            models.Post.objects.prefetch_related("tags")
31            .select_related("author")
32            .get(slug=slug)
33        )
34
35    def resolve_posts_by_author(root, info, username):
36        return (
37            models.Post.objects.prefetch_related("tags")
38            .select_related("author")
39            .filter(author__user__username=username)
40        )
41
42    def resolve_posts_by_tag(root, info, tag):
43        return (
44            models.Post.objects.prefetch_related("tags")
45            .select_related("author")
46            .filter(tags__name__iexact=tag)
47        )
The Query class in line 9 is made up of a number of attributes that are either graphene.List or graphene.Field. You use graphene.Field if the query should return a single item and graphene.List if it will return multiple items.
For each of these attributes, you also create a method to resolve the query:
- Line 16: Receive all the posts.
- Line 23: Get an author with a given username.
- Line 28: Get a post with a given slug.
- Line 35: Receive all posts by a given author.
- Line 42: Receive all posts with a given tag.
You resolve a query by taking the information supplied in the query and returning the appropriate Django queryset in response.
Note: The method for each resolver must start with resolve_, and the rest of the name should match the corresponding attribute. As an example, the method to resolve the queryset for the all_posts attribute in line 16 must be named resolve_all_posts.
You now have all the types and resolvers for your schema, but remember that the GRAPHENE variable you created in backend/settings.py points to blog.schema.schema. Create a schema variable at the end of schema.py that wraps your Query class in graphene.Schema to tie it all together:
back_end/blog/schema.py
# ...

schema = graphene.Schema(query=Query)
This variable matches the "blog.schema.schema" value you configured for Graphene-Django earlier in this tutorial.
Step 3 Summary
You’ve fleshed out your blog’s data model, and now you’ve also wrapped your data model with Graphene-Django to serve that data as a GraphQL API.
Run the Django development server and visit http://localhost:8000/graphql:
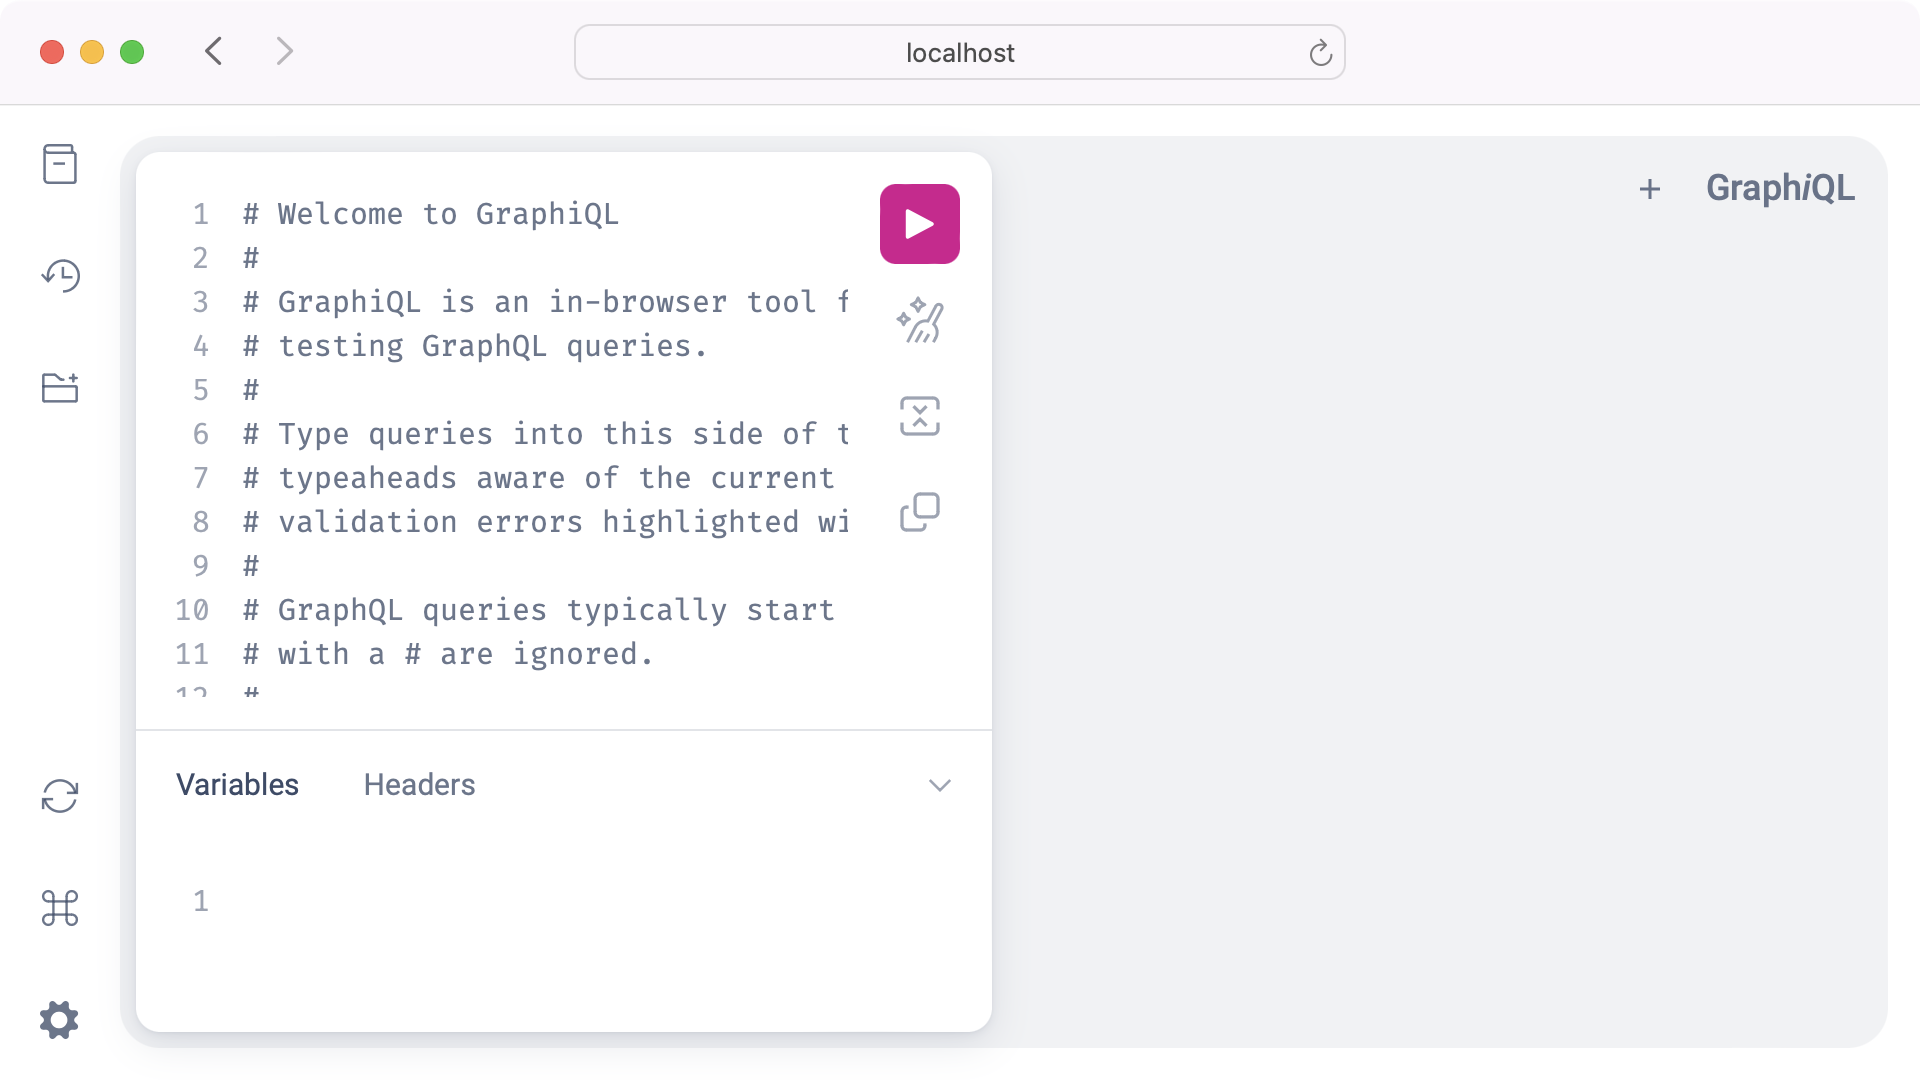
You should see the GraphiQL interface with some commented text that explains how to use the tool.
Expand the Docs section in the top left of the screen and click query: Query. You should see each of the queries and types that you configured in your schema:
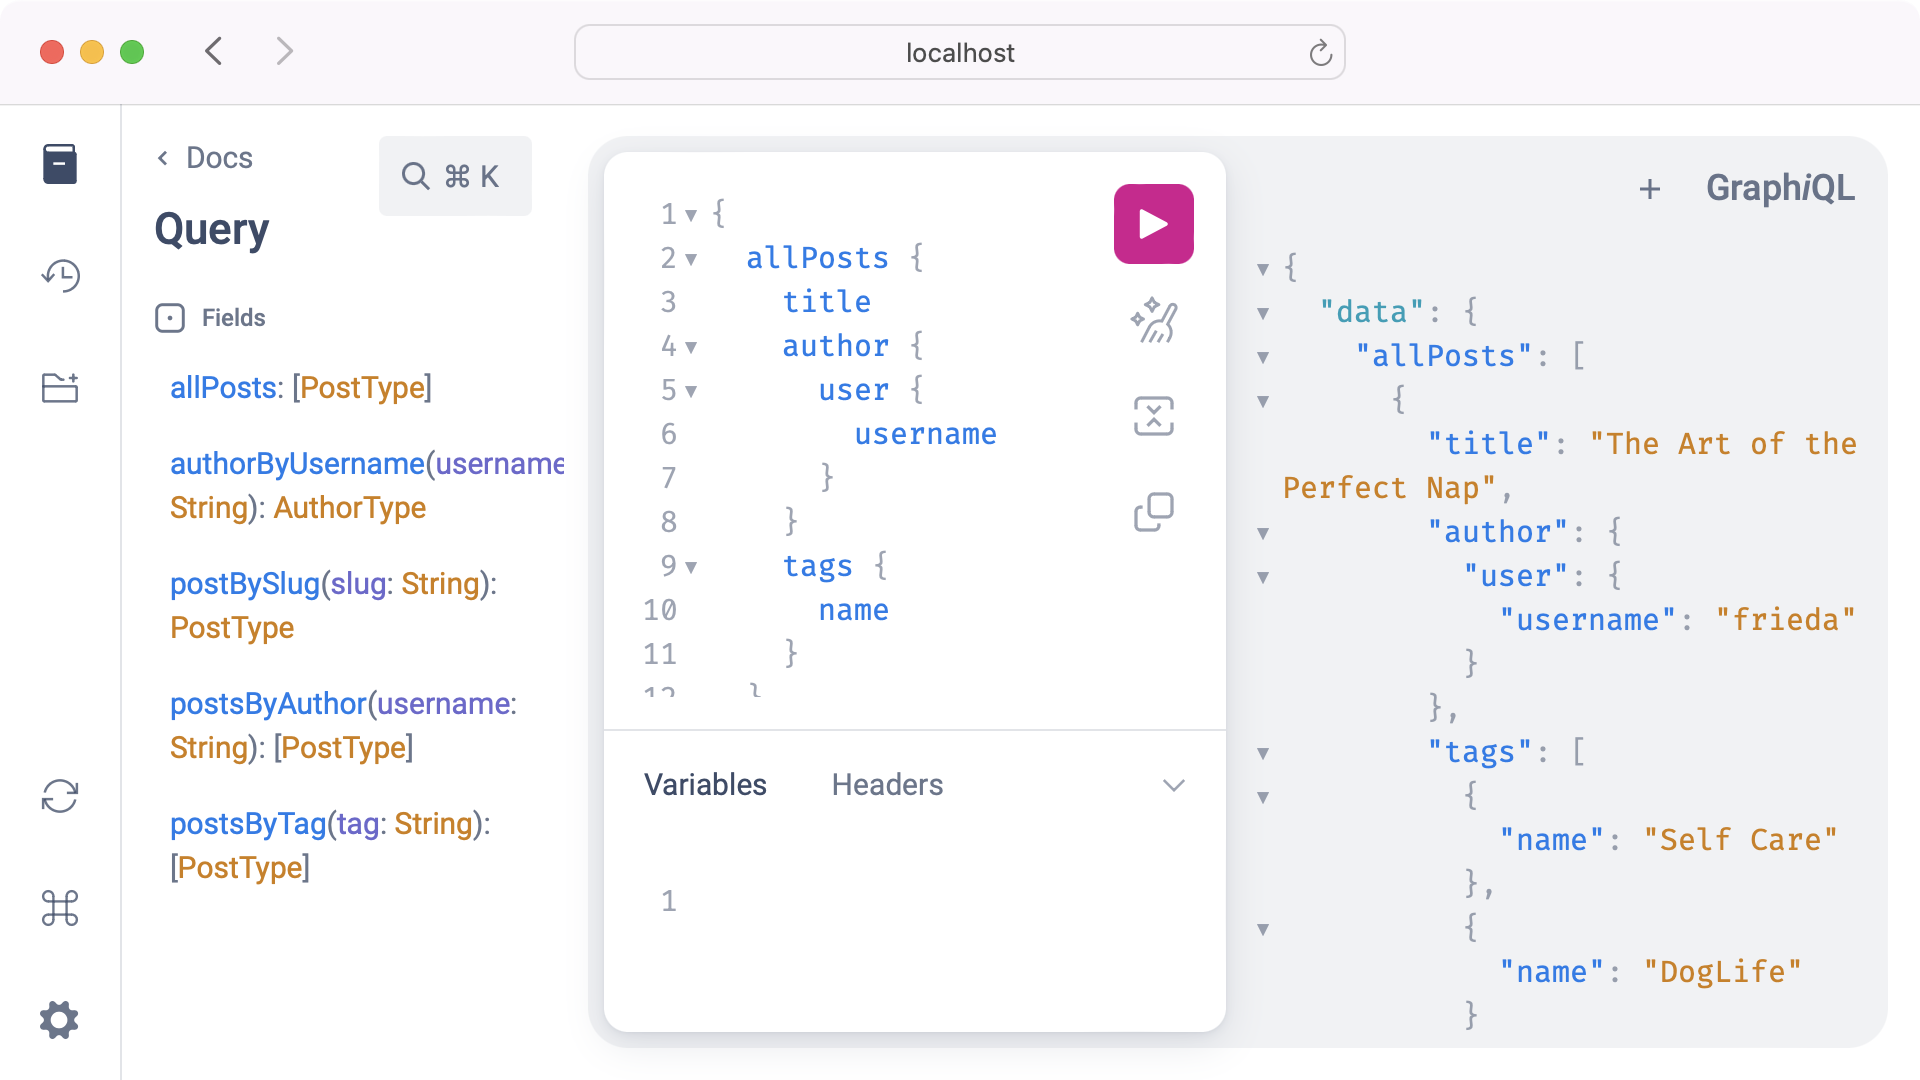
If you haven’t created any test blog content yet, do so now. Try the following query, which should return a list of all the posts you’ve created:
{
  allPosts {
    title
    author {
      user {
        username
      }
    }
    tags {
      name
    }
  }
}
The response should return a list of posts. The structure of each post should match the shape of the query, like in the following example:
{
  "data": {
    "allPosts": [
      {
        "title": "The Art of the Perfect Nap",
        "author": {
          "user": {
            "username": "frieda"
          }
        },
        "tags": [
          {
            "name": "Self Care"
          },
          {
            "name": "DogLife"
          }
        ]
      },
      {
        "title": "The Unbearable Lightness of Being Groomed",
        "author": {
          "user": {
            "username": "frieda"
          }
        },
        "tags": [
          {
            "name": "DogLife"
          },
          {
            "name": "Grooming"
          }
        ]
      },
      {
        "title": "Confessions of an Office Dog: The WFH Chronicles",
        "author": {
          "user": {
            "username": "frieda"
          }
        },
        "tags": [
          {
            "name": "DogLife"
          },
          {
            "name": "Work"
          }
        ]
      }
    ]
  }
}
The response you get should match the posts that you created so far. If you’ve saved some posts and see them in the response, then you’re ready to continue on.
Get Your Code: Click here to download the free sample code that you’ll use to build a blog using Django, GraphQL, and Vue.
Step 4: Set Up django-cors-headers
You’ll need to take one more step before you can call the back end work complete. Because the back end and the front end will run on different ports locally, and because they might run on entirely separate domains in a production environment, cross-origin resource sharing (CORS) comes into play. Without handling CORS, requests from the front end to the back end will generally be blocked by your browser.
The django-cors-headers project makes dealing with CORS fairly painless. You’ll use this to tell Django to respond to requests even if they come from another origin, which will allow the front end to communicate properly with the GraphQL API.
Install django-cors-headers
First, add django-cors-headers to your requirements file:
back_end/backend/requirements.txt
Django==5.0.2
graphene-django==3.2.0
django-cors-headers==4.3.1
Then install it using the updated requirements file:
(venv) $ python -m pip install -r requirements.txt
Add "corsheaders" to the INSTALLED_APPS list in your project’s settings.py module:
back_end/backend/settings.py
# ...

INSTALLED_APPS = [
    "django.contrib.admin",
    "django.contrib.auth",
    "django.contrib.contenttypes",
    "django.contrib.sessions",
    "django.contrib.messages",
    "django.contrib.staticfiles",
    "blog.apps.BlogConfig",
    "graphene_django",
    "corsheaders",
]

# ...
Stay in settings.py and add "corsheaders.middleware.CorsMiddleware" to the beginning of the MIDDLEWARE list:
back_end/backend/settings.py
# ...

MIDDLEWARE = [
    "corsheaders.middleware.CorsMiddleware",
    "django.middleware.security.SecurityMiddleware",
    "django.contrib.sessions.middleware.SessionMiddleware",
    "django.middleware.common.CommonMiddleware",
    "django.middleware.csrf.CsrfViewMiddleware",
    "django.contrib.auth.middleware.AuthenticationMiddleware",
    "django.contrib.messages.middleware.MessageMiddleware",
    "django.middleware.clickjacking.XFrameOptionsMiddleware",
]

# ...
The django-cors-headers documentation suggests putting the middleware as early in the MIDDLEWARE list as possible. If you don’t want to put the CORS middleware at the very top of the list, then you need to at least make sure to put it before Django’s CommonMiddleware.
Configure django-cors-headers
CORS exists for a good reason. You don’t want to expose your application so it can be used from anywhere on the Internet. To define how much you want to open up the GraphQL API, you must use one of these three settings:
CORS_ALLOWED_ORIGINS: A list of domains from which your Django application will allow requests.CORS_ALLOWED_ORIGIN_REGEXES: A list of regular expressions that match domains from which to allow requests.CORS_ALLOW_ALL_ORIGINS: A Boolean value that defines whether Django should be all open or all closed by default.
For this project, CORS_ALLOWED_ORIGINS is sufficient.
Add the following settings to settings.py:
back_end/backend/settings.py
# ...

CORS_ALLOWED_ORIGINS = ("http://localhost:5173",)
This setting will allow requests only from your front end, which you’ll create later and which will run on port 5173 locally.
Step 4 Summary
Congratulations, you’ve completed the back end of your blog! You have a working data model, a working admin interface, a working GraphQL API that you can explore using GraphiQL, and the ability to query the API from the front end you’ll build next. This is a great place to pause if you haven’t taken a break in a while.
Get Your Code: Click here to download the free sample code that you’ll use to build a blog using Django, GraphQL, and Vue.
Step 5: Set Up Vue.js
You’ll use Vue as the front end for your blog. To set up Vue, you’ll install Node.js on your system and then create the Vue project. In your project, you’ll install a couple of important plugins, and run another development server to make sure your application and its dependencies are working together properly.
Install Node.js
Before you can work with Vue you must install Node.js. Node.js is a JavaScript runtime environment that enables you to run JavaScript outside of your browser.
Just like Python and pip, Node.js provides a package manager. The Node Package Manager is named npm and you’ll use it in a moment to install Vue and some additional plugins.
Note: Please navigate to the official Node.js download page to download and install Node.js on your operating system before continuing with this tutorial.
To verify that Node.js and npm are available on your operating system, open a new terminal window and check their versions with the commands below:
$ node -v
v20.11.1

$ npm -v
10.2.4
Once you’ve verified that Node.js and npm are present, keep your terminal window open and navigate to your project directory:
$ cd dvg/
The dvg/ directory is the starting point to initialize your Vue project.
Create the Vue Project
Much like Django’s startproject command, the create-vue tool helps you to build your project structure. Even more so, it asks you a bunch of questions to fine-tune your setup. If you want to follow along closely with this tutorial, then you should answer the questions like this:
| Prompt | Selection |
|---|---|
| Project name: | front_end |
| Add TypeScript? | No |
| Add JSX Support? | No |
| Add Vue Router for Single Page Application development? | Yes |
| Add Pinia for state management? | No |
| Add Vitest for Unit Testing? | No |
| Add an End-to-End Testing Solution? | No |
| Add ESLint for code quality? | No |
The most important selections are naming your project “front_end” and adding Vue Router to the project.
To start the scaffolding process, run this command in your project directory:
$ npm create vue@latest
Need to install the following packages:
create-vue@3.9.2
Ok to proceed? (y) y
After you’ve initated the process, you need to install the create-vue tool. Then, you need to answer several questions about the tooling of your Vue project. Again, make sure to name your project “front_end” and to add Vue Router to the project
The scaffolding process creates a front_end/ directory alongside your existing back_end/ directory, installs a number of JavaScript dependencies, and creates some skeleton files for the application:
front_end/
│
├── public/
│   └── ...
│
├── src/
│   │
│   ├── assets/
│   │   └── ...
│   │
│   ├── components/
│   │   └── ...
│   │
│   ├── router/
│   │   └── index.js
│   │
│   ├── views/
│   │   ├── AboutView.vue
│   │   └── HomeView.vue
│   │
│   ├── App.vue
│   └── main.js
│
├── README.md
├── index.html
├── jsconfig.json
├── package.json
└── vite.config.js
In addition to the files and folders shown above, you can also find a .vscode/ folder with recommended Visual Studio Code extensions and a .gitignore file that contains some default files you may want to ignore when working with Git.
Step 5 Summary
The front_end/ folder will be the root folder for the front end part of your project. You’ll run all upcoming commands from within this directory or its subfolders.
Move into the front_end/ folder and install all dependencies for your Vue project:
$ cd front_end
$ npm install --include dev
added 30 packages, and audited 31 packages in 7s
...
found 0 vulnerabilities
Make sure to add the --include dev flag to the npm install command to also install development dependencies like Vite.
With your project structure in place and all dependencies installed, you can run the Vite development server:
$ npm run dev
> front_end@0.0.0 dev
> vite

  VITE v5.1.4  ready in 333 ms

  ➜  Local:   http://localhost:5173/
  ➜  Network: use --host to expose
  ➜  press h + enter to show help
By default, your Vite server runs on port 5173. If this port is already in use, then Vite looks for another port. In that case, you’ll get a message in the terminal output.
Note: If your Vite server runs on a different port, then you must adjust the URL you set for CORS_ALLOWED_ORIGINS in the settings.py of your Django project.
You now have your Django application running at http://localhost:8000 and your Vue application running at http://localhost:5173. Now visit http://localhost:5173 in your browser:

You should see the Vue splash page, which indicates that you’ve installed everything successfully. If you see the splash page, you’re ready to start creating some of your own views and components.
Get Your Code: Click here to download the free sample code that you’ll use to build a blog using Django, GraphQL, and Vue.
Step 6: Create Basic Views and Components
Now that you’ve got Vue up and running, you can start creating components. Components are the building blocks for your front end:
Components allow us to split the UI into independent and reusable pieces, and think about each piece in isolation. It’s common for an app to be organized into a tree of nested components. (Source)
The components you’ll create first are the views to see your Posts and Authors. The views are files that you’ll load with your routes later. Before you create your first views, there is a bit of clean up to do.
Remove Existing Views
The create-vue tool is helpful to create your project structure. It creates files that can give you a good starting point on how to create your own Vue project files. So you don’t confuse your new files with the existing ones, it’s a good idea to clean up the project first.
Note: While you clean up your Vue project and work on new files, the Vite server will throw some errors. You can ignore them for now. At the end of this step, you’ll have everything set up so the Vite server runs error-free again.
There are two default views in the src/views/ directory that you need to remove:
HomeView.vueAboutView.vue
Once you’ve deleted both files, you can stay in the same directory. The src/views/ directory is where you’ll create your views next.
Add Your Views
Your blog will have four views. Start with AuthorView.vue. This file is a Vue Single-File Component (SFC). SFCs contain HTML, JavaScript, and CSS blocks that bundle view, logic, and styling:
front_end/src/views/AuthorView.vue
<script setup>
import PostList from "../components/PostList.vue";
</script>

<template>
  <h2>Author</h2>
  <PostList />
</template>

<style scoped>
  h2 {
    color: red;
  }
</style>
You can order the blocks anyway you like. But commonly you start with the <script> block. Here, you import any components that your SFC uses. In this case, the PostList component that you’ll create later.
The HTML must be placed inside a <template> block. For the components that you want to render you use custom HTML tags.
The CSS inside <style> is scoped. That means any styling you define in a SFC will only affect elements in the same file. Even child components don’t inherit this styling by default.
Next, create the AllPostsView.vue file with the code below:
front_end/src/views/AllPostsView.vue
<script setup>
import PostList from "../components/PostList.vue";
</script>

<template>
  <h2>Recent Posts</h2>
  <PostList />
</template>

<style scoped>
  h2 {
    color: blue;
  }
</style>
Just like in AuthorView.vue you import PostList and render it in your HTML block. For now, AllPostsView looks similar to AuthorView, but you’ll adjust it later. To differentiate between views, you can change the headline and the headline’s color.
The third view is very similar again. Create PostsByTagView.vue inside the views/ folder and add the code below:
front_end/src/views/PostsByTagView.vue
<script setup>
import PostList from "../components/PostList.vue";
</script>

<template>
  <h2>Posts by Tag</h2>
  <PostList />
</template>

<style scoped>
  h2 {
    color: green;
  }
</style>
The last view you create is named PostView.vue. As the name suggests, this view will contain a single post of your blog:
front_end/src/views/PostView.vue
<script setup>
import AuthorLink from "../components/AuthorLink.vue";
</script>

<template>
  <h2>Post</h2>
  <AuthorLink />
</template>

<style scoped>
  h2 {
    color: orange;
  }
</style>
In this view, you import an AuthorLink component. Just like the components that you imported in the former views, this component doesn’t exist yet. Before you create this, it’s time for another small cleanup.
Remove Existing Components
If you navigate to the components/ folder inside your src/ folder, then you can see that there are some files and an icons/ folder present already. Go on and delete the icons/ folder with its contents, and these three files:
WelcomeItem.vueTheWelcome.vueHelloWorld.vue
With a clean components/ folder, you can go on and create the components you referenced in your views.
Create Your Components
In this section, you’ll create the two components that you need for your blog. Again, you’ll keep them basic for now and won’t add any special content to them just yet.
Start with the component that’ll display an author’s link later. To do so, create a file named AuthorLink.vue in the components/ folder:
front_end/src/components/AuthorLink.vue
<template>
  <h3>Author Link</h3>
</template>
For now, that’s all the code you need to verify that the component renders correctly. You’ll add more content to it later.
Next, create PostList.vue in the same folder:
front_end/src/components/PostList.vue
<script setup>
import AuthorLink from "./AuthorLink.vue";
</script>

<template>
  <h3>Posts List</h3>
  <AuthorLink />
</template>
In PostList, you also render AuthorLink. You can import components as building blocks wherever you need them.
Set Up Routes
If you’d visit http://localhost:5173 right now, you’d still get an error. At the moment, the Vite server still looks for the default views that Vue created during the scaffolding process.
To fix the wrong routes and set up routes to your new views, open the existing index.js file in src/router/. Replace the content with the code below:
front_end/src/router/index.js
import { createRouter, createWebHistory } from "vue-router";
import AuthorView from "../views/AuthorView.vue";
import AllPostsView from "../views/AllPostsView.vue";
import PostView from "../views/PostView.vue";
import PostsByTagView from "../views/PostsByTagView.vue";

const router = createRouter({
  history: createWebHistory(import.meta.env.BASE_URL),
  routes: [
    {
      path: "/",
      name: "posts",
      component: AllPostsView,
    },
    {
      path: "/author",
      name: "author",
      component: AuthorView,
    },
    {
      path: "/post",
      name: "post",
      component: PostView,
    },
    {
      path: "/tag",
      name: "tag",
      component: PostsByTagView,
    },
  ],
});

export default router;
Now that your routes point to existing views, all the errors in your Vite server output should be gone. To conveniently jump between the different pages, add the route links to the App.vue file.
The App.vue file is the base component that your Vue app looks for. You can find it prominently placed directly in the src/ folder.
Note: If you want to clean up your Vue project even more, then you can also remove the logo.svg file inside the src/assets/ folder at this point.
Open App.vue and replace the existing content with the content below:
front_end/src/App.vue
<script setup>
import { RouterLink, RouterView } from "vue-router";
</script>

<template>
  <header>
    <div class="wrapper">
      <h1>My Blog 🐾</h1>
      <nav>
        <RouterLink to="/">Posts</RouterLink>
        <RouterLink :to="{ name: 'author' }">Author</RouterLink>
        <RouterLink :to="{ name: 'post' }">Post</RouterLink>
        <RouterLink :to="{ name: 'tag' }">Tag</RouterLink>
      </nav>
    </div>
  </header>

  <RouterView />
</template>

<style scoped>
  h1 {
    text-align: center;
    font-weight: bold;
    margin-bottom: 1rem;
  }

  header {
    border-bottom: 1px solid #ccc;
    margin-bottom: 1rem;
  }

  nav {
    text-align: center;
    margin: 1rem 0;
  }

  nav a {
    padding: 0.5rem;
  }
</style>
You can reference Vue routes either by their path or their name. Later, you’ll remove the links here again because you’ll link to the routes from within your content. But for now, adding routes to the navigation is helpful to see if everything works.
Step 6 Summary
In this step, you cleaned up parts of your Vue project folders and created your own views and components. With all routes in place, you can open http://localhost:5173 in your browser and check out how your components render:
Perfect! Now that you’ve verified that you can access your views in the browser and that your components render correctly, you can move on and add more useful content to your components.
Get Your Code: Click here to download the free sample code that you’ll use to build a blog using Django, GraphQL, and Vue.
Step 7: Update the Vue Components
Your components will eventually display data from the GraphQL endpoint. At the moment, you’ll just make them display some static content. With the table below, you can verify that all your components are present:
| Folder | Filename |
|---|---|
src/ |
App.vue |
src/components/ |
AuthorLink.vue |
src/components/ |
PostList.vue |
src/views/ |
AllPostsView.vue |
src/views/ |
AuthorView.vue |
src/views/ |
PostView.vue |
src/views/ |
PostsByTagView.vue |
In the next sections, you’ll update your smaller components first and then continue with your view components. You’ll do the adjustments in this order:
AuthorLink: Provide a link to a given author’s page (used inPostandPostList).PostList: Render a given list of blog posts (used inAllPosts,Author, andPostsByTag).AllPostsView: Add a list of all posts.PostsByTagView:Add a list of posts associated with a given tag.AuthorView:Show information about an author and a list of posts they’ve written.PostView:Display the metadata and the content for a given post.App:Remove some links from the navigation.
You won’t work with dynamic data from the GraphQL API yet. But by implementing the main structure of each component you can focus on the GraphQL functionality later in the tutorial.
Link to the Author
The AuthorLink component should accept an author prop whose structure corresponds to the data about authors in your GraphQL API. Props are custom attributes that you can use in your component. The component should show the author’s first and last name if provided, or the author’s username otherwise.
Replace the existing content in the AuthorLink.vue file with the content below:
front_end/src/components/AuthorLink.vue
 1<script setup>
 2import { computed } from "vue";
 3import { RouterLink } from "vue-router";
 4
 5const props = defineProps(["author"]);
 6const firstName = props.author.user.firstName;
 7const lastName = props.author.user.lastName;
 8const displayName = computed(() => {
 9  if (firstName && lastName) {
10    return `${firstName} ${lastName}`;
11  } else {
12    return `${props.author.user.username}`;
13  }
14});
15</script>
16
17<template>
18  <RouterLink
19    :to="{ name: 'author', params: { username: author.user.username } }"
20  >
21    {{ displayName }}
22  </RouterLink>
23</template>
This component won’t work with GraphQL directly but with a passed in author object that other components provide. To be able to work with the author object, you define it as a prop in line 5 with defineProps().
The defineProps() function returns an object that you can store in a variable. That’s helpful when you want to access properties from within the <script> block like you do in lines 6 and 7, for example.
Note: You access props in your <template> block directly, without prefixing them with props.
In lines 18 to 22, you create a link to the author’s page. To let Vue do the linking, you work with the RouterLink component. The displayed name in line 21 is the value of a computed property.
Computed properties help you implement complex data into your <template> block. The displayName variable you define in line 8 will be either the first and last name or the username of an author.
Prep the Blog Posts List
You can define the props of a component with a list of strings. However, you can also finegrain the information of the provided props using object syntax. For the PostList component, you’ll use object syntax to declare more complex props.
The PostList component accepts a posts prop, whose structure corresponds to the data about posts in your GraphQL API. The component also accepts a Boolean showAuthor prop. In the end, the component should display the following features:
- The title of the post
- A link to the post’s page
- A link to the author of the post using
AuthorLinkifshowAuthoristrue
Open PostList.vue in the src/components/ directory and update the file with the highlighted content below:
front_end/src/components/PostList.vue
 1<script setup>
 2import AuthorLink from "./AuthorLink.vue";
 3import { RouterLink } from "vue-router";
 4
 5const props = defineProps({
 6  posts: {
 7    type: Array,
 8    required: true,
 9  },
10  showAuthor: {
11    type: Boolean,
12    required: false,
13    default: true,
14  },
15});
16</script>
17
18<template>
19  <ol class="post-list">
20    <li class="post" v-for="post in posts" :key="post.slug">
21      <RouterLink :to="{ name: 'post', params: { slug: post.slug } }">
22        {{ post.title }}
23      </RouterLink>
24      <span v-if="showAuthor"> by <AuthorLink :author="post.author" /> </span>
25    </li>
26  </ol>
27</template>
Giving more context to your props like you do in line 5 can help you and other developers to understand the intention of the provided props better.
In this component, you’ll receive a list of posts. You loop through them in line 20. When you use the v-for built-in Vue directive on an element, the element and its contents are rendered for every step of the loop.
In each step of the loop, you show the title as a link using RouterLink in lines 21 to 23. If the showAuthor prop is set to true, then you also display the AuthorLink component in line 24.
Render All Blog Posts
Now that you’ve got PostList sorted, you can move on to update AllPostsView. This component should display a list of all the posts on the blog.
Open AllPosts.vue component in the src/views/ directory and update it with the content below:
front_end/src/views/AllPostsView.vue
 1<script setup>
 2import PostList from "../components/PostList.vue";
 3
 4const { result, loading, error } = {
 5  error: { message: "No connection to the GraphQL API yet." },
 6};
 7</script>
 8
 9<template>
10  <h2>Recent Posts</h2>
11  <div v-if="loading">Loading...</div>
12  <div v-else-if="error" class="warn"></div>
13  <PostList v-else :posts="result.allPosts" />
14</template>
15
16<style scoped>
17  h2 {
18    color: blue;
19  }
20</style>
In line 4, you prepare the GraphQL API call, which you’ll implement later. You deconstruct the returned object into result, loading, and error using JavaScript’s destructuring assignment.
While you’re fetching the data from the API, loading will be true. Once you receive the data, it’ll be the value of result. If something goes wrong, then error will contain a message property with more information.
For now, you only define an error message in line 5. That means you won’t show a Loading indicator or the PostList component because both loading and result are undefined at the moment. Still, your <template> block is perfectly prepared to work with the data you’ll get in result.allPosts when you implement the GraphQL API call later.
Show Posts for a Given Tag
Next, update the PostsByTagView.vue file in the src/views/ directory to match the code below:
front_end/src/views/PostsByTagView.vue
 1<script setup>
 2import PostList from "../components/PostList.vue";
 3import { useRoute } from "vue-router";
 4
 5const route = useRoute();
 6const tag = route.params.tag;
 7const { result, loading, error } = {
 8  error: { message: "No connection to the GraphQL API yet." },
 9};
10</script>
11
12<template>
13  <div v-if="loading">Loading...</div>
14  <div v-else-if="error" class="warn">{{ error.message }}</div>
15  <section v-else :set="tagPosts = result.postsByTag">
16    <h2>Posts Tagged With "{{ tag }}"</h2>
17    <PostList v-if="tagPosts.length > 0" :posts="tagPosts" />
18    <p v-else>No posts found for this tag</p>
19  </section>
20</template>
21
22<style scoped>
23  h2 {
24    color: orange;
25  }
26</style>
The pattern in lines 7 to 9 is the same as in AllPostsView. For now, you’ll work with a placeholder error message and implement the GraphQL API call later.
Additionally, you grab the current tag name of the dynamically matched route in line 6. The tag variable definition will become handy later on when you filter the posts for this specific tag.
To make your life easier, you define the custom variable for your template in line 15. By using a bound attribute to set the tagPosts variable, you’ll save yourself a bit of typing later on. That way, you can use tagPosts in your template instead of result.postsByTag, which the API will return.
Show Information About an Author
The AuthorView component acts as an author’s profile page. It should display the following information:
- A heading with the author’s username
- A subheading with the author’s full name, if provided
- A link to the author’s website, if provided
- The author’s biography, if provided
- The list of posts by the author, with
showAuthorset tofalse
Update the AuthorView.vue file in src/views/ with the content below:
front_end/src/views/AuthorView.vue
 1<script setup>
 2import PostList from "../components/PostList.vue";
 3
 4const { result, loading, error } = {
 5  error: { message: "No connection to the GraphQL API yet." },
 6};
 7</script>
 8
 9<template>
10  <div v-if="loading">Loading...</div>
11  <div v-else-if="error">{{ error.message }}</div>
12  <section v-else :set="author = result.authorByUsername">
13    <h2>{{ author.user.username }}</h2>
14    <template v-if="author.user.firstName && author.user.lastName">
15      <h3>{{ author.user.firstName }} {{ author.user.lastName }}</h3>
16    </template>
17    <p v-if="author.bio">
18      {{ author.bio }}
19      <template v-if="author.website">
20        Learn more about {{ author.user.username }} on their
21        <a :href="author.website">website</a>.
22      </template>
23    </p>
24    <h3>Posts</h3>
25    <PostList
26      v-if="author.postSet"
27      :posts="author.postSet"
28      :showAuthor="false"
29    />
30    <p v-else>The author hasn't posted yet.</p>
31  </section>
32</template>
33
34<style scoped>
35  h2 {
36    color: red;
37  }
38</style>
Later, when you get the data from the GraphQL API, you’ll render the information you outline in lines 13 to 30:
- Line 13 shows the author’s username as a headline.
- Line 15 displays the author’s full name if their first name and last name are set.
- Line 17 checks if there is a biography present. If so, then you render the biography in line 18 and add an optional link to the website in line 21.
- Lines 25 to 29 render the
PostListcomponent if the author has posted. - Line 30 shows a fallback message if there are no blog posts.
With AuthorView updated, there are two components left. First, you’ll tackle PostView and, after that, the App.vue component.
Display a Single Blog Post
Just like the Post data model in your Django app, the PostView component is a bit more complex because it has the responsibility of displaying all the post’s information. The component should display the following information about the post:
- Title and subtitle, as a heading
- Author, as a link using
AuthorLink - Publication date
- Meta description
- Content body
- List of associated tags, as links
Update the PostView.vue file in the src/view/ directory with the highlighted content below:
front_end/src/views/PostView.vue
 1<script setup>
 2import AuthorLink from "../components/AuthorLink.vue";
 3
 4const dateFormatter = new Intl.DateTimeFormat("en-US", { dateStyle: "full" });
 5const displayableDate = (date) => dateFormatter.format(new Date(date));
 6const { result, loading, error } = {
 7  error: { message: "No connection to the GraphQL API yet." },
 8};
 9</script>
10
11<template>
12  <div v-if="loading">Loading...</div>
13  <div v-else-if="error" class="warn">{{ error.message }}</div>
14  <section v-else :set="post = result.postBySlug">
15    <h2>{{ post.title }}</h2>
16    <h3>{{ post.subtitle }}</h3>
17    <p>{{ post.metaDescription }}</p>
18    <aside>
19      Published on {{ displayableDate(post.publishDate) }}<br />
20      Written by <AuthorLink :author="post.author" />
21      <h4>Tags</h4>
22      <ul>
23        <li v-for="tag in post.tags" :key="tag.name">
24          <RouterLink :to="{ name: 'tag', params: { tag: tag.name } }">
25            {{ tag.name }}
26          </RouterLink>
27        </li>
28      </ul>
29    </aside>
30    <article>{{ post.body }}</article>
31  </section>
32</template>
33
34<!-- ... -->
When the post data is present, it’ll be saved in the result variable you define in line 6 and display the content inside the <template> block in lines 14 to 31.
In line 19, you pass the .publishDate of a post into displayableDate(), which you define in line 5. The publish date is saved as a datetime object in your database and won’t look good without some treatment. With the help of dateFormatter in line 4, you return a well-readable formatted date in the template.
In lines 23 to 27, you render the tags a blog post contains as dynamic links. Each link will point to the tag-specifc URL. So far, your routes don’t recognize additional params like the one you provide in line 24. So that’s a good reminder to tackle the App component and the routes next.
Adjust the Routes for the App
In the previous step, you added some links to your blog’s navigation to see if the views and components render. While updating the components in this step, you may have noticed that most of your links require additional parameters.
The only view that doesn’t require parameters is your AllPostsView. This is the only link you want to keep in your navigation. Open App.vue and remove the other links:
front_end/src/App.vue
 1<script setup>
 2import { RouterLink, RouterView } from "vue-router";
 3</script>
 4
 5<template>
 6  <header>
 7    <div class="wrapper">
 8      <h1>My Blog 🐾</h1>
 9      <nav>
10        <RouterLink to="/">Posts</RouterLink>
11        <!-- Remove the links to 'author', 'post', and 'tag' -->
12      </nav>
13    </div>
14  </header>
15
16  <RouterView />
17</template>
18
19<!-- ... -->
In line 11, you remove the RouterLink components for author, post, and tag. In the future, you may add an About page or other menu items into <nav>. For now, keep the menu basic by just showing Posts.
In your index.js file you’re still referencing routes without any parameters. Update router/index.js with the route parameters you added in your components:
front_end/src/routes/index.js
 1import { createRouter, createWebHistory } from "vue-router";
 2import AuthorView from "../views/AuthorView.vue";
 3import AllPostsView from "../views/AllPostsView.vue";
 4import PostView from "../views/PostView.vue";
 5import PostsByTagView from "../views/PostsByTagView.vue";
 6
 7const router = createRouter({
 8  history: createWebHistory(import.meta.env.BASE_URL),
 9  routes: [
10    {
11      path: "/",
12      name: "posts",
13      component: AllPostsView,
14    },
15    {
16      path: "/author/:username",
17      name: "author",
18      component: AuthorView,
19    },
20    {
21      path: "/post/:slug",
22      name: "post",
23      component: PostView,
24    },
25    {
26      path: "/tag/:tag",
27      name: "tag",
28      component: PostsByTagView,
29    },
30  ],
31});
32
33export default router;
In lines 16, 21, and 26, you adjust the path values to accept the route params you used when rendering the RouterLink components. Make sure not to forget the colon (:) in front of the param substring.
Step 7 Summary
If you haven’t used Vue much before, this step might have been a lot to digest. You’ve reached an important milestone, though. You have a working Vue application, complete with dynamic routes and templates that are ready to work with the content the GraphQL API will provide soon.
You can confirm your application is working by starting the Vite server and visiting http://localhost:5173:
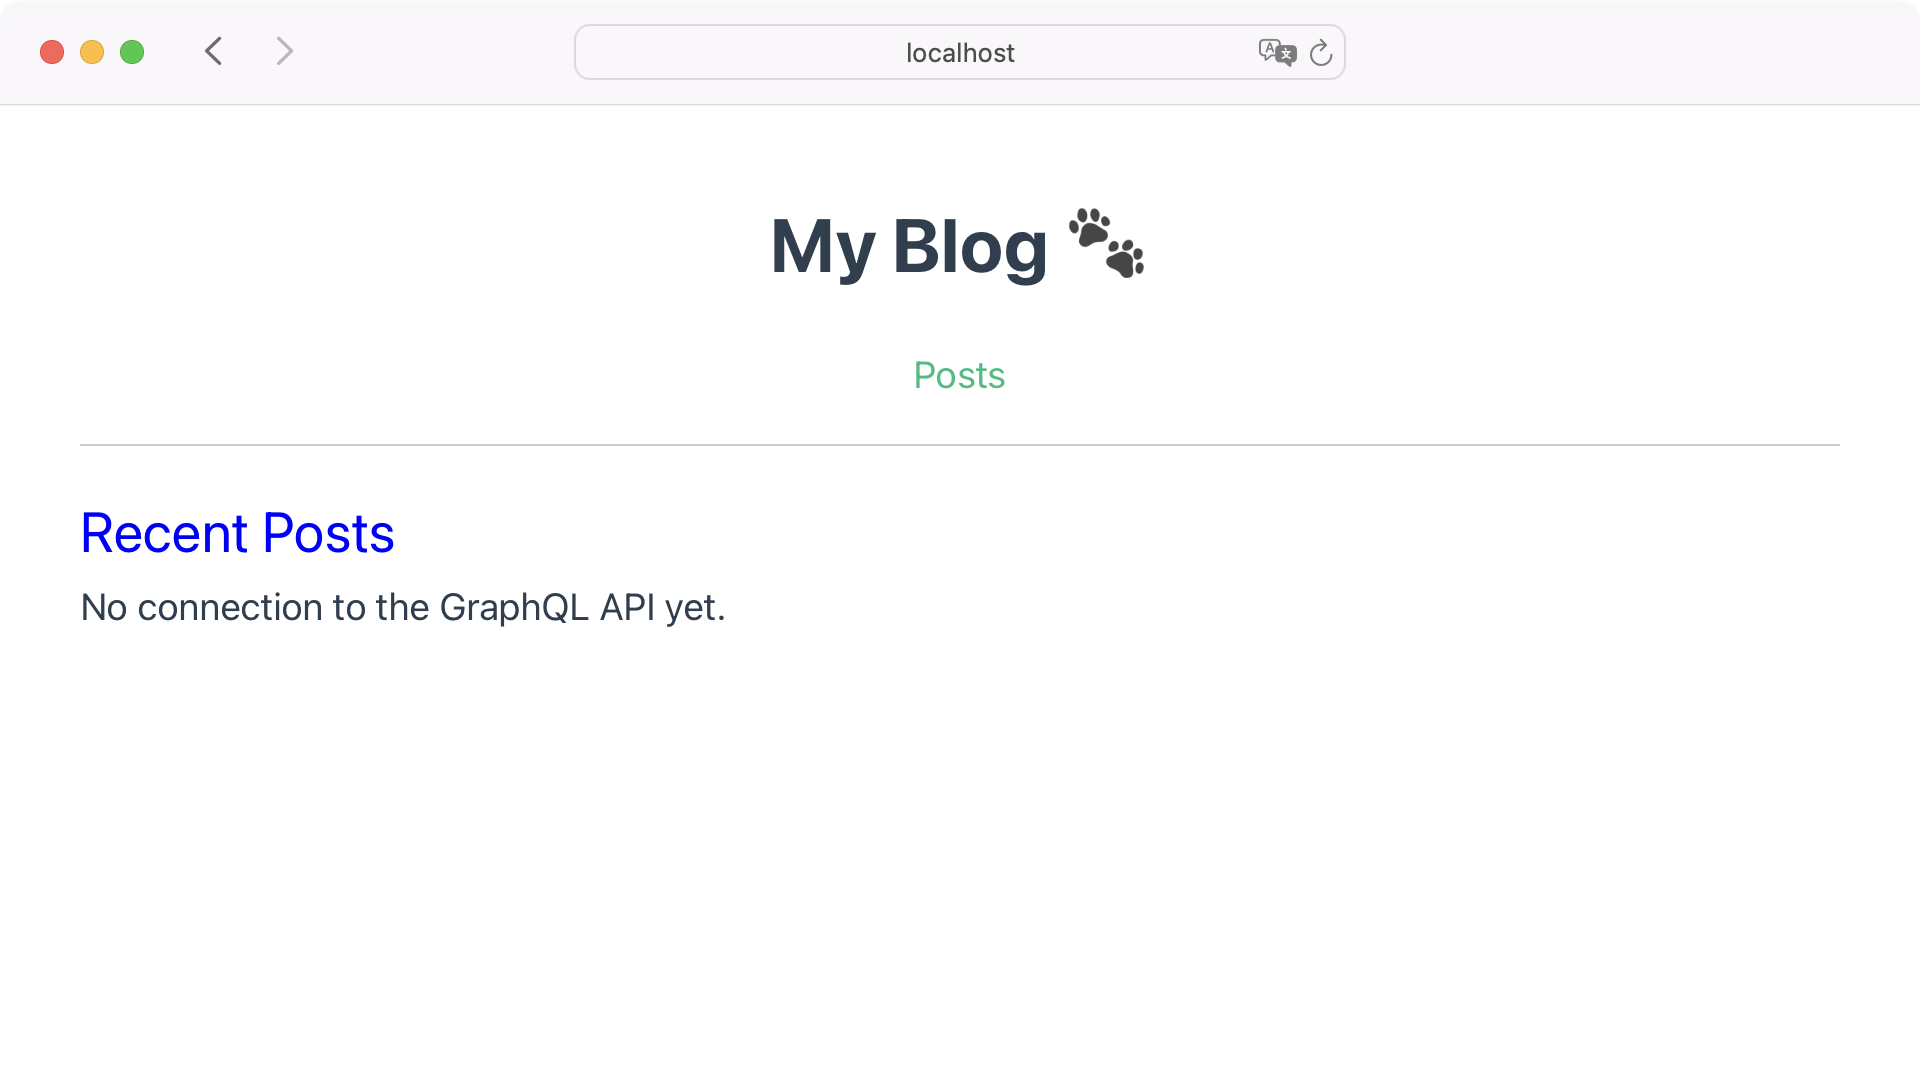
You should see the Posts link and the Recent Posts heading. If you do, then you’re ready to take on the final step, where you’ll use Apollo to query your GraphQL API to bring the front end and back end together.
Get Your Code: Click here to download the free sample code that you’ll use to build a blog using Django, GraphQL, and Vue.
Step 8: Implement Vue Apollo
To make querying the GraphQL API more convenient, you’ll use the Vue Apollo client. To integrate Vue Apollo into your project you need to install the Vue Apollo packages.
Install Vue Apollo
To conveniently work with Apollo in your Vue project, you need the Vue Apollo client and the apollo-composable package. Additionally, you’ll install GraphQL.js and graphql-tag to help you write the GraphQL API queries.
Open a terminal window in the front_end/ folder and install the packages with this command:
$ npm install graphql graphql-tag @apollo/client @vue/apollo-composable

added 27 packages, and audited 50 packages in 6s
...
found 0 vulnerabilities
With all packages installed, you need to make a few adjustments before you can work with the GraphQL queries in your components.
Configure Vue Apollo
Vue Apollo is mostly configured out of the box, but you’ll need to tell it the right endpoint to query. Also, you want the Apollo Client to do some caching. Open main.js in the src/ folder and add your Apollo Client configuration to the file:
front_end/src/main.js
import "./assets/main.css";

import { createApp } from "vue";
import App from "./App.vue";
import router from "./router";
import {
  ApolloClient,
  createHttpLink,
  InMemoryCache,
} from "@apollo/client/core";

const httpLink = createHttpLink({
  uri: "http://localhost:8000/graphql",
});

const cache = new InMemoryCache();

const apolloClient = new ApolloClient({
  link: httpLink,
  cache,
});

const app = createApp(App);

app.use(router);

app.mount("#app");
With these lines of code, you’re telling the Apollo Client where to find the GraphQL API. Also, you set the cache to InMemoryCache(). This allows you to retrieve data without redundant network requests if the data hasn’t changed.
Next, you need to initiate your Vue app with the Apollo Client using the Apollo Composable package. Stay in main.js and update the highlighted lines:
front_end/src/main.js
 1import "./assets/main.css";
 2
 3import { createApp, provide, h } from "vue";
 4import App from "./App.vue";
 5import router from "./router";
 6import {
 7  ApolloClient,
 8  createHttpLink,
 9  InMemoryCache,
10} from "@apollo/client/core";
11import { DefaultApolloClient } from "@vue/apollo-composable";
12
13const httpLink = createHttpLink({
14  uri: "http://localhost:8000/graphql",
15});
16
17const cache = new InMemoryCache();
18
19const apolloClient = new ApolloClient({
20  link: httpLink,
21  cache,
22});
23
24const app = createApp({
25  setup() {
26    provide(DefaultApolloClient, apolloClient);
27  },
28
29  render: () => h(App),
30});
31
32app.use(router);
33
34app.mount("#app");
The provide() function you import in line 3 allows a component to provide data or methods to all its descendant components. This is particularly useful for deeply nested components or when you want to share common functionality across many components. The perfect example of this mechanism is the DefaultApolloClient you import in line 11. Passing DefaultApolloClient to provide() in line 26 makes the Apollo client available in all your components.
In line 3, you also import h(). Vue uses the h() render function to create Virtual DOM elements. The Virtual DOM is a lightweight copy of the Document Object Model (DOM). In line 29, you tell Vue to use the h() function to create a Virtual DOM representation of the App component and mount it as the root of your application.
Step 8 Summary
In this step, you installed additional plugins such as Vue Apollo and you configured the Apollo Client to be able to work with your back end.
When you check out your front end in the browser at http://localhost:5173, there are no changes on the surface. But that also means there are no errors and you configured the Apollo Client successfully.
Note: If the npm run dev command doesn’t work properly for you at this point, you can try reinstalling your packages with npm install --include dev.
Your Vue application is now ready to work with the GraphQL API. It’s time to get the back end into the picture again!
Get Your Code: Click here to download the free sample code that you’ll use to build a blog using Django, GraphQL, and Vue.
Step 9: Fetch the Data
Now that you’ve got everything prepped for displaying data when it’s available, it’s time to fetch that data from your GraphQL API.
In this last step of the tutorial, you’ll add the GraphQL queries to populate your pages. Before you continue, make sure that your Django development server is running in a separate terminal window:
(venv) $ python manage.py runserver
At this point, both the Vite server and the Django development server should be running in two separate terminal windows.
Note: While you update your components, you may see a “Load failed” error message on your blog’s pages. Once you’ve updated all components, this error should be gone.
If you’re unsure about the query structure, then you can leverage the GraphiQL platform at http://localhost:8000/graphql to test your queries before you use them in your components.
AllPostsView Query
The query for AllPostsView should only return the set of information that you render in your template. That means you only need your post’s title, the slug, and information about the author:
src/views/AllPostsView.vue
 1<script setup>
 2import PostList from "../components/PostList.vue";
 3import { useQuery } from "@vue/apollo-composable";
 4import gql from "graphql-tag";
 5
 6const { result, loading, error } = useQuery(gql`
 7  query {
 8    allPosts {
 9      title
10      slug
11      author {
12        user {
13          username
14          firstName
15          lastName
16        }
17      }
18    }
19  }
20`);
21</script>
22
23<!-- ... -->
In line 3, you’re importing useQuery(), which lets you execute a query and reactively track its result. The gql that you import in line 4 helps you to parse your GraphQL query string into a query document that useQuery() can understand and work with.
You define the GraphQL query in lines 7 to 19 within the gql template literal. The content is the same string that you’d use on the GraphiQL platform. Here, you request only the specific set of data that you need in your template.
When you call useQuery() with your GraphQL query, it returns an object containing three properties:
result, which will be populated with the result of your query once it has successfully completedloading, which istruewhile the query is in progresserror, which will contain details if there is an issue with the API request
These three properties enable you to control when you display specific information to the user. You already prepared your template to work with the properties, so you can keep the content in <template> as it is and move on to the next component.
PostView Query
The query for an individual post must accept the slug of the desired post. It should return all the necessary pieces of information to display the post information and content. Consequently, the code to make the query work is a bit more complex.
Update your PostView component with the highlighted code below:
src/views/PostView.vue
 1<script setup>
 2import AuthorLink from "../components/AuthorLink.vue";
 3import { useRoute } from "vue-router";
 4import { useQuery } from "@vue/apollo-composable";
 5import gql from "graphql-tag";
 6
 7const dateFormatter = new Intl.DateTimeFormat("en-US", { dateStyle: "full" });
 8const displayableDate = (date) => dateFormatter.format(new Date(date));
 9const route = useRoute();
10const slug = route.params.slug;
11const { result, loading, error } = useQuery(gql`
12  query {
13    postBySlug(
14      slug: "${slug}"
15    ) {
16        title
17        subtitle
18        publishDate
19        published
20        metaDescription
21        slug
22        body
23        author {
24          user {
25            username
26            firstName
27            lastName
28          }
29        }
30        tags {
31          name
32        }
33    }
34  }
35`);
36</script>
37
38<!-- ... -->
This query pulls in most of the data about the post and its associated author and tags. This time, you’ll need to do a bit of extra work.
In lines 9 and 10, you define route and grab the slug from your route’s parameters. Then, you use the slug for your query in line 14.
AuthorView Query
In the query for PostView, you fetched the single post’s data and some nested data about the author. In the AuthorView query, you’ll need to fetch the author data and the list of all the posts by the author.
The author query accepts the username of the desired author and should return all the necessary pieces of information to display the author and their list of posts. It should look like the following:
src/views/AuthorView.vue
<script setup>
import PostList from "../components/PostList.vue";
import { useRoute } from "vue-router";
import { useQuery } from "@vue/apollo-composable";
import gql from "graphql-tag";

const route = useRoute();
const username = route.params.username;
const { result, loading, error } = useQuery(gql`
  query {
    authorByUsername(
      username: "${username}"
    ) {
        website
        bio
        user {
          firstName
          lastName
          username
        }
        postSet {
          title
          slug
        }
      }
  }
`);
</script>

<!-- ... -->
This query uses postSet, which might look familiar if you’ve done some Django data modeling before. The name “post set” comes from the reverse relationship Django creates for a ForeignKey field. In this case, the post has a foreign key relationship to its author, which has a reverse relationship with the post called post_set. Graphene-Django has automatically exposed this as postSet in the GraphQL API.
PostsByTagView Query
The query for PostsByTagView is pretty similar to query in AllPostsView. The important difference is that the query in PostsByTagView requires the desired tag and returns the list of matching posts.
Open PostsByTagView.vue and adjust the file with the highlighted code below:
src/views/PostsByTagView.vue
<script setup>
import PostList from "../components/PostList.vue";
import { useRoute } from "vue-router";
import { useQuery } from "@vue/apollo-composable";
import gql from "graphql-tag";

const route = useRoute();
const tag = route.params.tag;
const { result, loading, error } = useQuery(gql`
  query {
    postsByTag(
      tag: "${tag}"
    ) {
        title
        slug
        author {
          user {
            username
            firstName
            lastName
          }
        }
      }
    }
`);
</script>

<!-- ... -->
You might notice that some pieces of each query look quite similar to one another. Although it won’t be covered in this tutorial, you can use GraphQL fragments to reduce duplication in your query code.
Step 9 Summary
Now that each component is fetching the data it needs to display, you’ve arrived at a functioning blog. Run the Django development server and the Vue development server. Visit http://localhost:5173 and browse through your blog:
Congratulations! You started by creating a Django blog back end to administer, persist, and serve the data for a blog. Then you created a Vue front end to consume and display that data. You made the two communicate with GraphQL using Graphene and Apollo. Well done!
Next Steps
You may already be wondering what you can do next. To further validate that your blog is working as expected, you could try the following:
- Add additional pages like an About page to the navigation menu of your blog.
- Create overview pages where you display all authors and tags.
- Make some posts unpublished to confirm that they don’t show up on the blog.
If you’re feeling confident and adventurous with what you have going, you can also take this system of yours even further:
- Expand your data model to create new behavior in your Django blog.
- Create new queries to provide interesting views on your blog’s data.
- Explore GraphQL mutations to write data in addition to reading it.
- Add CSS to your single-file components to make the blog more eye-catching.
The data modeling and component architecture you’ve put together is remarkably extensible, so take it as far as you like!
Conclusion
You’ve seen how you can use GraphQL for building typed, flexible views of your data. You can use these same techniques on an existing Django application you’ve built or one you plan to build. Like other APIs, you can use yours in most any client-side framework as well.
In this tutorial, you learned how to:
- Build the Django blog data model and admin interface
- Wrap your data model in a GraphQL API using Graphene-Django
- Create and route to separate Vue components for each view of the data
- Query the GraphQL API dynamically to populate your Vue components using Apollo
You covered a lot of ground, so try to identify some new ways to use these concepts in different contexts to solidify your learning. Happy coding, and happy blogging!
You can download the complete source code for this project by clicking the link below:
Get Your Code: Click here to download the free sample code that you’ll use to build a blog using Django, GraphQL, and Vue.


