.jpg?q=50&fit=contain&w=1140&h=&dpr=1.5)
There are several power plans within Windows 11 to help you manage the power consumption of your device. These mainly help you manage your overall system performance and conserve battery life. By default, Windows 11 offers three Power modes including Balanced, Best Power Efficiency, and Best Performance.
In addition to that, you can also tweak Windows 11 so that it saves power and doesn't waste it on needless things. Fortunately, none of these methods are difficult to sort out. Below are listed the most efficient ways of optimizing the Power settings on your Windows 11 device in detail.
1. Disable Background Apps
Generally, Windows is quite good at handling and optimizing the background processes of applications in order to improve battery life, but they can still drain the battery and consume data even when they are not actively being used. This is why disabling the background applications should be your first step when optimizing the Power Settings.
Before proceeding, however, ask yourself how essential it is to you that certain applications stay synced. In the case that you frequently use them during work, disabling them might reduce your productivity.
Other than that, disabling the background applications is quite safe.
Here is all that you need to do:
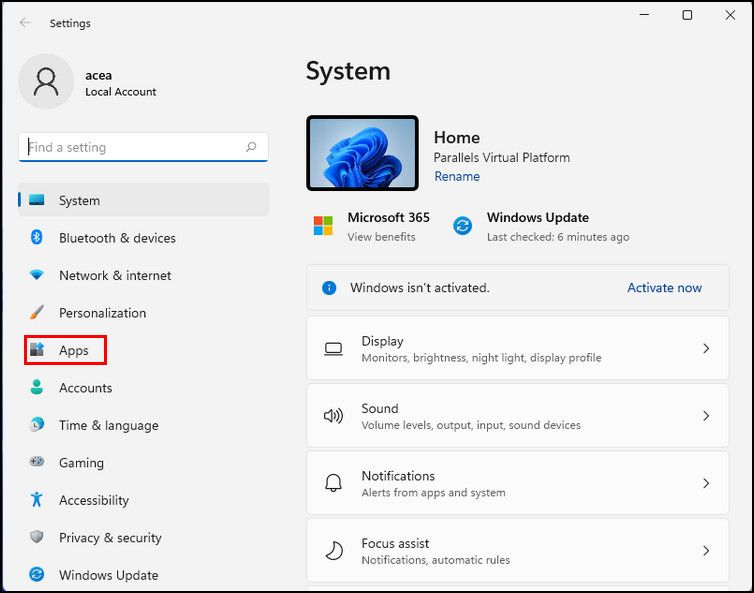
- Press Win + I to open the Windows Settings.
-
Inside the Settings window, select Apps from the left pane.
-
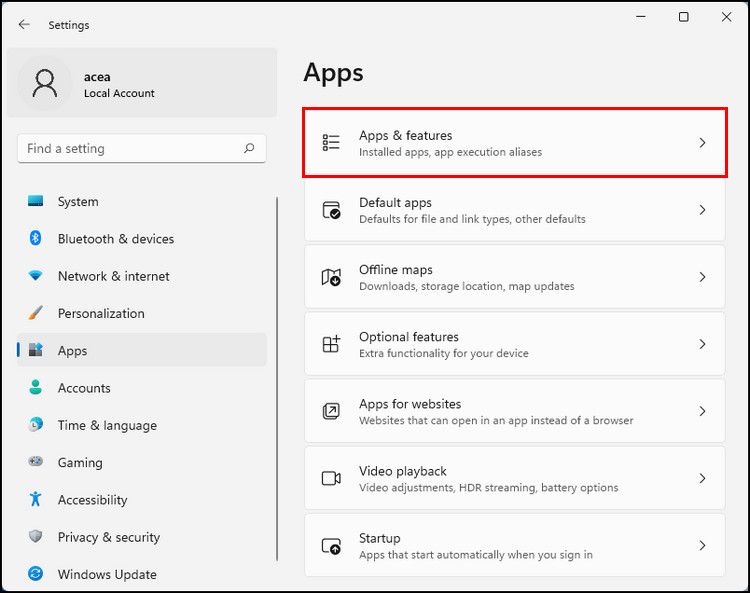
Then, click on Apps & features on the right side of the window. You will be presented with a list of all the applications installed on your Windows computer.
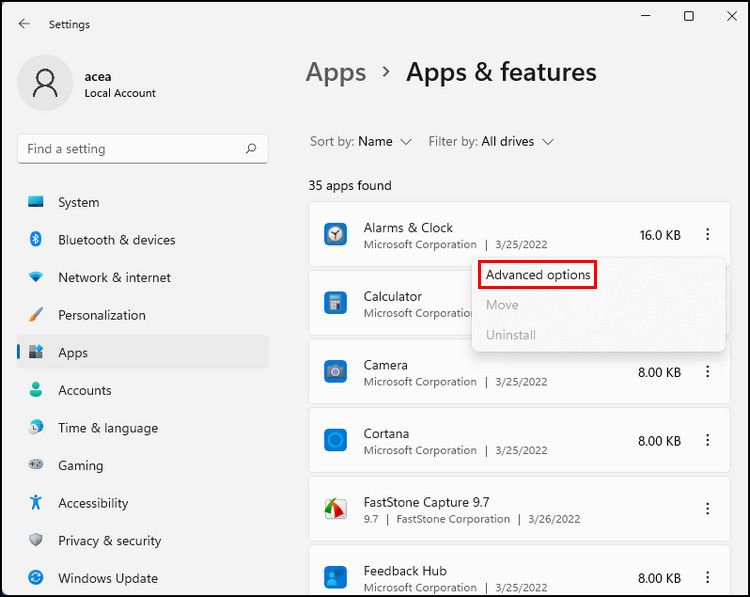
- Locate the application whose background permissions you wish to change and click on the three-dots menu associated with it.
-
Choose Advanced options from the context menu.
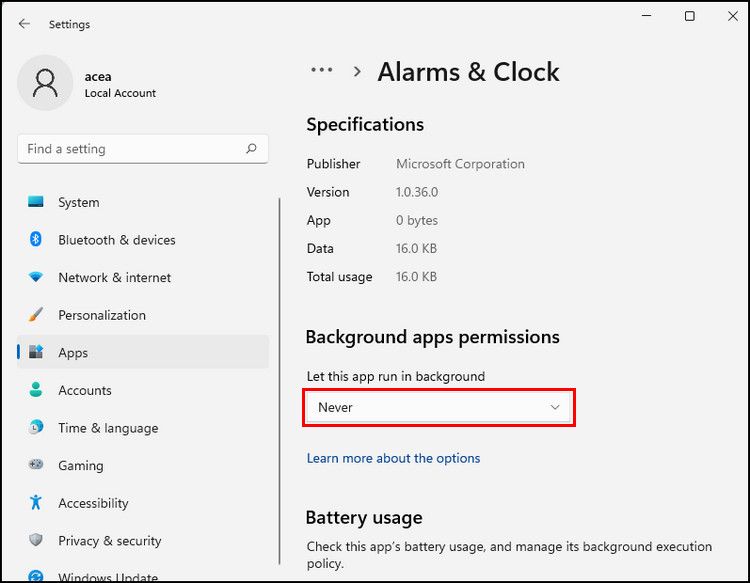
- In the Advanced options window, expand the Background apps permissions menu.
-
Select Never from the context menu and close Windows Settings.


You can do the same for all the applications that you do not want to run in the background. Moreover, Windows also allows you to disable the background apps for all users via the Registry Editor.
2. Debloat Windows 11
Debloating is exactly what it sounds like - removing apps and services you no longer require or are intrusive. Typically, these are the programs that come pre-installed with Windows and make it run less efficiently than it should.
In this method, we will first view a list of all the preloaded applications on the Windows operating system, and then uninstall the ones not needed.
Here is all that you need to do:
-
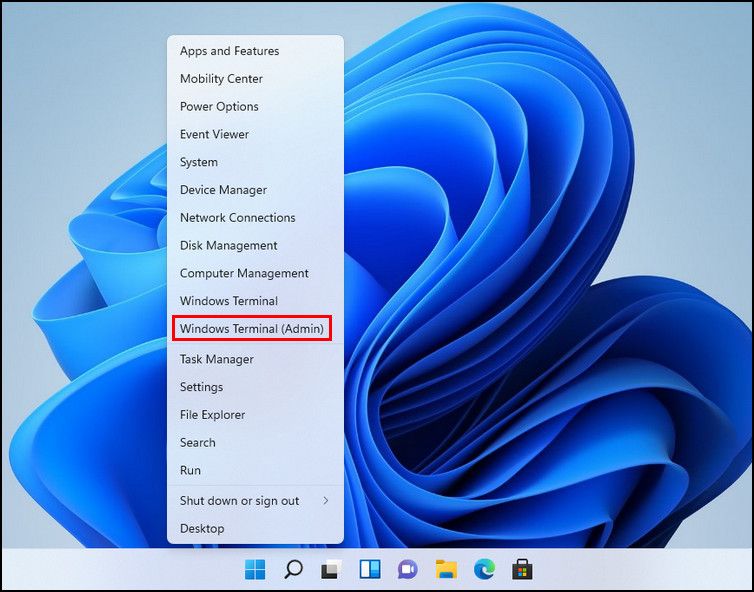
Right-click on the Windows icon on your taskbar and click on Windows Powershell (Admin) from the list of options available.
- Click Yes in the Confirmation Prompt that pops up on your screen.
-
Once you are inside the Powershell window, type the command mentioned below and click Enter.
Get-AppxPackage | Select Name, PackageFullName.jpg)
-
In case you want to find a list of applications for a specific account, execute the command below. Replace the username with the name of your targeted account.
Get-AppXPackage -User <username> | Select Name, PackageFullName.jpg)
-
Now that you know which applications are installed on your computer, it is time to remove the ones you do not need. For that, execute the command mentioned below in the same Powershell window. Replace <AppName> with the name of the application you want to remove.
Get-AppxPackage <AppName> | Remove-AppxPackage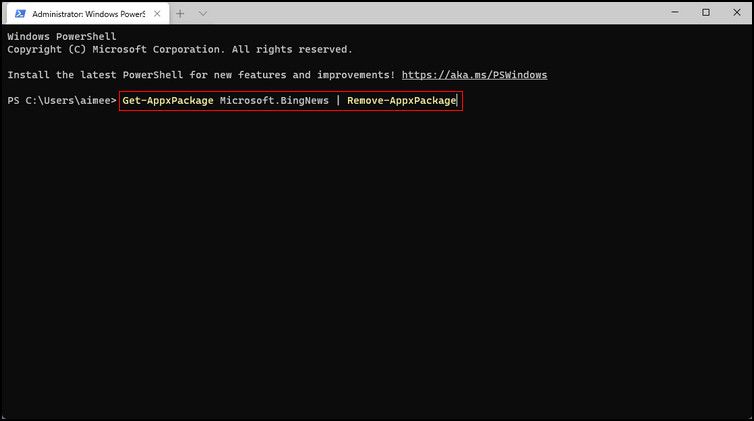
-
If you want to uninstall an application from a specific user account, execute the command below. Replace <username> and <AppName> with the name of the user account and the application respectively.
Get-AppxPackage -user <username><AppName> | Remove-AppxPackage.jpg)
-
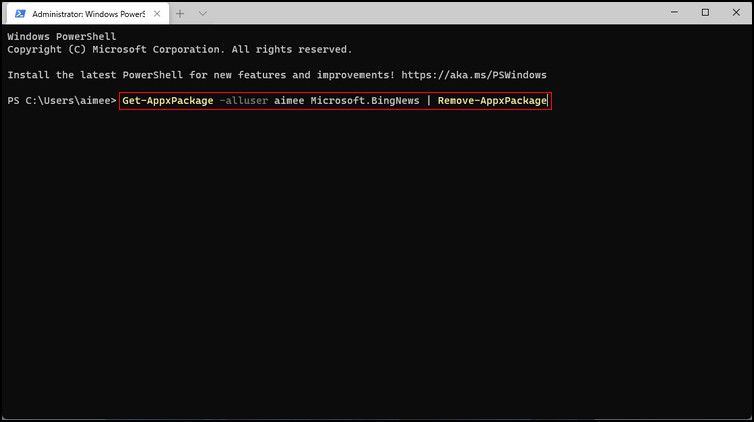
Execute the following command to uninstall an app from all user accounts. Get-AppxPackage -alluser <username><AppName> | Remove-AppxPackage

.jpg?q=50&fit=crop&w=1500&dpr=1.5)
.jpg?q=50&fit=crop&w=1500&dpr=1.5)

.jpg?q=50&fit=crop&w=1500&dpr=1.5)

3. Defragment the Hard Disk
The data on your hard disk scatters over your storage drive over time. It's like a closet with all your clothes, but none of them are in the right place.
When you delete files, uninstall programs, and install new ones irregularly, you create gaps in your storage structure, which is referred to as fragmentation.
To fix this issue and improve the performance of your PC, you can perform defragmentation, which is a process of rearranging files on your hard drive for easy and quick access. It is one of the key factors in PC performance.
Here is how you can defragment your hard disk you optimize the performance of your Windows 11 PC:
- Press Win + I to open Windows Settings.
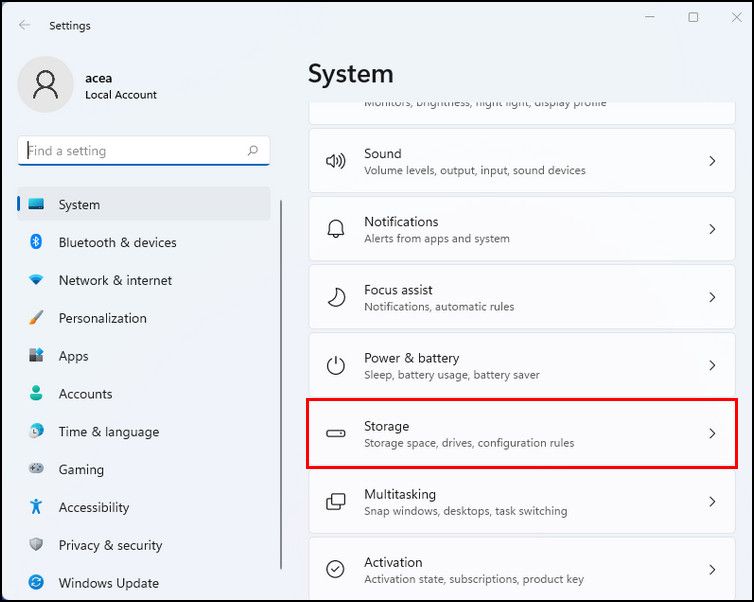
- Inside the Settings window, select System from the left pane.
-
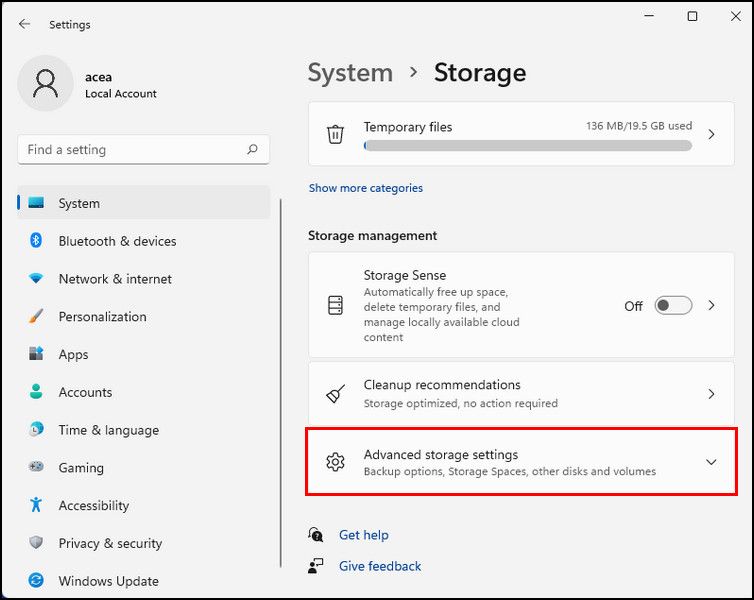
Then, click on Storage on the right side of the window.
-
In the Storage window, scroll down and click on Advanced storage settings.
- Select Drive optimization from the list of options available. This should launch an Optimize Drives dialog when you can view the current status of fragmentation of your disks.
-
Select the drive you need to optimize and click on the Analyze button. This will help you check if the disk you have selected needs defragmentation.
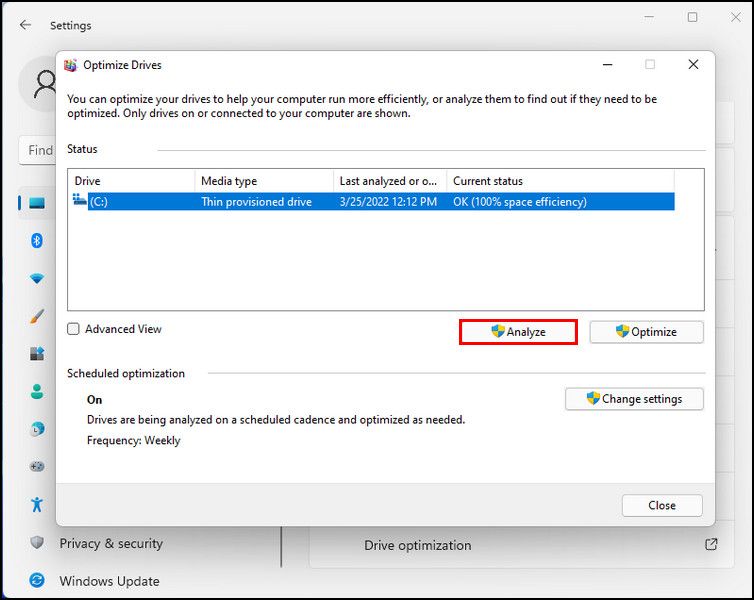
- If after the scan the Current Status column displays OK next to your targeted drive, your drive does not require defragmentation at this time.
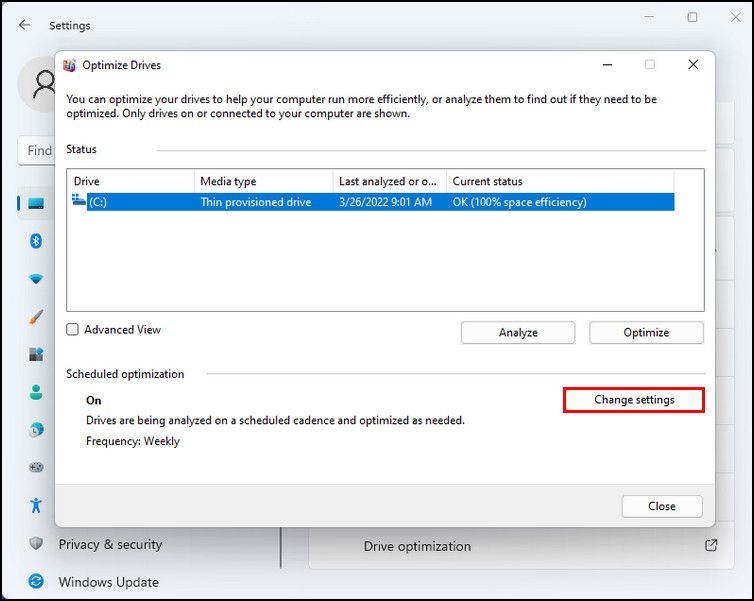
-
To defragment your drive manually, click on the Optimize button. However, if you want to let Windows do its job, click on the Change settings button under Scheduled optimization. If this setting is not enabled already, click on the Turn on button. Then, choose Change settings.
- Next, checkmark the box associated with Run on a schedule.
- Expand the dropdown menu for Frequency and choose your preferred option.
-
Now checkmark the box associated with Increase task priority, if three consecutive scheduled runs are missed.
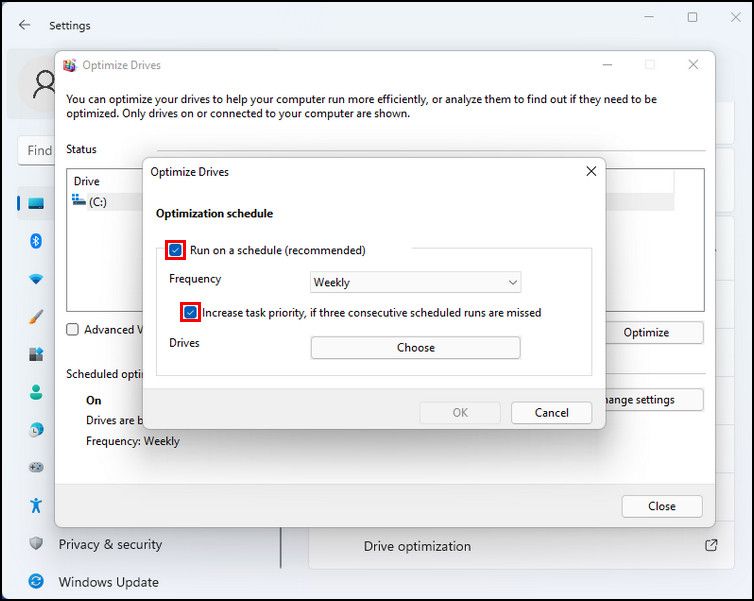
- Once done, click on the Choose button to select the drives you want to defragment. You can select the Select All option if you want to defragment all the drives.
-
Checkmark the box associated with Automatically optimize new drives.

- Finally, click OK to save the changes.


Your drives will now be automatically defragmented according to the schedule you chose.
4. Choose a Different Power Mode
Lastly, we will switch to a power mode, which is a setting specifically developed to manage the power settings of a device. With Windows 11, you get to choose between three power modes which are as follows:
- Balanced: This mode changes your CPU’s speed as needed. For instance, if you are performing a complex task, it will automatically increase the speed. Similarly, it will decrease it when you switch to relatively less intensive tasks. Windows recommends this power mode.
- Best Power Efficiency: As its name suggests, this mode helps you conserve power by reducing the CPU speed, regardless of the task you are performing. When enabled, it reduces the brightness as well.
- Best Performance: This mode increases the overall speed of your CPU while improving the overall performance of other computer components.
Here is how you can choose a power mode on Windows 11:
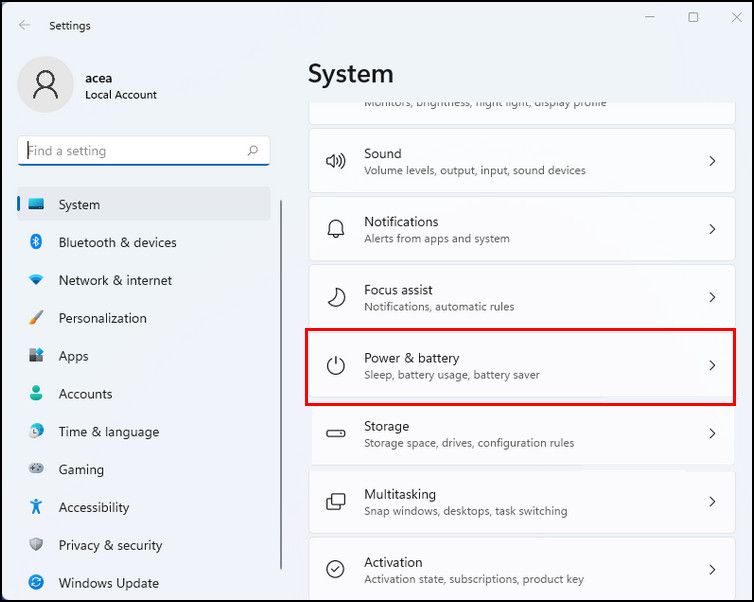
- Launch Windows Settings and select System from the left pane.
-
Choose Power & battery on the right side of the window.
-
Expand Power mode and choose one of the three options according to your preferences.
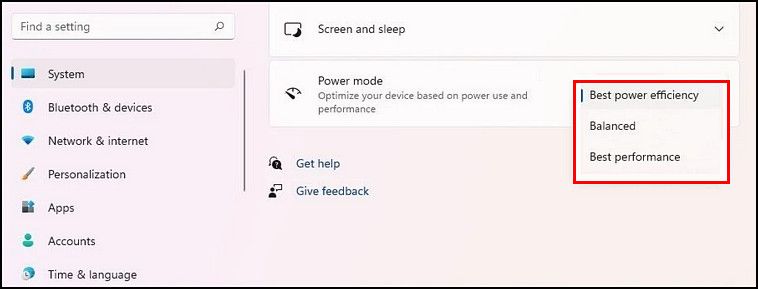
- Once done, close Windows Settings.


Enjoy a Longer Battery Life on Windows 11
Hopefully, you will now be able to manage how your Windows 11 device uses power. This will help your device (especially if it's a laptop) run efficiently and even play a role in the longevity of your battery. Moreover, if you are using Windows 11 on a laptop, you can also try setting a battery charge threshold to extend your battery life.