How to Version Control your Django project
In the previous post, we have gone through the process of setting up a basic Django project. In this post, we will be talking about version control and the best practices when it comes to Django projects.
TL;DR use the following .gitignore.
I'm not going to be teaching you git in this post. I'm going to assume that you have git installed on your computer and you have a Github account. If you haven't worked with git before I recommend you check out this post, it helped me when I was learning, but really there are a ton of other awesome posts.
However, that said, this post is aimed toward beginners when it comes to version controlling Django projects.
Why?
Why is it important to dedicate an entire post on how to version control your Django project?
When I was starting out I was just doing stuff and not using tutorials. I was silly, unlike you! I ended up putting secret information to the public. For example, I was using AWS to host images, and accidentally put my secret key on Github. I was contacted by the Amazon team and was told to delete it and immediately create a new one so that some bad actors would use it maliciously. I almost sh*t my pants. I don't want this to happen to you!
Another important point is that eventually (in the next post) we are going to be creating a SQLite database and storing user information on it. We don't want to expose that either.
So, now that you understand the importance of good practices when it comes to version control we can begin.
The good news is that it actually is not so hard.
Beginning of History
After you finished the previous post, you should have a functional code. Make sure everything works by running poetry run python manage.py runserver.
Let's start by creating a repo for your project on Github. If you head over to https://github.com/new you will be prompted for some info.
Give your repo a name and press "Create repository". No need to change anything else.
Tip: use kebab case for the name: something-like-that.
Once you've done that you will see a convenient list of instructions on Github:

We don't need the first line, since we already have some files.
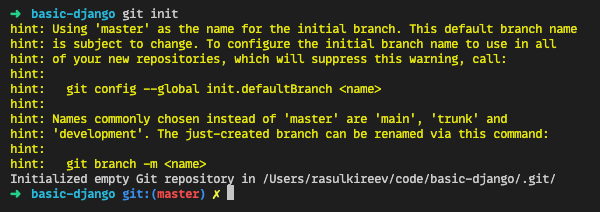
We do however need to run git init in our terminal (hopefully in an integrated VS Code terminal) to start the version control history. Once you run git init you should see a couple of changes.
First is the terminal itself will show the branch you are on:
Second is the File Explorer, all files should have turned green meaning that they are new files in our repo, they haven't appeared before in our history. If files had existed but were changed, they would have turned yellow.

Ignoring secrets
Awesome! Now, before adding all our files to our repo history let's create a .gitignore file in which we will list all the files and folders that we don't want to end up in the history.
So, create .gitignore file at the root of your project. Copy the content from the following gist and paste it into the .gitignore file. Now files and folders that match the Regex in .gitignore, will not be version controlled.
You should care about most of them. Here are the important ones:
-
.env. We will be storing our secrets in this file, so we don't want them to end up on Github. -
*.sqlite3. We don't want any database to end up on Github either. -
node_modules/this is where all Javascript packages will be stored, once we get there.node_modules/are notoriously large directories, so we don't want them to be on Github as they will slow up all actions immensely. -
media/when we are going to work locally, some images that we will upload into our database will end up in the media folder. Since Github has some rules regarding how much space you can take, we don't want any images to end up there, as they tend to be heavy. -
other than that you shouldn't worry too much about other things, at least for now.
Final Steps
Now we can run other commands provided by Github. In your terminal run:
git add --allto add all the files (except the ones in.gitignore) to version control history.git commit -m "first commit", to "commit" the changes.git branch -M mainto rename the main branch. New standard.git remote add origin git@github.com:{your username}/{your project name}.git. Use the command provided by Github.- Finally, run
git push -u origin main
If you didn't run into any issues, then you can try reloading the Github page and seeing if the files have been added to the repo.
If all is good, then congratulations.
Conclusion
In this post, we have created a repo and committed our files to it. This will help us keep track of our code in future posts.