

How to Perform Load, Performance Testing Using the Gatling Recorder?
Beginner's Guide: Running Load, Performance Testing Using Gatling Recorder


Gatling, a powerful Load testing tool, offers a built-in feature called the Gatling Recorder, which allows you to record user journeys for performance testing. In this guide, we'll walk through the steps of using the Gatling Recorder to create Performance testing scripts.
1. Understanding Recording Modes
Gatling Recorder offers two recording modes:

1.1 HTTP Proxy Mode:
- Captures all traffic from your browser via a proxy.
1.2 HAR Converter:
- Converts an HTTP Archive (HAR) file, providing more control and less overhead in recording setup.
Choose the mode that best suits your needs or preferences.
Note:- Here we are using the 1.2 option which is the HAR Converter mode of Recording.
2. Generating the HAR File
To begin, we'll generate a HAR file of our user journey in Google Chrome:
Navigate to the website you want to test.
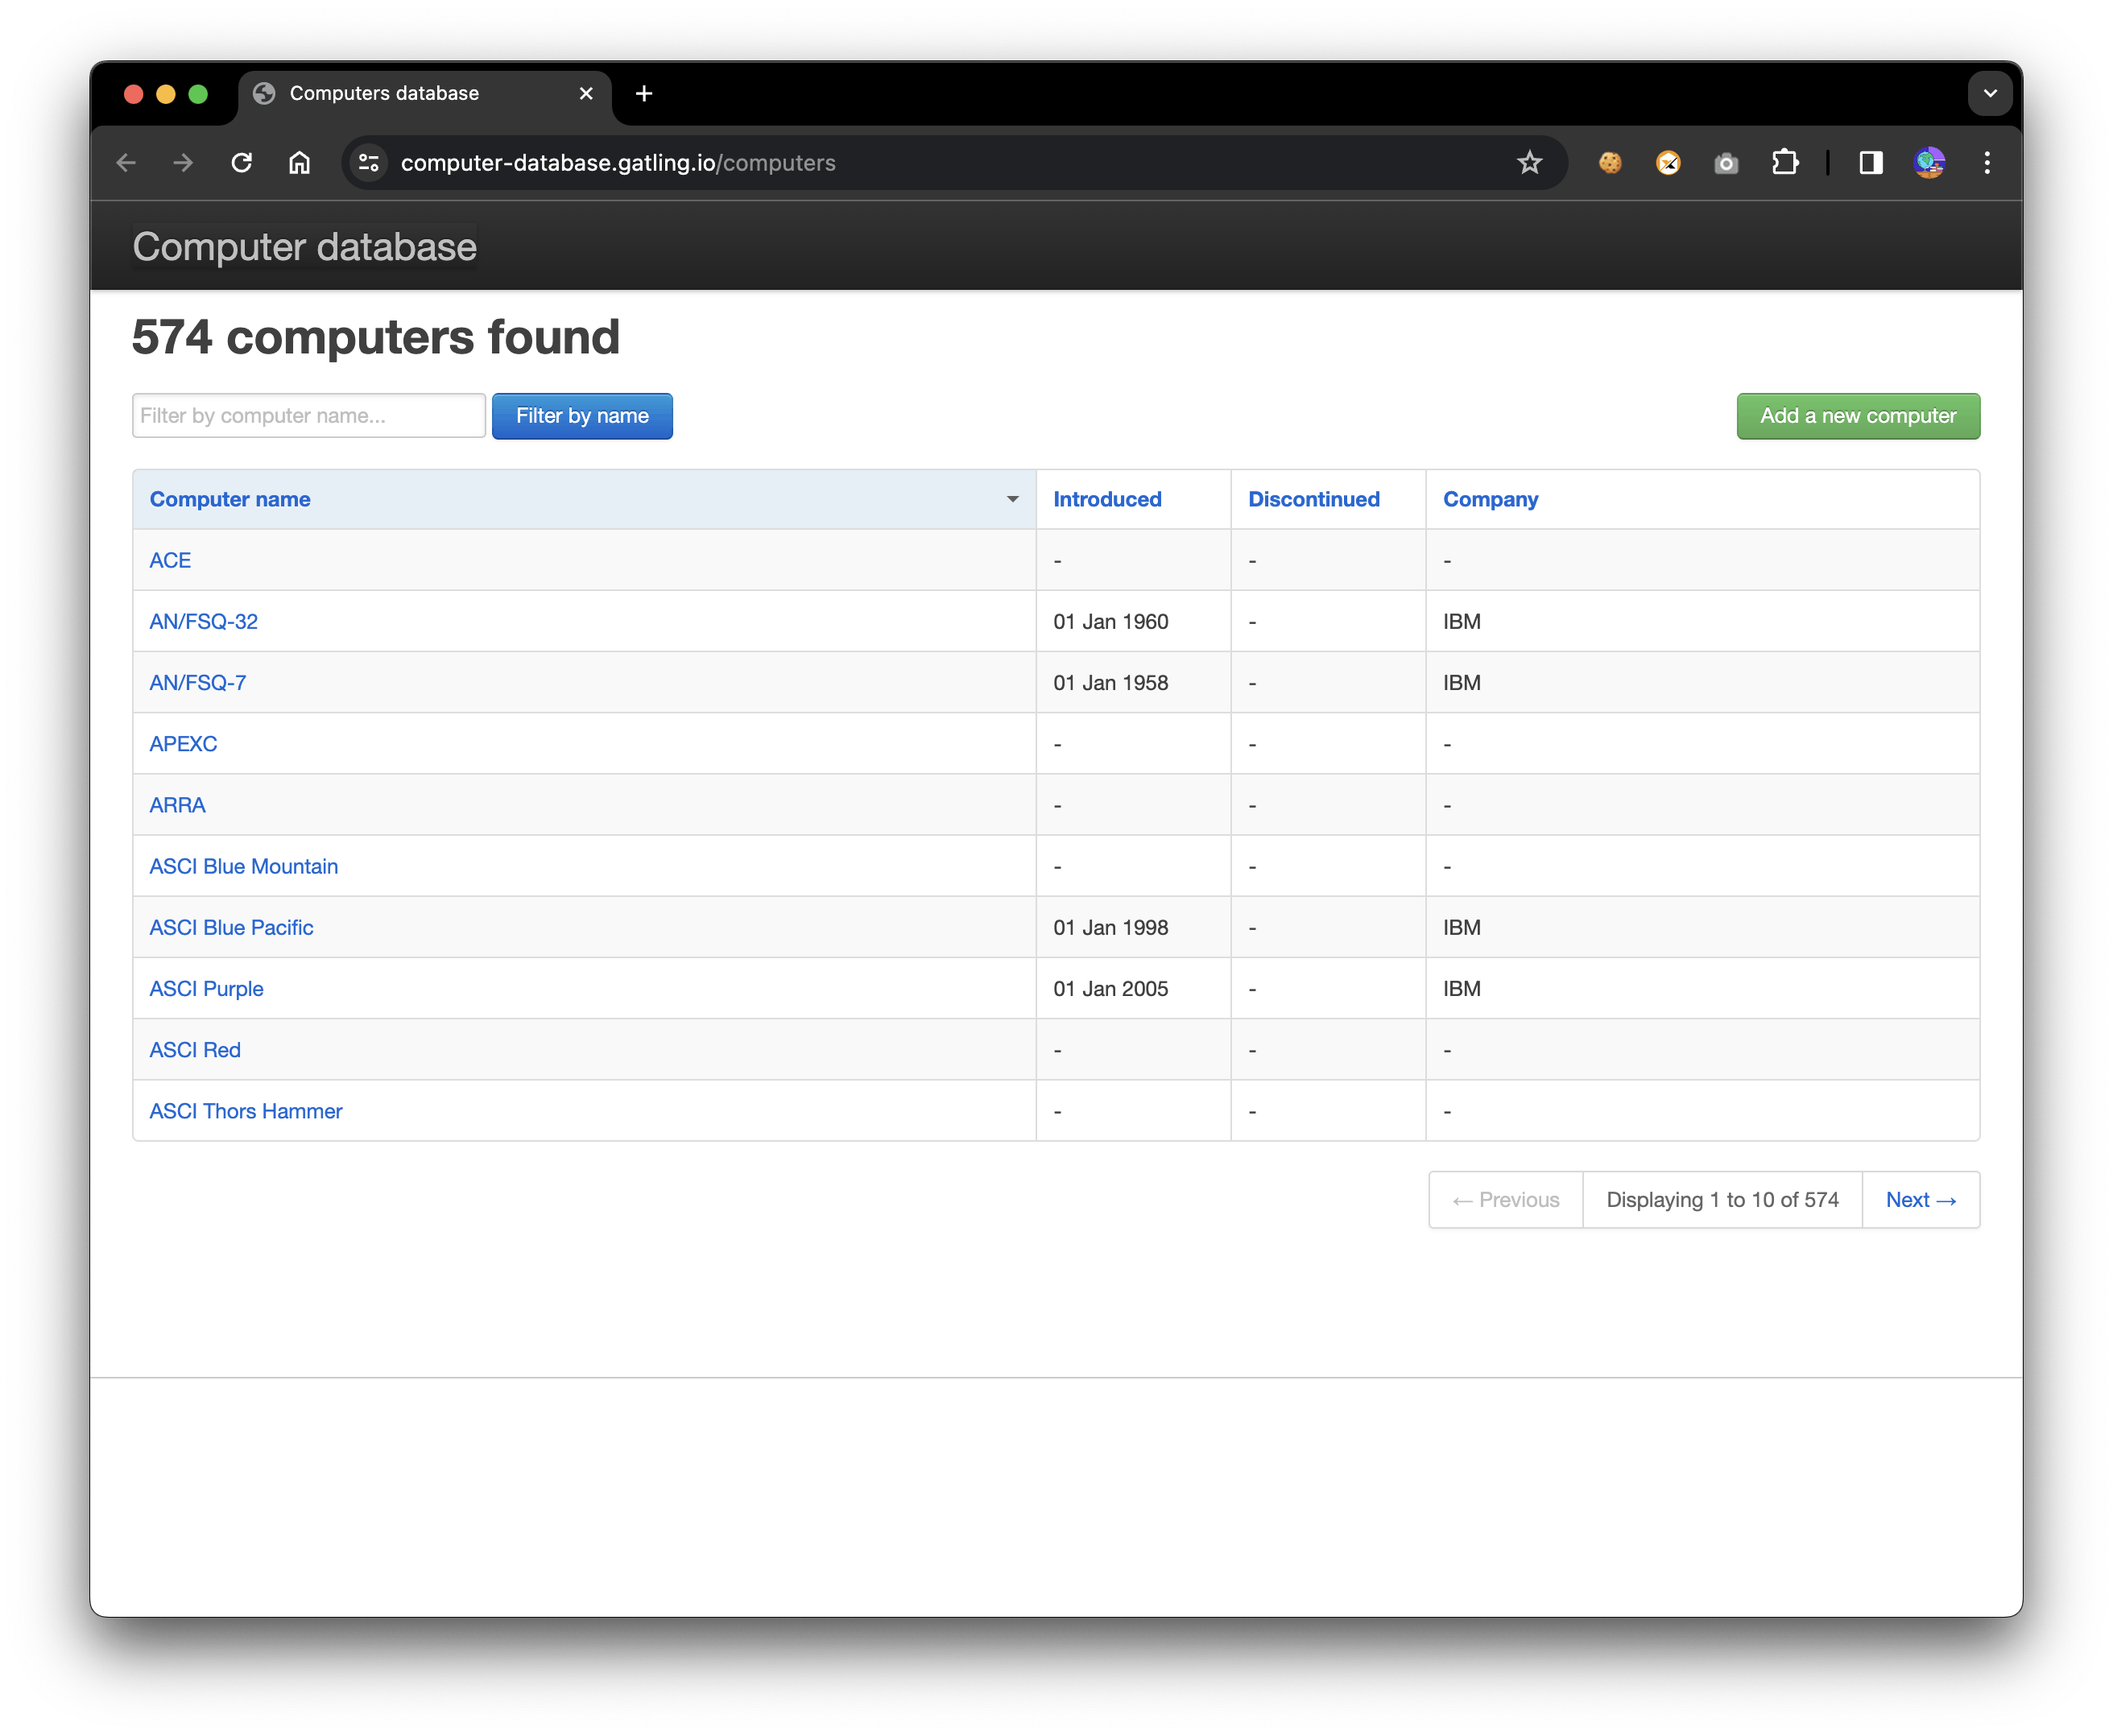
For Example: Open the Gatling computer database training site - this is the site we will record a user journey against.
Open Chrome Developer Tools > Network tab.
Clear previous network calls and enable recording.

Perform your user journey (e.g., navigating pages, interacting with elements).
For Example: Navigate to Gatling computer database training site
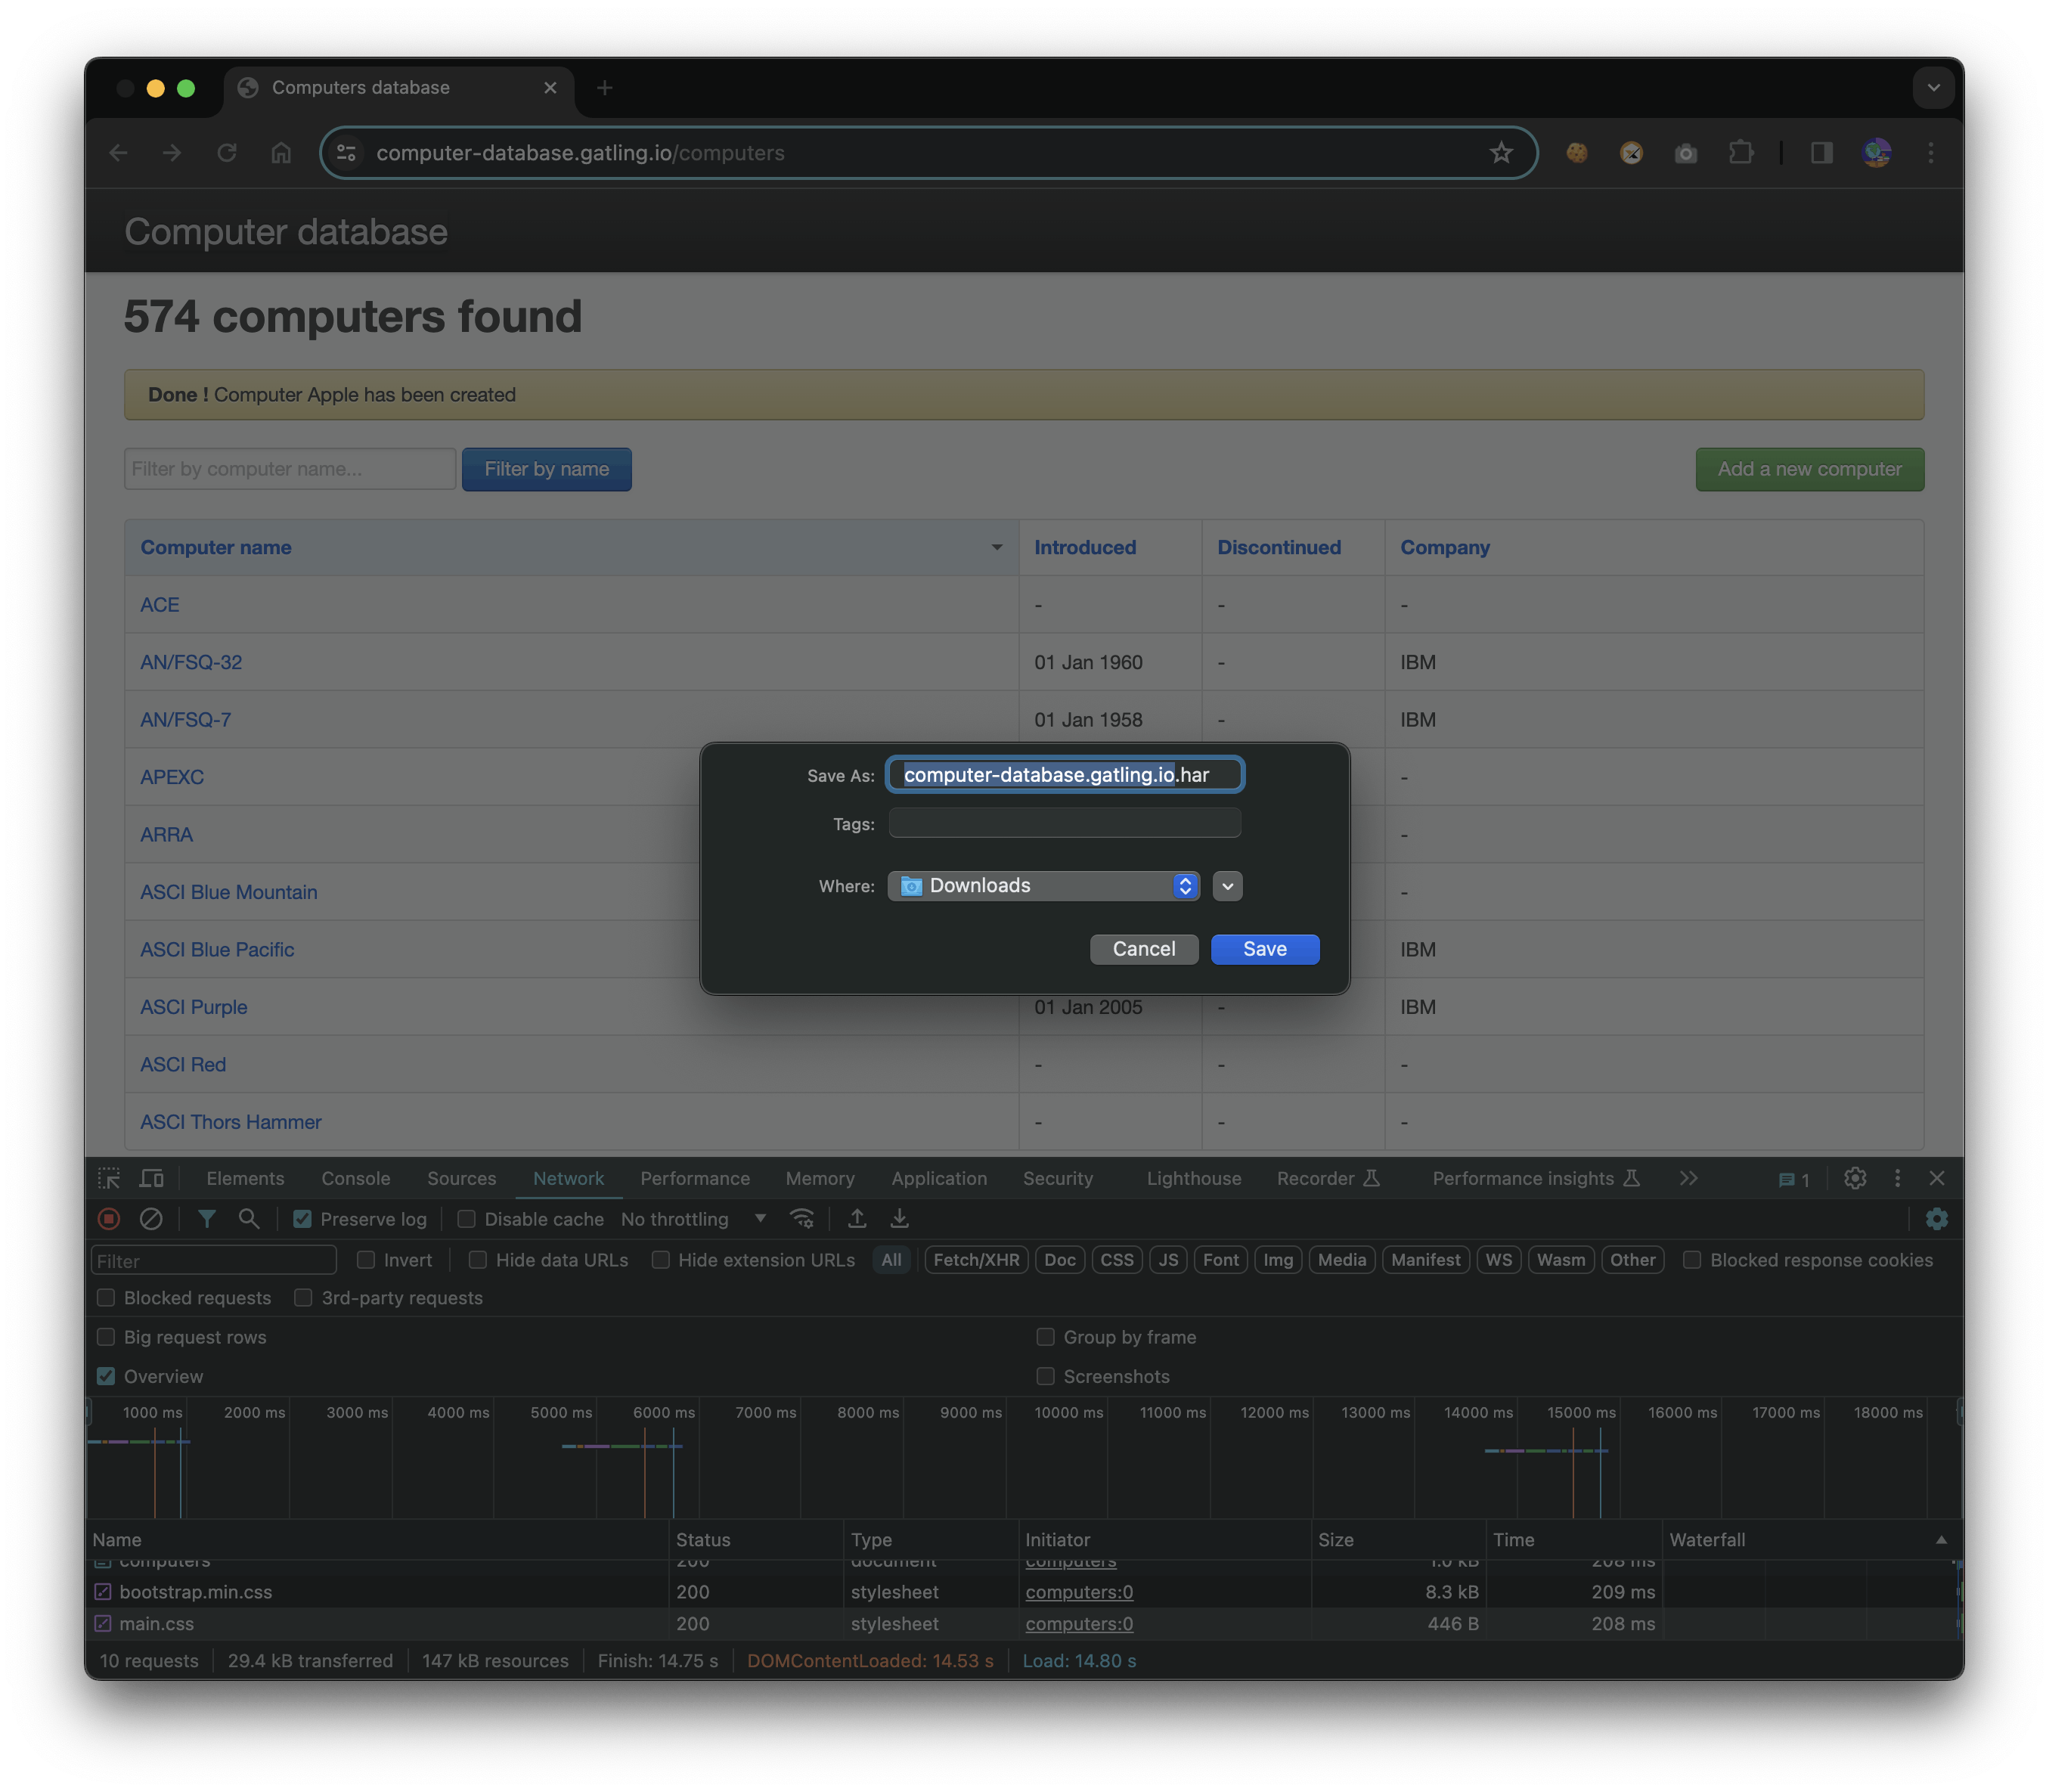
Click on “Add a new computer”.
Select the Computer name as Apple and the company name as “Apple Inc” from the dropdown as shown in the below image.

- Click on ‘ Create this computer’ after entering the details.

Right-click in the Network tab > Save all as HAR with content.
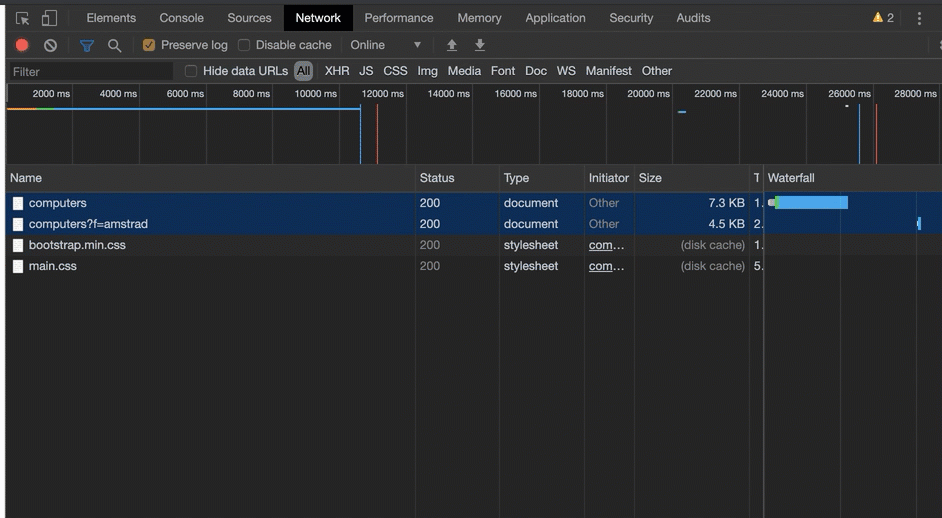
Save the generated HAR file on your machine.

3. Converting HAR File to Gatling Script
Next, let's convert the HAR file into a Gatling script using the Recorder:
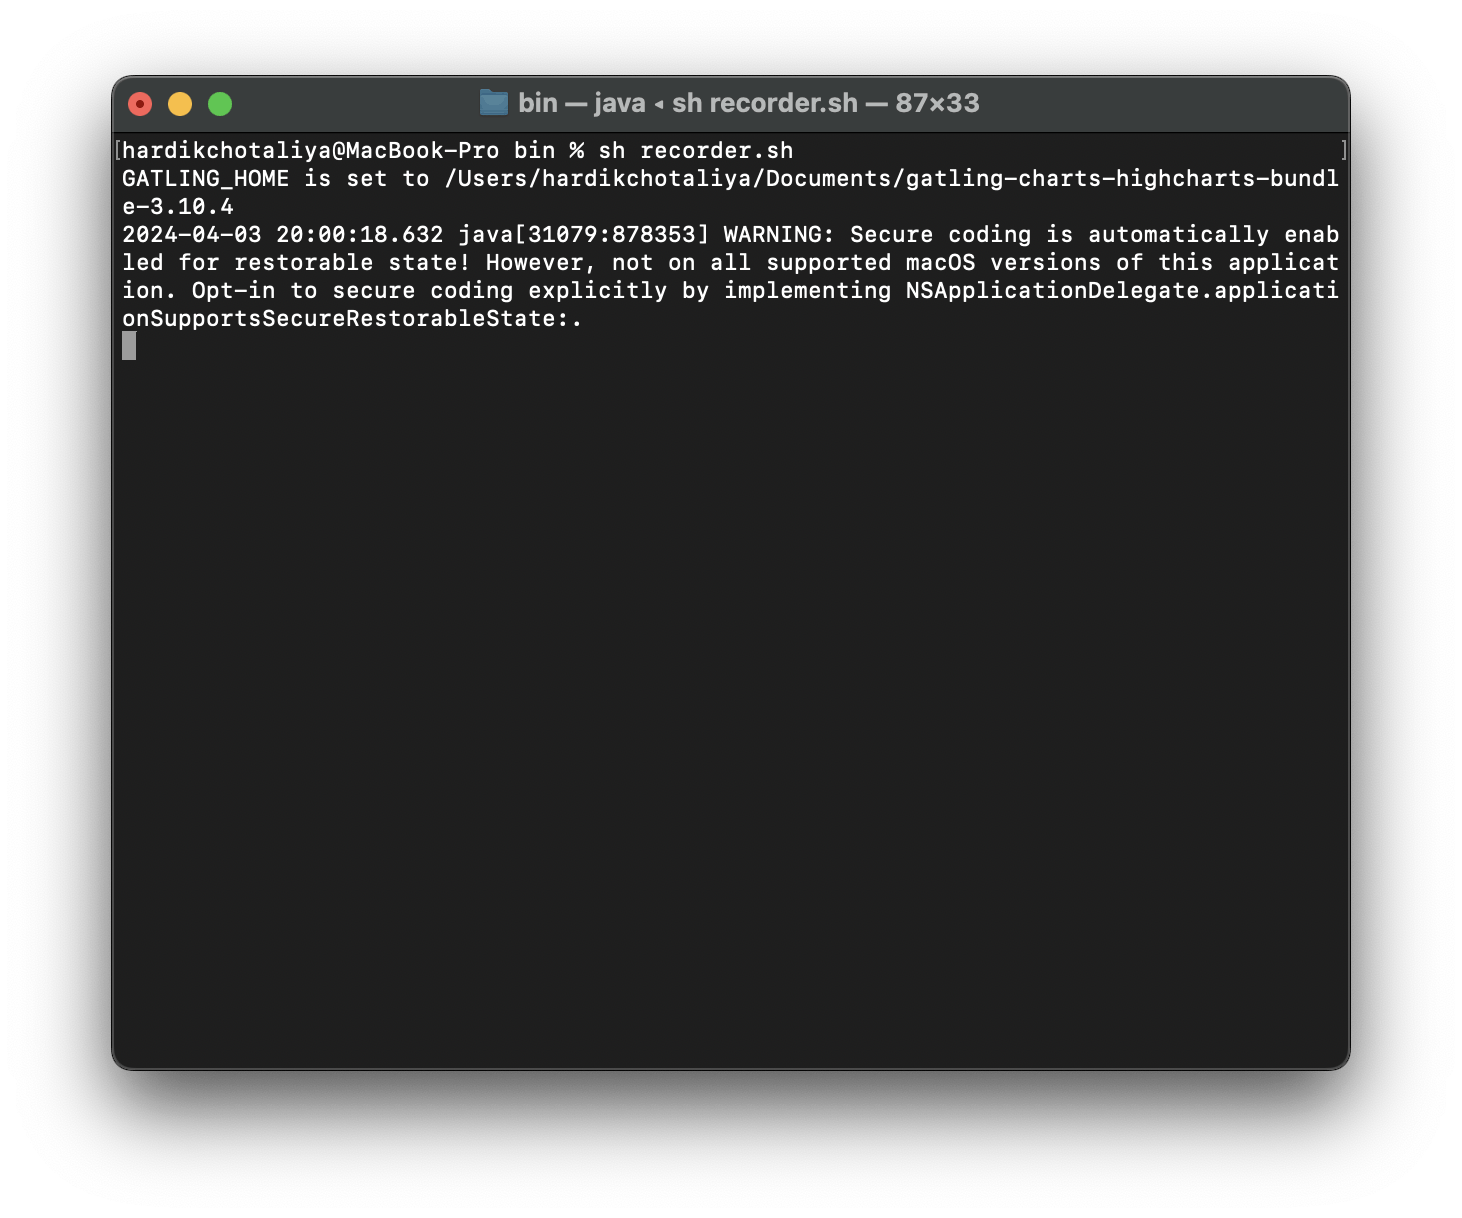
Open your terminal.

Navigate to the
binfolder of Gatling in Terminal.
Run
recorder.sh(Mac/Unix) orrecorder.bat(Windows) from the Gatling Bin folder.$ sh recorder.sh
Change Recorder Mode to "HAR Converter".

Browse and select the generated HAR file.
Give your script a name and configure preferences.
Click Start to convert the HAR file into a Gatling simulation.
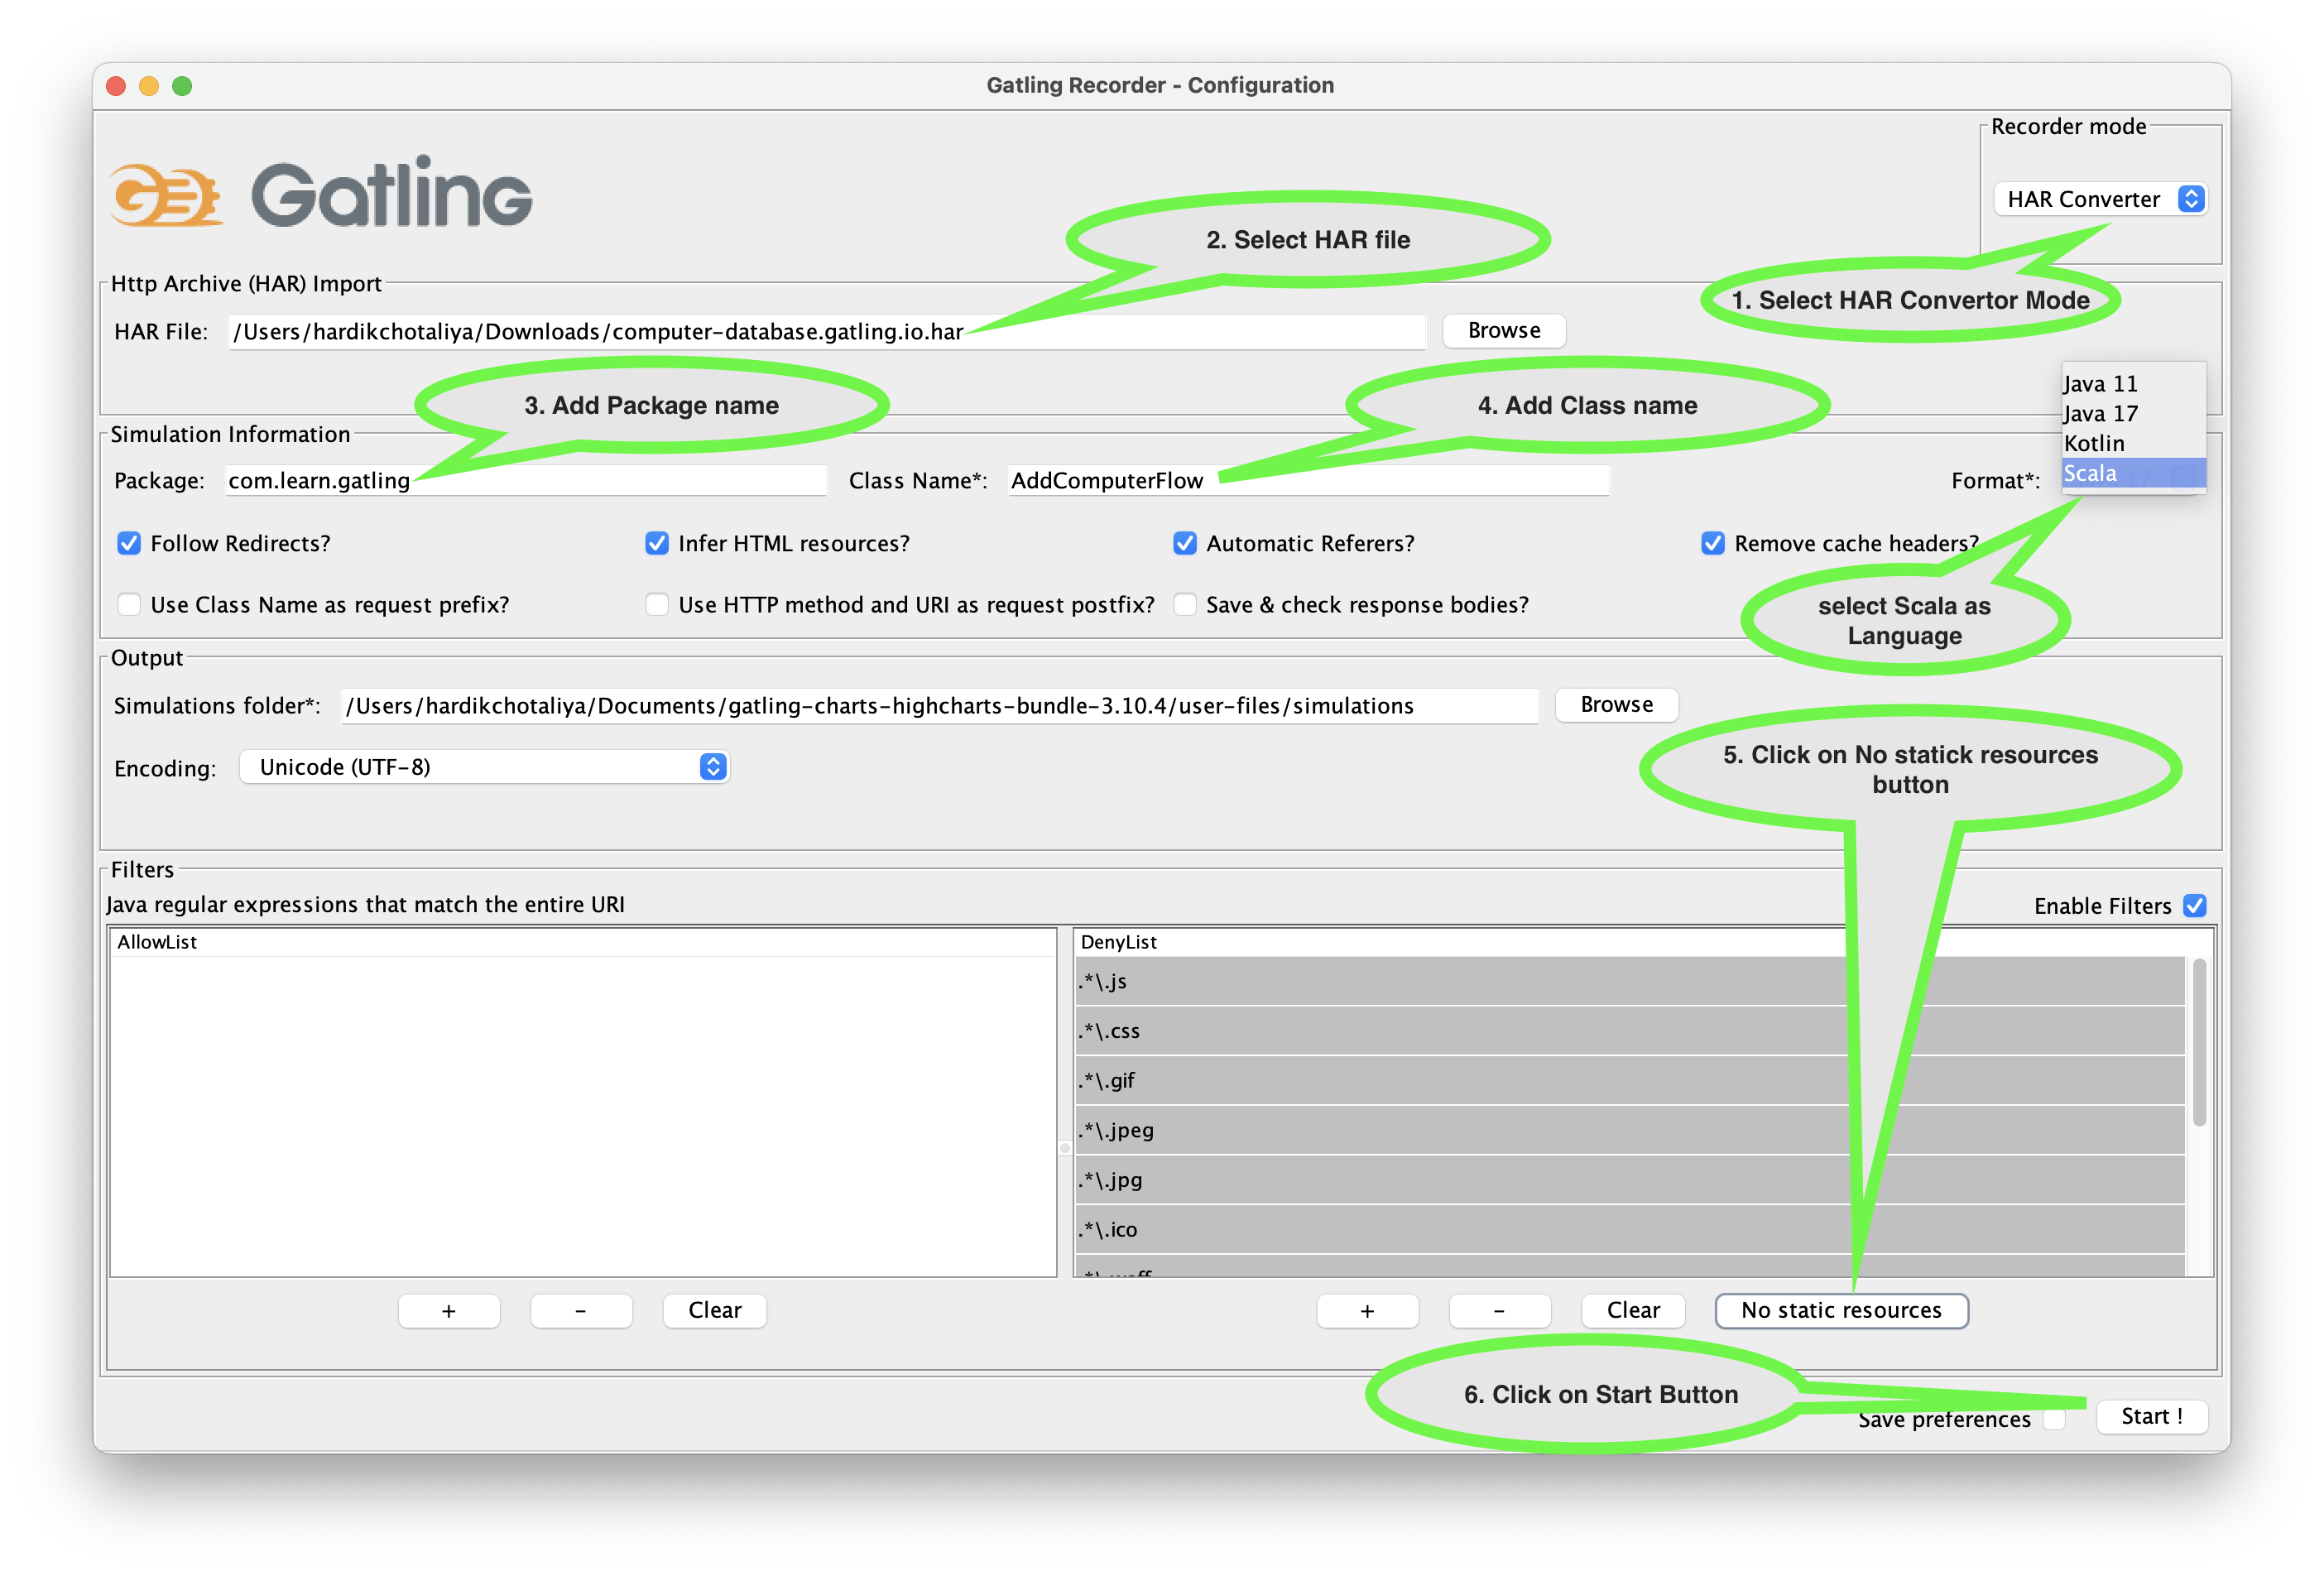
Upon successful conversion, you'll receive a confirmation message.

4. Viewing the Gatling Simulation File
Locate the Gatling simulation file in the User-Files > Simulations folder of your Gatling installation directory. You can open and edit this file using any text editor or IDE like Visual Studio Code (VS Code).
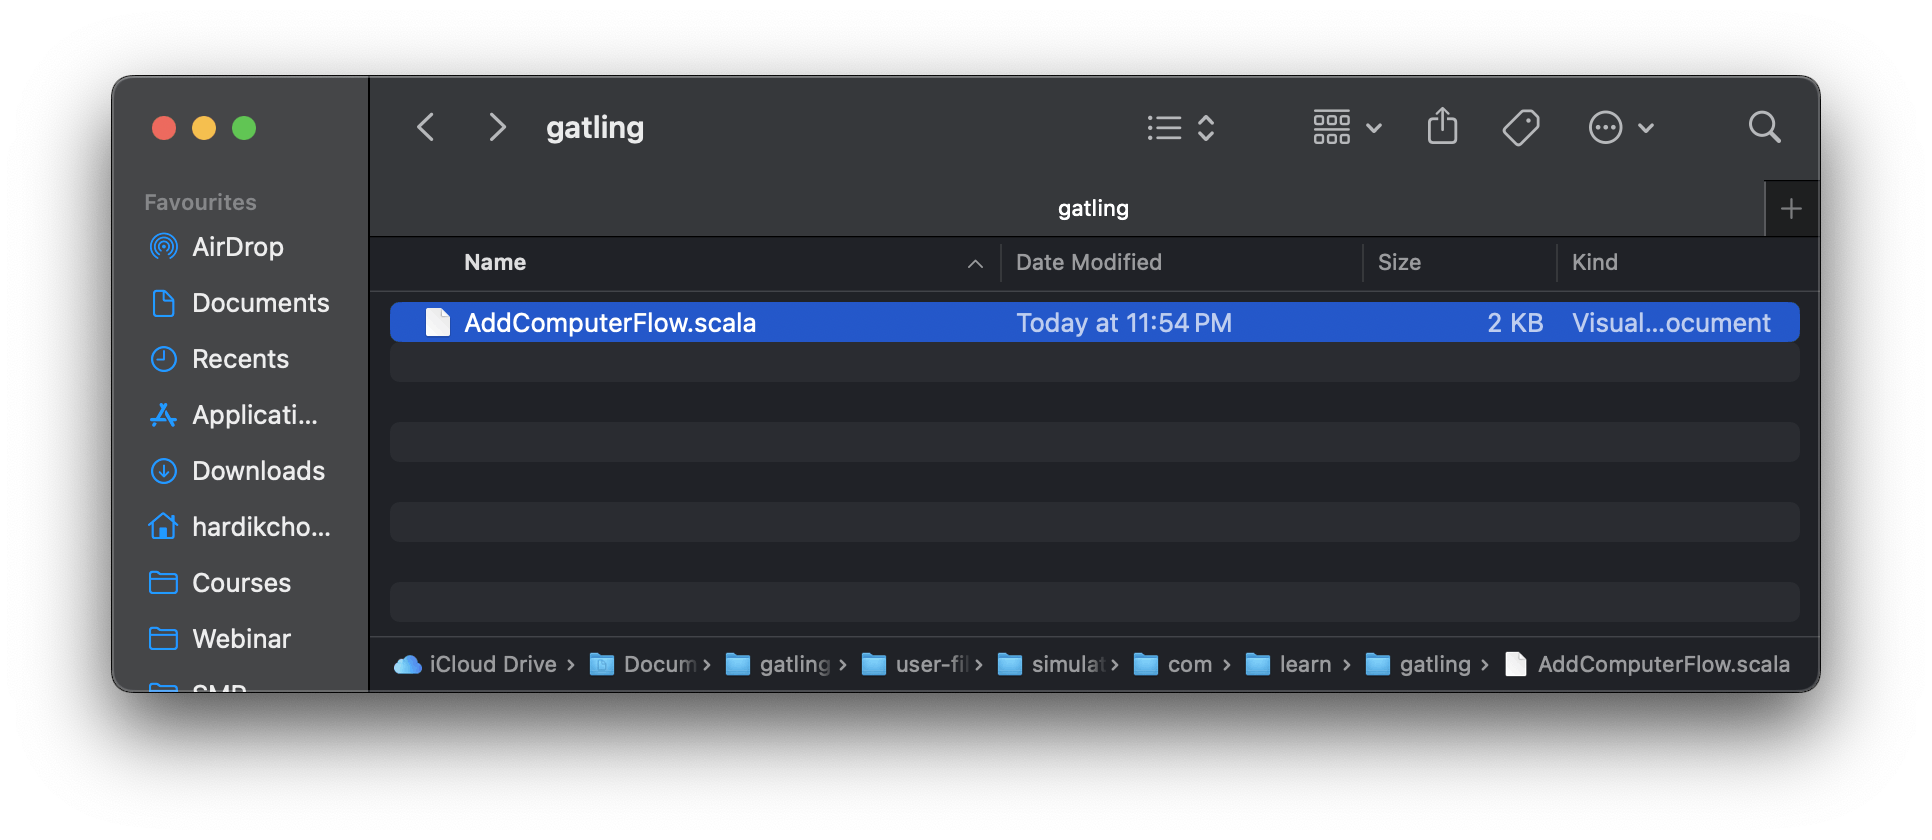
5. Edit the Scala file
If you want to take a look at the script you just created, you can find it in the user-files/simulations folder of your Gatling directory. Open up the AddComputerFlow script you just recorded in a text editor or VS Code as shown below.

The code should look something like this:
package com.learn.gatling

import scala.concurrent.duration._

import io.gatling.core.Predef._
import io.gatling.http.Predef._
import io.gatling.jdbc.Predef._

class AddComputerFlow extends Simulation {

  private val httpProtocol = http
    .baseUrl("https://computer-database.gatling.io")
    .inferHtmlResources(AllowList(), DenyList(""".*\.js""", """.*\.css""", """.*\.gif""", """.*\.jpeg""", """.*\.jpg""", """.*\.ico""", """.*\.woff""", """.*\.woff2""", """.*\.(t|o)tf""", """.*\.png""", """.*\.svg""", """.*detectportal\.firefox\.com.*"""))
    .acceptHeader("text/html,application/xhtml+xml,application/xml;q=0.9,image/avif,image/webp,image/apng,*/*;q=0.8,application/signed-exchange;v=b3;q=0.7")
    .acceptEncodingHeader("gzip, deflate, br")
    .acceptLanguageHeader("en-GB,en-US;q=0.9,en;q=0.8")
    .doNotTrackHeader("1")
    .upgradeInsecureRequestsHeader("1")
    .userAgentHeader("Mozilla/5.0 (Macintosh; Intel Mac OS X 10_7) AppleWebKit/537.36 (KHTML, like Gecko) Chrome/123.0.0.0 Safari/537.36")

  private val headers_0 = Map(
          "sec-ch-ua" -> """Google Chrome";v="123", "Not:A-Brand";v="8", "Chromium";v="123""",
          "sec-ch-ua-mobile" -> "?0",
          "sec-ch-ua-platform" -> "macOS",
          "sec-fetch-dest" -> "document",
          "sec-fetch-mode" -> "navigate",
          "sec-fetch-site" -> "same-origin",
          "sec-fetch-user" -> "?1"
  )

  private val headers_2 = Map(
          "origin" -> "https://computer-database.gatling.io",
          "sec-ch-ua" -> """Google Chrome";v="123", "Not:A-Brand";v="8", "Chromium";v="123""",
          "sec-ch-ua-mobile" -> "?0",
          "sec-ch-ua-platform" -> "macOS",
          "sec-fetch-dest" -> "document",
          "sec-fetch-mode" -> "navigate",
          "sec-fetch-site" -> "same-origin",
          "sec-fetch-user" -> "?1"
  )

  private val scn = scenario("AddComputerFlow")
    .exec(
      http("request_0")
        .get("/computers")
        .headers(headers_0),
      pause(4),
      http("request_1")
        .get("/computers/new")
        .headers(headers_0),
      pause(8),
      http("request_2")
        .post("/computers")
        .headers(headers_2)
        .formParam("name", "Apple")
        .formParam("introduced", "")
        .formParam("discontinued", "")
        .formParam("company", "1")
    )
//Here we have added 10 virtual users concurrently
    setUp(scn.inject(atOnceUsers(10))).protocols(httpProtocol)
}
As you can see we have added 10 concurrent virtual user in the script.
setUp(scn.inject(atOnceUsers(10))).protocols(httpProtocol)
6. Running the Gatling Script
Return to the Gatling Bin folder.
Run
gatling.sh(Mac/Unix) orgatling.bat(Windows).
In case of multiple script files present in the simulation folder, the script will prompt the user to select the simulation that the user wants to run.
For Example: Select option "[1] Run the Simulation locally" by entering 1 in the terminal then press enter (Wait for some time as it may take time to load the existing scripts to show).Select the script you just created in the same way by entering the number in the terminal.

The script now prompts to add an optional run description. You can simply ignore this and press enter to start the simulation execution.
While the simulation is executing, you can see execution reports getting printed on the terminal and the parameters like response time, total requests, success/failures, etc summarized view will be displayed once the scenario execution completes.
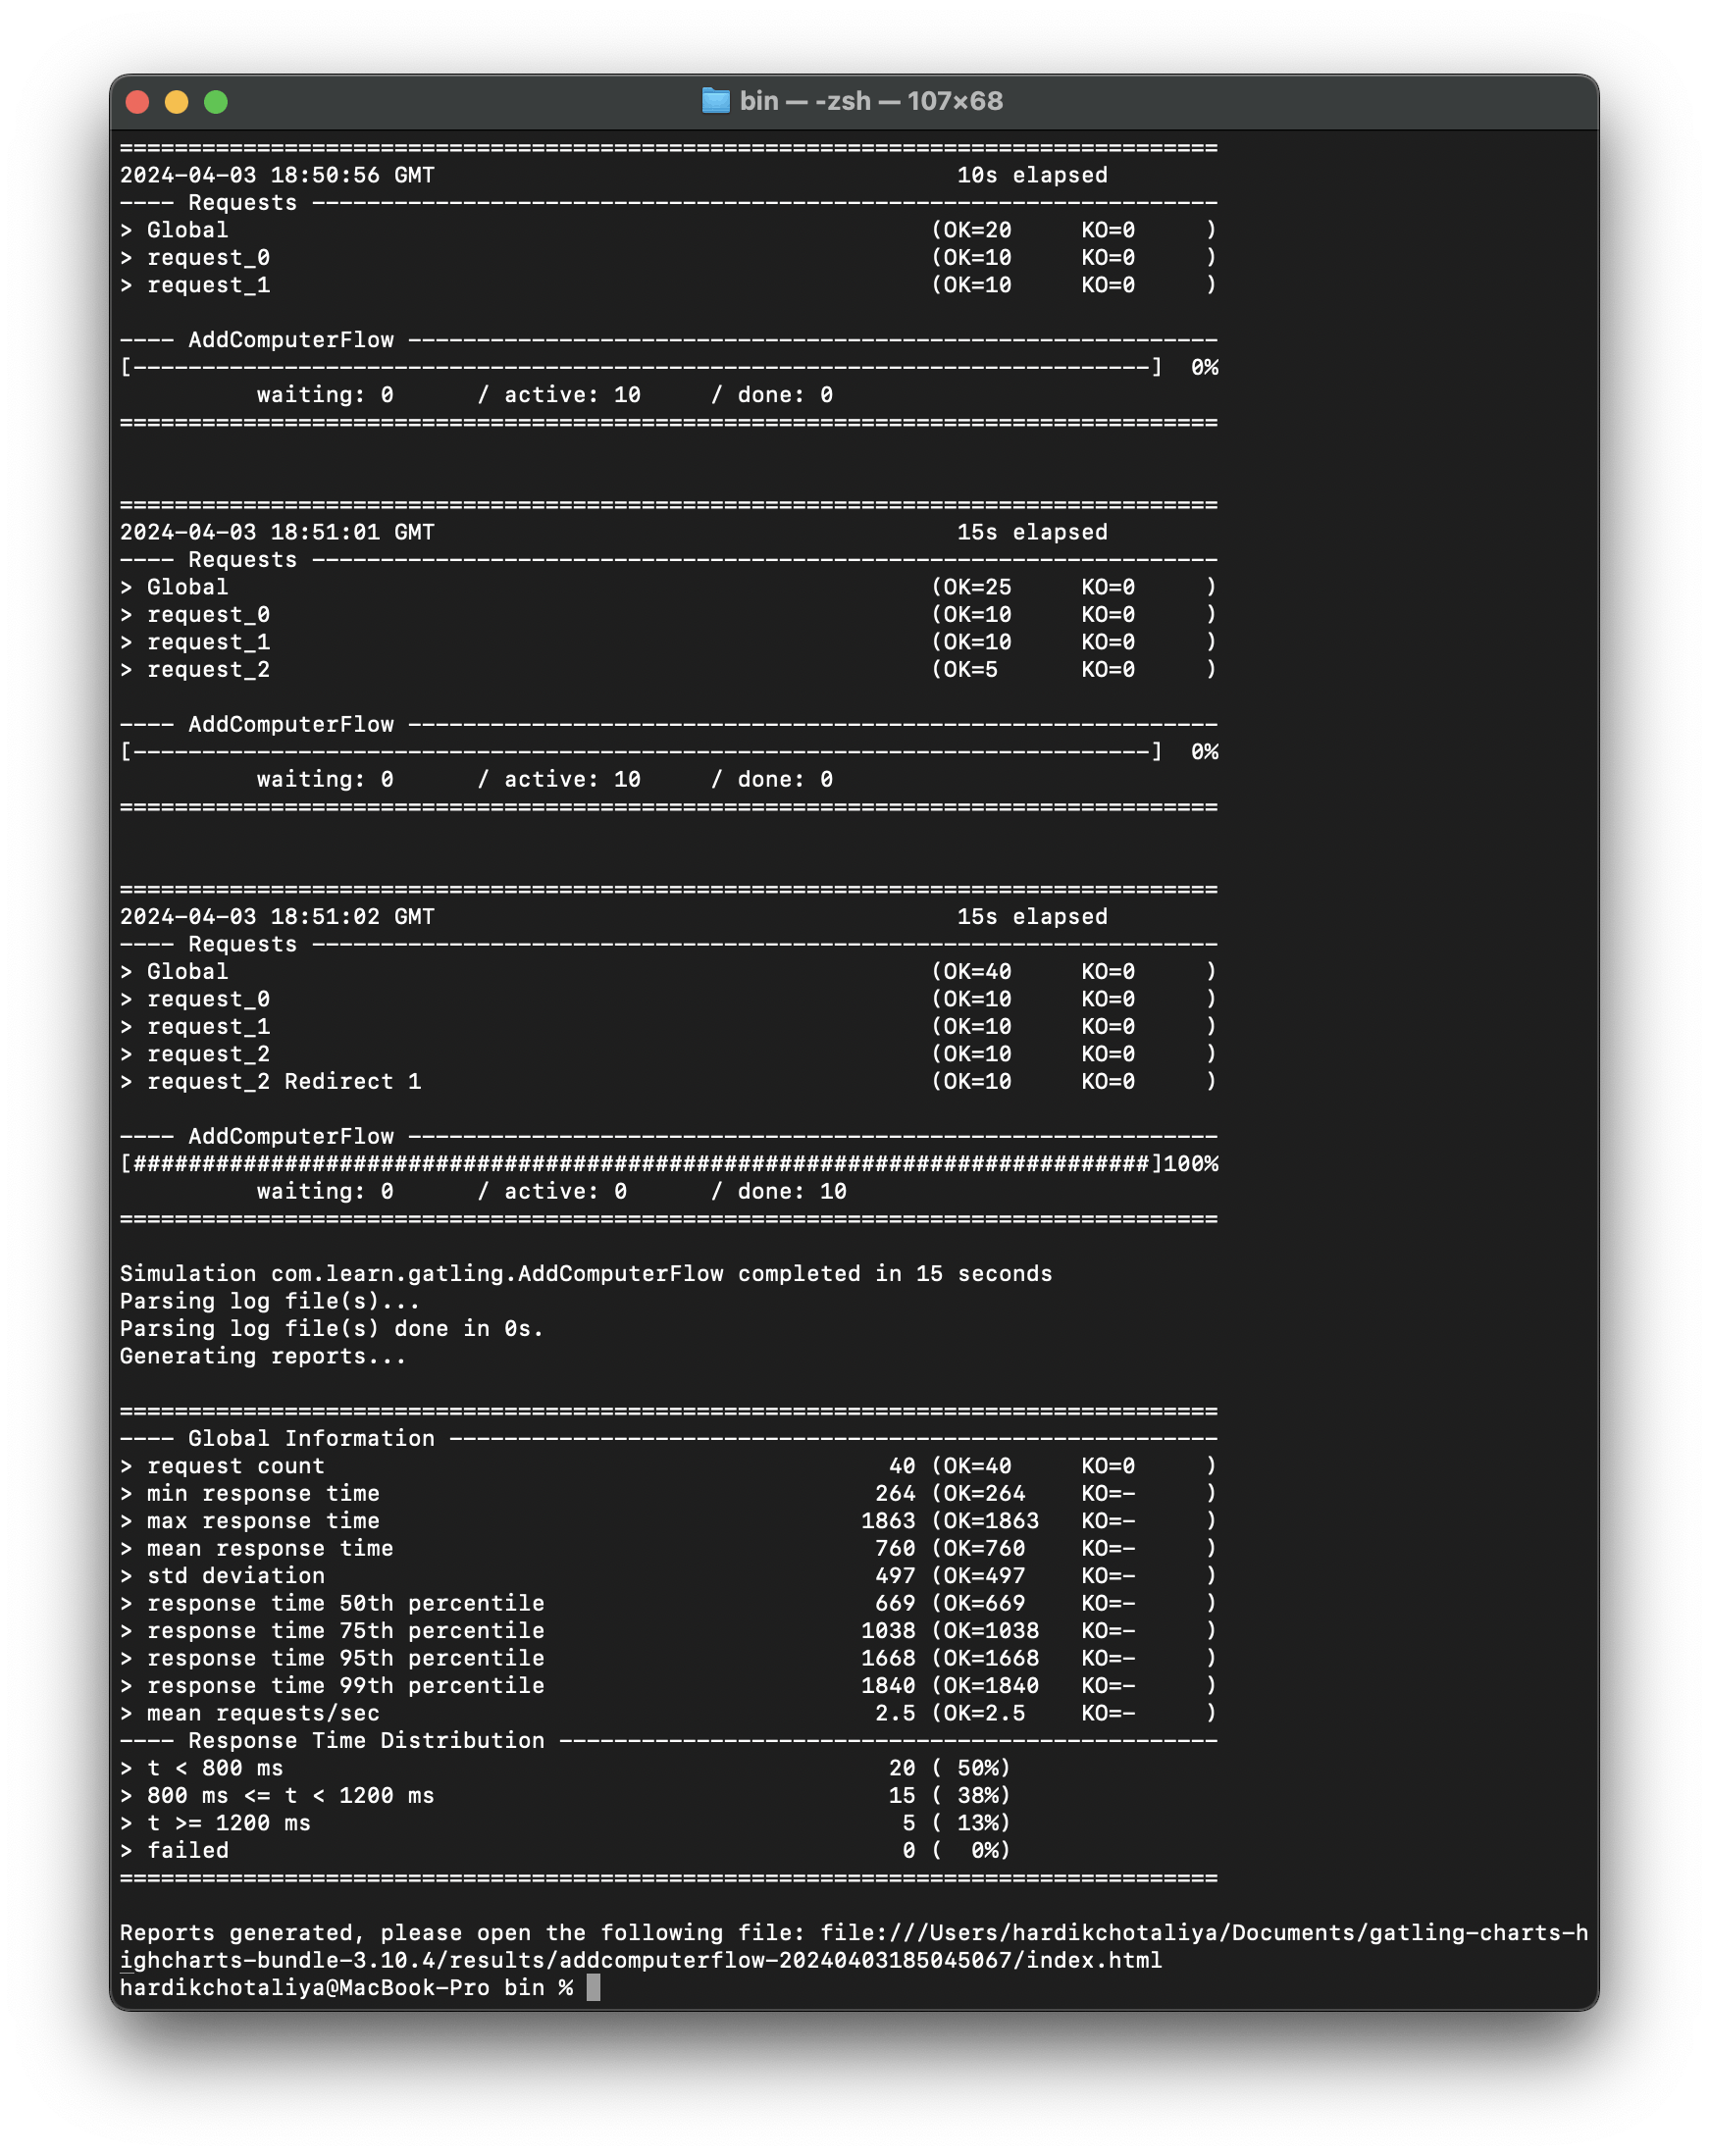
View detailed report information by clicking the HTML report link in the command line report.

That's it! You've successfully recorded and executed a Performance testing script using the Gatling Recorder. Explore further and experiment with Gatling to optimize your Load testing efforts.
By following these steps, even beginners can quickly set up and run performance tests using Gatling Recorder.
Happy testing!
Gatling Recorder load testing
Perform load testing Gatling Recorder
Gatling Recorder tutorial
Load performance testing guide
Gatling Recorder best practices