 iOS Dev Recipes
 RSS Feed
APIs You Forgot About: UIView layerClass, maskView and UITintAdjustmentMode
The UIView class is the backbone of UIKit, and over the years it's had a lot of responsibilities added and removed to help keep up with changes like moving to auto layout, dealing with tint colors, and improving accessibility and support for right-to-left languages.
There are a lot of interesting and useful features in UIView that I feel are often overlooked, and today we're going to explore a few of the more obscure items and talk about when and how they're useful.
If you'd like to follow along, there's a Playground that you can use.
+layerClass
Every instance of a UIView is backed by a CALayer of some kind, and it's possible to specify that a subclass should always use a specific CALayer subclass by overriding the layerClass class property of your custom UIView subclass. This allows you to skip some indirection and layer management and instead wrap up your layer with direct access through the higher-level view interface.
One example of where this might be useful is in creating a view that provides a gradient background, something you may have done before using CAGradientLayer as a sublayer of another view. If your view needs only to render a gradient, you can skip this indirection, and instead make the view use a CAGradientLayer as its backing store.
Let's start with the basics: A new UIView subclass called ConicalGradientView (since we're going to use the new-in-iOS-12 conical gradient type) that uses a gradient view layer class.
class ConicGradientView: UIView {

	override class var layerClass: AnyClass {
		return CAGradientLayer.self
	}

	// We'll want to access the layer internally as the correct type
	private var gradientLayer: CAGradientLayer {
		return self.layer as! CAGradientLayer
	}
}
To get started, we'll set the layerClass to return the CAGradientLayer class (not an instance) when UIKit asks us what layer we want to use as the backing layer for this view.
Next, we'll add a bit of initialization:
	override init(frame: CGRect) {
		super.init(frame: frame)
		configureGradientLayer()
	}

	required init?(coder aDecoder: NSCoder) {
		super.init(coder: aDecoder)
		configureGradientLayer()
	}

	func configureGradientLayer() {
		gradientLayer.type = .conic
		// Don't worry about these too much, they're arbitrarily chosen to look ok
		gradientLayer.startPoint = CGPoint(x: 0.65, y: 0.35)
		gradientLayer.endPoint = CGPoint(x: 0.75, y: 1)
	}
We set the type of the gradient layer, and for our example to look good, we set up a start and end point. As a final step, we'll allow users of our new view to set an array of colors to use in the gradient:
	var colors: [UIColor]? {
		didSet { gradientLayer.colors = colors?.map { $0.cgColor } }
	}
CAGradientLayer wants CGColors, and by handling the conversion from UIColor to CGColor in our new subclass, we've saved our users a bit of trouble.
Now we're all set to use our new view, I'd suggest grabbing the Xcode Playground, and running page 1, or pasting the code above in to a new "Single View" playground, and set some colors (try at least 3) on your view to see what you get. Here's what it looks like with 5 colors:
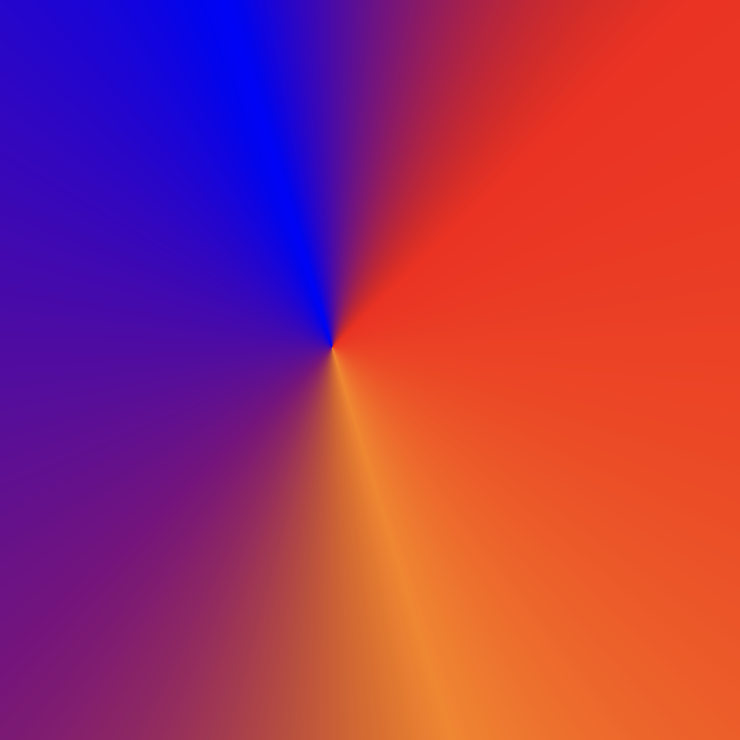
Pretty cool, right? You can even extend this just a bit more and make it @IBDesignable so it even renders inside of interface builder! Unfortunately, you may run in to some issues with setting an array of colors and a start and end point via @IBInspectible properties, however you could at least set some default values and get a rough preview of what the final result might look like, or subclass again to set the values and get a "real" preview.
Now let's build on to this fancy new view, and add a mask to it!
Mask View
Another oft-overlooked helper on UIView is the mask view, added in iOS 8. This is a view that is used to mask the underlying view using the alpha channel of the mask view. That is, if your mask view is a completely opaque, white view then everything is visible, otherwise, any transparent parts of the view are not rendered.
We can expand on our ConicGradientView a bit and put a simple mask layer on it that provides a circular mask for our view.
class CircleView: UIView {

	override class var layerClass: AnyClass {
		return CAShapeLayer.self
	}

	var shapeLayer: CAShapeLayer {
		return self.layer as! CAShapeLayer
	}

	override func layoutSubviews() {
		shapeLayer.frame = bounds
		shapeLayer.fillColor = UIColor.white.cgColor
		// For simplicity, we'll just assume this is iPhone in portrait and center a circle
			var bbox = CGRect(origin: frame.origin, size: CGSize(width: frame.width, height: frame.width))
		bbox.origin.y = center.y - (bounds.width / 2)
		shapeLayer.path = UIBezierPath(ovalIn: bbox).cgPath

		super.layoutSubviews()
	}
}
Then we'll use this view as the mask view for our ConicGradientView:
class CircleGradientViewController : UIViewController {

	override func loadView() {
		let view = ConicGradientView()
		view.colors = [ .blue, .purple, .white, .orange]

		let circleView = CircleView(frame: view.bounds)
		view.mask = circleView

		self.view = view
	}

	override func viewWillLayoutSubviews() {
		super.viewWillLayoutSubviews()
		view.mask?.bounds = view.bounds
	}
}
Notice that we use viewWillLayoutSubviews to update the bounds of the mask view to match the gradient view. There are other ways to do this, depending on who "owns" the mask view, but this helps us to get a simple version we can use in a Playground for now.
Now that we have our circle-masked gradient view, we can cover one more topic that is often overlooked: the tintAdjustmentMode!
tintAdjustmentMode
This property came along with the tintColor property in iOS 7 that enabled easy styling of common interaction items in your UI by simply setting the tint color of a view, or window and allowing it to be pushed downward to child views, or more accurately, the default implementation simply searches parent views until it finds one that has a value set on it.
The tintAdjustmentMode allows us to know when our view is considered "out of focus" by providing child views with the value dimmed. You might have noticed that when system alerts take over the screen, default controls in UINavigationBar and UITabBar turn grey, and don't draw as much attention to themselves
UITintAdjustmentModeAutomatic

UITintAdjustmentModeDimmed

We'll implement something similar in our current circle-masked gradient view that will "dim" our bright and happy gradient colors to a nice, desaturated gradient based on the existing colors. We can add an implementation of tintColorDidChange() to our ConicalGradientView that will swap the colors to grayscale versions of the provided colors when the tintAdjustmentMode is dimmed.
	override func tintColorDidChange() {
		super.tintColorDidChange()
		switch tintAdjustmentMode {
		case .dimmed:
			gradientLayer.colors = self.colors?.map { $0.grayscale.cgColor }
		default:
			gradientLayer.colors = self.colors?.map { $0.cgColor }
		}
	}
We'll also need to add a basic implementation of UIColor.grayscale to get colors that are relatively similar to the ones provided, but dimmed. We'll do this by grabbing the Hue, Saturation and Brightness values, and de-saturating the color to get a "grayscale" value.
extension UIColor {
var grayscale: UIColor {
var hue: CGFloat = 0
var saturation: CGFloat = 0
var brightness: CGFloat = 0
var alpha: CGFloat = 0
if self.getHue(&hue, saturation: &saturation, brightness: &brightness, alpha: &alpha) {
return UIColor(hue: hue, saturation: 0.3 * saturation, brightness: brightness / 2, alpha: alpha)
}
return self
}
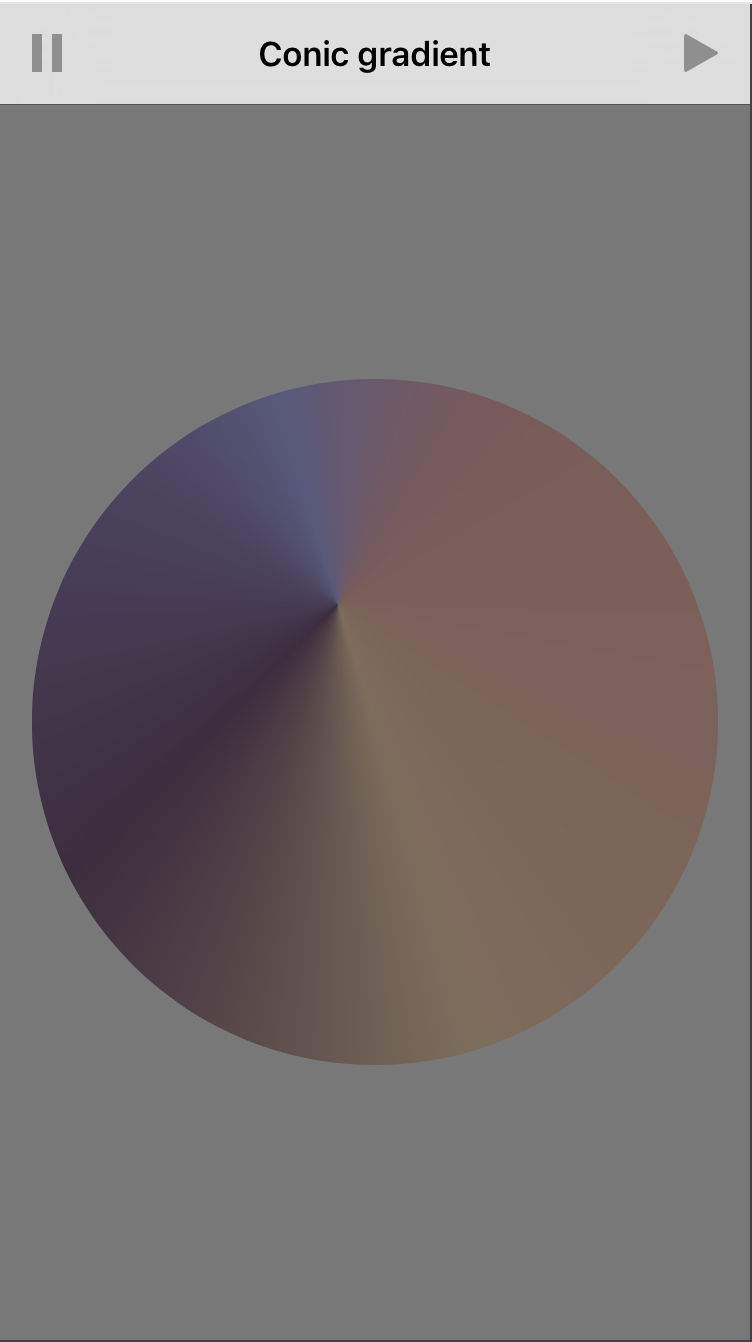
}If we set up a preview in a Playground we can set the tintAdjustmentMode directly in order to see what our dimmed view looks like:
Review
UIKit is full of dark, dusty, interesting corners -- but it's definitely worth shining a light on them when they can save us time, enhance re-usability and improve the user experience of the apps we build. I'd argue that these three properties fall in to that category:
- layerClass lets you re-use or enhance layer-based content with a higher-level UIView interface
- maskView lets you use simple views and alpha channels to mask content easily
- UITintAdjustmentMode is probably one you didn't realize you were used to (from Apple apps) and will probably want to go and check out in your own apps with custom controls
I hope everyone has gotten some value out of this post, and ideally learned something new. If you like this post, or have questions (or polite critique) please don't hesitate to tweet at me.
