
In this tutorial, I will be going over to how to deploy a Django app from start to finish using AWS and EC2. Recently, my partner Tu Vo and I launched our app Hygge Homes (a vacation home rental app for searching and booking vacation homes based off Airbnb) and we wanted to share with other developers some of the lessons we learned along the way.
Following this tutorial, you will have an application that has:
- An AWS EC2 server configured to host your application
- SSL-certification with Certbot
- A custom domain name
-
Continuous deployment with Github Actions/SSM Agent
We have provided a dummy repo to follow along with here, but feel free to apply it to your own application as necessary.
Table of Contents
- Project Layout
- Previewing the Project
- Previewing the Django-app project with Docker
- Previewing the Django-app project Locally
- Creating an AWS Account
- Creating an AWS EC2 Instance
- EC2 Environment Setup
- Setting up Continuous Deployment
- Setting up your Domain
- HTTPS
- Closing Thoughts
Project Layout
Here is the project layout:
django-app
|___ backend/ (Django Backend settings)
|   |___ settings.py
|___ static_files/
|___ templates/ (Django Templates)
|   |___ index.html
|___ manage.py
|___ requirements.txt
Previewing the Project
Start by cloning the project with the command:
$ git clone https://github.com/rmiyazaki6499/django-app.git
Previewing the django-app project with Docker
Install Docker
To make this as easy as possible, we will be using Docker Compose to creat our container.
If you do not have Docker yet, start by downloading it if you are on a Mac or Windows:
https://www.docker.com/products/docker-desktopOr if you are on a Linux Distribution follow the directions here:
https://docs.docker.com/compose/install/-
To confirm you have Docker Compose, open up your terminal and run the command below:
$ docker-compose --version docker-compose version 1.26.2, build eefe0d31 -
Go into the project directory to build and run the container with:
$ cd mern-app/ $ docker-compose up --build -
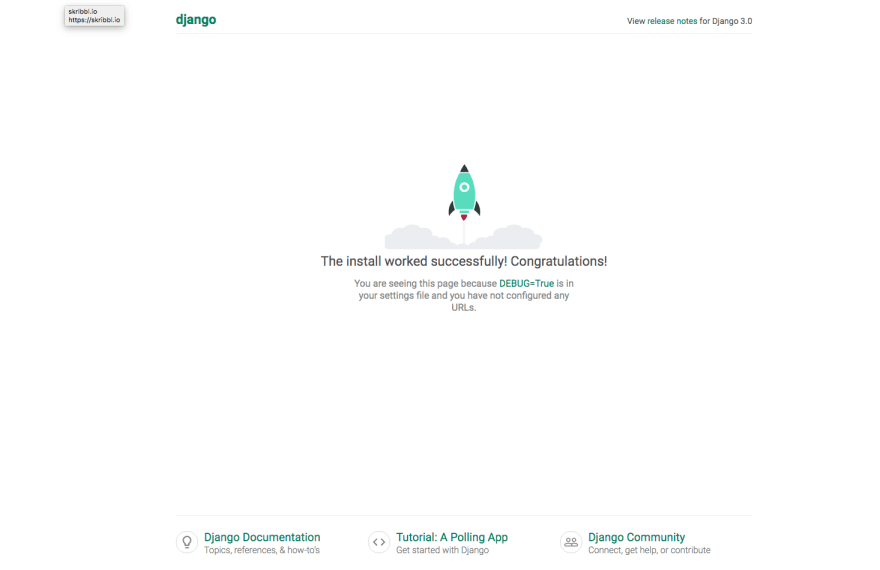
Navigate to http://localhost:8000, you should see something like this:
Cleaning up the Container and Image
- To stop the container from running, use
<Ctrl-C>twice. -
To close down the container use the command:
$ docker-compose down -
Then to clean up the container and image which we are no longer using use the command:
$ docker system prune -fa -
Confirm that the container and image is no longer there with:
$ docker system df -v
Previewing the django-app project locally
To preview the project on your local machine, follow the directions below.
-
Create a virtual environment:
$ cd django-app/ $ python3 -m venv env $ source env/bin/activate -
Install dependencies for Django (make sure you have pip (https://pip.pypa.io/en/stable/installing/)):
$ pip3 install -r requirements.txt -
Migrate the database and collect the static files:
$ python3 manage.py makemigrations $ python3 manage.py migrate $ python3 manage.py collectstatic -
Run the development server with the following command:
$ python3 manage.py runserver -
Run the production server with the following command:
$ ENV_PATH=.env-prod python3 manage.py runserverNavigate to http://localhost:8000 to view the site on the local server.
It should look something like this:
Creating an AWS Account
Why choose AWS?
- It offers a lot of free services for new accounts.
- Very popular among startups and even enterprises.
- Customer service support, in our opinion, is a step above the competition.
-
If you do not have an account, check out this step by step guide by Amazon here.
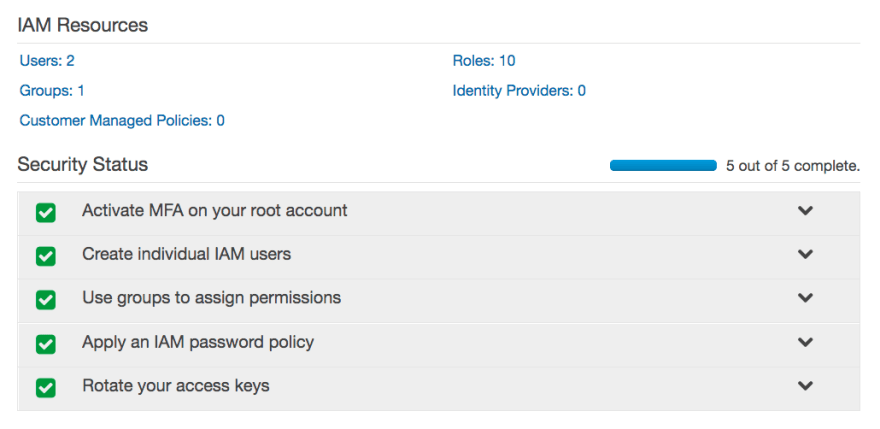
Before you provision a new server, it is best practice to make sure your account is as secure as possible by following the prompts on your Security Status checklist. This can be found under the IAM tab from your console's homepage.
Creating an AWS EC2 Instance
Amazon's EC2 or Elastic Compute Cloud is one of the core products/services AWS provides and is the main building block for many of AWS's other services. It allows users to essentially rent virtual computers on which to run their own applications. You can learn more about EC2 here.
Start out by going into the AWS Console and going to the EC2 tab. An easy way to get there is through the Services link at the top and search for EC2 in the prompt.
We recommend setting your AWS Region to the one closest to you or your intended audience. However, please note that not all AWS Services will be available depending on the region. For our example, we will be working out of the us-east-1 as this region supports all AWS Services.
EC2 Console
You should see this screen (as of July 2020):
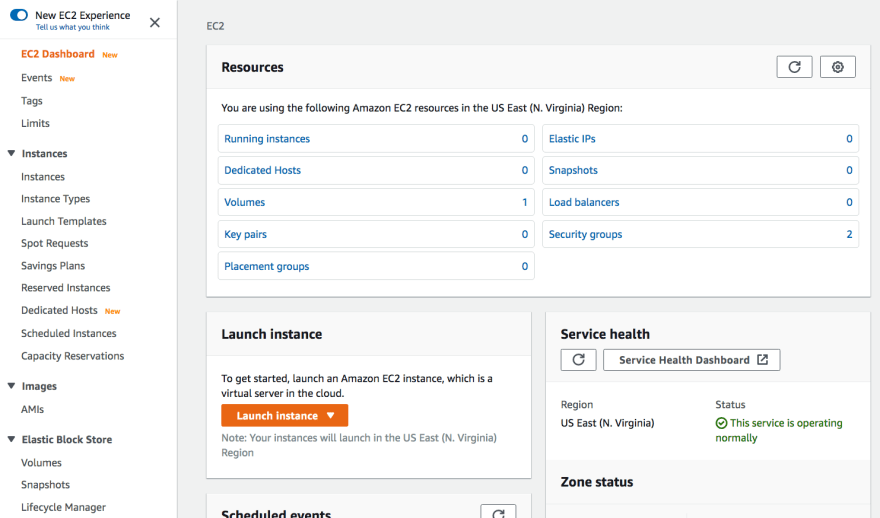
Go to the Running Instances link on the EC2 dashboard and click Launch Instance.

AMI
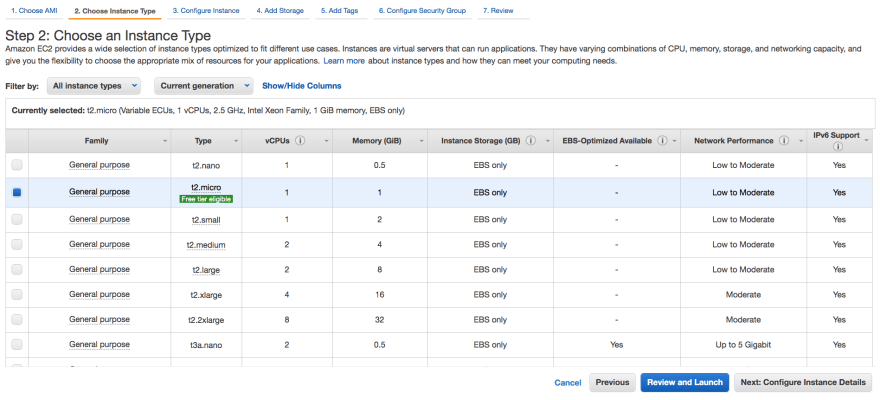
In this step, AWS will prompt you to choose an AMI. AMI's are templates to configure new instances. For this tutorial, we will be using Ubuntu 18.04 64-bit (free tier).

Next, select the t2.micro instance type.
On the next screen, keep clicking next until you see the option to Configure Security Group.
Security Groups
Security groups are virtual firewalls for your instances.
Important: by default, there is an implicit deny on all ports meaning if you do not add rules, all incoming/outgoing traffic is blocked. Security groups are also stateful, which means setting inbound rules for a certain port will also affect the outbound rules for that port.
Set your Security Group settings with the following:
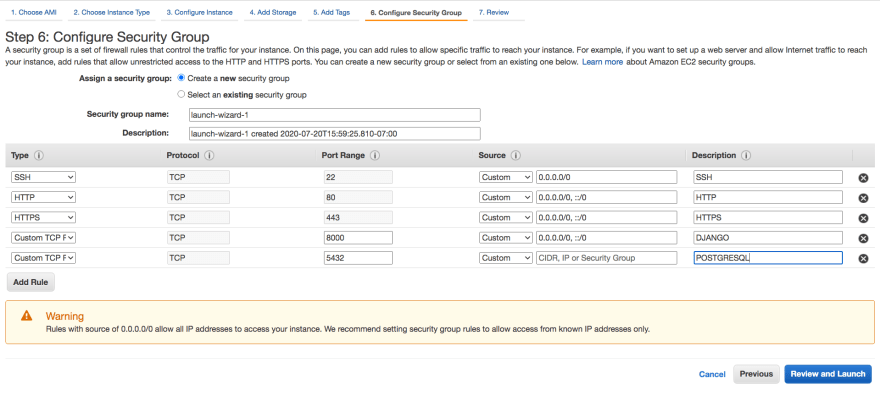
Setting Anywhere on Source for Custom TCP will display a warning flag, but you can ignore that for this tutorial. Ideally, you only want to set known IP addresses.
| Type | Port Range | Description. |
|---|---|---|
| SSH | 22 | Port for SSH'ing into your server |
| HTTP | 80 | Port for HTTP requests to your web server |
| HTTPS | 443 | Port for HTTPS requests to your web server |
| Custom TCP | 8000 | Port which Django will run |
| Custom TCP | 5432 | Port at which to connect to PostgreSQL |
As you can see with the warning near the bottom of the screen, you do not want to set your SSH Source IP as anywhere. This will create a security vulnerability as anyone can try to attempt to log into your server.
Therefore, be sure to set it to your own IP address and any other IP address which may need access to the instance.
Instance Details
Click forward to Review and Launch to view all configurations of your Instance/AMI.
If the configurations look correct go ahead and hit Launch.
Key Pairs
Once you launch the instance, AWS will prompt you to create a key pair. A key pair consists of a public key that AWS stores and a private key file that you store. Together they allow you to connect to your instance securely through asymmetrical encryption.
If this is the first time you are creating a key pair for your project, select Create a new key pair from the drop-down and add a name for the key pair.
Be sure to store the key pair in a secure location. It is generated only once and AWS will not have access to it if you lose it. This is your only means to log into the EC2 instance via SSH.
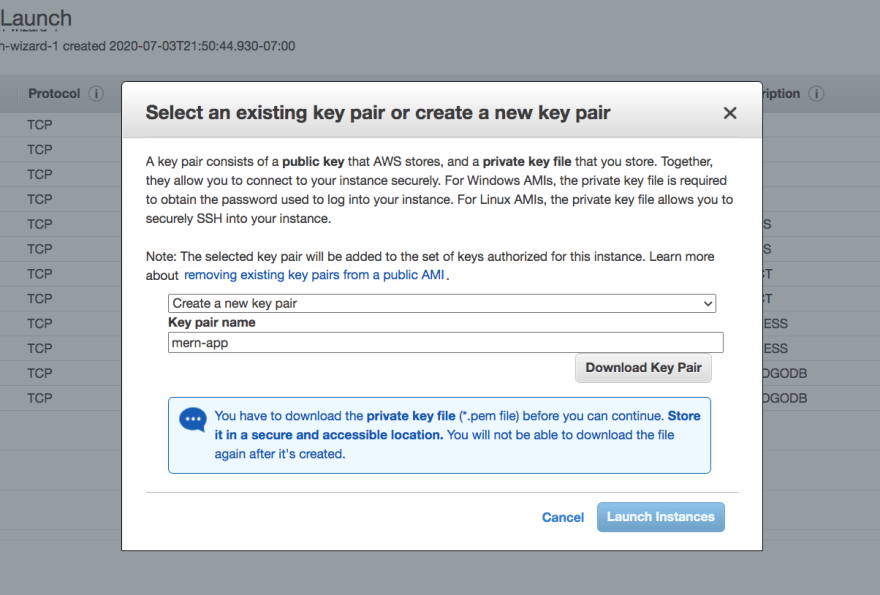
Once you have downloaded the key pair make sure to move the .pem file to the root directory of your project on your local computer.

Next, check the checkbox acknowledging that you have access to the private key pair and click Launch Instances. This should take you to the Launch Status page.
Accessing your EC2 Instance
Click on the Instances tab on your EC2 console.
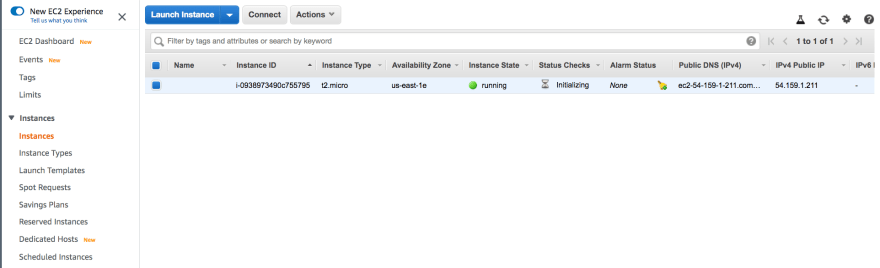
The instance may take a couple of minutes to launch. Once it passes its' status checks, the instance state should show a green circle and a "running" state.
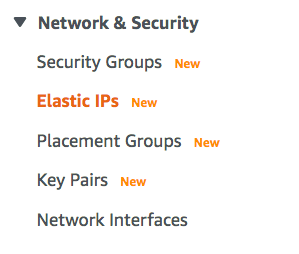
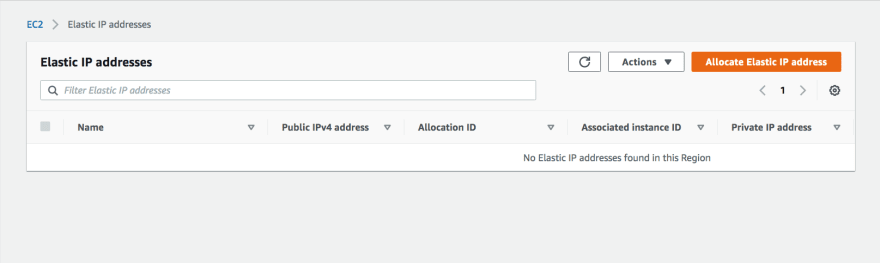
Elastic IP
Before you can log into your EC2 instance, it is important to first generate an Elastic IP and associate it to your EC2 instance.
An Elastic IP is a dedicated IP address for your EC2 instance. Although the instance has a public IP address assigned upon creation, that IP address is dynamic and does not persist if you stop and start the instance. With an Elastic IP address, you can mask the failure of an instance by remapping the address to another instance in your account.
Therefore, by using an Elastic IP, you can have a dedicated IP to which users from the internet can access your instance. This will come in handy later when you assign a custom domain name and add SSL certification to the server.
Note: If you are using the free tier, AWS will charge you if your Elastic IP is NOT associated with an AWS identity.
On the EC2 dashboard, look under the Network & Security tab and go to Elastic IPs:
It should take you here:
Click on Allocate Elastic IP address.
It should take you here:
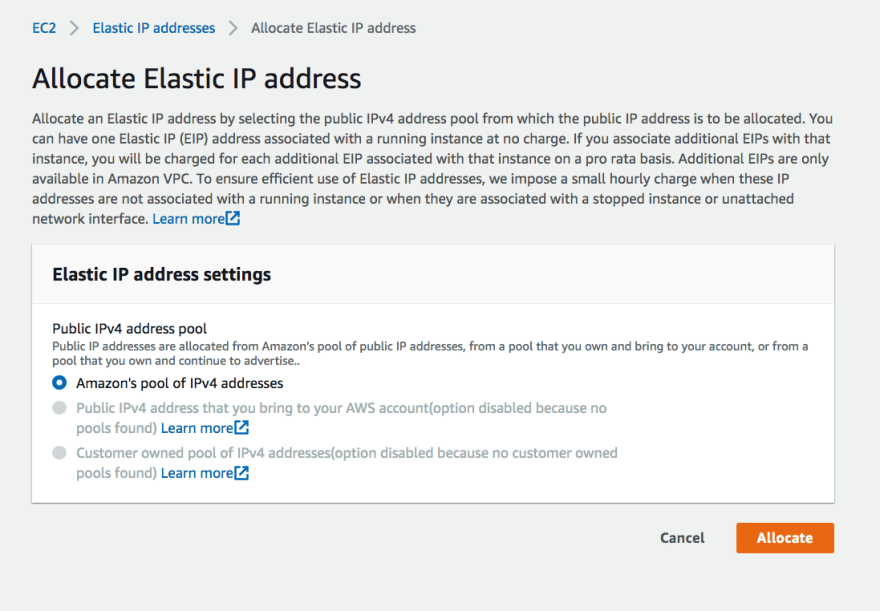
Select Allocate.

This should create an Elastic IP. The next step is to associate that Elastic IP to the instance.
With the Elastic IP checked on the left side:
- Go to Actions
- Click on Associate Elastic IP address
- Make sure your Resource type is Instance
- Search for your instance (if this is your first time, it should be the only one)
-
Click Associate
To check if everything is done correctly, go to the Instances tab and in the instance details, you should see the Elastic IP.
Connecting to your EC2 Instance
With the instance selected in the EC2 console, click Connect near the top. You will be prompted with directions on how to connect to your EC2 instance:
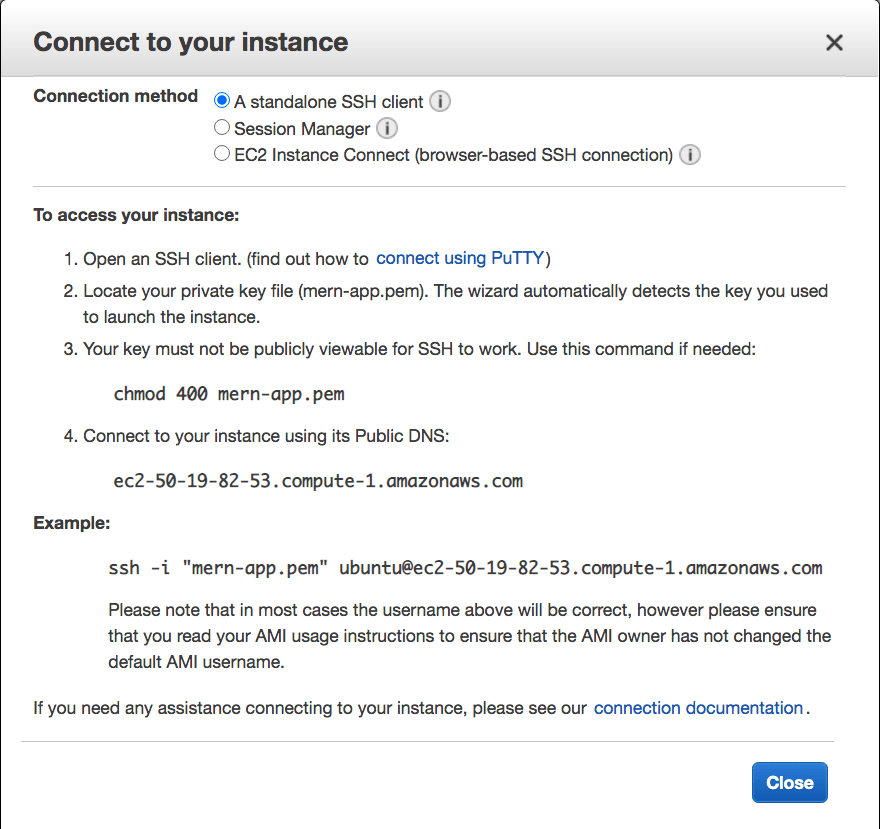
-
Changing the .pem file's permission to read-only ensures nobody can modify your private key.
Connecting to your EC2 Instance
Now that we have our instance and have allocated an Elastic IP to it.
It is time to connect to our server!
If you have not already, go to the Instances link in the EC2 Dashboard.
With the instance highlighted, click on Connect on the top banner of the Instaces Dashboard.
It should give you a pop up with directions on how to connect to your EC2 instance.
Go back to your project root directory and make sure that your .pem file has the correct permissions.
Run the command:
$ chmod 400 *.pem
Next run the command given to you in the example:
$ ssh -i "<KEY-PAIR>.pem" ubuntu@<YOUR-IP-ADDRESS>.compute-1.amazonaws.com
The ssh should prompt you that the authenticity of host instance can't be established and will show an ECDSA key fingerprint.
It will also ask you Are you sure you want to continue connecting (yes/no)?
Type yes and Enter.
This should take you into the EC2 Instance.
If not, try the ssh command again.
Congratulations you are inside your EC2 Instance!
EC2 Environment Setup
Once you are logged into your server, we will install all of the project dependencies:
We will install the following:
- Django and Python3
- pip
- gunicorn
- NGINX
-
UFW (Firewall)
Firewall Setup
Enable Firewall and allow OpenSSH
% sudo ufw enable
% sudo ufw allow OpenSSH
% sudo ufw allow 'Nginx Full'
Check to make sure we are allowing OpenSSH
% sudo ufw status
Expected output:
To                         Action      From
--                         ------      ----
Nginx Full                 ALLOW       Anywhere
OpenSSH                    ALLOW       Anywhere
Nginx Full (v6)            ALLOW       Anywhere (v6)
OpenSSH (v6)               ALLOW       Anywhere (v6)
Installing Dependencies
Updating packages:
% sudo apt update
% sudo apt upgrade
Installing Python 3, PostgreSQL, NGINX and Gunicorn:
% sudo apt install python3-pip python3-dev libpq-dev postgresql postgresql-contrib nginx gunicorn curl
Setting up the Project on the Remote Server
Recall the steps earlier we did with the dummy project on our local machine. We will repeat that on the EC2 instance.
% git clone https://github.com/rmiyazaki6499/django-app.git
% python3 -m venv env
% source env/bin/activate
% pip3 install -r requirements.txt
% python3 manage.py makemigrations
% python3 manage.py migrate
% python3 manage.py collectstatic
Note: Make sure to update your .env file so that your project has the correct Environment Varialbes necessary to run.
Configuring Gunicorn
Create a gunicorn.socket file:
% sudo vim /etc/systemd/system/gunicorn.socket
Configure the gunicorn.socket file with:
[Unit]
Description=gunicorn socket

[Socket]
ListenStream=/run/gunicorn.sock

[Install]
WantedBy=sockets.target
Next configure the gunicorn.service file with:
% sudo nano /etc/systemd/system/gunicorn.service
Use the configurations below:
[Unit]
Description=gunicorn daemon
Requires=gunicorn.socket
After=network.target

[Service]
User=djangoadmin
Group=www-data
WorkingDirectory=/home/ubuntu/<YOUR-PROJECT>
ExecStart=/home/djangoadmin/pyapps/venv/bin/gunicorn \
--access-logfile - \
--workers 3 \
--bind unix:/run/gunicorn.sock \
<YOUR-PROJECT>.wsgi:application

[Install]
WantedBy=multi-user.target
Start and enable Gunicorn:
% sudo systemctl start gunicorn.socket
% sudo systemctl enable gunicorn.socket
Check the status of gunicorn with:
% sudo systemctl status gunicorn.socket
Configuring NGINX
Next, we need to configure NGINX to redirect web traffic.
Create a new NGINX config file with the following command:
% sudo vim /etc/nginx/sites-available/<YOUR-PROJECT-NAME>
Paste in the following configurations and replace any of the ALL CAPS sections with your own project details:
server {
listen 80;
server_name YOUR_INSTANCE_IP_ADDRESS;

location = /favicon.ico { access_log off; log_not_found off; }
location /static/ {
root /home/ubuntu/<YOUR-PROJECT>;
}

location /media/ {
root /home/ubuntu/<YOUR-PROJECT>;
}

location / {
include proxy_params;
proxy_pass http://unix:/run/gunicorn.sock;
}
}
Once your NGINX config is set up, make sure there are no syntax errors with:
% sudo nginx -t
Next, create a soft link of your config file from sites-available to the sites-enabled directory. This step is important because NGINX will use the configuration settings located at /etc/nginx/sites-available/default by default if there is nothing in sites-enabled.
% sudo ln -s /etc/nginx/sites-available/<YOUR-PROJECT-NAME> /etc/nginx/sites-enabled
Restart the NGINX Web Server with:
% sudo systemctl restart nginx
Now if you go to your Elastic IP on your browser it should show the app!
Setting up Continuous Deployment
Continuous Deployment is helpful because it saves you the time of having to ssh into your EC2 instance each time you make an update on your codebase.
In this project, we will be using a Github Action called AWS SSM Send-Command created by peterkimzz to implement auto-deployment.
Github Actions
Github Actions is a service by Github that allows you to perform actions such as run scripts every time something happens to a repository. In our case, we will run a script to install the latest dependencies and restart our server every time a push is made to master.
For Github Actions to work, it needs a way to communicate with the EC2 Instance and vice-versa. In order to do that, we need to assign permissions via IAM roles.
Create SSM Role
To create an IAM Role with AmazonSSMFullAccess permissions:
- Open the IAM console at https://console.aws.amazon.com/iam/.
- In the navigation panel, select Roles, and then click Create role.
- Under Select type of trusted entity, choose AWS service.
- In the Choose a use case section, choose EC2, and then choose Next: Permissions.
- On the Attached permissions policy page, search for the
AmazonSSMFullAccesspolicy, choose it, and then choose Next: Review. - On the Review page, type a name in the Role name box, and then type a description.
-
Choose Create role. The system returns you to the Roles page.
Assigning an SSM Role to EC2 Instance
Once you have the Role created:
- Go to the EC2 Instance Dashboard
- Go to the Instances link
- Highlight the Instance
- Click on Actions
- Instance Settings
- Attach/Replace IAM Role
- Select the SSM Role you had created earlier
-
Hit Apply to save changes
Github Secrets
With our instance being able to use the SSM Agent, we will need to provide it some details so that it can access our EC2 instance.
Now that the instance is able to communicate to Github via SSM Agent, you will need to provide the repo with credentials. Github Secrets act like environment variables for repositories and store sensitive data such as AWS login information. In order for the Github Actions script to work, it needs these three secrets: AWS_ACCESS_KEY, AWS_SECRET_ACCESS_KEY, and INSTANCE_ID.
There is an article by AWS on how to find your AWS Access Key and Secret Access Key here. Your instance ID is shown on your instances tab under EC2.
Start by going to your Github project repo:
- Then go to your Settings
- On the menu on the left, look for the link for Secrets
-
There, add the three Secrets with these keys:
AWS_ACCESS_KEY_IDAWS_SECRET_ACCESS_KEY-
INSTANCE_IDOnce these Secrets are set, we are ready to move on!
Deployment script
Next, let's create a bash script to download dependencies and restart NGINX and PM2. Inside the EC2 instance, create a deploy.sh script in the root of the directory:
% vim deploy.sh
Fill the contents with the bash commands we ran to build the project earlier:
#!/bin/sh
sudo git pull origin master
sudo pip3 install -r requirements.txt
python3 manage.py makemigrations
python3 manage.py migrate
python3 manage.py collectstatic
sudo systemctl restart nginx
sudo systemctl restart gunicorn
YAML File
AWS SSM Send-Command requires a .yml file to execute. At the root of the project, create these two directories:
% mkdir -p .github/workflows/
Create a new YAML file with:
% sudo vim .github/workflows/deploy.yml
Paste in the following:
name: Deploy using AWS SSM Send-Command

on:
    push:
        branches: [master]

jobs:
    start:
        runs-on: ubuntu-latest

        steps:
        - uses: actions/checkout@v2

        - name: AWS SSM Send Command
        uses: peterkimzz/aws-ssm-send-command@1.0.1
        with:
        aws-access-key-id: ${{ secrets.AWS_ACCESS_KEY_ID  }}
        aws-secret-access-key: ${{ secrets.AWS_SECRET_ACCESS_KEY  }}
        aws-region: us-east-1
        instance-ids: ${{ secrets.INSTANCE_ID  }}
        comment: Deploy the master branch
        working-directory: /home/ubuntu/<YOUR PROJECT DIRECTORY>
        command: /bin/sh ./deploy.sh
The Secrets we provided to the repo earlier comes into use in this script.
There are 3 parts of the .yml file to configure:
- The aws-region should be the same region as where you have created your EC2 instance. (If you do not know, check the top left of your EC2 console to confirm the region you are in).
- working-directory should be the directory where you created the deploy.sh script.
- command should be the command you would like the SSM agent to run.
Once this is complete, commit and push the workflow to your repo.
Setting up your Domain
So far, users can access the site using the Elastic IP. However, it can be difficult to remember and share so we will configure a custom domain name.
To get started, you need to first purchase a domain. This can range from $10 to $1,000+s. Amazon has a service called Route53 you can use or you can choose other providers such as Google Domains, GoDaddy, etc. (we used Google for AlgoAcademy which was $10/year).
There are two steps you would need to configure to connect the project with a custom domain:
- Create domain records with DNS registrar
-
Configure NGINX on the EC2 instance to recognize the domain
Creating Domain records
Let's start with configuring our DNS with records:
- Go to the DNS portion of your registrar.
- Find where you can create custom resource records.
Set the records like so:
| Name | Type | TTL | Data |
|---|---|---|---|
| @ | A | 1h | YOUR-ELASTIC-IP-ADDRESS |
| www | CNAME | 1h | your-awesome-site.com |
Configuring our Web Server
Edit the NGINX config file inside your EC2 instance:
% sudo vim /etc/nginx/sites-available/default
Update the server:server_name section of the config file:
server {
server_name <YOUR-ELASTIC-IP> your-awesome-site.com www.your-awesome-site.com;
...
Save and restart NGINX:
sudo sudo systemctl restart nginx
DNS changes can take up to 48 hours to update so your results may vary. Once it is complete, going to your custom domain should redirect you to your app.
HTTPS
Secure Sockets Layer (SSL) is a standard security technology for establishing an encrypted link between a server and a client. So far, we have been serving web content over HTTP, which can be dangerous as data sent between the server and client is not encrypted. If you are handling user sign-in and need to protect data such as passwords or credit card information, it is always best practice to have SSL certification on your applications.
In this tutorial, we will be using Certbot by letsencrypt.org, a non-profit organization that provides free SSL Certificates.
Installing Certbot
On your browser go to https://certbot.eff.org/instructions.
Select the Software and Operating System (OS) you are using. In this case, we are using NGINX and Ubuntu 18.04 LTS (bionic).
Inside your EC2 Instance, follow the command-line instructions until you see these instructions:
% sudo certbot --nginx
After running this command, Certbot will present to you the following prompt: Which names would you like to activate HTTPS for?
If NGINX is configured correctly, it should show both your root domain as well as with the www subdomain:
1: your-awesome-site.com
2: www.your-awesome-site.com
Select enter to activate both HTTP and HTTPs. The next prompt will be:
Please choose whether or not to redirect HTTP traffic to HTTPS, removing HTTP access.
- - - - - - - - - - - - - - - - - - - - - - - - - - - - - - - - - - - - - - - -
1: No redirect - Make no further changes to the web server configuration.
2: Redirect - Make all requests redirect to secure HTTPS access. Choose this for
new sites, or if you're confident your site works on HTTPS. You can undo this
change by editing your web server's configuration.
Select option 2 as this will redirect all traffic through HTTPS and is the most secure option. Afterward, Certbot will make changes to the NGINX configuration file.
Note: Once your site is using HTTPS, double-check your API calls and make sure that they are going to the https:// endpoint rather than http://. This may be an unnecessary precaution, but it is an easy bug to miss.
Next, go to your custom domain. Check to see if there is a lock icon next to your URL.
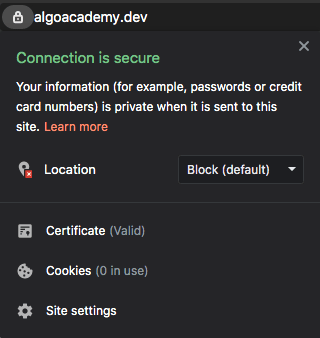
Congratulations! You have successfully deployed a web app with HTTPS!
Closing Thoughts
I hope this provided some help for those getting started with web development and AWS. If you run into any problems, please feel free to reach out to either me or Tu and we can try our best to help. Thank you for reading!


Top comments (13)
Still in beta but now you can run your Docker compose files directly to Amazon ECS.
docs.docker.com/engine/context/ecs...
It abstracts a lot of the manual set up in the AWS console.
Awesome! Thanks for the heads up!
I will have to give it a try and update the guide.
Hi Ryuichi! Thanks for your post. I followed it, and I can browse to my django project. However, the admin site does not load any CSS. I collected the static files and double checked the nginx config to no avail. Any hints?
Don't worry! I found my mistake: the /home/user directory did not have execution rights for its user group and others. So, I changed the permissions by running:
Hi Jorge!
Sorry for the late response and for not being able to help you. I wrote this guide a couple of years ago so some things might be out of date. Your comment will help anyone who runs into the same issue again so I really appreciate your comment!
Hi Ryu, saw your profile on Twitter. I'm was just recently deployed a django app to a VPS. Though I followed a different method. Curious whether you have recommendation on project deployment once a project is up and running. (pulling newest version from github repo to server)
Good stuff btw!
I'm launching my own app to AWS with you setup, thanks a lot for sharing. I have one question though. Don't you need RDS when building for production ?
Hi Jose!
Thank you for checking out my guide!
Good point and I think I did not mention it but yes using either RDS or some other database service would be necessary.
For my personal project, I used ElephantSQL for a Postgres database as it was free but you are free to use whichever database works best for you!
I might do a follow-up guide on setting up a database with AWS when I have the time...
Thanks for replying, I'll be waiting for your follow-up. Keep it up!
I failed to start guvicorn, its saying failed to gunicorn.socke failed, also in status its inactive
is it necessary to turn on the 8000 port on inbound security group, once we set up Nginx/Apache for the static contents. The port for apache/nginx could get the requests right?
yes it is necessary to add 8000 port on inbound security group..
I'm just a beginner to this, can anyone explain why the docker is being used here?