Using Xamarin.Forms to develop mobile applications is particularly desirable because most of the UI and interaction logic for iOS and Android can be shared in a single common project. However, there are instances where code cannot be shared and has to be implemented in the platform specific projects.
One scenario that we will be discussing in this blog is setting up an application as a sharing target. There are a hand full of items that a user could share to an application from a device, for example images, text and files of various types. This post will walkthrough a sample for sharing url links from a browser to a Xamarin application, while discussing other sharing options.
Here is the documentation on how to setup an Android application as a sharing target and the sample below uses that as a reference. However, there aren’t many resources online on how to navigate back to the original application after the sharing is complete which the sample below will get into.
For Xamarin.iOS on the other hand, there are tools and templates available for setting up an iOS extension project. An IOS extension is a small standalone application for the sole purpose of displaying the sharing UI on the host application. The host application is the application that does the sharing to the target application and in the sample below the host application would be a browser application.
Below I will walk through a step by step example for setting up an Android and iOS application as a target for sharing url links.
Setting up your Xamarin.Android application as a sharing target
1.) Add an intent filter to the AndroidManifest.xml file like below.
<?xml version="1.0" encoding="utf-8"?>
<manifest xmlns:android="http://schemas.android.com/apk/res/android" android:versionCode="1" android:versionName="1.0" package="com.companyname.sharelinksamplexamandroid">
  <uses-sdk android:minSdkVersion="21" android:targetSdkVersion="28" />
    <application android:label="ShareLinkSampleXamAndroid.Android" android:theme="@style/MainTheme">
       <activity android:name=".MainActivity" >
          <intent-filter>
             <action android:name="android.intent.action.SEND" />
             <category android:name="android.intent.category.DEFAULT" />
             <data android:mimeType="text/plain" />
          <intent-filter/>
       <activity />
     <application/>
  <uses-permission android:name="android.permission.ACCESS_NETWORK_STATE" />
<manifest/>
You can add multiple “intent-filter” tags for each media type that you want to allow sharing to your application as shown here. For this example, we’ve set up one intent-filter with the android:mimetype set to “text/plain” for sharing links.
2.) Set the name attribute on the activity that will receive the callback when a user clicks the share icon.
In the manifest above, the android:name value on the activity tag corresponds to the activity that will receive the callback. For Xamarin.Forms applications, the activity has to be the main launcher, if not the application will crash. And the name has to be preceded by the application’s package name like below

3.) Display and handle the url that the user wants to share to the application.
In the MainActivity.OnCreate method, first check if the Intent.Action and Intent.Type values corresponds to the values set in the AndroidManifest. If they match that means an application or browser has requested to share a url link to our application and now we can display the UI for handling this. In the sample below, a Dialog is displayed with the url and a text input for the user to enter a description for the url.
4.) And when the user is done, FinishAndRemoveTask() is called to kill the sharing request task and FinishAffinity() navigates the user back to the application that did the sharing.
     protected override void OnCreate(Bundle savedInstanceState)
     {
        TabLayoutResource = Resource.Layout.Tabbar;
        ToolbarResource = Resource.Layout.Toolbar;

        base.OnCreate(savedInstanceState);
        Xamarin.Essentials.Platform.Init(this, savedInstanceState);
        global::Xamarin.Forms.Forms.Init(this, savedInstanceState);
        LoadApplication(new App());

        if (Intent.ActionSend.Equals(Intent.Action) &&
            Intent.Type != null &&
            "text/plain".Equals(Intent.Type))
          {
             handleSendUrl();
          }
    }

    private void handleSendUrl()
    {
       var view = new LinearLayout(this) { Orientation = Orientation.Vertical };
       var url = Intent.GetStringExtra(Intent.ExtraText);

       var urlTextView = new TextView(this) { Gravity = GravityFlags.Center };
       urlTextView.Text = url;

       view.AddView(urlTextView);
       var description = new EditText(this) { Gravity = GravityFlags.Top };
       view.AddView(description);

       new AlertDialog.Builder(this)
                .SetTitle("Save a URL Link")
                .SetMessage("Type a description for your link")
                .SetView(view)
                .SetPositiveButton("Add", (dialog, whichButton) =>
                {
                    var desc = description.Text;
                    //Save off the url and description here
                    //Remove dialog and navigate back to app or browser that shared
                    //the link
                    FinishAndRemoveTask();
                    FinishAffinity();
                })
                .Show();
   }
Setting up your Xamarin.iOS application as a sharing target
1.) Add a new iOS > Extension > Share Extension project like below. I did try the Share Links Extension template but I could not get it to run on my simulator with Xamarin.Forms version 5.0 on VSMac version 8.9.2.

The template should contain the following files:
- Info.plist
- MainInterface.storyboard
- ShareViewController
2.) To allow sharing of only url links to your application, modify the NSExtensionAttributes dictionary in the Info.plist file of the Extension project to the following:
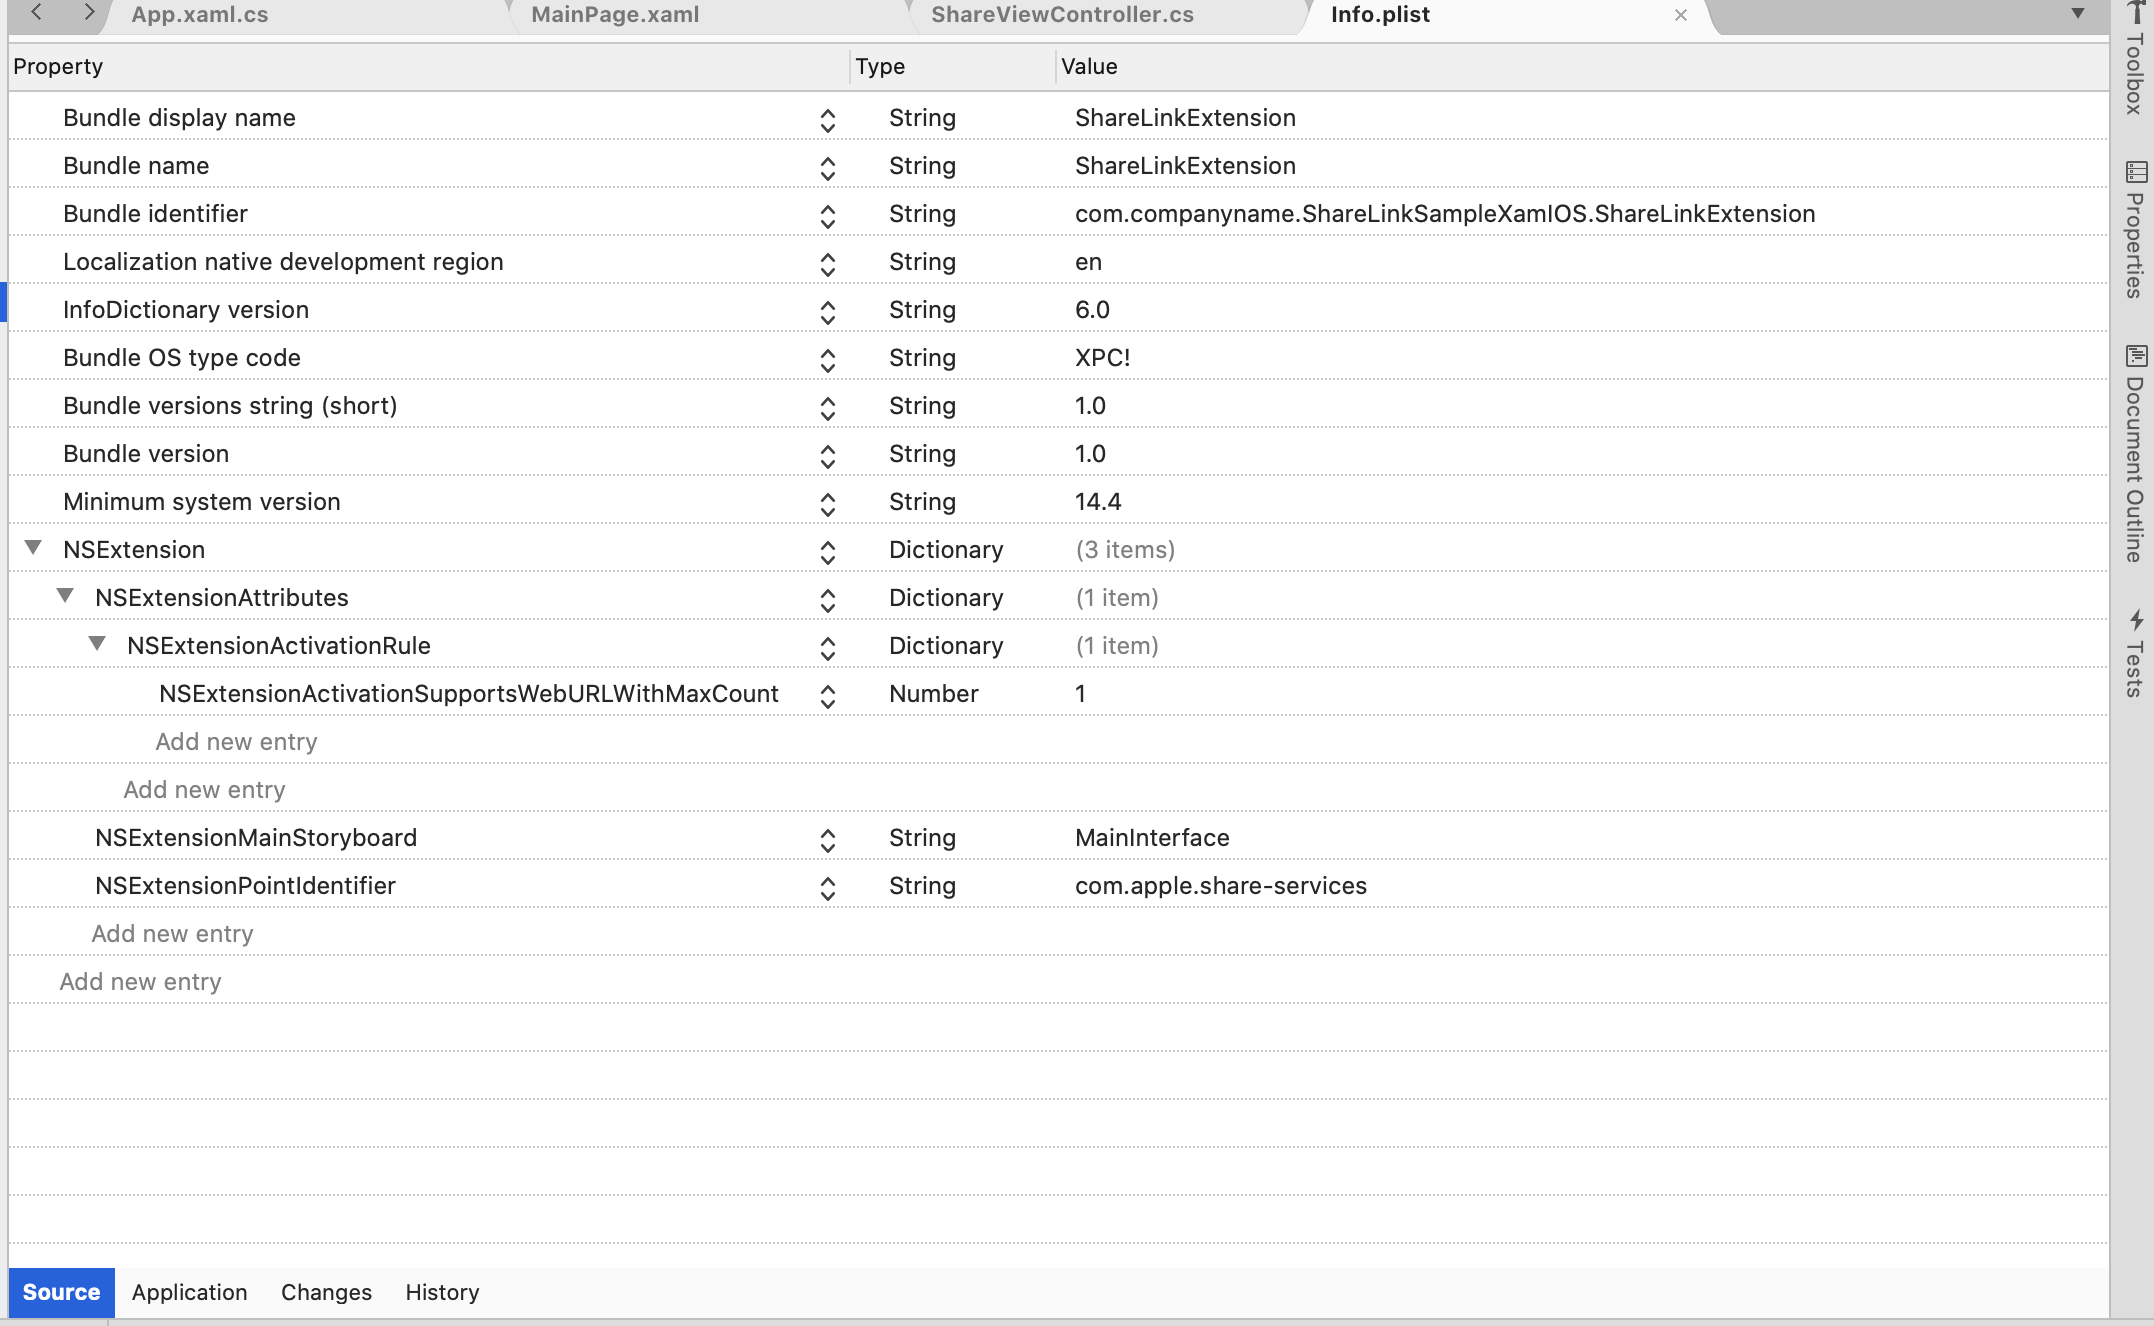
Also notice that the first part of bundle identifier “com.companyname.ShareLinkSampleXamIOS” matches the bundle identifier of the iOS project. They have to match for the extension to work.
3.) Receive and save off the url and description shared by the user.
In the ShareViewController.DidSelectPost method enumerate the shared items and get the url as shown in the code below:
    public override void DidSelectPost()
    {
       var description = "";
       var url = "";

       foreach (var extensionItem in ExtensionContext.InputItems)
       {
          if (extensionItem.Attachments != null)
          {
             foreach (var attachment in extensionItem.Attachments)
             {
                if (attachment.HasItemConformingTo(UTType.URL))
                {
                   attachment.LoadItem(UTType.URL, null, (data, error) =>
                   {
                     var nsUrl = data as NSUrl;
                     url = nsUrl.AbsoluteString;
                     WriteToDebugFile($"URL - {url}");
                     //Save  off the url and description here
                   });
                }
             }
          }
          if(!string.IsNullOrWhiteSpace(extensionItem.AttributedContentText.Value))
          {
             description = extensionItem.AttributedContentText.Value;
             WriteToDebugFile($"URL description - {description}");
          }
       }
       ExtensionContext.CompleteRequest(new NSExtensionItem[0], null);
   }
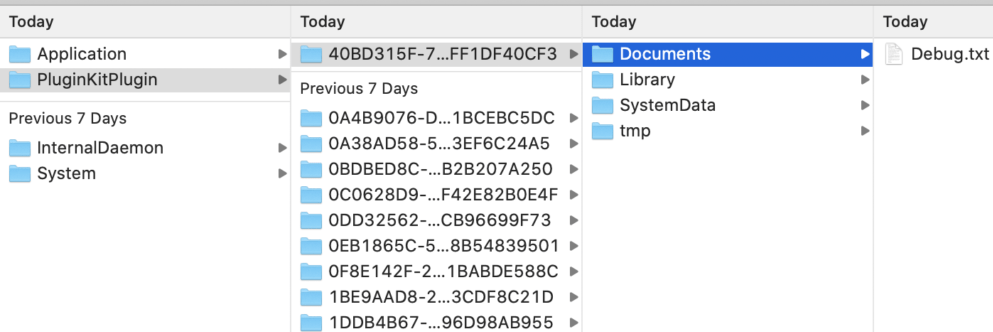
4.) Debugging the iOS extension can be a little tricky as the debugger does not get attached to the extension. Instead I used the approach of writing to the filesystem of the extension application as shown below:
   private void WriteToDebugFile(string dbgText)
   {
      var documents = Environment.GetFolderPath(Environment.SpecialFolder.MyDocuments);
      var filename = Path.Combine(documents, "Debug.txt");

      if (!File.Exists(filename))
      {
         File.WriteAllText(filename, $"\n{DateTime.Now} - {dbgText}");
      }
      else
      {
         File.AppendAllText(filename, $"\n{DateTime.Now} - {dbgText}");
      }
   }
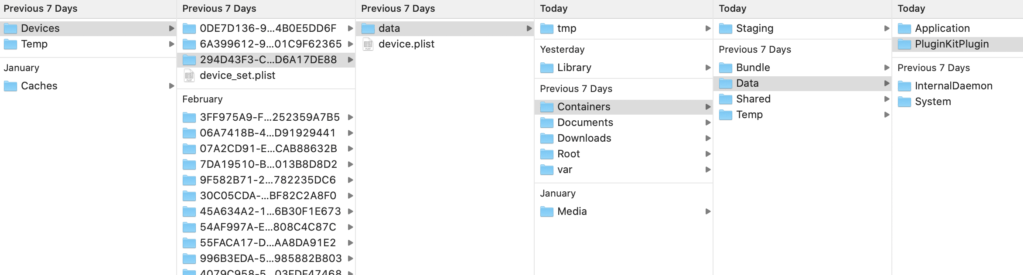
Because an extension is a standalone application, it has its own application folder separate from the main application folder. To navigate to the folder, start by opening the Library folder on your MacBook. From there, navigate to the
Developer > CoreSimulator > Devices folder and you should see a list of all your simulators. And from there, navigate to the PluginKitPlugin folder and locate your application folder.
The full code samples can be found below:
Android : https://github.com/criticalhittech/ShareLinkSampleXamAndroid
iOS: https://github.com/criticalhittech/ShareLinkSampleXamIOS