- Azure
- Azure DevOps
- Xamarin
In this series of tutorial we are going to show how to setup your continuous integration (CI) and continuous delivery (CD) for your mobile application using Azure DevOps. For the purpose of this tutorials we will focus on Xamarin.Forms application but these concepts can be applied easily to any mobile technologies.
There are many different ways to setup your continuous integration and continuous delivery for an application, in this series you will see how to setup it using yaml pipelines and how to reuse it in your different projects.
Why using yaml?
yaml is used as the new way to define your pipelines using Azure DevOps, there are multiple reasons to use it:
- You can save your
yamlconfiguration in your project repository. - You can reuse it in different project easily.
- You can create customed templates and build your own
yamlgallery.
Each tutorial can be read independently, but if you follow it entirely you will understand the full process to improve your pipelines step by step. You will find the source code inside this Github repository, each tutorial will have its own branch, so you can start at any tutorial of the series.
What do you need?
To be able to do the series entirely you will need:
- An Azure DevOps account for the pipelines.
- An App Center account to distribute your application.
- A
Keystoreto sign your Android application. - Access to an Apple Account to get a
Provisioning profileandp12to sign your iOS application. - A Github account to get the code (Optional).
Continuous Delivery
When you want to create an application you follow this global template:
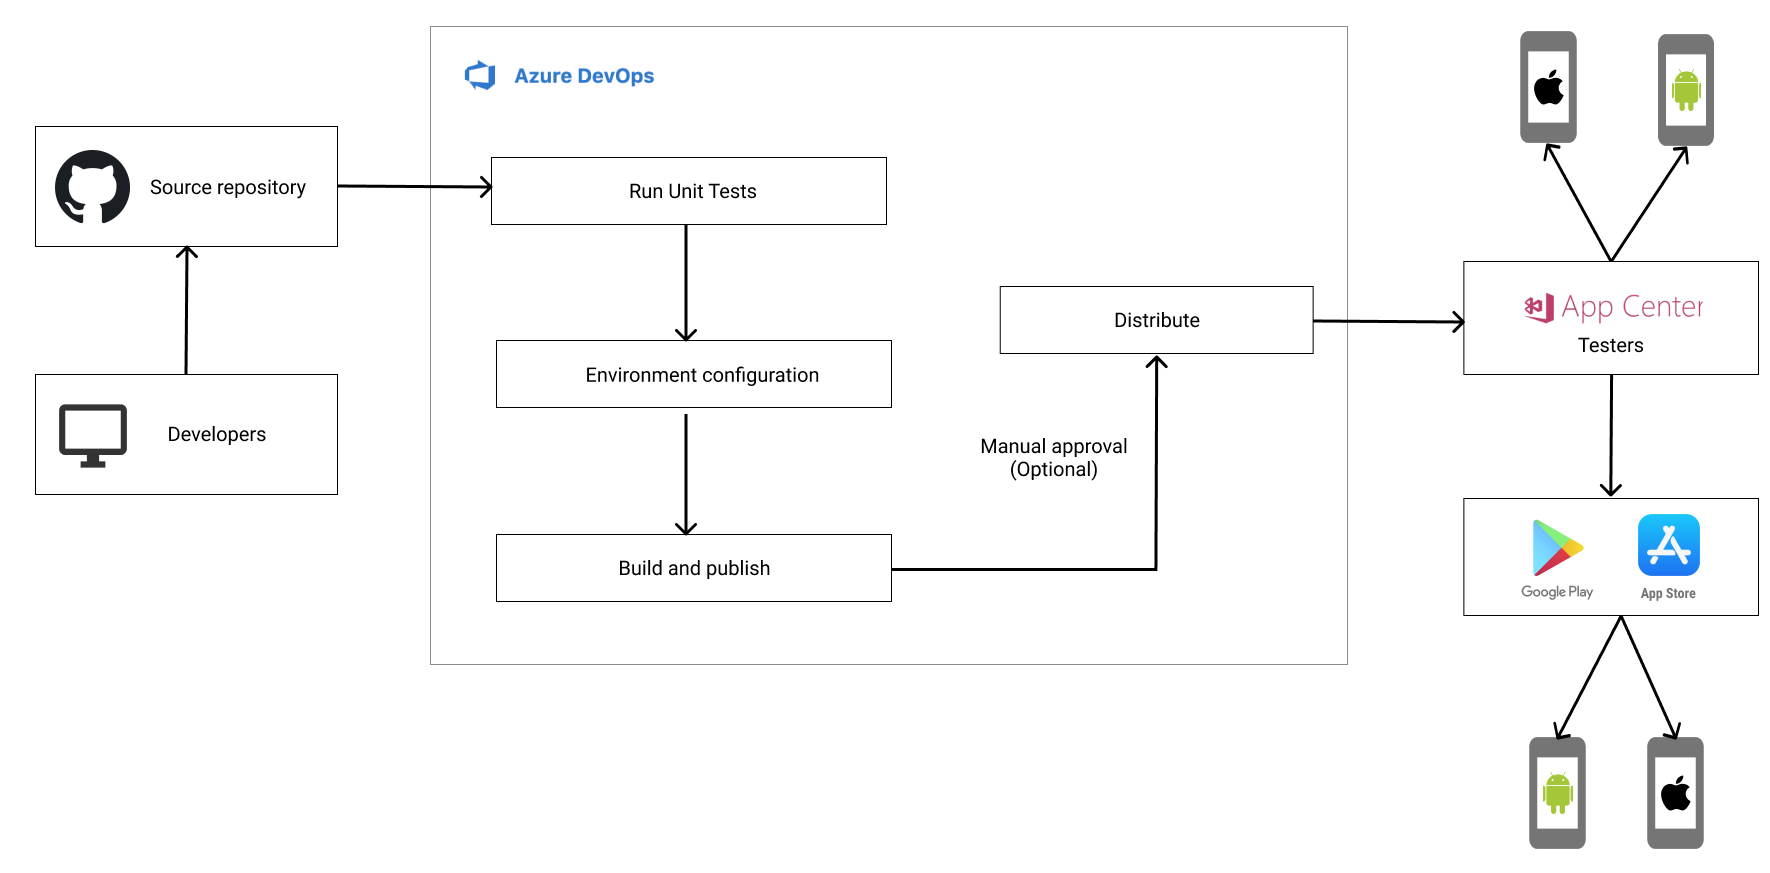
Step one you develop your application with your team and you save your code in a git repository. Each time you add a new feature you will add the Unit Tests associated. Your code will be part of a Pull request that one or two developers of your team will validate. From here your code is inside Azure DevOps git repository, now your CI starts.
Step two, you start running your Unit Tests to validate that everything is still working. Then you apply an environment configuration (QA, Prerealease, Production…) and you build your application on an agent inside Azure DevOps.
Step three, when your build succeed you can now distribute your application through App Center for your team of testers or your customers, and when you are satisfied of a version you can then publish it to a store of your choice!
Then you can go back to step 1 and go again over the cycle of development.
This is basically the steps of developing your own application.
Summary
Below you can find the list of the topics I will show you:
- Run Unit Tests to your Xamarin apps using Azure DevOps
- Add nightly builds to your Xamarin applications using Azure DevOps
- Manage your application by environment using Azure DevOps
- Prepare your application for publishing using Azure DevOps
- Create your own bank of templates for Azure DevOps
I will post each tutorial on Twitter keep in touch, and see you next week!
If you have suggestions about this series of tutorial, feel free to contact me on Twitter I will kindly answer you!