

Swift Regex Deep Dive
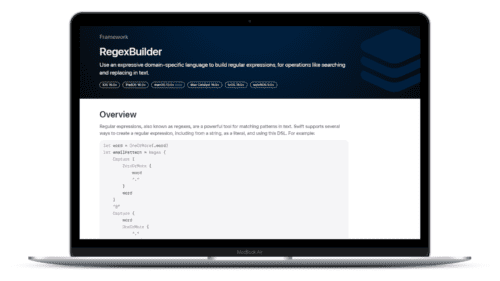
iOS MacOur introductory guide to Swift Regex. Learn regular expressions in Swift including RegexBuilder examples and strongly-typed captures.

My colleagues and I just shipped a tvOS project for a client in December. Toward the end, it was a high-powered rush to knock out some troublesome bugs so that we could ship on time. When we finally shipped, I had a lot of momentum. I had been thinking about the interaction model of tvOS and the applicability of game controllers, and so I decided to invest some time in learning about them.
Apple handles this through the Game Controller Framework on tvOS and iOS. Apple’s Game Controller Programming Guide is a good place to start. It’s written for iOS originally, as they talk about supporting those device-wrapping controllers; but like so many things in tvOS, it’s close enough to iOS that the pattern is still applicable.
In brief, there are static methods for starting and stopping controller discovery. Via notification, that process vends instances of GCController as needed. Any given GCController might have a GCMicroGamepad or a GCExtendedGamepad. Each gamepad has an assortment of GCControllerButtonInput and GCControllerDirectionPad properties.
I built the Controlla app (repo here) to detect and list all the controllers and show you all their inputs. It’s a simple app: there is only a centered vertical stack view, which will hold a horizontal panel for each control. The horizontal panels are built from simple building blocks.
To get started, I needed to discover the available controllers. This is done through the time-honored process of subscribing to a few notifications and then kicking off the discovery thread. When the discovery thread has a controller for us, we’re going to get a call to our observer. I stubbed in add and remove methods, and after we have controller panels, we’ll manage the panel stack there.
func startWatchingForControllers() {
     // Subscribe for the notes
    let ctr = NotificationCenter.default
    ctr.addObserver(forName: .GCControllerDidConnect, object: nil, queue: .main) { note in
        if let ctrl = note.object as? GCController {
            self.add(ctrl)
        }
    }
    ctr.addObserver(forName: .GCControllerDidDisconnect, object: nil, queue: .main) { note in
        if let ctrl = note.object as? GCController {
            self.remove(ctrl)
        }
    }
    // and kick off discovery
    GCController.startWirelessControllerDiscovery(completionHandler: {})
}

func stopWatchingForControllers() {
    // Same as the first, 'cept in reverse!
    GCController.stopWirelessControllerDiscovery()

    let ctr = NotificationCenter.default
    ctr.removeObserver(self, name: .GCControllerDidConnect, object: nil)
    ctr.removeObserver(self, name: .GCControllerDidDisconnect, object: nil)
}

func add(_ controller: GCController) {
    let name = String(describing:controller.vendorName)
    if let gamepad = controller.extendedGamepad {
        print("connect extended (name)")
    } else if let gamepad = controller.microGamepad {
        print("connect micro (name)")
    } else {
        print("Huh? (name)")
    }
}

func remove(_ controller: GCController) {

}
What to do with my new-found controller(s)? Well, as you may have surmised from the code above, they’re going to be one of two types.
If you wish to support the use of the Siri Remote as a gameplay controller, you’re going to interact with its GCMicroGamepad.
It has an XY input (the touch-sensitive top area) and two buttons: A (Play/Pause) and X (pressing the top area.) It also offers up a GCMotion, which aligns closely with Core Motion’s CMMotion classes.
The GCExtendedGamepad documentation lists the set of inputs available:
Also, there is an array of LEDs. This isn’t an input but an output; the controller has a playerIndex property which takes an enum. You should honor the spirit of this and set the value appropriately for your game and your use.
Here are all the ways it is possible to observe the values of the direction pad.
guard let gamepad = gamepad as? GCMicroGamepad else { return }

// method one
gamepad.valueChangedHandler = { (gamepad, element) in
    if let dpad = element as? GCControllerDirectionPad {
        print("CTRL : ( dpad )")
    } else {
        print("OTHR : ( element )")
    }
}

// method two
gamepad.dpad.valueChangedHandler = { (dpad, xValue, yValue) in
    print("DPAD : ( dpad )")
}

// method three
gamepad.dpad.xAxis.valueChangedHandler = { (axis, value) in
    print("AXIS: ( axis ) -> ( value ) ")
}

// A bonus: grab the play/pause event
if let ctrl = gamepad.controller {
    ctrl.controllerPausedHandler = { controller in
        // play/pause here
        print("PLAY: ( controller ) ")
    }
}
A diagonal swipe produces…
AXIS: Axis -> 0.0435127
DPAD : DirectionPad (x: 0.044, y: -0.025)
DPAD : DirectionPad (x: 0.044, y: -0.025)
CTRL : DirectionPad (x: 0.044, y: -0.025)
AXIS: Axis -> 0.0873253
DPAD : DirectionPad (x: 0.087, y: -0.068)
DPAD : DirectionPad (x: 0.087, y: -0.068)
CTRL : DirectionPad (x: 0.087, y: -0.068)
AXIS: Axis -> 0.0913773
DPAD : DirectionPad (x: 0.091, y: -0.086)
DPAD : DirectionPad (x: 0.091, y: -0.086)
CTRL : DirectionPad (x: 0.091, y: -0.086)
… and so on.
Notice that the handlers are called outward: First the axis’s handler, then the pad’s handler, then the controller’s handler. Also notice that the axis has a bad description implementation.
There is a fourth method for getting the controller’s values, which you might use if your game has an internal time loop separate from the display loop. It looks like this:
let shot = gamepad.saveSnapshot()
This returns a GCMicroGamepadSnapshot, which offers all the values of the GCMicroGamepad for a moment in time that you can process at your leisure.
I pulled out my notebook and sketched a few horizontal designs for the micro and extended gamepads. This is what I came up with, recreated in Omnigraffle:

The directional pad view needed to display values between (-1.0, 1.0) as shown in the diagram above. I handled this by adding a circular CALayer to a square view, with some logic to translate the pad values to coordinates for the circle’s center. That’s implemented in XYPositionView, which is subclassed as DirectionPadView and MotionView. The latter class also changes the circle’s radius to indicate the Z dimension, and the effect is quite striking:

I saw that I was going to need a view to display the on-off state of a controller button. I began with a UIButton subclass for my ButtonIndicatorView. Simply by modifying the enabled flag, I thought I could display on and off states. This didn’t work well at all! The focus engine thought I was trying to navigate a sea of buttons. What a holy interaction mess that was! The left stick and D-pad would move focus from button to button. The additional highlight and sizing provided by the focus engine made the display ugly, and worse, confusing. The focus engine—in a game, I’d almost always want to handle that interaction myself.
GameControllerKit includes an GCEventViewController, which is a simple view controller subclass that adds a controllerUserInteractionEnabled toggle. When it is set to false, none of the standard actions (eg. direction commands, Menu, and Select) are honored. Since Menu is what exits the app, I’d have to deal with that eventually, but not just yet. I wanna see those controls!
I swapped UILabel for UIButton. After, all, they’re only for display, and don’t need to be interactive. The label dims the background color when the button is active. Then, I created a container view for the ABXY buttons. It creates the buttons, colors their labels, attaches them to the controller, and sets their constraints.
Rather than code-dump these classes here, you can go see them in the Github repository.
Remember how Menu no longer worked? I handled it here:
override func pressesBegan(_ presses: Set<UIPress>, with event: UIPressesEvent?) {
    var menuPressed = false
    if presses.contains(where: { press in press.type == .menu }) {
        menuPressed = true
    }
    if (menuPressed) {
        self.controllerUserInteractionEnabled = true
        let alert = UIAlertController(title: "Quit?", message: "You sure you're out?", preferredStyle: .alert)
        alert.addAction(UIAlertAction(title: "Yep, I'm out", style: .default) { _ in
            super.pressesBegan(presses, with: event)
        })
        alert.addAction(UIAlertAction(title: "Nevermind", style: .default) { _ in
            self.controllerUserInteractionEnabled = false
        })
        self.present(alert, animated: true, completion: nil)
    }
}
Okay, now I’ve got a nice handle on how controllers work. In my next installment, we’ll build a game inspired by the classic Robotron: 2084 game in SpriteKit. We’ll use what we learned here, add what we learned putting SpriteKit on the watch. Then we’ll add in some state machines using GameplayKit, and finally a leaderboard using GameKit.
Our introductory guide to Swift Regex. Learn regular expressions in Swift including RegexBuilder examples and strongly-typed captures.
The Combine framework in Swift is a powerful declarative API for the asynchronous processing of values over time. It takes full advantage of Swift...
SwiftUI has changed a great many things about how developers create applications for iOS, and not just in the way we lay out our...