GSD
The Great Continuum: Getting Started with the ButterCMS Django Starter Kit
Posted by Dawn Wages on October 2, 2023
Table of contents
Why use a cloud-based CMS?
Cloud-based CMSs are headless content APIs that aim to simplify managing content for enterprise to hobbyist websites. The CMS (Content Management System) platform will be hosted by an external provider to give you all the goodies that leads entrepreneurs and makers to pick SaaS (Software as a Service) over rolling your own solution. SaaS technology delivers your application to connect you to cloud-based apps over the internet. It is usually a subscription based service that:
- allows for seamless downstream updates
- is easily accessible with an internet connection and a browser
- has increased security
- has reliable data storage
- is cost effective because it reduces the investment in developer resources to incorporate the latest and greatest features that your cloud-based CMS solution could have out of the box
Why ButterCMS?
Now that I’ve sold you on why a SaaS CMS may work for your team, ButterCMS has provided platform to manage all of your content with a slick new deployment process. I recommend trying ButterCMS, a headless CMS, to see how easy it is to start. The thorough documentation, active blog space and knowledge base help you get the most out of Butter. ButterCMS is a headless cloud-based CMS that separates your front and backends allowing you to have control over whatever frontend solution you’d like. In this example we’ll be using Django and Django template with HTML, CSS and vanilla JavaScript.
Note: If you’re interested in connecting ButterCMS to an app that is not Django, you’re in luck. ButterCMS currently supports Angular, Express, Flutter, Gatsby, Java, Laravel, Next, Node, Nuxt, PHP, vanilla Python, Ruby, Vue, and more...
The ButterCMS features that are most appealing to me comes into the experience for the non-technical editors and how easy it is for the developer to support. There is an integrated team-based workflow, advanced support for media (gifs are notorious for taking down a site or two) and the developer Write API that allows users to write data to the CMS programmatically.
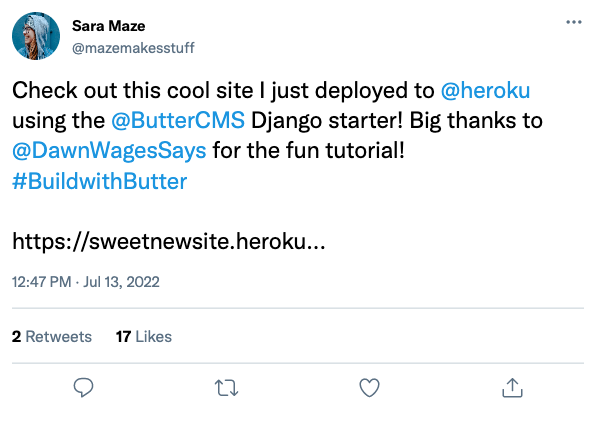
How you can score some sweet Butter swag!
Before we get started with the tutorial you should know that if you follow along with me and deploy the Django starter on your own ButterCMS account (you can sign up for free!) you can score a pretty awesome swag pack from ButterCMS. All you need to do once you've deployed the starter we're working on today is tweet about it in order to be eligible. The tweet should include the following:
- A link to the deployed site
- Mention @ButterCMS and @DawnWagesSays
- Include the hashtag #BuildwithButter
The end result should look something like this:
Setting up your site
Ok great! Lets jump into creating your first site. I expect that following these steps will take you under an hour! Most of the heavy lifting comes with customizing your site. Visit the complete Django code. to see the working site — a fun Star Trek themed site called The Great Continuum: a Ferengi Craig’s List dupe, which at this moment is just a re-skin of the out of the box starter blog—which you can access here. I show you in the Make It Yours section, what the developer experience looks like.
More complicated sites may need to have the data elements more thoughtfully planned before attempting. You may want to get more into the way ButterCMS handles its data structures or how to get a look at the API. Skip ahead to Update your ButterCMS datastore to get more context and find some links to resources.
Login
Navigate to https://buttercms.com/ and create your account.
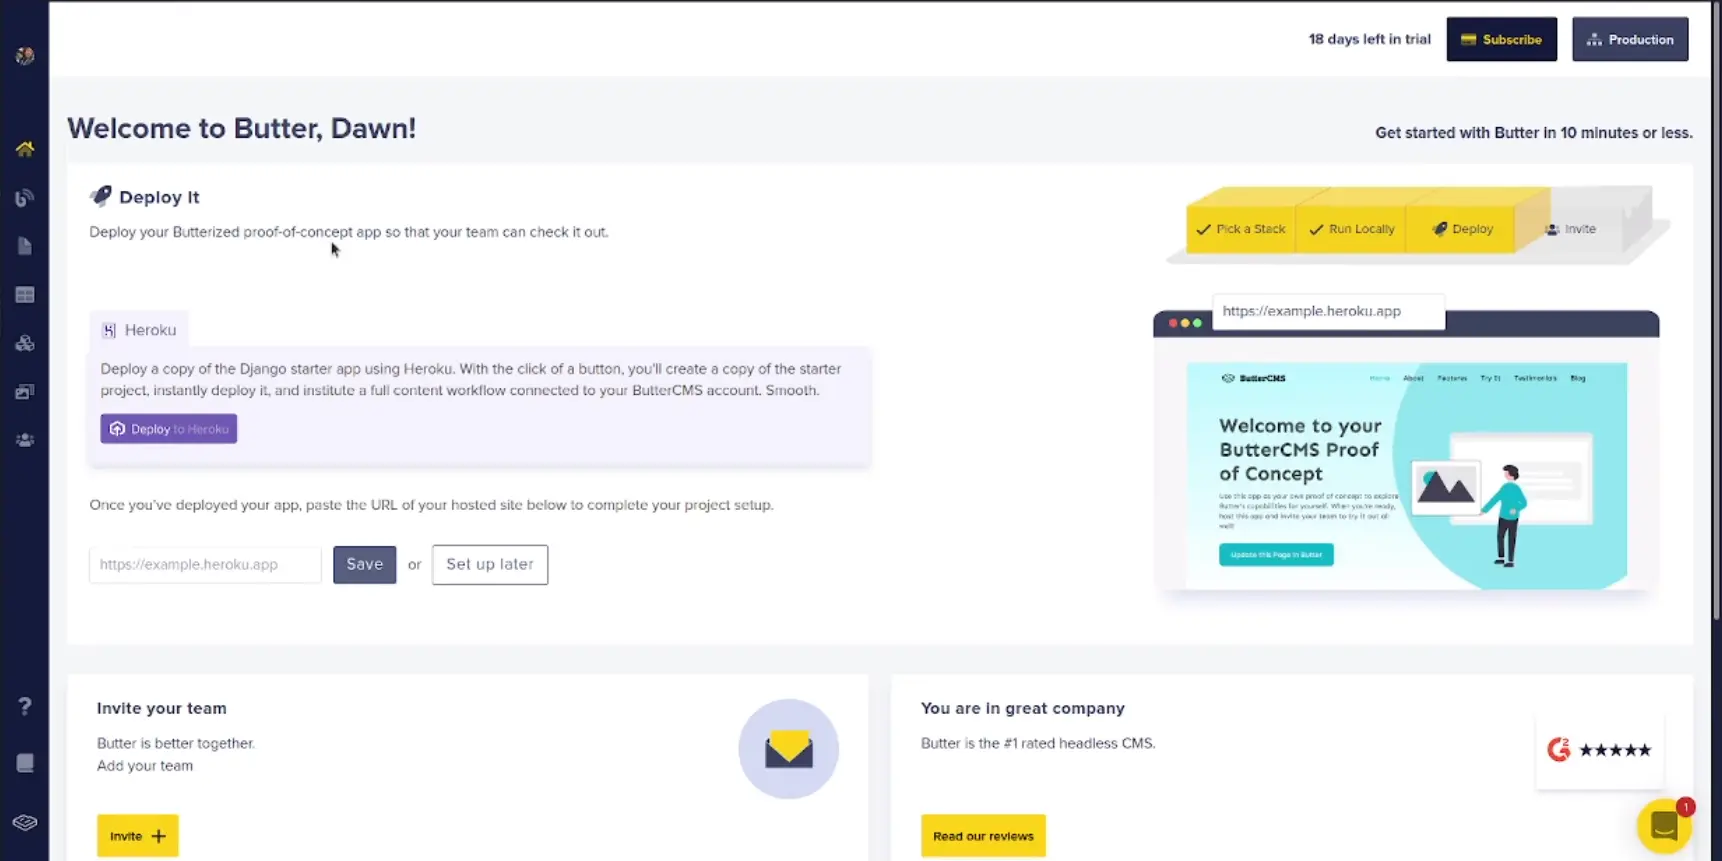
When you first log in you’ll be greeted with a page giving you options to pick your stack.
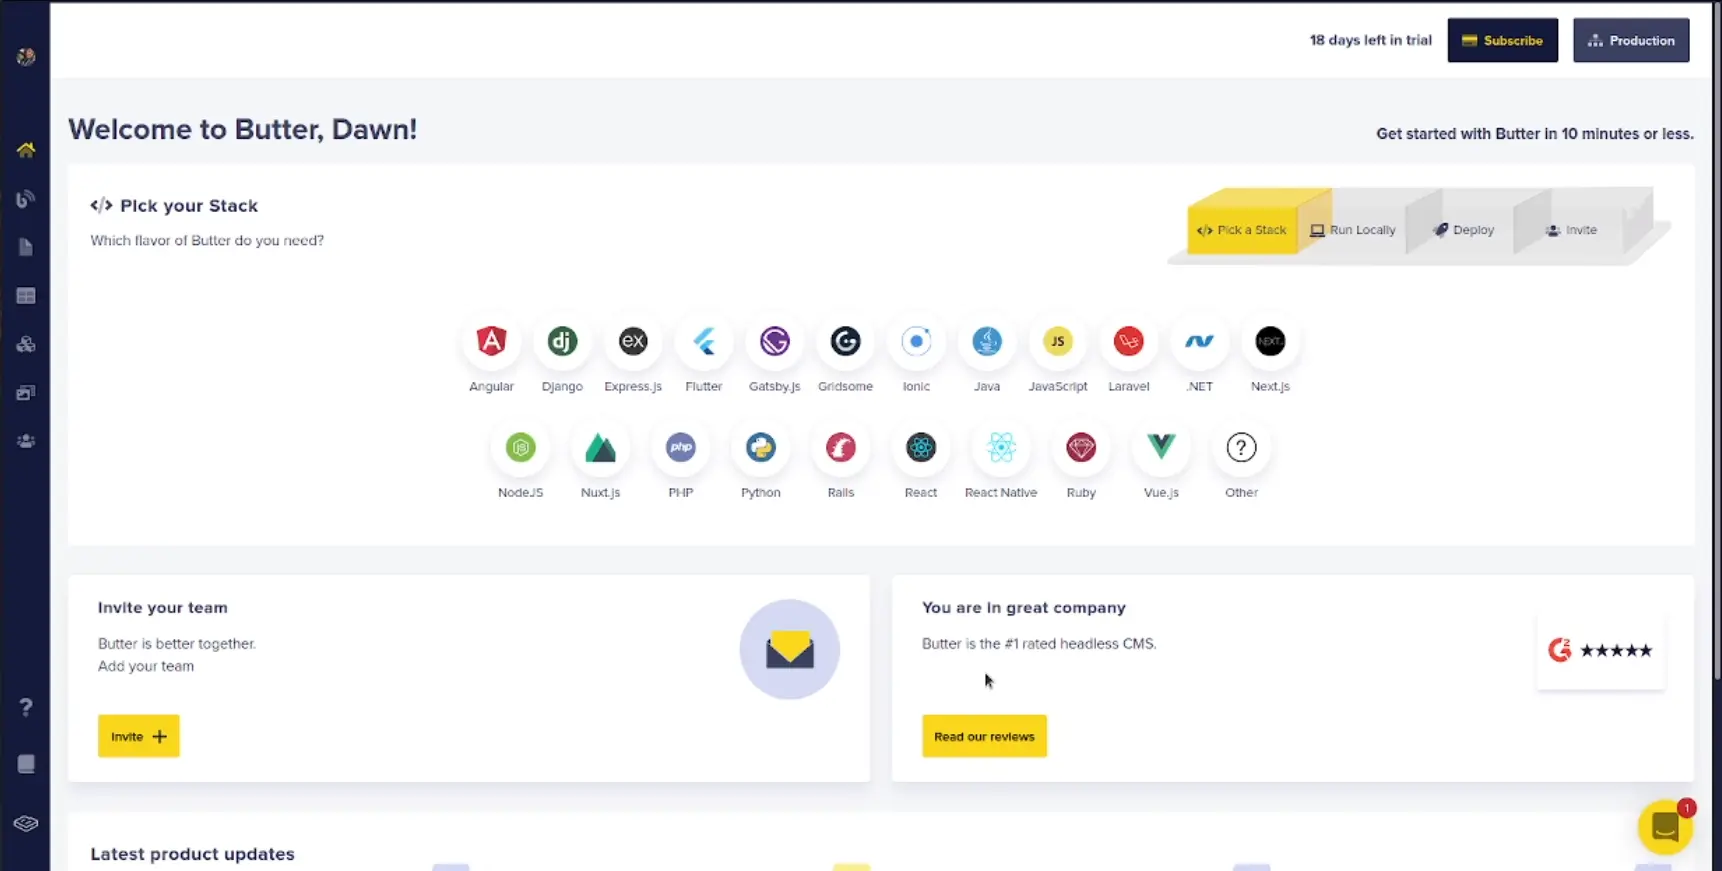
Note: Your landing page will not look like this again. The </> Pick your Stack section at the top leaves after you have created your site and will not come back.
Get your code running locally, step by step
The next page tells you step by step how to start with a sample application and deploy it in a few short steps.
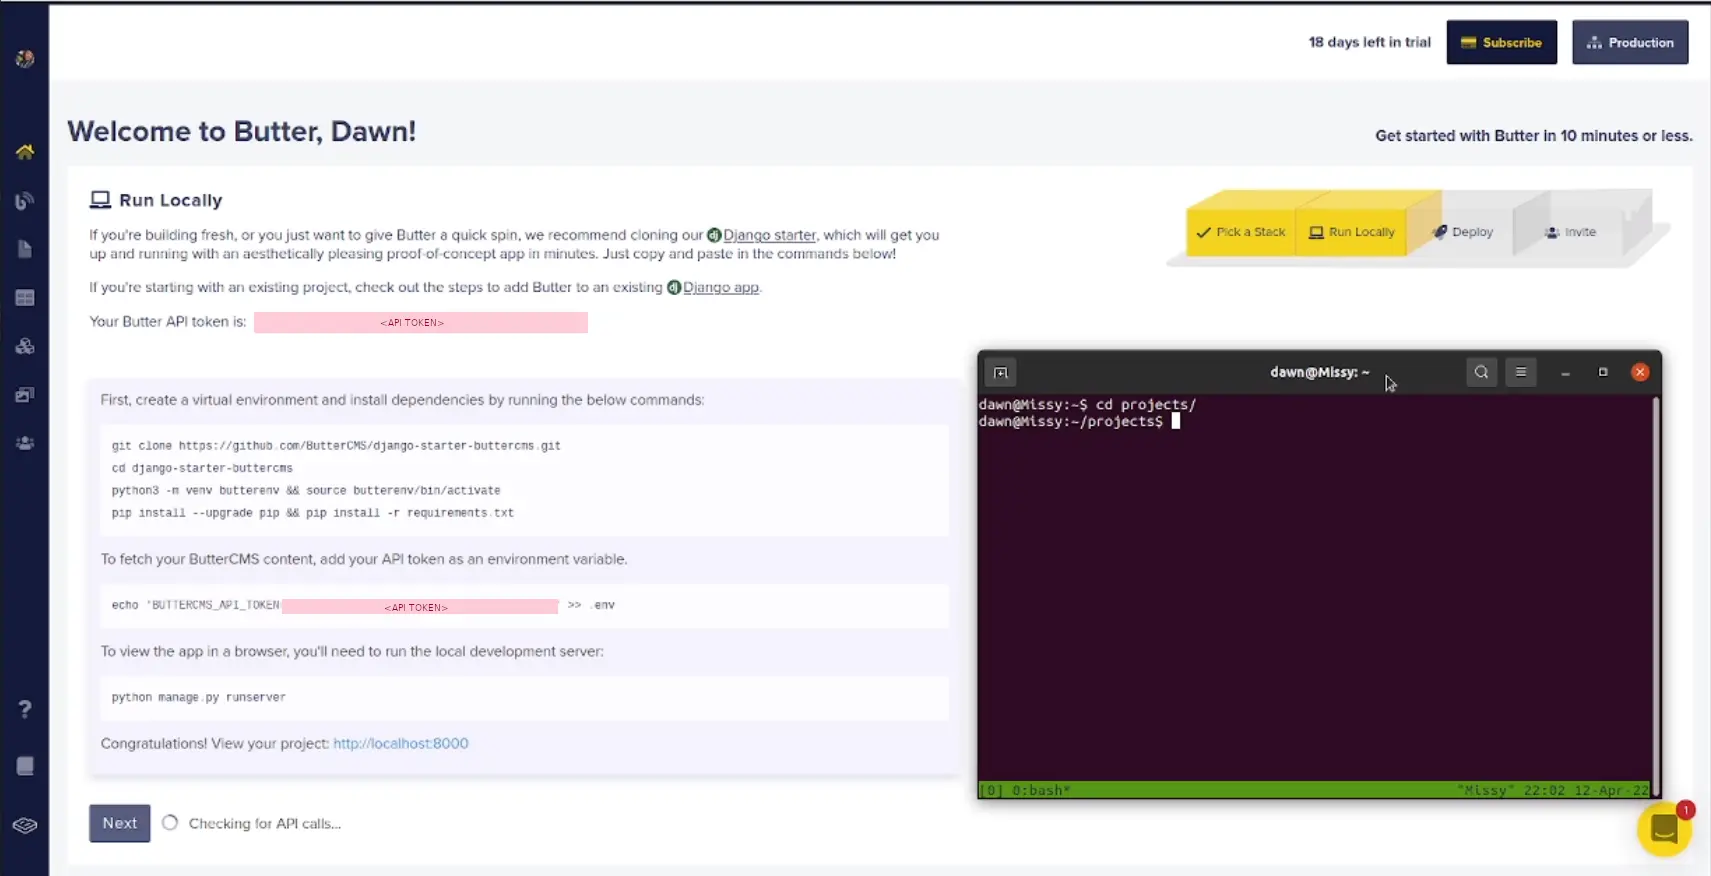
Follow the direction on the page to:
- clone
django-starter-buttercms - create virtual environment named
butterenv - install packages for your application with pip and the default
requirements.txt - copy your ButterCMS API Token to your
.env - run your local application
python manage.py runserverThe next sections below titled A peak into the Django app that ButterCMS gives you and What is not here? go on to describe the application. Skip to Deploy starter experience to continue with the tutorial.
A peak into the Django app that ButterCMS gives you
app.json- information for global application and out of the box describes the proof-of-concept application- starts with a
sqlitedatabase - remember that we’re using a django application. If you’re looking for an external data source that will ultimately be hosted the same place as your application (separately from your site content) — today we will be deploying with Heroku. Procfile- a declarative process file that describes to Heroku the types of processes and commands upon application startup. To learn more about Heroku Procfiles, checkout the Heroku Dev Center.pytest.ini- there are several configuration options for how to have your pytest. In this project, I recommend you test your views as all of the model objects are created in ButterCMS.requirements.txt- it will be helpful to point out the bell of the ballbuttercms-pythonwhich we will discuss a little more later.configdirectory - includes the typical settings directories that, wsgi andurls.pythat handles 400, 403, 404 and 500 errors. The rest of the urls are handled indjango_starter_buttercms/content/urls.py.django_starter_buttercmsdirectoryurls.py- if you’re familiar with Django, you’ll recognize how this file works. We have the url patterns listed for the landing page, blog list, blog search, blog articles, blog category, blog tags, and other page view.views.py- the key to this file is recognizing where ButterCMS starter application handles theclientcontent that we see imported fromcommon.buttercms. We can get all of ButterCMS pages with this line:
butter_page = client.pages.get(
    "*", slug, params=params
)
This works because of the way the content is created in our CMS. This will also translate to accessing blog posts:
blog_posts = client.posts.all(params=kwargs)
What is not here?
For those familiar with Django applications, we see that there is no models.py.
Check out LOCAL_APPS in config/settings/base.py. Here our settings are directing us to a local application that informs the site the shape of the content created in ButterCMS django_starter_buttercms_content.apps.ContentConfig.
class ContentConfig(AppConfig):
    name = "django_starter_buttercms.content"
    verbose_name = _("Content")
Deploy starter experience
Your application should now be running locally at https://localhost:8000.
ButterCMS is now checking for API calls from your locally running application.
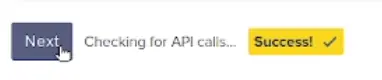
Click the Next button once you see the success label.
Note: This check happens automatically. If you are having trouble with the API check, it is likely that the BUTTERCMS_API_TOKEN was copied to the .env file incorrectly or your environment variables are not set which can be solved by running the shell command source.env.
With one button you can deploy your application to Heroku.
Log into Heroku

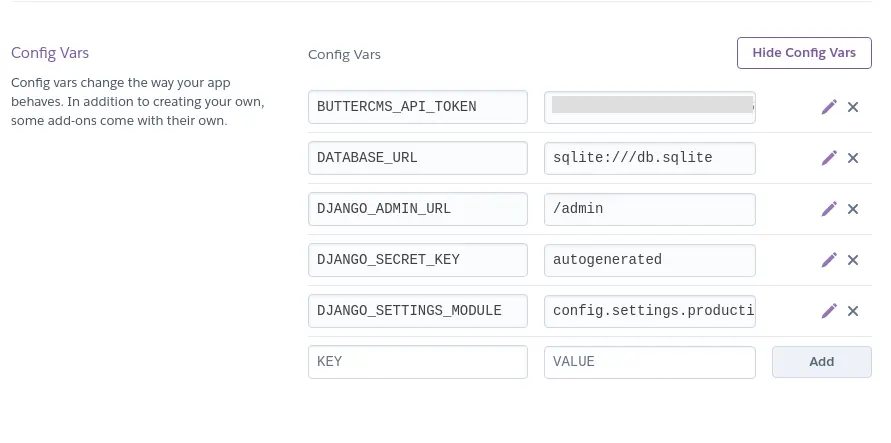
Add in your app name and you can leave all other settings as is. Your BUTTERCMS_API_TOKEN should automatically be applied as Config Vars.
Scroll down to the bottom of the page and click the button Deploy app.
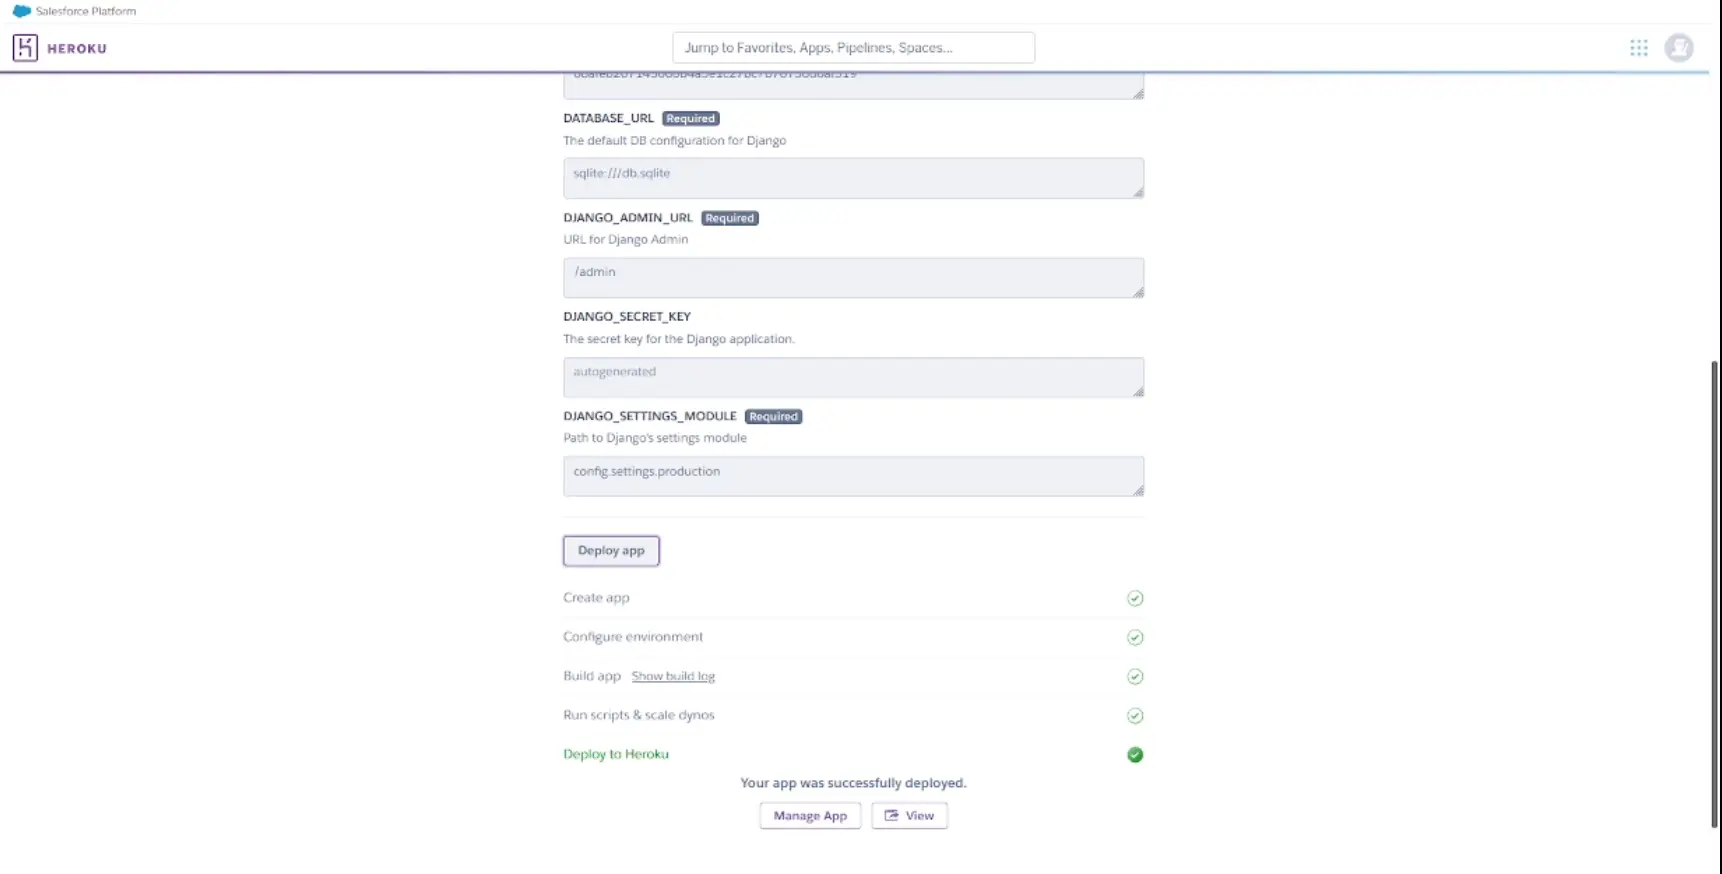
Your app is now live on Heroku! https://<your_app_name>.herokuapp.com.
Copy the url to your Heroku app and copy it back in to your ButterCMS backend to:

Note: Once you’ve finished deploying the site from the dashboard, the main way to review your site will be either through local development or through your Heroku dashboard. You will use the ButterCMS login to edit your site content.
You can now start inviting your team, but we are going to customize our app first.
Make it yours
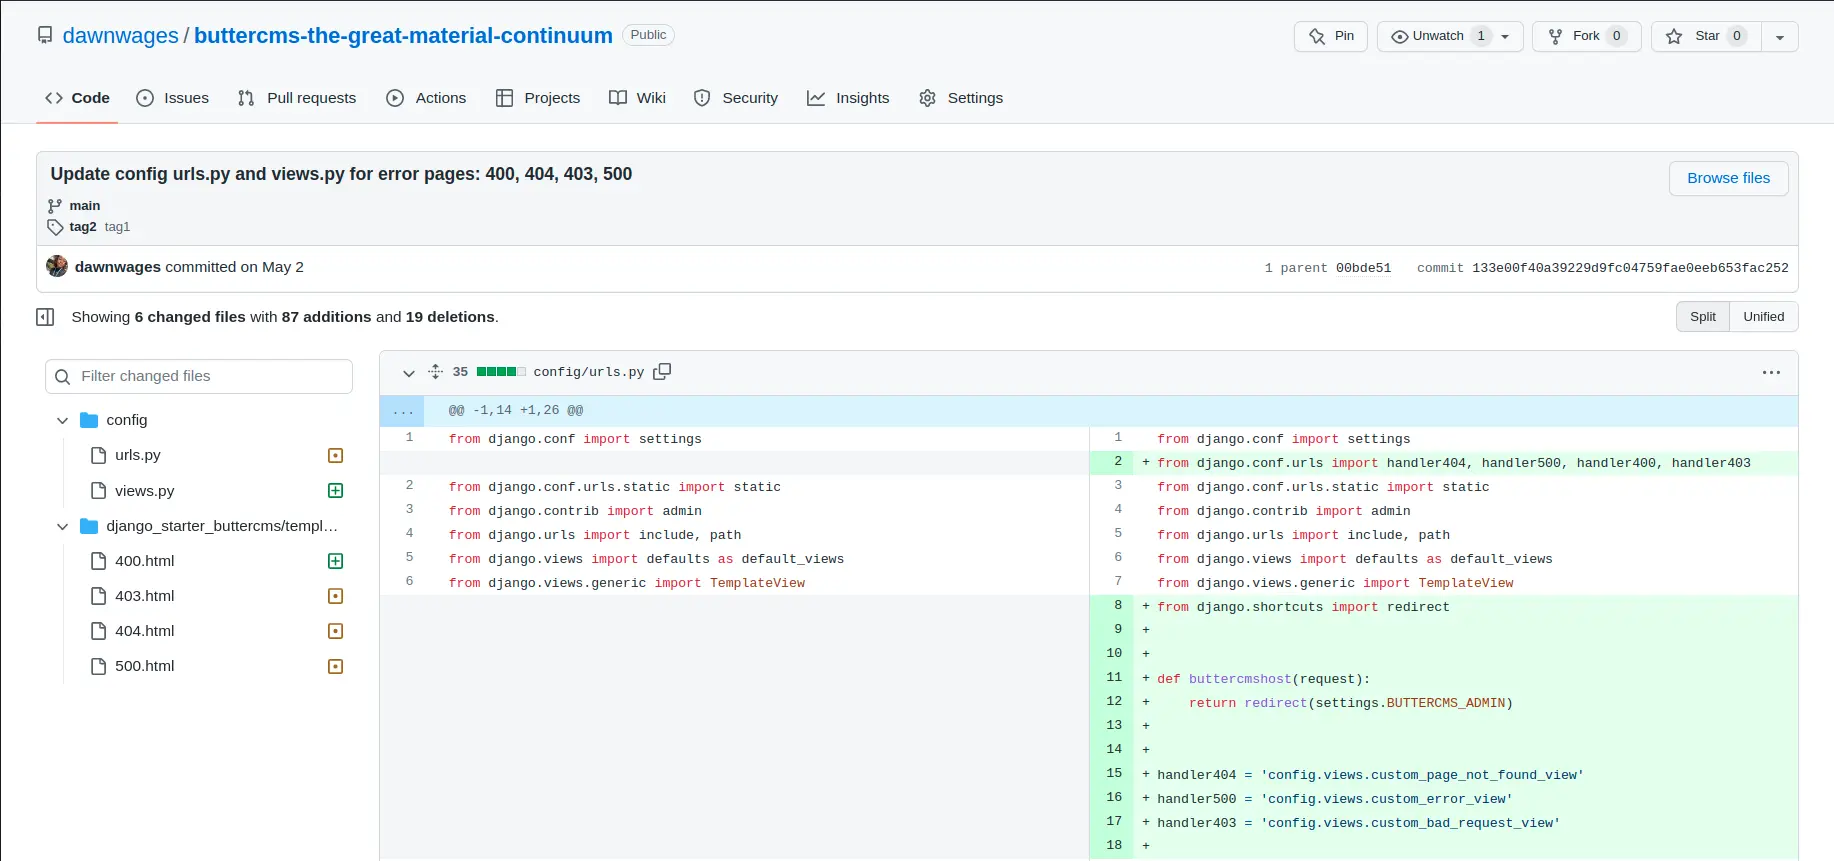
Note: In order to complete the Make it yours section of this tutorial, you will need to have an understanding of how Django works and navigating GitHub. I’ve added links to tag releases of the code. If you click the commit associated to each tag it will show the code diff and tell you line by line what changes were made which are also summarized in this tutorial!
Change the remote repo url from the django-starter-buttercms to your own repo. Start by creating a repo in your git repository of choice, I’m hosting my code with GitHub.
git branch -m main && git remote set-url <remote_name> <remote_url>You can check it is correct by typing git remote -v.
dawn@Missy:~/projects/django-starter-buttercms$ git remote -v
origin	git@github.com:dawnwages/buttercms-the-great-material-continuum.git (fetch)
origin	git@github.com:dawnwages/buttercms-the-great-material-continuum.git (push)
Now you can push your application to your own repo with git push.
Update your code
These changes below are tweaks to help in making the first set of changes for your start application.
I’ve organized the tutorial into stages so you can follow along with copying each of the files. You can see all of the changes here in the repo (https://github.com/dawnwages/buttercms-the-great-material-continuum/tags) separated by tags:
- tag 0: Add
BUTTERCMS_ADMINand updateDJANGO_SECRET_KEYto a clearly unusable string. - tag 1: Update
config/urls.pyandconfig/views.pyfor error pages: 400, 404, 403, 500. - tag 2: Re-name pages, update
basetemplates, updateurls,viewsandcss
Update content/urls.py and content/views.py which handle the app pages as opposed to default configuration.
They styles are all in main.css and make changes to content/base.html, content/component/hero.html, content/page.html.
We rename and update the the following files in templates directory:
content/blog-post.html⇒content/product-post.htmlcontent/partials/blog-posts.html⇒content/partials/product-posts.htmlcontent/partials/blog-search-and-categories.html⇒content/partials/product-search-and-categories.html.content/blog.html⇒content/products.html
Update your ButterCMS data store
Now we want to change the data in the ButterCMS admin. There’s a lot to learn about this cloud content management system that will not be covered here. To get a crash course on ButterCMS’s approach to its flexible Content API, check out their documentation.
It is easy to ignore that ButterCMS is also a cloud storage model, that delivers on demand, fast, low cost and highly durable storage. This is managed and operated by ButterCMS and provides an API Explorer, you can also import third-party data.
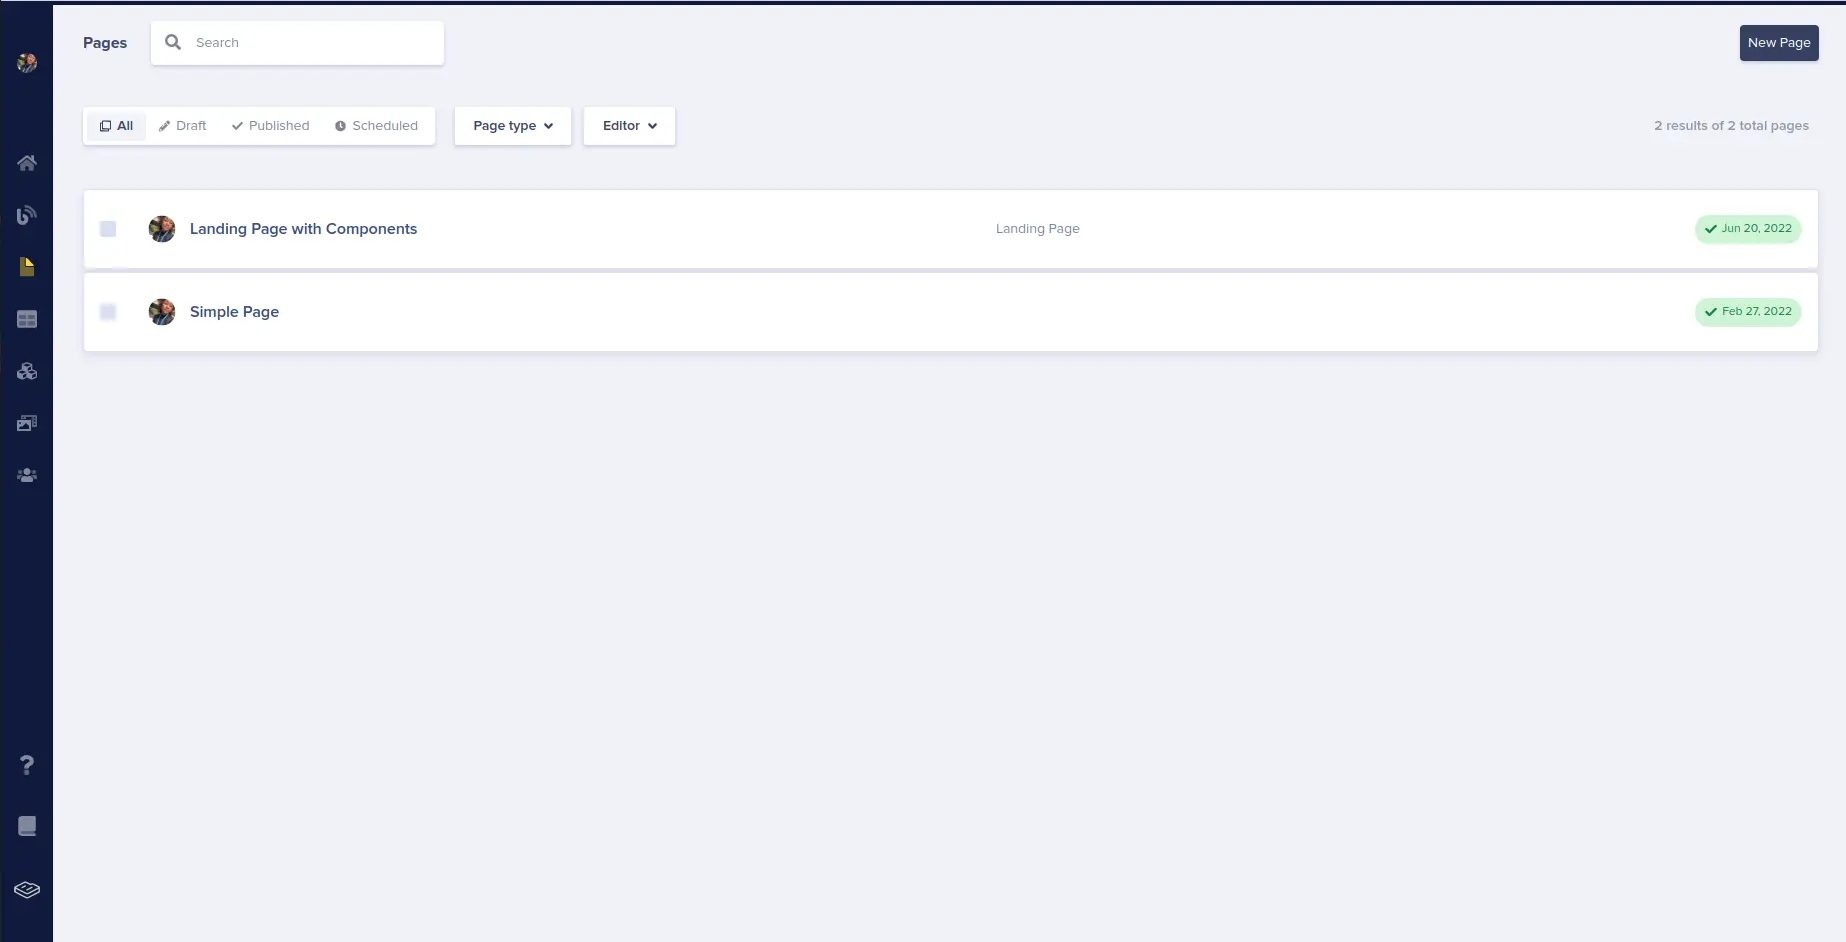
Check out your pages:
We are not currently using the “Simple Page” but we are using “Landing Page with Components”.
To update the Hero image and texts as I have click on “Landing Page with Components” shown below:
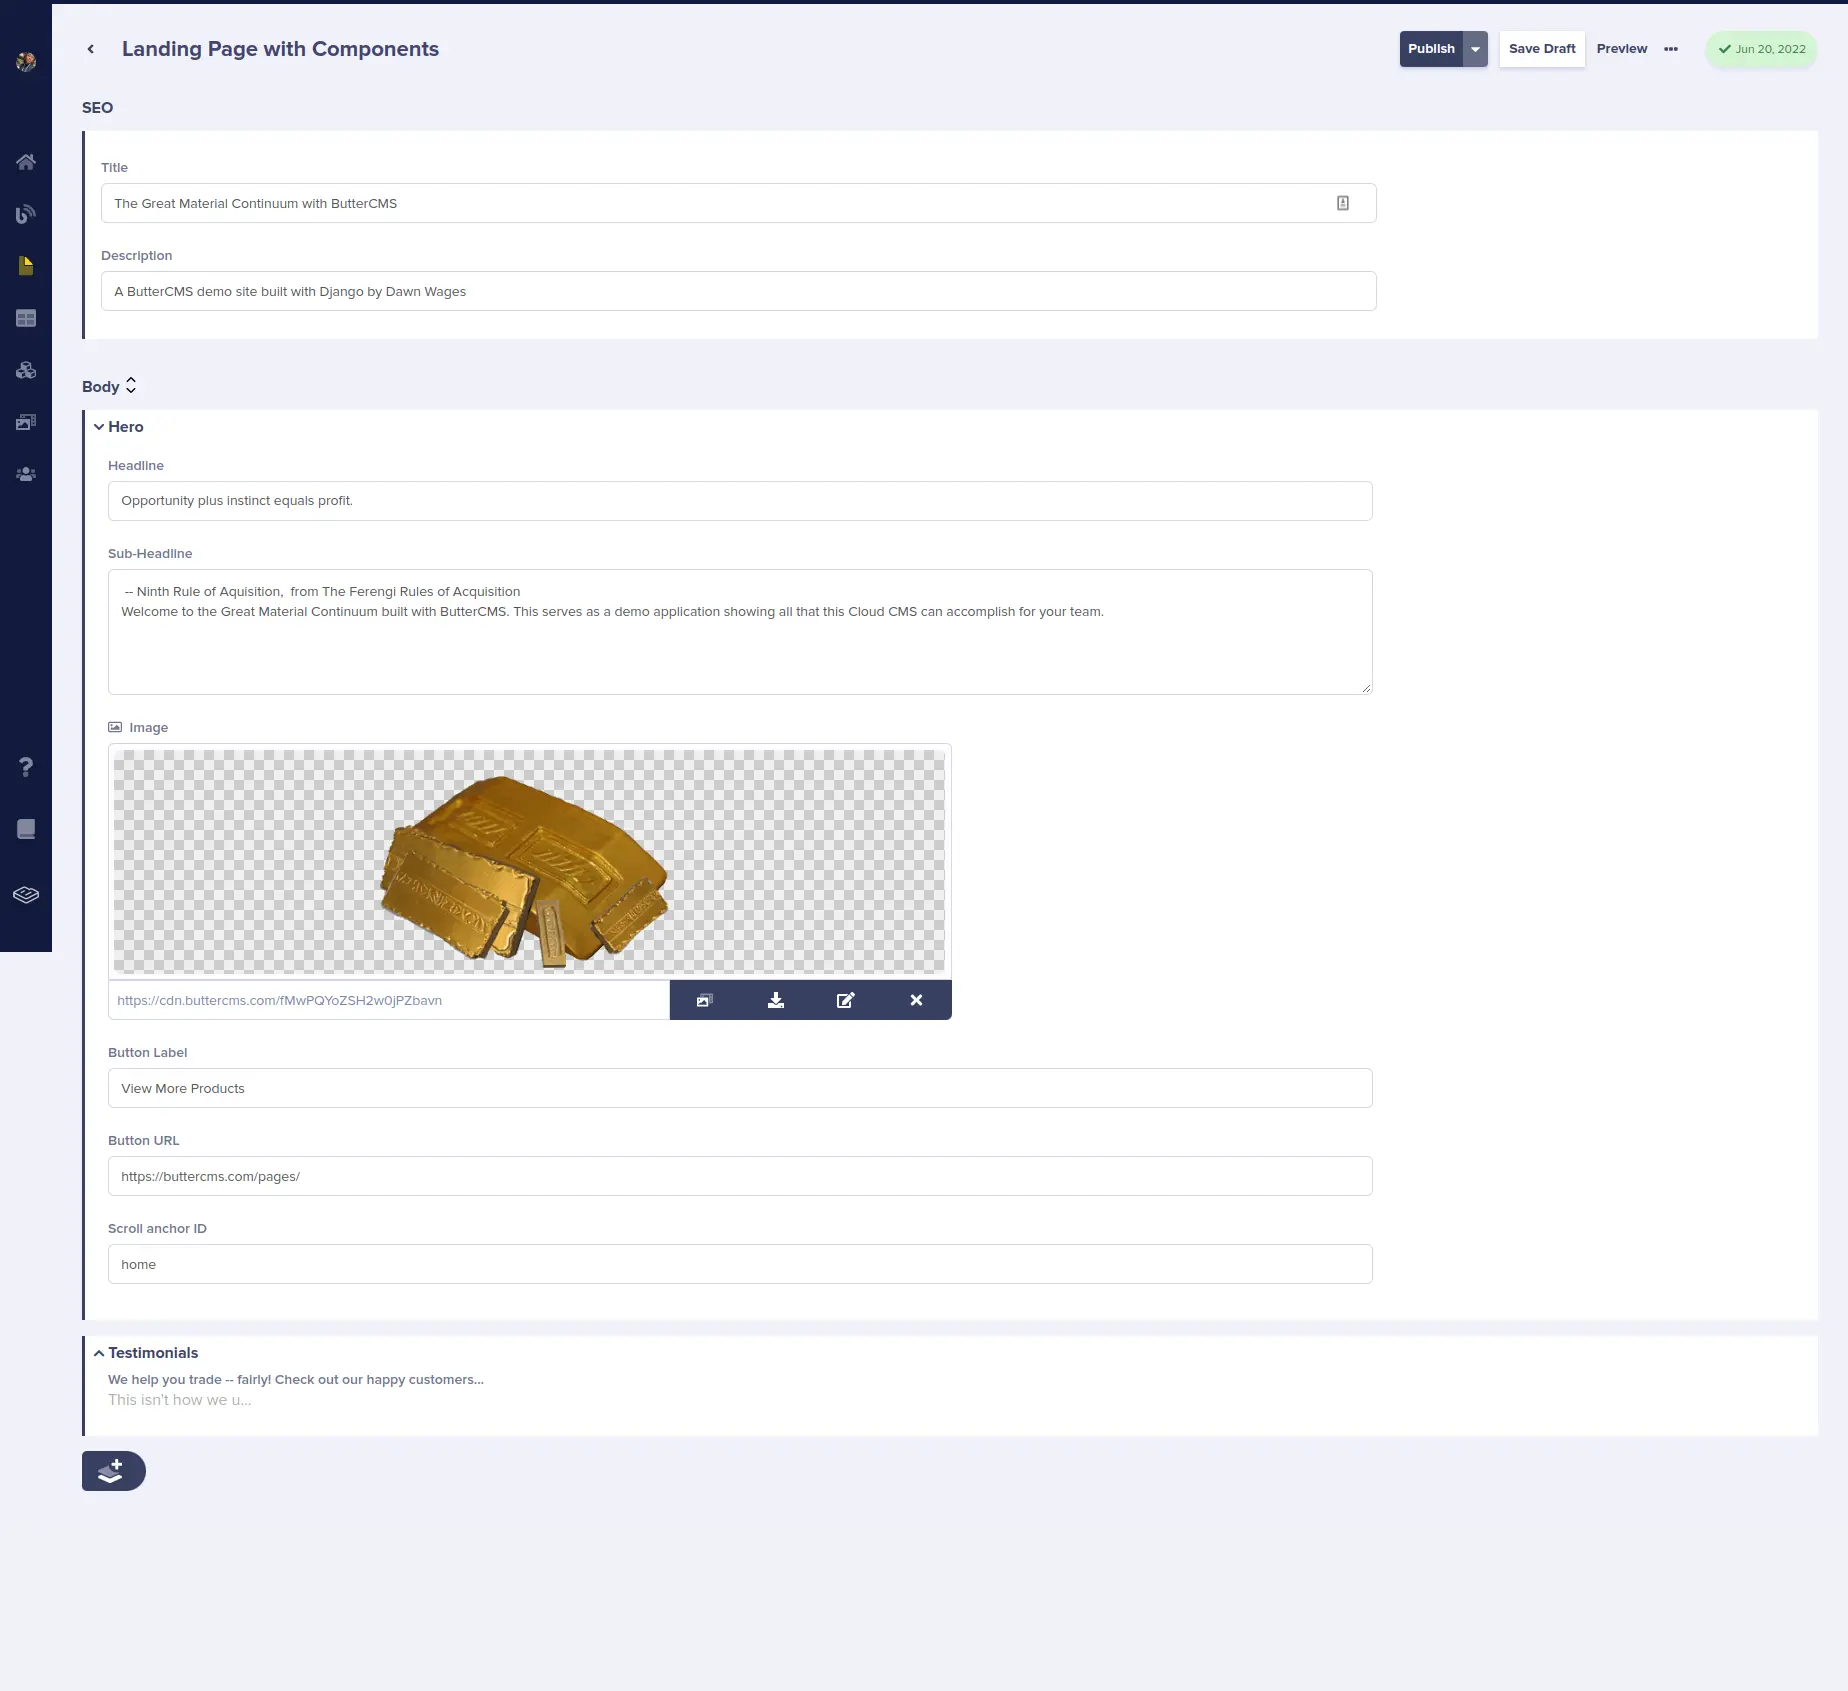
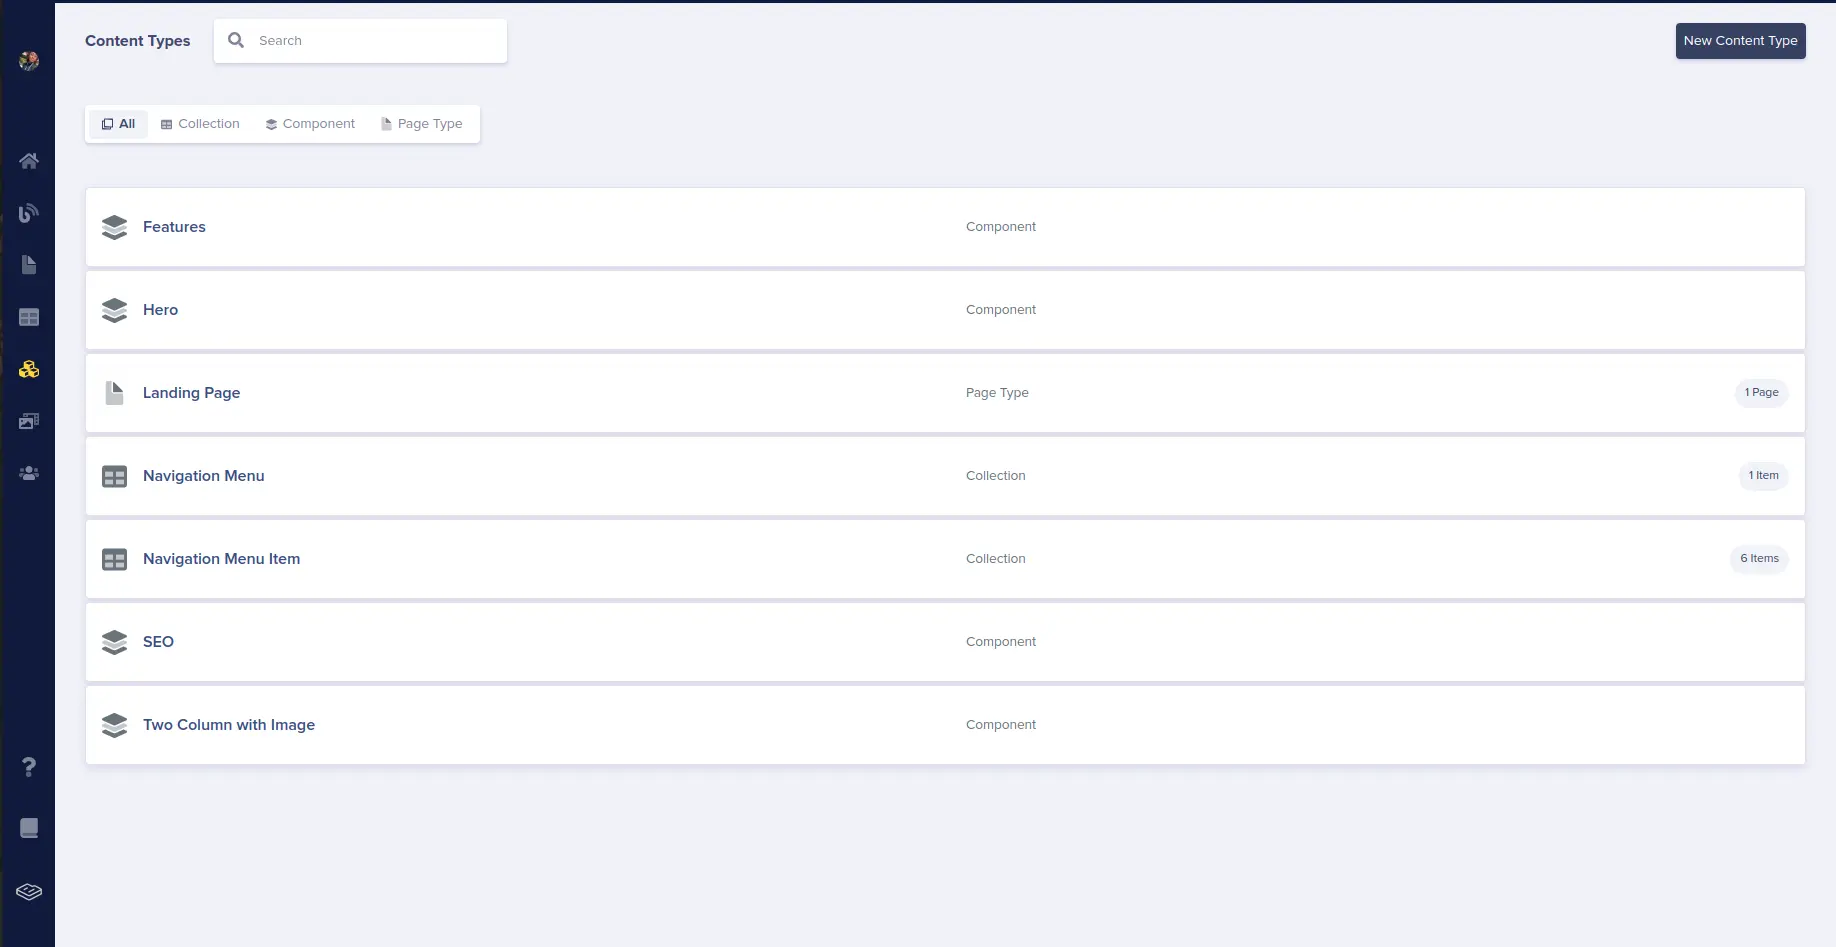
For this example, I’ve deleted all of the sub sections except “Hero” and “Testimonials”. This is where you’d create customized page components. To create more page components, which you will need to do as you customize your site, go to the “Content Types” on the left side navigation
The default shows “All Content Types” - this is where you can see how to edit your Navigation Menu or the Navigation Menu Items. There was no need to change this, the default experience works for this demo.
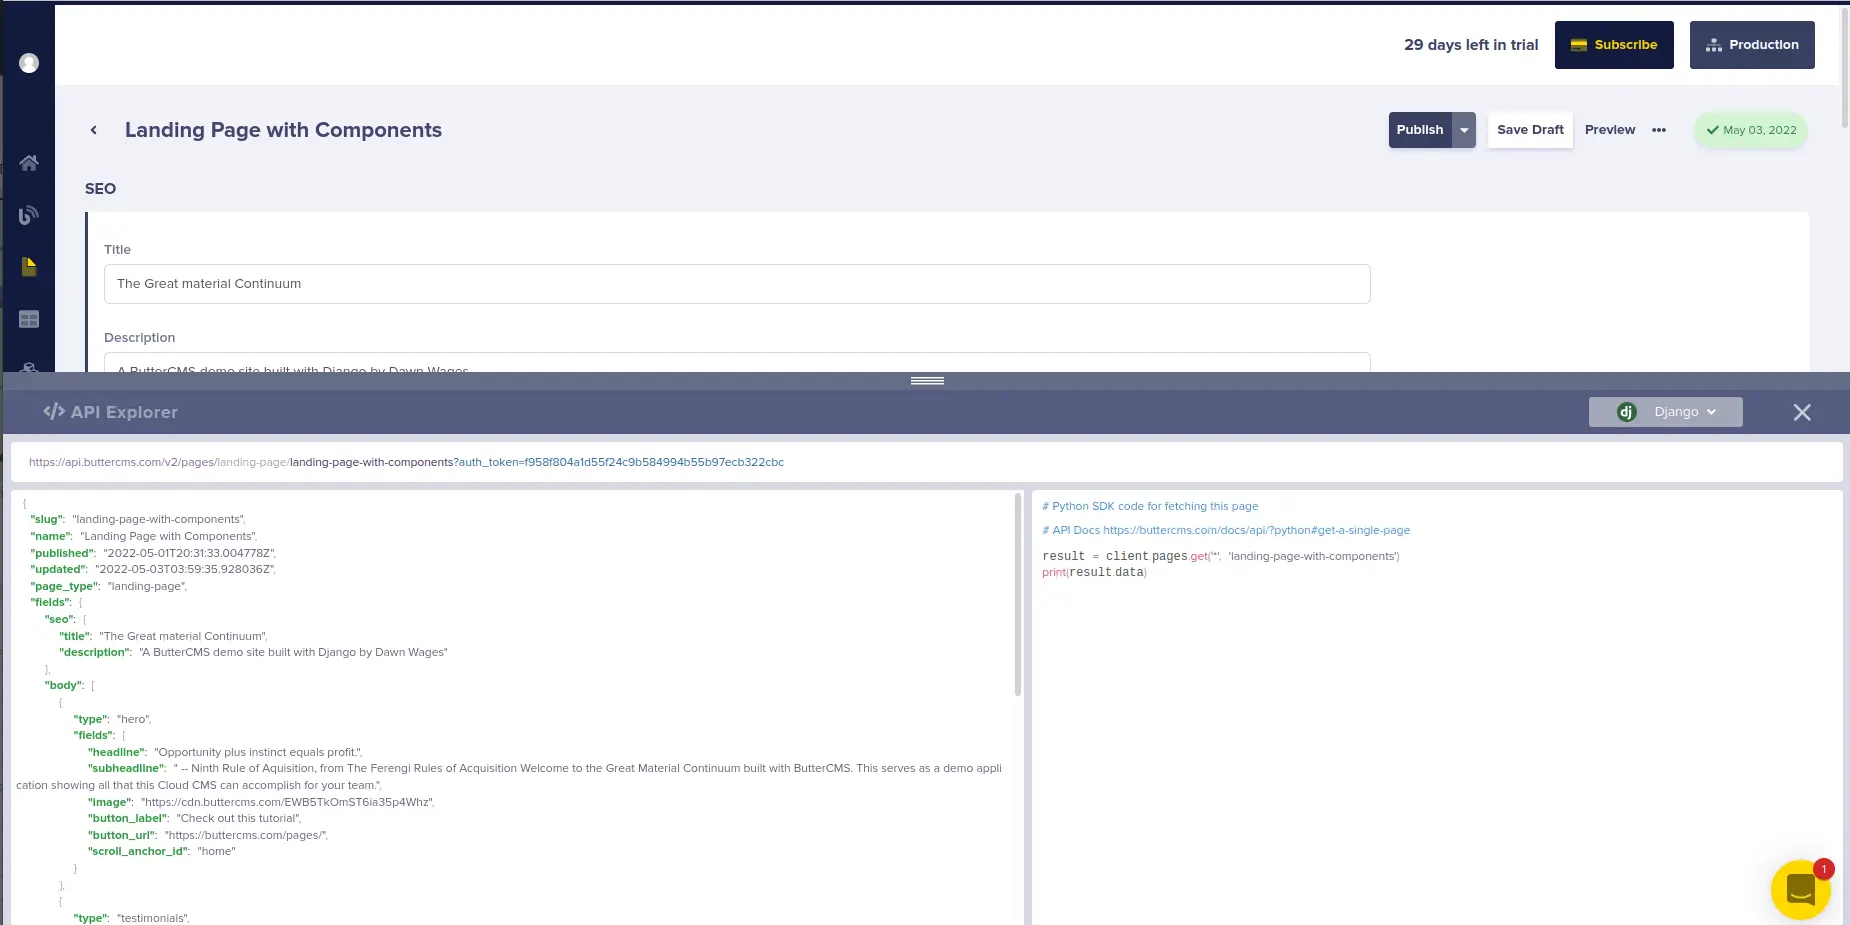
Note: If you want to check out the data in an API Explorer, I found it really helpful to click the three dots at the top of a page using your structured content. here is a screenshot of me doing so on the “Landing Page with Components”. Once you open the bottom window pane, there is a drop down to select your stack and it will help you format your API request.
Update your “Blog Posts”:
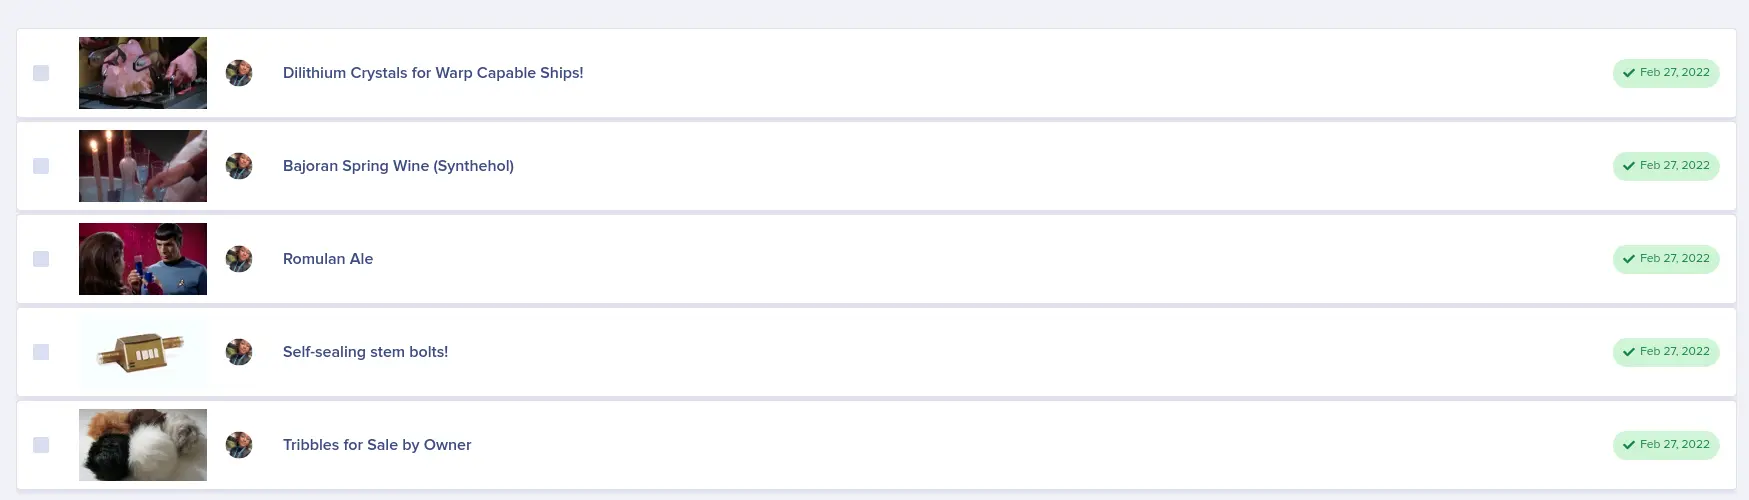
For us it’s now a product page but the paradigm still fits. Check out the posts I’ve created as an homage to the canon Star Trek commerce. We have Tribbles, Bajoran Spring Wine, and Dilithium Crystals.
Below I’m adding Romulan Ale as a post:
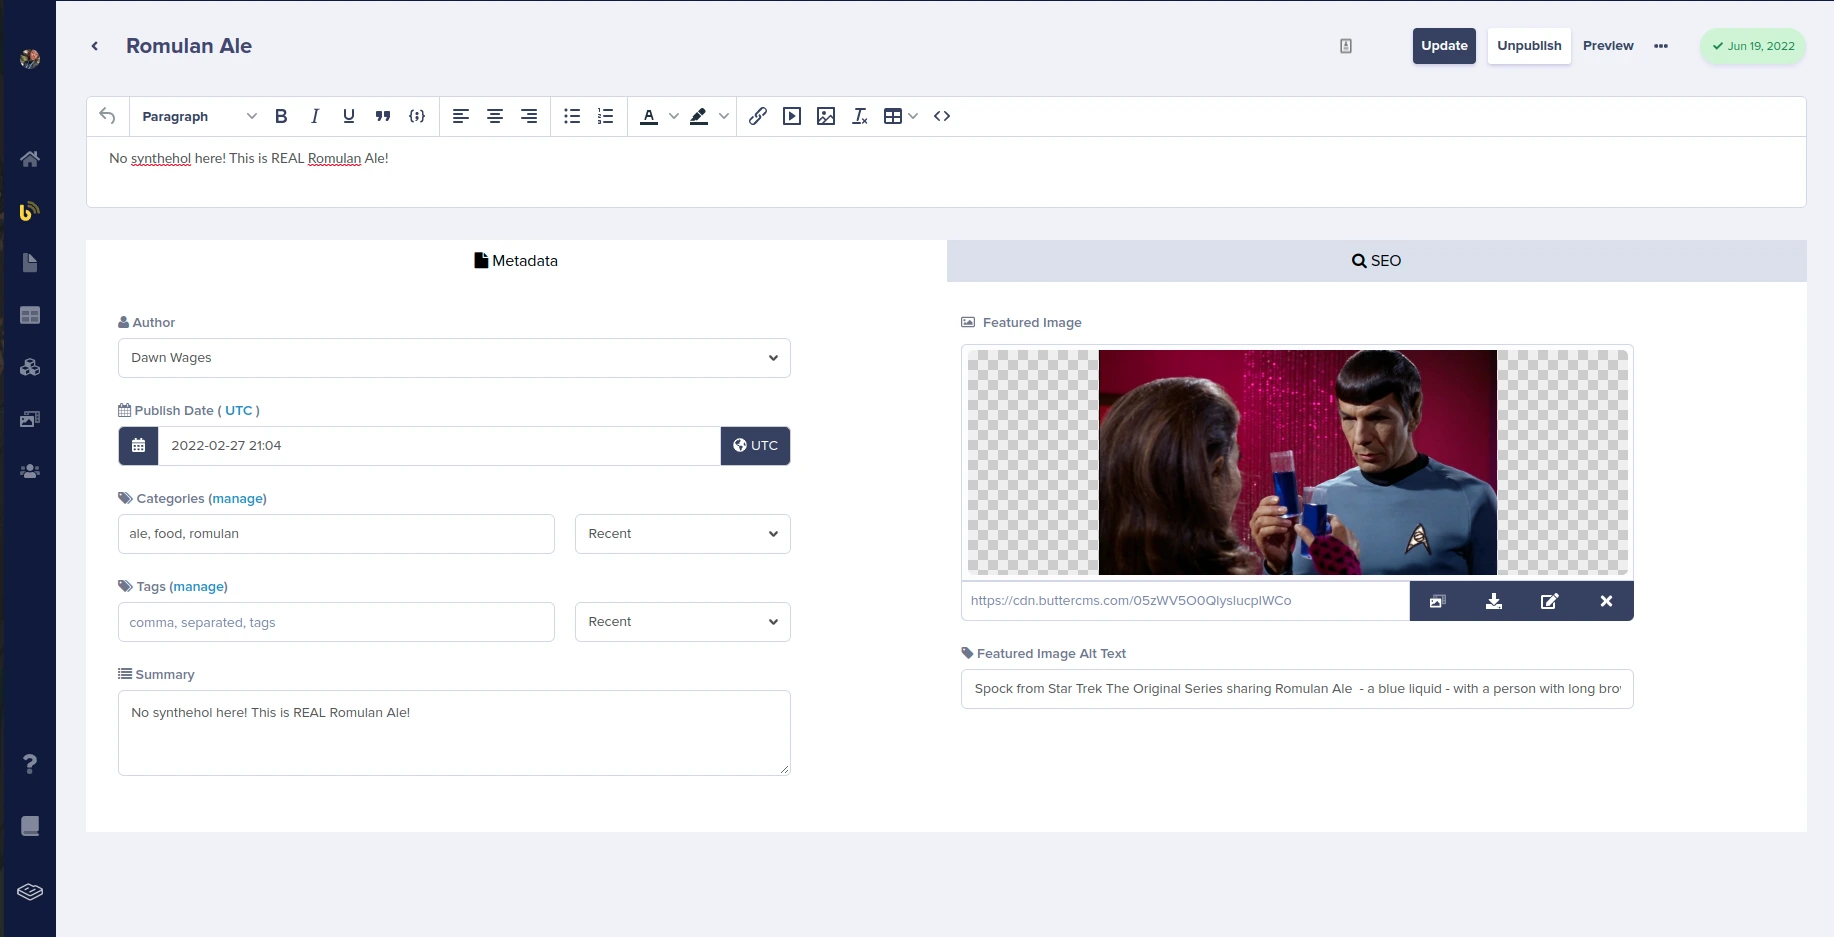
Here they are listed on the post page:
Re-deploy
We are now ready to re-deploy to the same Heroku app.
The easiest way to deploy is by deleting the original Heroku application, and creating a new one.

Click the New button and select Create new app from the dropdown menu. Add an app name. You can use the one from before or a new one.
Next add the same variables to the Config Vars that we did before. It looks different in this process but serve the same purpose. You can get to this page by going to the settings tab.
You’ll next use the Heroku CLI to login and set the repo to connect to Heroku. The instructions are displayed prominently on the deploy page. You can also deploy from the the Heroku Deploy button in your README.md but make sure your environment variables are correctly represented.
$ heroku git:remote -a <your_heroku_app_name>You’re now ready to deploy your updated code.
$ git push heroku mainShare widely!
Your new app is live! You can continue to update your code with git push heroku main to update.
My app is located at: https://buttercms-material-continuum.herokuapp.com/.
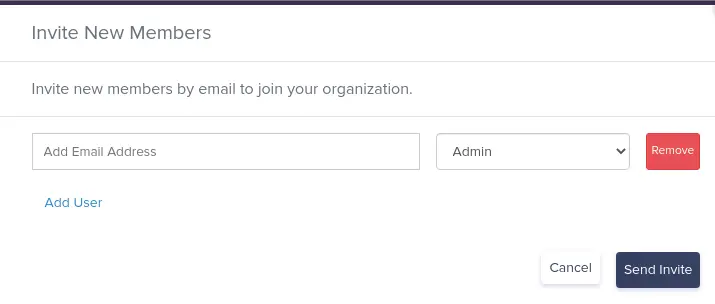
Don’t forget to add more users to collab on content!
Learn More...
Here are more resources you can check out to dive deeper into the topics discussed in this tutorial.
ButterCMS is the #1 rated Headless CMS


Related articles
Don’t miss a single post
Get our latest articles, stay updated!
Dawn is a community organizer, speaker and developer specializing in Django, Python, React, and JavaScript. She actively helps Django shops and software companies with web engineering and eCommerce companies with engagement and conversion.