In this tutorial, I’ll show you how to leverage Xcode targets to control the massive complexity involved in building iOS (and macOS, watchOS, and tvOS) apps. A lot of time can be saved when developers realize that not everything they’re required to do has to be done by writing software language code, like Swift. Integrated development environments (IDEs) like Xcode offer very powerful tools, like targets, that allow developers to decouple nitty-gritty tasks that used to be done in code (or manually) out into project configuration settings. I’ve found that, because of the sheer number of project settings, developers often take one look at say, Xcode’s long, long list of Build Settings, and want to curl up and pass out. When finished reading this tutorial, you’ll see that you can neatly organize code into one project that’s capable of producing binaries for iOS, macOS, watchOS, and tvOS.
If developers take the time to harness the power of Xcode’s features, they can spend most of their time doing what they should be doing: designing, writing, and organizing their code using tools like architectural design patterns (MVVM), tactical design patterns (factory method, facade, adapter), object-oriented techniques, protocol-oriented techniques, generics, delegation — all good, solid development concepts.
Developers should always be on the lookout for opportunities to logically organize and group related code and, conversely, logically separate unrelated code. Xcode targets can let you take related code, put it into one project, yet simultaneously target that code at each of Apple’s platforms: iOS, macOS, watchOS, and tvOS.
When it comes to the more mundane tasks, like changing an app’s name, version number, help bundle, app icon, or copyright text, programmers should be able to turn to Xcode’s tools. Developers shouldn’t be dealing with such tasks using hacks, pyramid-of-doom if statements, and hardcoding values and/or logic. Let’s decouple our coding from these usually boring but necessary responsibilities. Targets help here.
The protocol I’ll discuss herein is a mixture of using Xcode “targets” and “schemes.” I’m sure all sorts of people have all sorts of ways of doing things differently, but I’ve found that this works best for me. I’m not claiming this is the only way to do things.
I know I could’ve (possibly) made things even more generalized by using workspaces, but this is a tutorial. You need to grasp the basics of Xcode’s targets and schemes before building a better, newer, grander solution. There’s such a thing as being too generalized to be useful, too…
Introduction to Xcode Targets
When you create a new project in Xcode, one single target is created for you. For example, I created an Xcode project for iOS, based on the Single View App template, and named it “Xcode Targets.” You can download it from GitHub. Let’s get a quick overview of how project configuration settings/options are stored.
According to the Xcode docs,
By selecting the project name in the project navigator, you open the project editor.
Let’s do that and here’s what we’ll see:
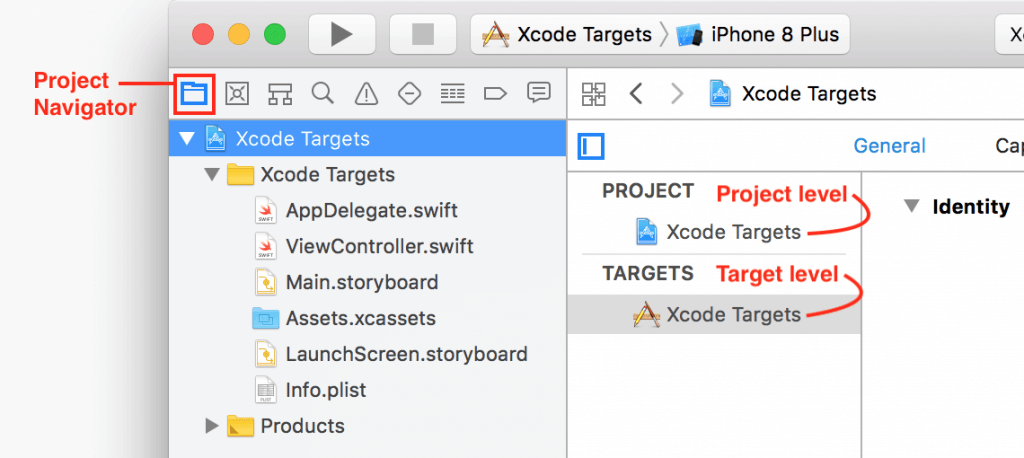
As we forge ahead through this tutorial, keep two concepts from the Xcode docs in mind. First, consider that:
Build settings defined at the target level override any values assigned to those build settings at the project level. Therefore, target-level configurations take precedence over any project-level configurations.
Second, recognize that:
A target contains instructions–in the form of build settings and build phases–for building a product. A target inherits the project’s build settings. Although most developers seldom need to change these settings, you can override any of the project’s build settings by specifying different settings at the target level.
You’ll see that I generally disagree with the statement, “Although most developers seldom need to change these settings.” We’ll be changing settings. That’s a major concern in this tutorial.
A note about “configurations”
Apple notes that:
When you create a project, Xcode provides two standard project-level build configurations: debug and release. … These two build configurations are probably sufficient for your product development needs. Most developers never need to change the values of the vast majority of build settings.
I would add that you can change debug and release settings in each of your targets, not just at the project level. Perhaps because of the length of time that I’ve developed Apple apps, and the complexity of most apps with which I’ve worked, I find myself and coworkers often need to change the values of Build Settings. I also find it very confusing and difficult to manage when almost every build setting at the project and target level have a Debug and Release option. See the following image — and remember that these are just a few of the available options:
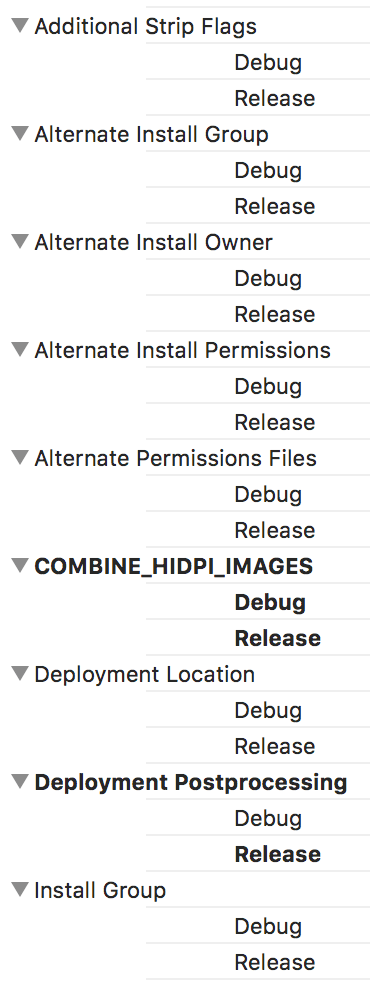
So when faced with debug/release, debug/release, debug/release, debug/release…, I see the opportunity for developers to start unwittingly — and easily — commingling debug and release options, or just plain setting conflicting options. As we’ll soon see, I’d rather keep all my release settings in one target and my debug settings in another.
Separating release settings from debug settings
Once I’ve created a project as described above, the first thing I do is to rename the default target as shown here:
Let me just briefly mention schemes. There are variety ways to approach organizing project settings, and I want to keep this tutorial simple. Let me just quote the Xcode documentation again:
When you open an existing project (or create a new one), Xcode automatically creates a scheme for each target. The default scheme is named after your project…
You can read up on schemes using the links I’ve provided. Since a default scheme was generated when I created the project, I’m going to rename it with the same name as my default target:

Notice that I’ve left the Autocreate schemes checkbox ticked.
Now let’s set “Xcode Targets – Release” scheme’s Build Configuration to Release to match it’s name. Go to the Set the active scheme control, just where we started in the last video, Edit Scheme…, and change Debug to Release as follows:

Of course, now we want to create a new target (and scheme) for debugging. Here’s how we create and rename a new target:
The Autocreate schemes checkbox had its intended effect, creating a new scheme — except it didn’t catch my renaming of my new target to “Xcode Targets – Debug.” Make sure to change the newly auto-created scheme from “Xcode Targets – Release copy” to “Xcode Targets – Debug” just like how I did it in the gif above. Set “Xcode Targets – Debug” scheme’s Build Configuration to Debug. You may find that it is already set as Debug, but check it anyway.
To switch between debug and release configurations, all you have to do is switch/set the active scheme. Very importantly, make sure you confine all your Release configurations in Build Settings to the “Xcode Targets – Release” target and all your Debug configurations in Build Settings to the “Xcode Targets – Debug” target. We’ll see how to do this below.
A note about Info.plist
When you Duplicate (create) a new target, Xcode creates a new Info.plist. It gives the new target a name you probably don’t want and puts the file where you probably don’t want:
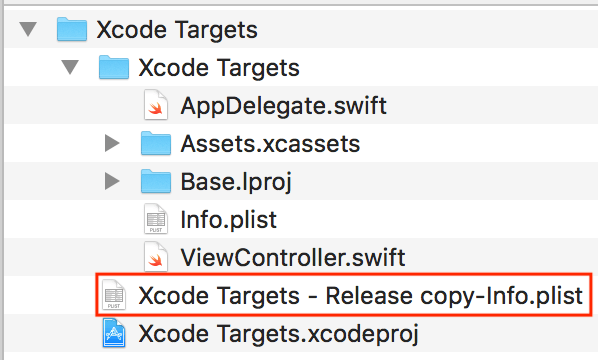
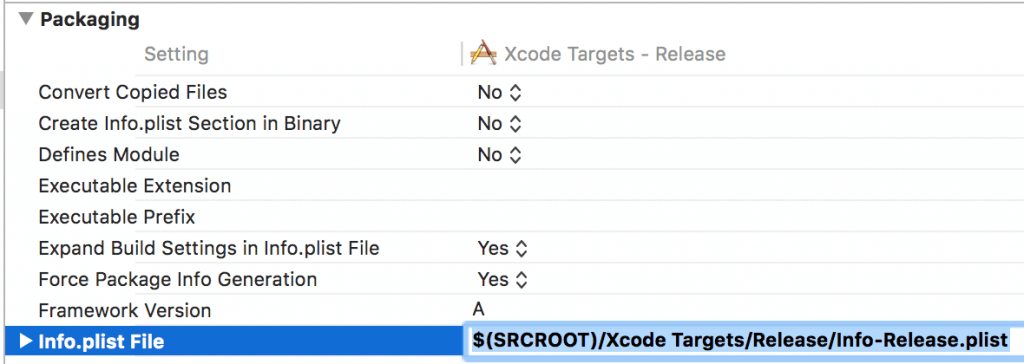
I like to use the $(SRCROOT) macro in my Xcode projects to standardize and organize my file locations. To keep things “Xcodey,” I set my Build Settings for my “Xcode Targets – Release” target’s Info.plist like so:
For my “Xcode Targets – Debug” target, I put my Info.plist here:
|
1 |
$(SRCROOT)/Xcode Targets/Debug/Info-Debug.plist |
I highly recommend that you clean up your Project Navigator setup after making these changes. (I control-clicked the “Xcode Targets” folder in the Project Navigator and used the Add Files to “Xcode Targets”… to context menu command.) Look at the sample project and you’ll understand.
Release versus debug dependencies
I’ve supported quite a few iOS and macOS Xcode apps that consume C++ libraries. In order to provide optimized production code, I only include release versions of libraries when distributing apps to the public. When developing and debugging, I want debug versions of libraries with all symbols linked into my apps so I can set breakpoints and step through code.
For production, I switch to my “Xcode Targets – Release” target and drag release versions of libraries into Build Phases -> Link Binary With Libraries like this:
For debugging and development:
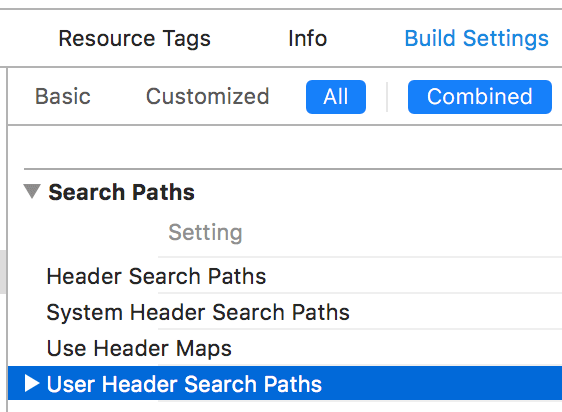
Remember that if I’m calling code from linked libraries, I’ll need the paths to the header files (.h, .hpp). I usually specify those in Build Settings -> Search Paths -> User Header Search Paths:
If I am responsible for the library code and need to maintain it in Xcode, I can use the same separation of concerns structure outlined in this tutorial in my library projects. We’ll see an example below.
Suppose I have release and debug versions of iOS frameworks. For release, I simply click on my “Xcode Targets – Release” target and drag the release framework version into General -> Embedded Binaries. For debug, I simply click on my “Xcode Targets – Debug” target and similarly drag the debug framework version into my target.
Release and debug dependencies are cleanly separated using my targets protocol. We’ll talk more about dependencies later.
Compilation conditions
Those of us who used and/or are still using Objective-C are accustomed to leveraging symbols like DEBUG defined in Xcode under Build Settings -> Apple LLVM 9.0 – Preprocessing -> Preprocessor Macros. If you want similar behavior in Swift, you need to use what Apple calls conditional compilation:
A conditional compilation block allows code to be conditionally compiled depending on the value of one or more compilation conditions.
You can use any of the symbols listed in this link, but I’ll talk about using custom symbols here. Swift still respects DEBUG, but if you want to use it, or the language’s built-in symbols, or custom symbols, you have to define them in your Build Settings -> Swift Compiler – Custom Flags -> Active Compilation Conditions now.
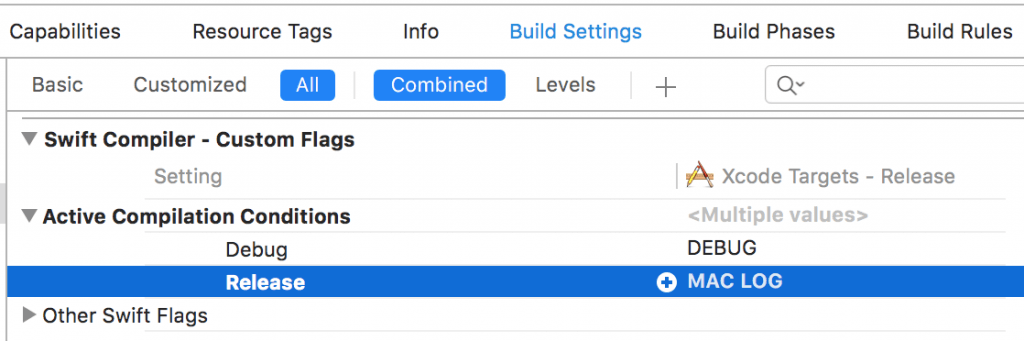
Let’s say I’m logging (LOG) in release to create an audit trail (i.e., I’m tracking logins). Check what’s in my “Xcode Targets – Release” target:
Let’s say I’m not worried about auditing during development. Check what’s in my “Xcode Targets – Debug” target:
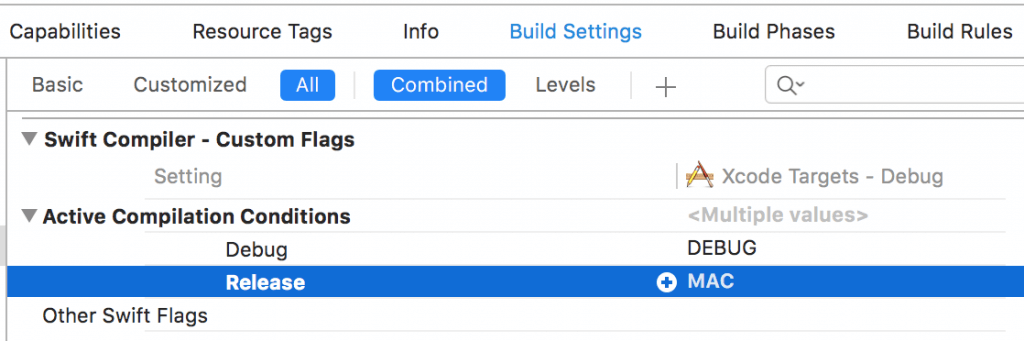
I’ve supported quite a few iOS and macOS Xcode projects that consume C++ code that runs on multiple platforms, including Unix/Linux flavors, Microsoft Windows, and macOS. Sometimes things get tricky and, for example, I run into code that will only compile and run on Windows, but not on Mac, and vice versa. I try to minimize such situations, but sometimes things just need to get done. When necessary, I use preprocessor macros or, as Apple now says in Swift, compilation conditions, like WIN, MAC, LOG, and DEBUG.
When calling into my portable C++ code, something like MAC would be defined in both release and debug versions so that I can selectively compile, or not compile, portable or non-portable core code that can only build and run, or not build and run, successfully under macOS (or Windows). Remember that I can use logical operators like ! (not) with my compilation conditions.
I generally use DEBUG to report on and sometimes act upon error conditions. I generally use LOG when my code needs an audit trail (like when processing sensitive data).
If, for example, I have to deal with core code specific to Mac, and debugging and logging, I would use the following generalized though runnable ViewController.swift file:
|
1 2 3 4 5 6 7 8 9 10 11 12 13 14 15 16 17 18 19 20 21 22 23 24 25 26 27 28 29 30 31 32 33 34 35 36 37 38 39 |
class ViewController: UIViewController { var loginAttempts: Int = 0 @IBAction func loginButtonPressed(_ sender: Any) { #if LOG print("Login button pressed") loginAttempts += 1 if loginAttempts > 3 { print("HACK ATTEMPTED?") // CALL 911! } #endif } override func viewDidLoad() { super.viewDidLoad() // Do any additional setup after loading the view, typically from a nib. #if WIN print("Use Windows code...") #elseif MAC print("Use Mac code...") #endif } override func didReceiveMemoryWarning() { super.didReceiveMemoryWarning() // Dispose of any resources that can be recreated. #if DEBUG print("ViewController::didReceiveMemoryWarning") #endif } } // end class ViewController |
Let’s say I build and distribute my app using the “Xcode Targets – Release” target. Here’s the console output from the previous code snippet:
|
1 2 3 4 5 6 |
Use Mac code... Login button pressed Login button pressed Login button pressed Login button pressed HACK ATTEMPTED? |
The main takeaway here is that you can define as many or as few compilation conditions as you like and specify differing combinations of those conditions in different targets. While I generally frown upon conditionally compiling code, there are times when nothing else works in complex, realworld scenarios. I’m more comfortable with using compilation conditions for situations like turning logging (i.e. print statements) off and on.
Different app flavors/branding
What if you’ve licensed your code to partners/resellers who want their own branding, like custom logos/icons and specific product names, to be displayed by an app? In the iOS App Store, Apple generally frowns on a bunch of identical apps that only differ in their main icons… at least they said they do ;-). But you definitely can have multiple versions of the same app(s) differing in the sense of up-selling from free to intermediate to advanced features and functionality. Branding or “flavors” of iOS apps is much more flexible in an Apple Developer Enterprise Program environment. In macOS development, Apple allows you to build, brand, and distribute apps without going through the Mac App Store, and thus you’re afforded much more flexibility.
Do differing icons, graphics, text, and tiered features warrant multiple Xcode projects? Generally, no. Why don’t we just use targets? I’ve supported apps that have 10 different flavors.
To show you how you can leverage targets to handle branding, I created an Xcode project for macOS, based on the Cocoa App template, and named it “Xcode Manage Config.” You can download it from GitHub.
My project shows you how you can abstract out and customize an app’s:
- Help bundle
- Name
- Version number
- Icon
- Copyright text
All are done without hacking (i.e. without using if statements and hardcoding values). Reviewing the code and commentary in my sample project’s ViewController.swift file should give you a good idea of how I abstracted all details for the 5 tasks I just listed out of code and into targets:
|
1 2 3 4 5 6 7 8 9 10 11 12 13 14 15 16 17 18 19 20 21 22 23 24 25 26 27 28 29 30 31 32 33 34 35 36 37 38 39 40 41 42 43 44 45 46 47 48 49 50 51 52 53 54 55 56 57 58 |
import Cocoa let reverseDomain = "us.microit." class ViewController: NSViewController { @IBOutlet weak var logoImage: NSImageView! @IBOutlet weak var productName: NSTextField! @IBOutlet weak var copyright: NSTextField! @IBOutlet weak var version: NSTextField! var helpPath: String = "" override func viewDidLoad() { super.viewDidLoad() // Do any additional setup after loading the view. // Get the product name by stripping out the // reverse domain name. let bundleIdentifier = Bundle.main.bundleIdentifier?.replacingOccurrences(of: reverseDomain, with: "") // Display the product name. productName.stringValue = bundleIdentifier! // Build app icon set name using concatenation. let appIconSetName:String = bundleIdentifier! + "AppIcon" // Get and display the product logo. logoImage.image = NSImage(named: NSImage.Name(rawValue: appIconSetName)) // Get the copyright statement. let copyrightString = Bundle.main.object(forInfoDictionaryKey: "NSHumanReadableCopyright") // Display the product copyright. copyright.stringValue = copyrightString! as! String // Get the product version. let versionString = Bundle.main.object(forInfoDictionaryKey: "CFBundleShortVersionString") // Display the version. version.stringValue = "Version: " + (versionString! as! String) // Build and save the path to help files. helpPath = Bundle.main.path(forResource: "index", ofType: "html", inDirectory: bundleIdentifier!)! } // end func viewDidLoad() @IBAction func invokeHelp(_ sender: Any) { // Open help in default browser. NSWorkspace.shared.openFile(helpPath) } override var representedObject: Any? { didSet { // Update the view, if already loaded. } } } // end class ViewController |
Let’s build and run the code to see how targets can differentiate two licensors of the same software but with different branding. Let’s build and run the “Acme – Release” target:

Now let’s build and run the “Emca – Release” target:
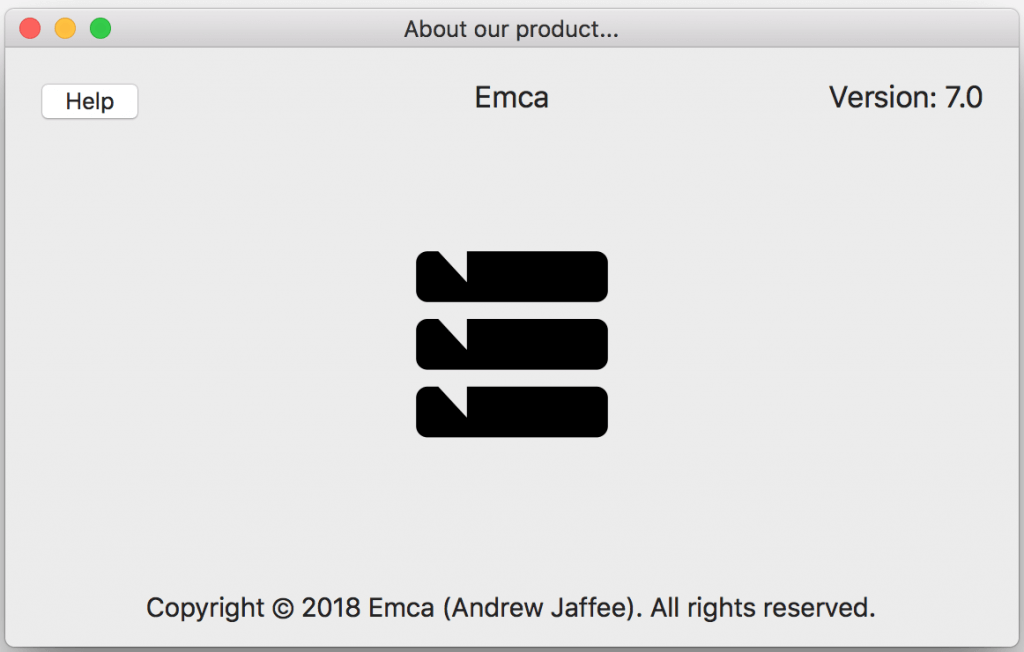
Notice that nothing was hardcoded… well, except my reverse domain name, and that hasn’t been changed since 1999. It could easily be abstracted into a plist. Please forgive my one, minor transgression. Notice that the official app icons for each target are recognized by macOS:
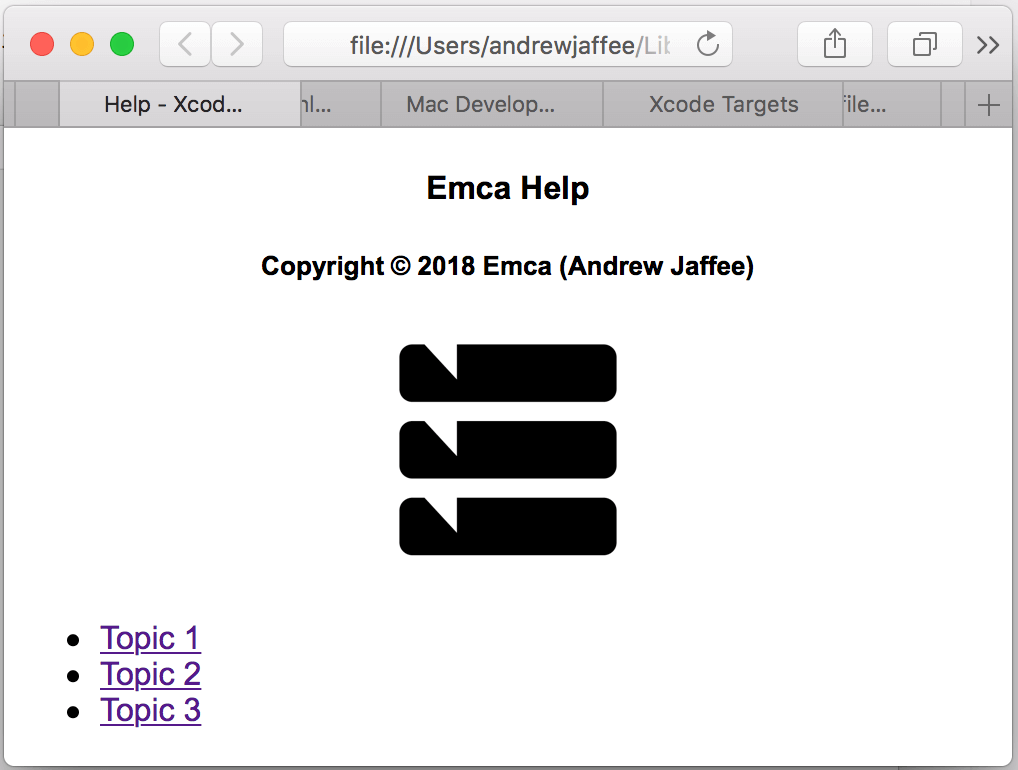
What if we click on the “Help” button in either target’s app? This is help customized to the “Acme – Release” target, running in Safari:
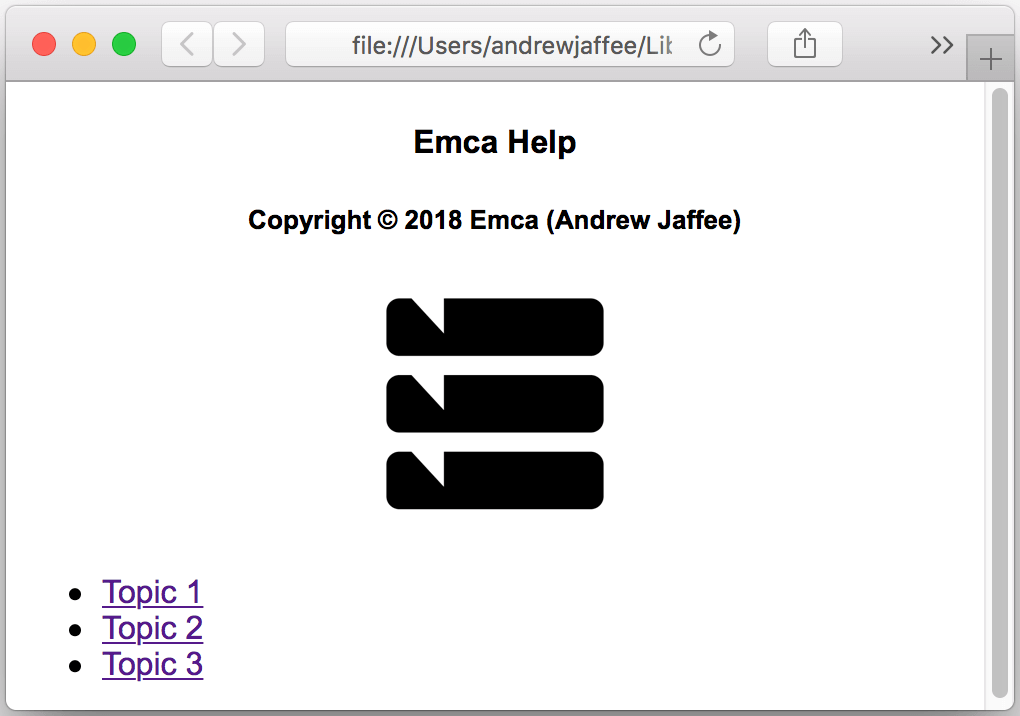
The “Emca – Release” target’s help is differentiated:
The help bundle
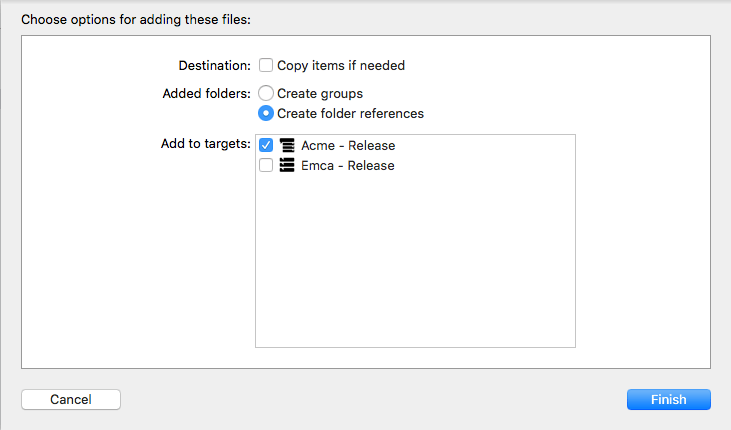
A help bundle is often just a directory containing HTML files/resources. I dragged help folders named “Emca” and “Acme” into the Project Navigator. I was prompted by Xcode both times. I’ll just show you the prompt for the “Acme” folder. Notice I only set the “Acme” folder to be a member of the “Acme – Release” target:
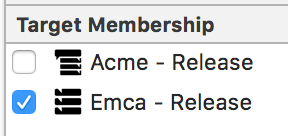
If you click on the “Emca” folder in Xcode’s Project Navigator, you’ll see its Target Membership is only ticked for the “Emca – Release” target:
I’ve seen multi-megabyte help bundles, so if you insist on including the actual help resources in your project, make sure you’re not including stuff that you don’t need, like don’t include Acme’s help in Emca and vice versa. On a side note, believe it or not, I’ve heard many customers insist that they get the actual help included in-situ in their products.
If you plan building, signing, and creating a signed installer for one or both of the “Xcode Manage Config” project’s targets, you need to take a few extra steps. For one thing, remember to go to Build Phases -> Copy Bundle Resources and add the “Acme” folder for copying in the “Acme – Release” target, and similarly add the “Emca” folder for copying in the “Emca – Release” target. Again, two products; two different targets.
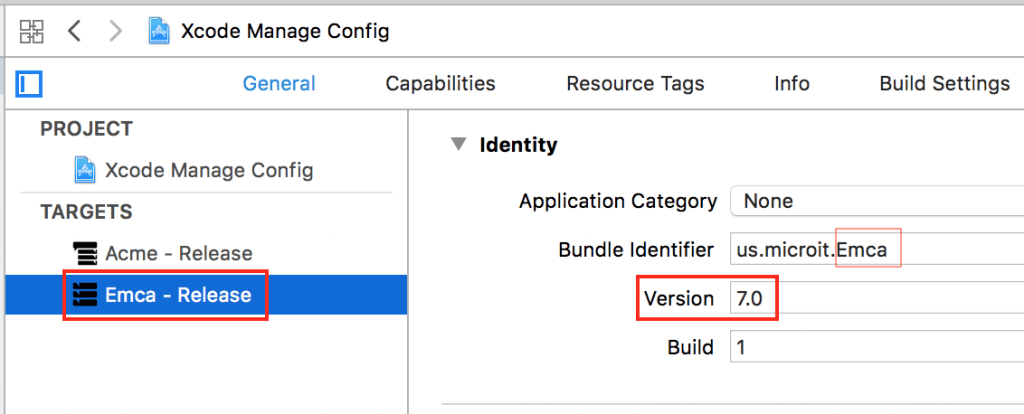
The app name and version number
The app name and version number are distinct per target. You set them by selecting the target and then going to General -> Identity. I’ll just show you how I set the values for the “Emca – Release” target:
The app icon
Here, you can see that I’ve already set the app icon for “Acme – Release” and am about to create a new app icon set for “Emca – Release” — this is in the Asset Catalog which is shared by all targets:
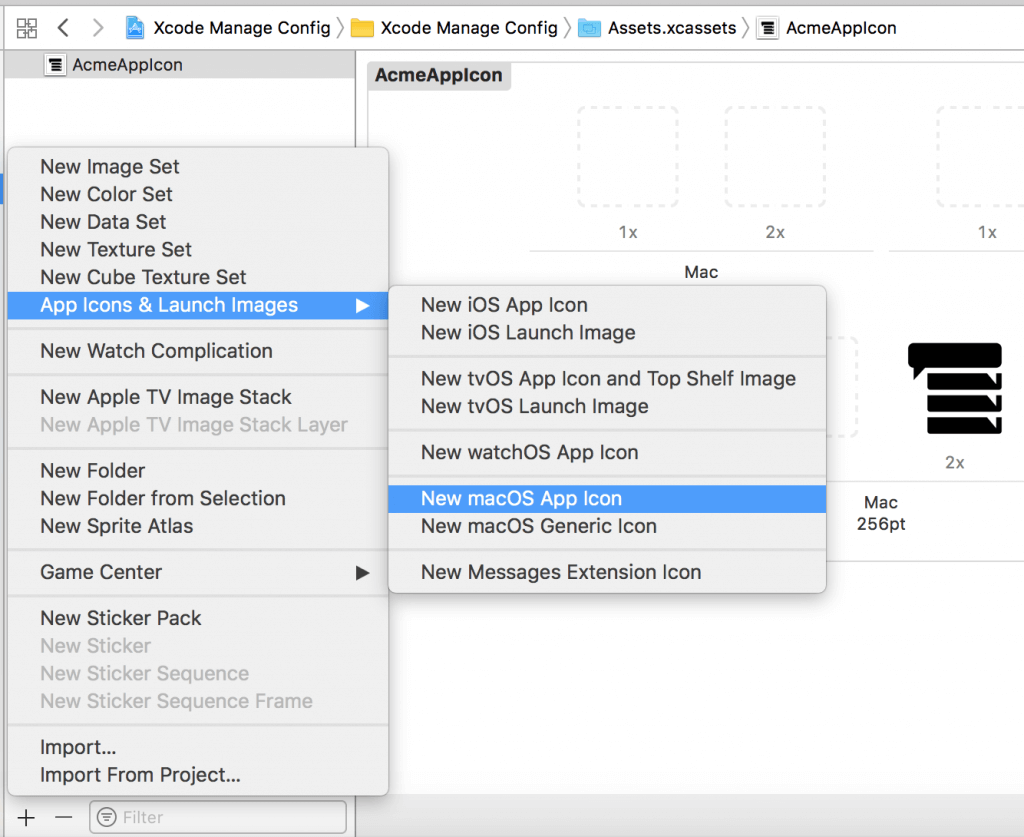
Notice that in my code above, I get the code-independent Bundle Identifier and append “AppIcon” to it to get the app icon set appropriate to the current target.
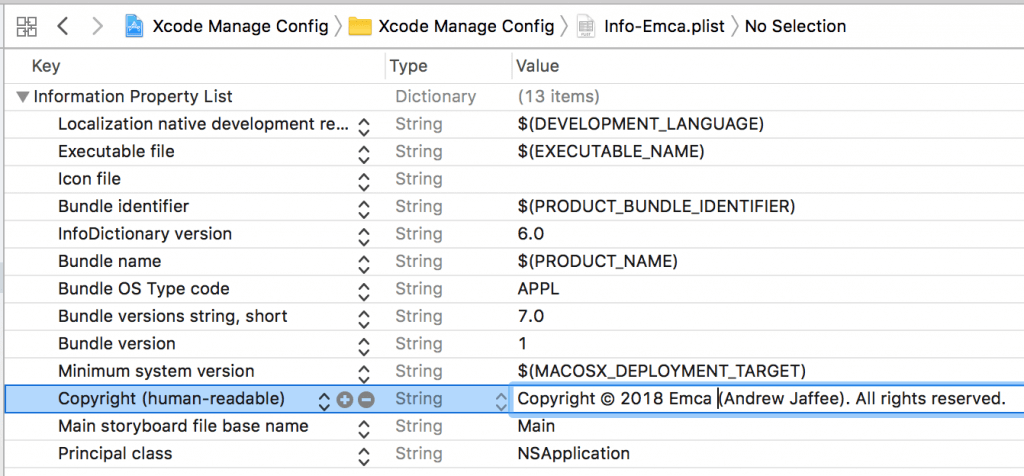
The copyright text
I arranged the Info.plist files for the two targets in this project as I had discussed above in the first sample project. As you’d expect, there’s an Info-Acme.plist for the “Acme – Release” target and an Info-Emca.plist for the “Emca – Release” target. Changing the copyright text is code independent. You highlight the plist file in each target, click into the Copyright (human-readable) string value, and make your edits like so:
We just went through a whole slew of examples of how you can leverage targets for keeping your app code and resources centralized and giving you the flexibility to make changes, like generating multiple flavors of the same app, without using hacks like hardcoding, writing scripts, or writing pyramid-of-doom if statements.
Different dependencies for different app platforms
Over the years, I’ve designed, encoded, used, and accumulated a lot of good, solid C++ code. This code is meant for solving a wide range of problems, or modelling a major gamut of everyday scenarios, for example, messaging, statistical tests, data manipulation, etc. Over the years, I’ve learned to first look for existing code that I can reuse before spending hundreds of hours reinventing the wheel… again (and again).
What does this have to do with targets? I’m going to show you how you can reuse existing code in one Xcode project that has targets for macOS and iOS (and tvOS and watchOS if you put a little thought into it). So one project can allow you to build binaries and reuse them in four different Apple app types.
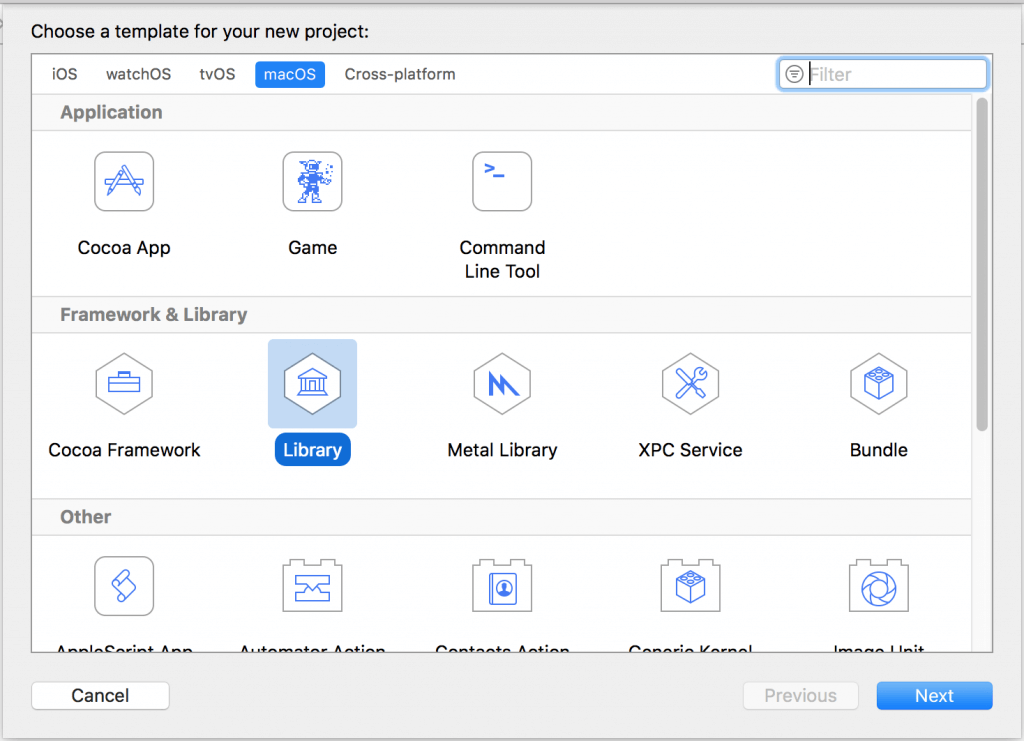
I could show you how to do this with frameworks, and that’s the direction to which you’ll want to head, but to keep this didactic, short, and simple, I’m just going to build libraries. You can download a library-based project I created named “Xcode Cocoa Library” from GitHub if you want to follow along.
Create a new Xcode project using these settings:
Click Next and configure thusly:
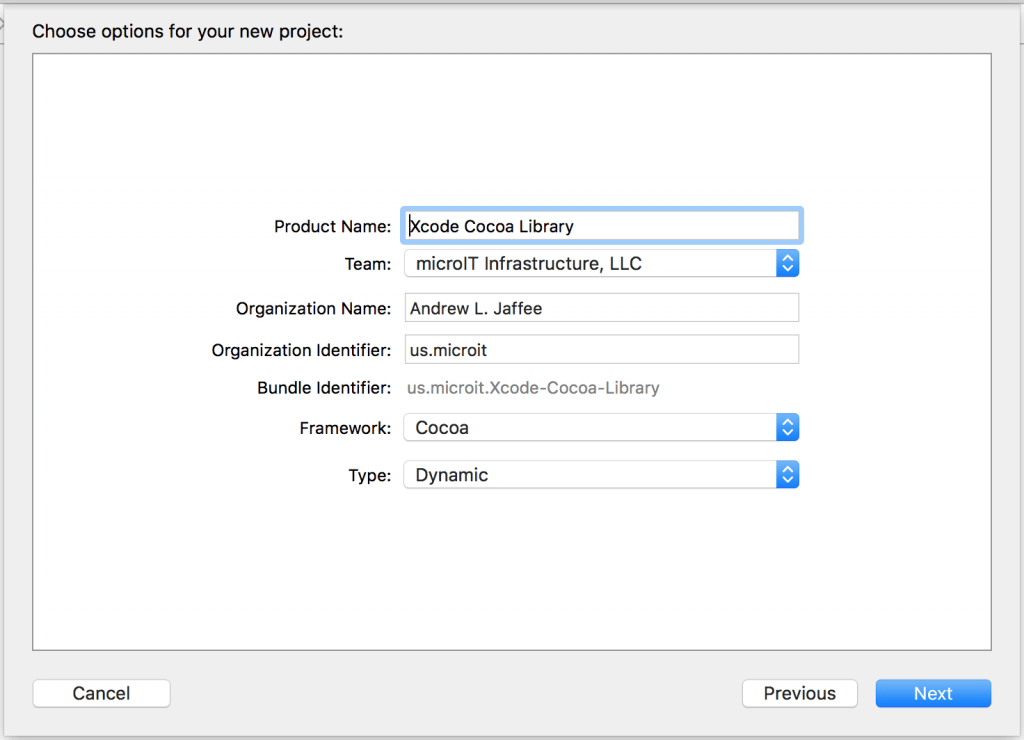
Click Next and save in a location of your choosing. In the Project Navigator, find the file Xcode_Cocoa_Library.m and rename it to Xcode_Cocoa_Library.mm to be sure that C++ and Objective-C++ are supported.
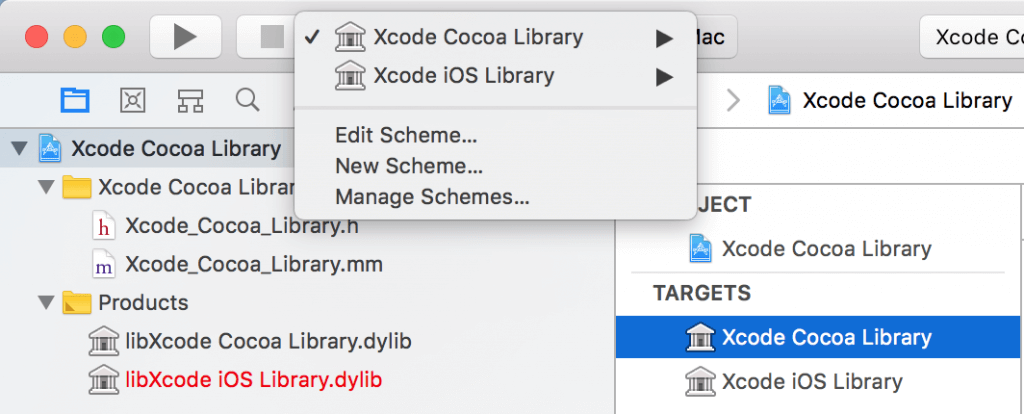
As we did earlier, Duplicate the “Xcode Cocoa Library” target, renaming the new target and associated scheme as “Xcode iOS Library.” At this point, your project should look like so:
Highlight the “Xcode Cocoa Library” target, go to Build Settings, and look at the Architectures section. You’ll note that the library is configured to be run under macOS on an Intel-based machine:
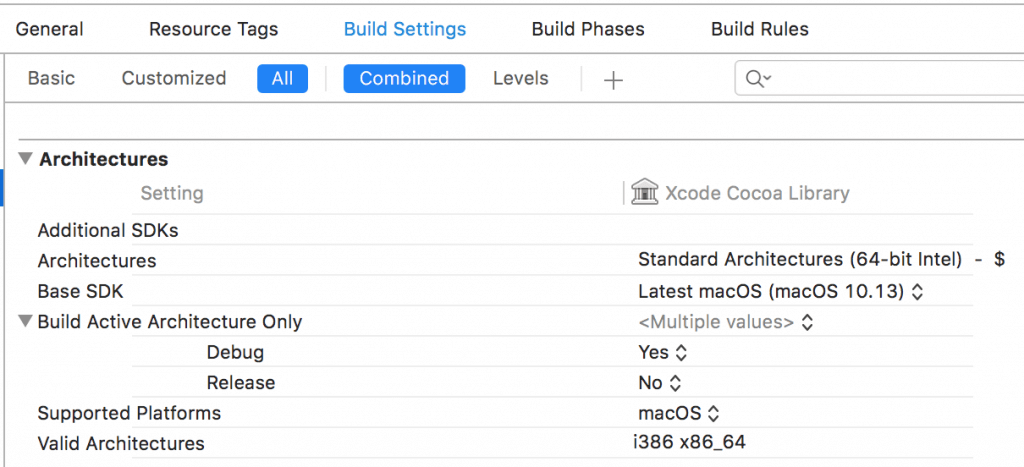
Notice the target builds successfully.
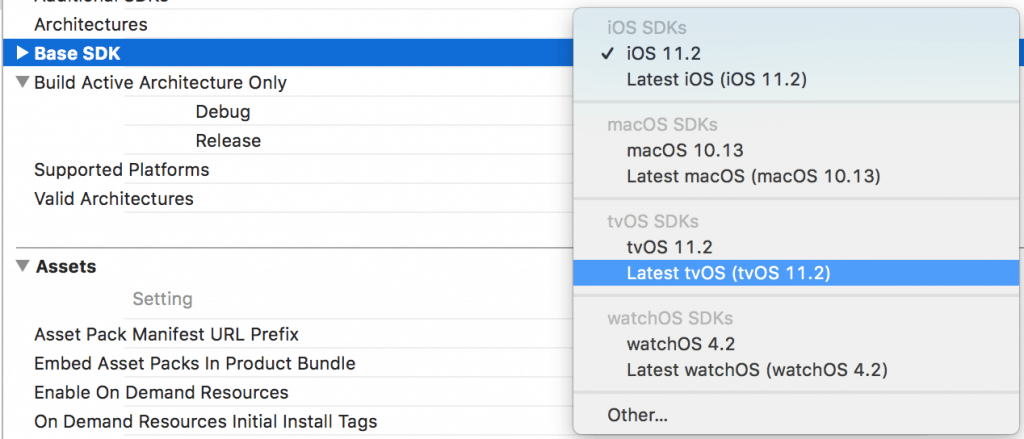
Highlight the “Xcode iOS Library” target, go to Build Settings, and look at the Architectures section. Change the Base SDK to the latest version of iOS, like so:
You should notice that the library is configured to be run under iOS on an ARM-based machine. Build the “Xcode iOS Library” target. Notice the target builds successfully.
Let’s add some code to the project just to be sure we can write C++ and Objective-C++. (Note that many times I’ve added rock-solid existing C++ .h and .cpp files, blended in some Objective-C and Objective-C++, and was able to reuse mountains of code in my macOS, watchOS, and iOS apps.)
Here’s file Xcode_Cocoa_Library.h:
|
1 2 3 4 5 6 7 8 9 10 11 12 13 14 15 16 17 18 19 20 21 22 |
#import <Foundation/Foundation.h> #include <iostream> @interface Xcode_Cocoa_Library : NSObject - (void)helloWorld; @end class Parent { public: virtual void soundOff() { std::cout << "This is the parent class" << std::endl; } }; class Child: public Parent { public: virtual void soundOff() { std::cout << "This is the child class" << std::endl; } }; |
Here’s file Xcode_Cocoa_Library.mm:
|
1 2 3 4 5 6 7 8 9 10 11 12 13 14 |
#import "Xcode_Cocoa_Library.h" @implementation Xcode_Cocoa_Library - (void)helloWorld { Child child; child.soundOff(); NSLog(@"Hello, world!"); } @end |
Build both targets with the new code added. Here’s the result (success):
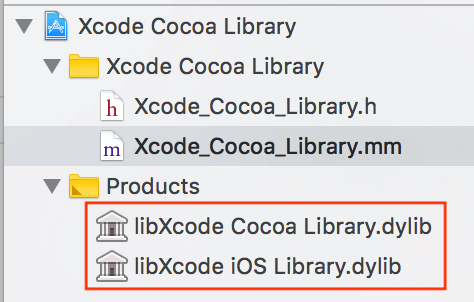
These library names would be red if they failed to build.
I’m not going to show you how to consume this library in a Swift-based project, as it’s beyond the scope of this tutorial. Rest assured that I’ve incorporated such libraries (and static libs and frameworks) many times into Swift-based projects (generally using a wrapper, a bridging header, and of course, including the libraries’ header files).
The point I’m making here is that you can reuse code and organize it, without using hacks, build for multiple platforms, and get great maintainability and extensibility. How? By using targets.
Truly universal app code
Take a look at this image from the “Xcode Cocoa Library” project discussed in the last section:
I could create two new targets, one for tvOS and one for watchOS. If I organize code properly, keeping abstraction in mind, I can build, maintain, and extend functionality for macOS, iOS, tvOS, and watchOS all in one project.
Conclusion
In reality, I currently have libraries that allow me to reuse much of my over-the-years-accumulated C, C++, Objective-C, Objective-C++, and Swift code in macOS, iOS, tvOS, and watchOS apps. The reason I mention all these languages is that Xcode’s targets and schemes have enabled me to reuse a lot of code I’ve written in the past — and I’ve been able to reuse my legacy code on multiple Apple platforms, namely iOS, macOS, watchOS, and a bit of tvOS.
I’ve only been able to do that by planning, doing requirements analysis, designing first before coding, concentrating on abstraction — looking before leaping. I’ve been able to abstract so much code by implementing concepts and techniques like best practices for building classes, using architectural design patterns like MVVM, using tactical design patterns (here, here, and here), and, of course, using object-oriented and protocol-oriented programming techniques.
I’m waxing theoretical. You’ve got great tools available to you, like Xcode and its targets and schemes. Don’t be a just-get-it-done developer. Invest some time into reading up on the documentation provided with Xcode. Look at some third party books and videos. Join special interest groups and social media groups. Take the information you glean from your studying and put it to practice in your everyday work. Don’t be a stick in the mud. Try new things and constantly push the envelope.
If you take the time, you’ll find that tools like Xcode provide features beyond your wildest dreams.

Avid and well-published author and software developer now specializing in iOS mobile app development in Objective-C and Swift. He has a strong background in C#, C++, .NET, JavaScript, HTML, CSS, jQuery, SQL Server, Agile, TDD, Git, and other technologies. He earned a B.Sc. and M.Sc. in Computer Science. Andrew has published several apps in the Apple App Store and has 30 years of experience in software development and professional writing. You can read his blog at http://iosbrain.com/.