
by Mukhamed Khasanza
How to integrate maps in React Native using react-native-maps

Nowadays, almost all mobile applications have a maps feature. I had to integrate Google Maps to my React Native application, and the only choice was react-native-maps by Airbnb (it’s the only one still supported by the React Native community).
I found several tutorials on how to set up this library, but none fully worked for me. This was because I had to run on both iOS and Android platforms and also support Google Maps for iOS.
Let’s create a React Native application from scratch using react-native-cli to show, step by step, how everything is installed. If you want to integrate react-native-maps for your existing app, skip Step 1.
Step 1: Install and set up React Native application
If you haven’t installed the React Native command line interface, run: npm install -g react-native-cli. Now you can create your project, simply using: react-native init ReactNativeMaps
Here are the dependency versions at the time of building this project:
- “react”: “16.6.1”
- “react-native”: “0.57.5”
- “react-native-maps”: “0.22.1” — we will install this one later.
Now you can try to run your app, react-native run-ios or react-native run-android . Usually, this works without any problems.
Step 2: Add and Link react-native-maps package
Now let’s install react-native-map: npm install --save react-native-maps after installing the package you should link it to your native apps: react-native link react-native-maps.

Step 3: Set up Apple Maps (iOS)
It will be easier if we set them up separately by platform, so let’s first do it on iOS. Before integrating Google Maps, we will check if Apple Maps works correctly. Add the following code to your current rendering component where you want to render your MapView.
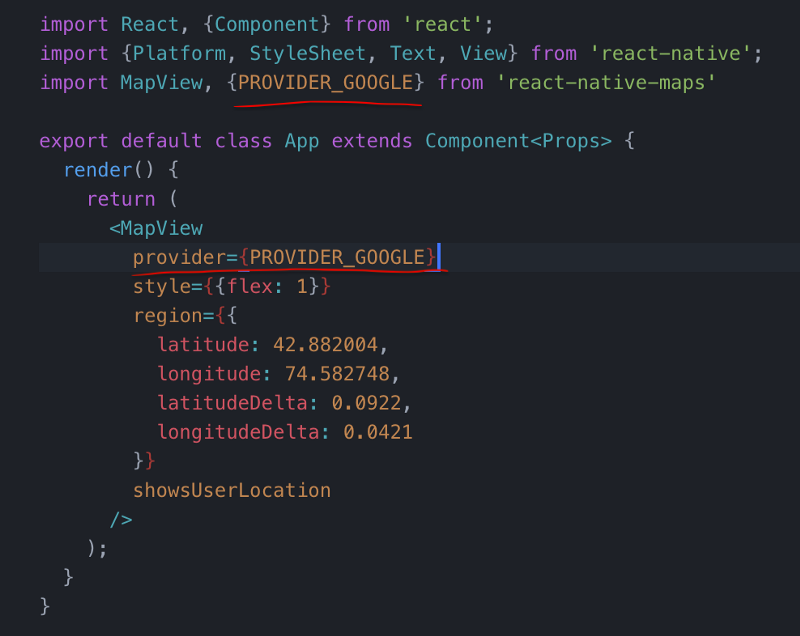
import MapView from 'react-native-maps'export default class App extends Component<Props> { render() { return ( <MapView style={{flex: 1}} region={{ latitude: 42.882004, longitude: 74.582748, latitudeDelta: 0.0922, longitudeDelta: 0.0421 }} showsUserLocation={true} /> ); }}You can test whatever location you want, just specify the appropriate Latitude and Longitude. As you can see, I enabled user location simply by adding the showUserLocation prop to the MapView component. If you are running on the real device you will see your current location.
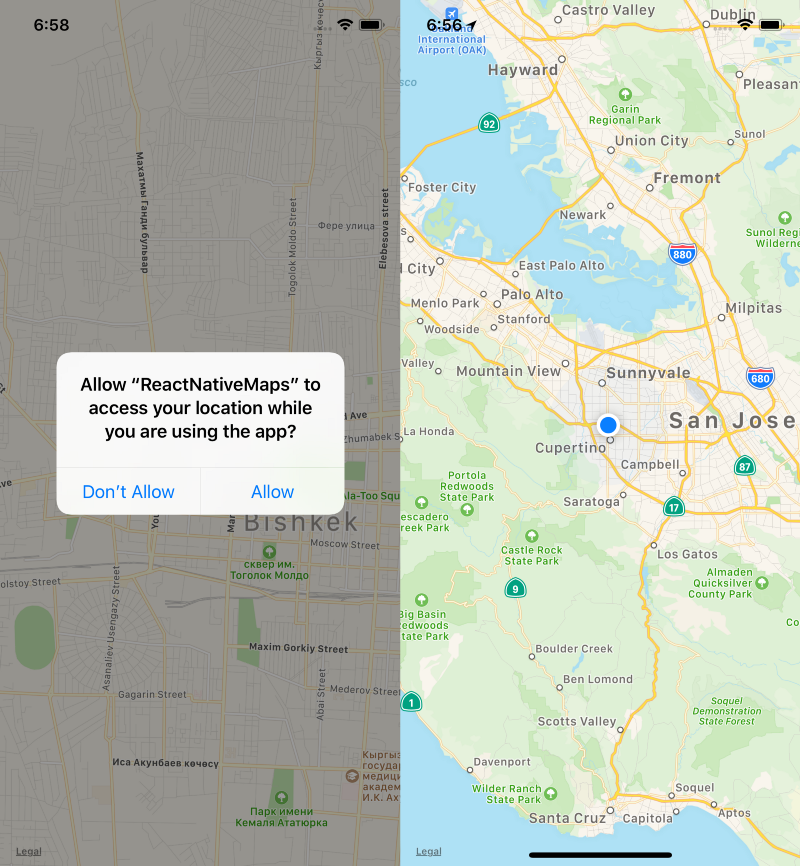
So, as you can see, by default Apple Maps is already working. More than that, if you linked everything correctly and enabled the user location, it’s actually done a lot of things for us (the user permission for the location with a default message). If you came from native iOS development, then you probably know what is an info.plist file.
Step 4: Install Cocoapods and ‘GoogleMaps’ package (iOS)
Apple Maps was easy, right? Agreed — so let’s see what Google Maps has for us. We have to install Google Maps SDK for iOS. We will use Cocoapods. If you haven’t used it before, run sudo gem install cocoapods.
Now you have to create a Podfile where you will specify the dependencies of your iOS application. Navigate to your iOS/ folder in your React Native app and run: pod init or you can use touch Podfile you should have something similar to this:
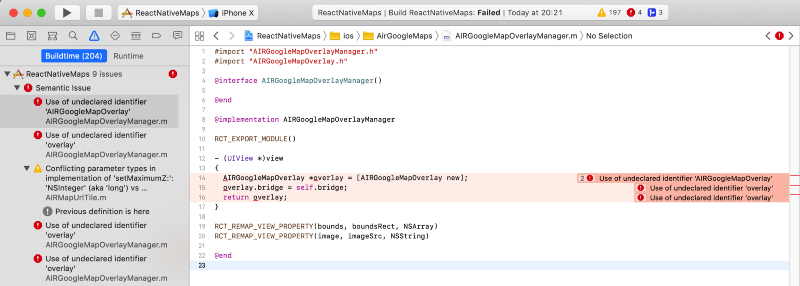
# platform :ios, '9.0'target 'ReactNativeMaps' do# Pods for ReactNativeMapspod 'GoogleMaps'endAs you can see, I added the pod GoogleMaps and now we have to install it. If you are still on iOS/ folder, run: pod install . If you try to run it now, you will probably get an error:
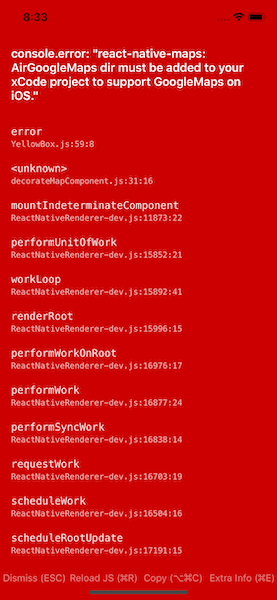
Okay, let’s do what it wants. Now we should open xCode workspace.
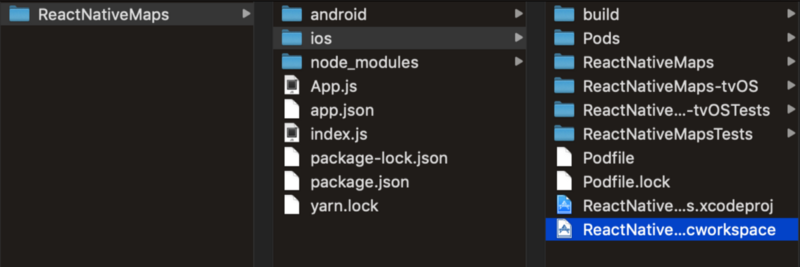
Navigate to AirGoogleMaps folder from node_modules/

And drag it to the top of your xCode project
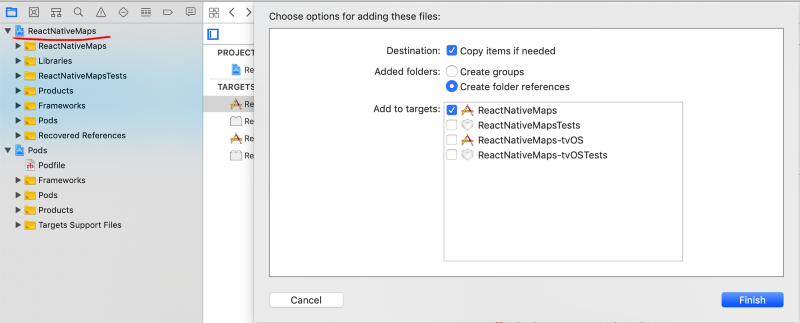
Please try to build your xCode project, if you are failing
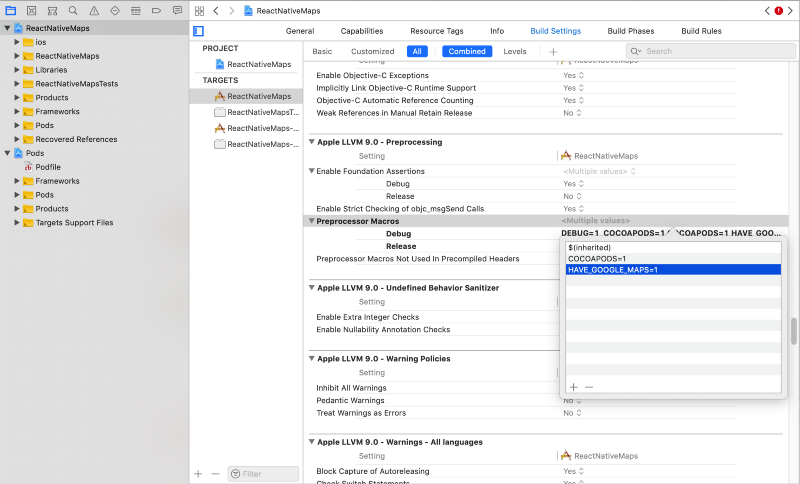
You should add HAVE_GOOGLE_MAPS=1Preprocessor Macro to Build Settings
Step 5: Get Google Maps API key, Run iOS app with Google Maps
So now we have to generate a Google Maps API key.
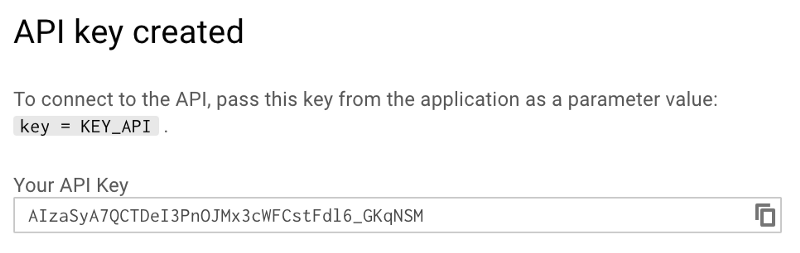
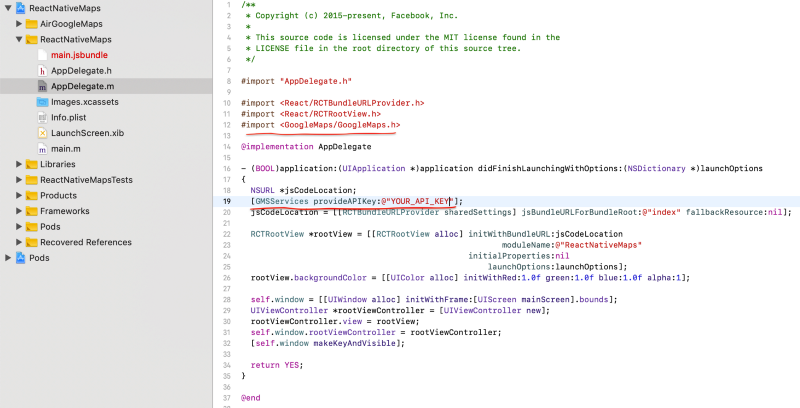
Copy your API key and add to AppDelegate.m file.
#import <GoogleMaps/GoogleMaps.h>
[GMSServices provideAPIKey:@"YOUR_API_KEY"]
Now you can tell your MapView component that you are ready to use Google Maps.
Oh yesss, please run your iOS app. And you will get Google Maps.
I hope.
Step 6: Let’s try Android now
Okay now we can quit xCode and let’s just try react-native run-android. If you are getting the same as this:
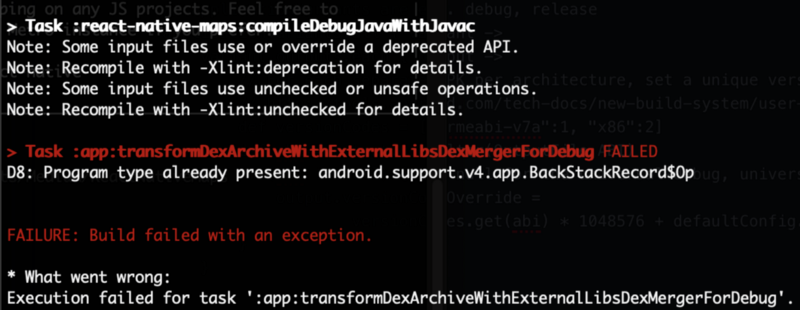
check your android/app/build.gradle file. And replace this:
compile project(':react-native-maps') with this:
implementation(project(':react-native-maps')){ exclude group: 'com.google.android.gms', module: 'play-services-base' exclude group: 'com.google.android.gms', module: 'play-services-maps' }implementation 'com.google.android.gms:play-services-base:12.0.0'implementation 'com.google.android.gms:play-services-maps:12.0.0'Oh, and don’t forget to add API_KEY to AndroidManifest.xml file.
<application> <meta-data android:name="com.google.android.geo.API_KEY" android:value="YOUR_API_KEY"/></application>Yes, now your app is running on both platforms. Please check the react-native-maps repo for more fun things that you can do with your MapView component.
Conclusion
Hope my first article on Medium was helpful for you. Please, if you see any mistakes don’t hesitate to leave a comment, I will appreciate your comments!