Simplified Image Asset Management for Xamarin Apps
Easily manage the image assets in your Xamarin apps with MFractors Image Manager.
Working with image assets is definitely one of the most time-consuming parts of Xamarin development; adding new assets to our projects is tedious, it's hard to completely delete an image resource and there is no way to visually explore all images in our solution.
Thankfully, MFractor includes an Image Manager; a centralised user interface that you can use to explore and manage the images in your Xamarin app.
With the Image Manager, you can easily import new resources, delete existing resources, optimise your image assets using TinyPNG and perform a slew of other useful actions. It's your one-stop-shop for working with images!
To open the image manager, go to the MFractor menu in the top menu bar and choose Manage Image Assets. Alternatively, right-click on any project or solution in the project pad and choose Manage Image Assets.
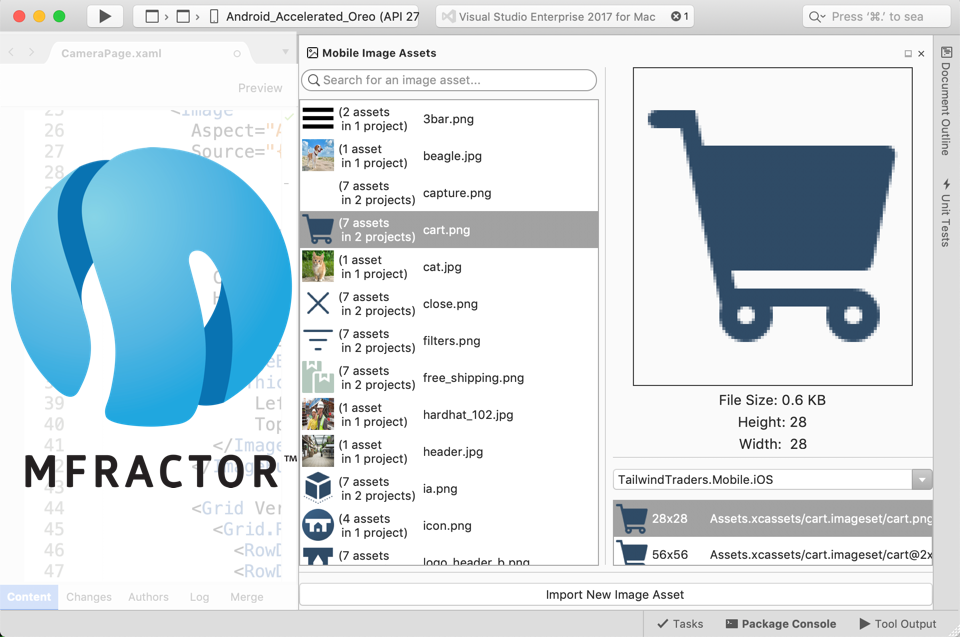
This will open the image manager pad on the right side of your IDE:
We can also press Command+D on an image reference in XAML to open the Image Manager and select that image 😉
Managing Image Assets
Let's learn how we can use the Image Manager to manage our images.
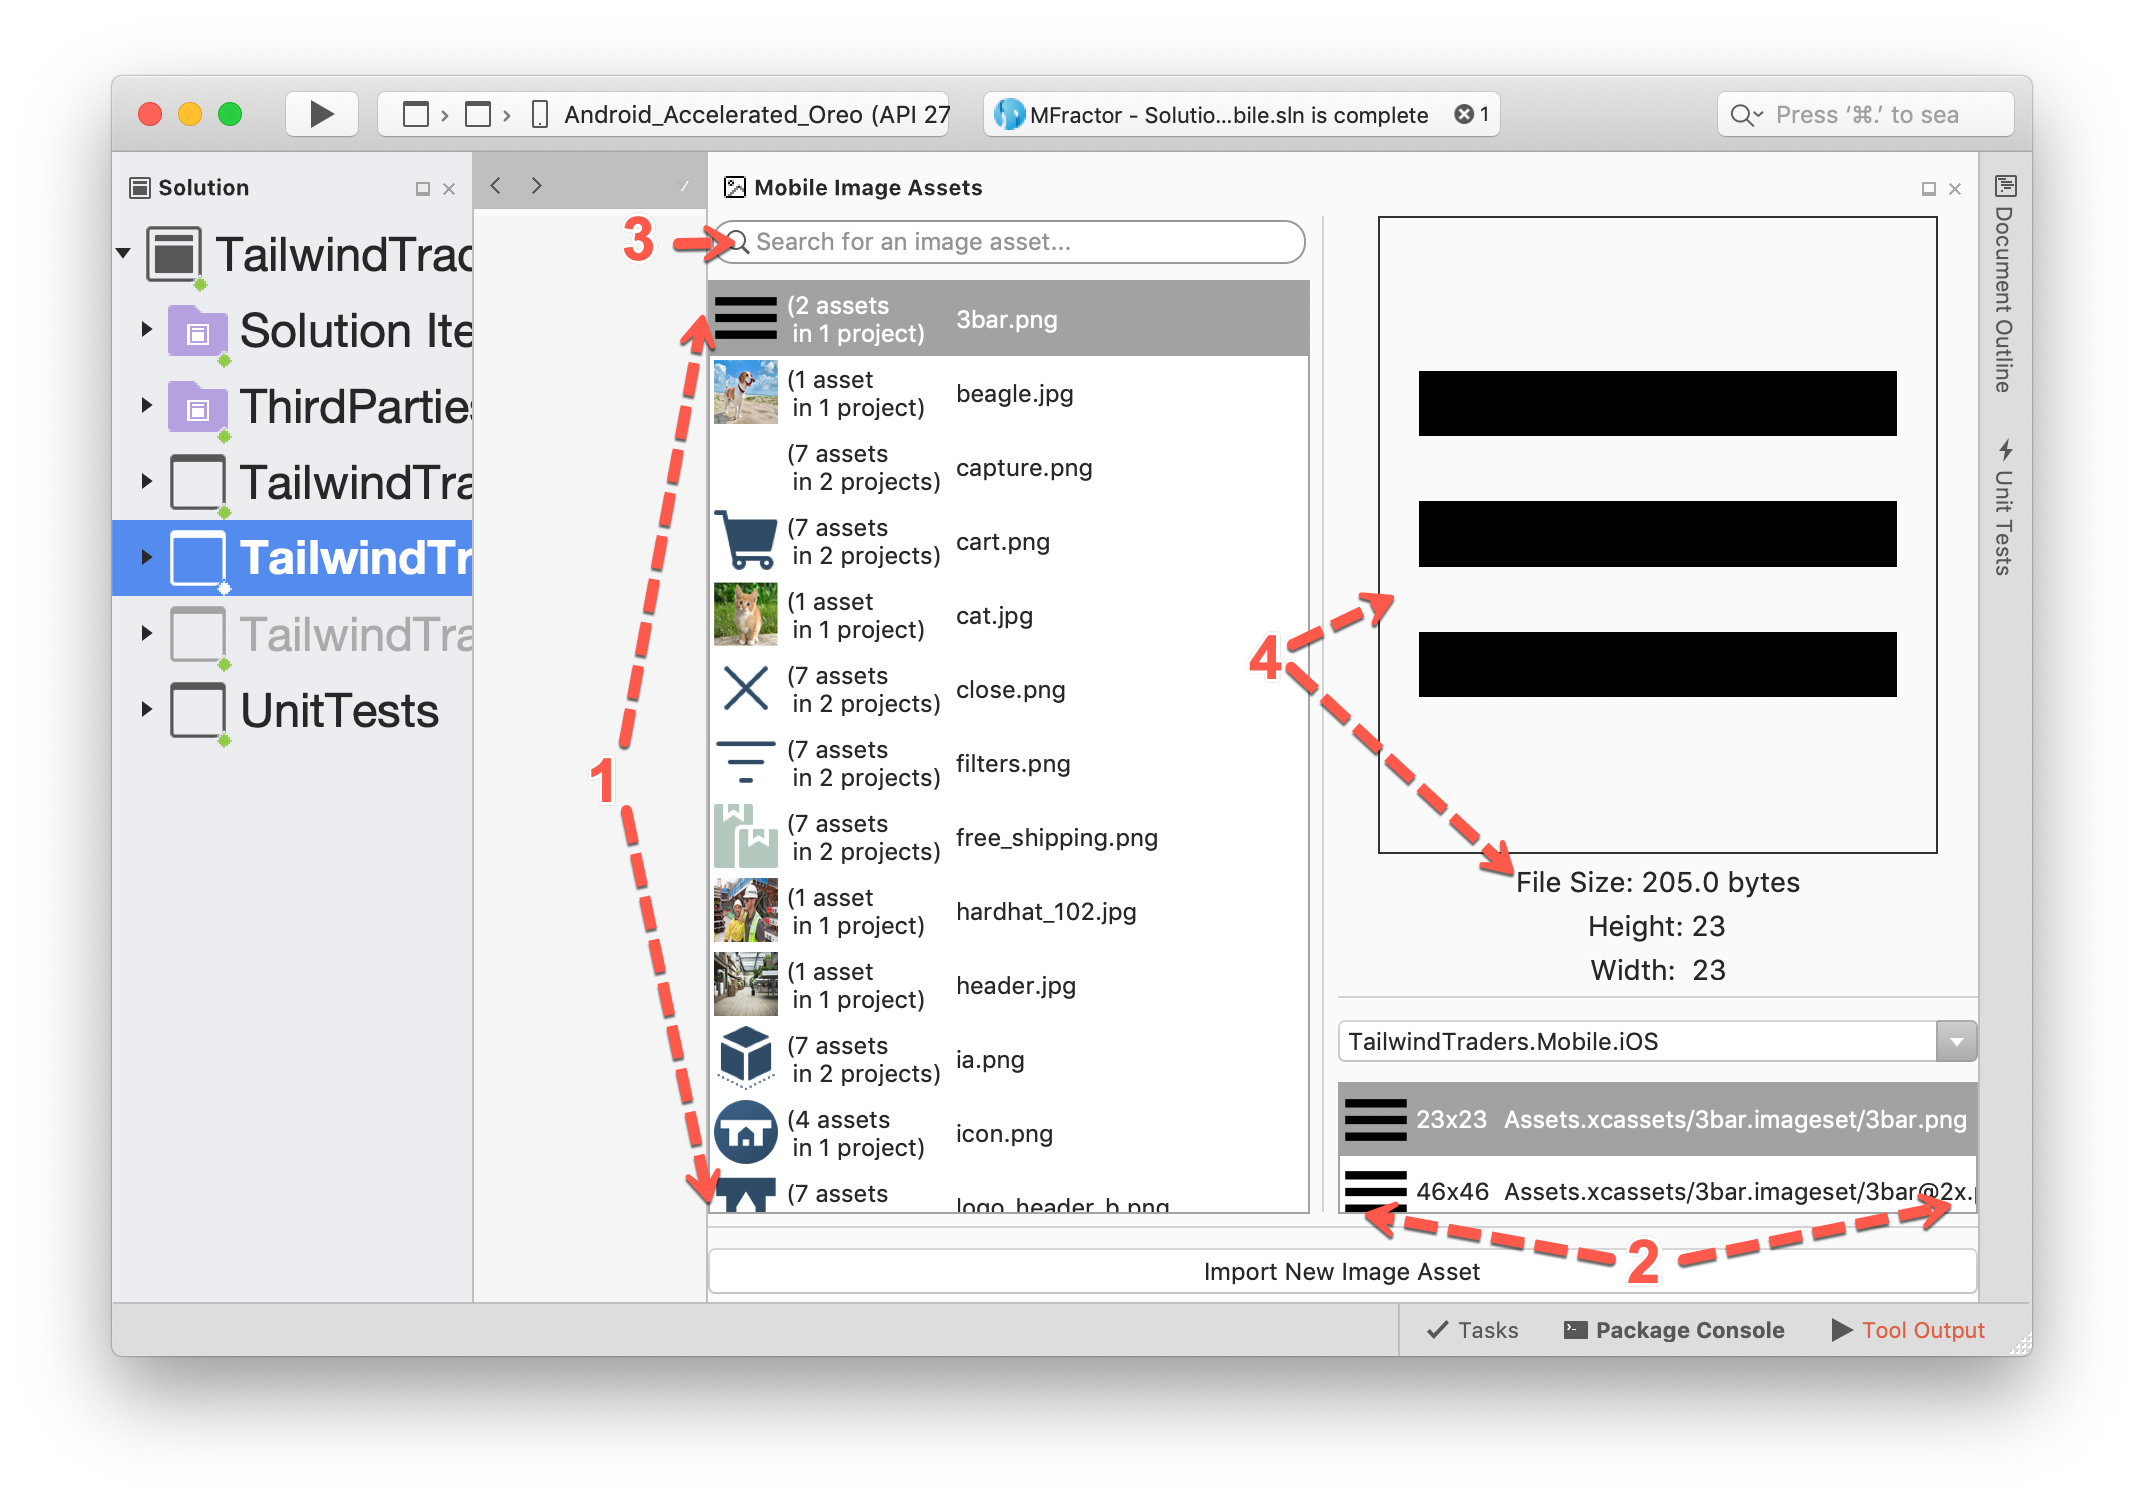
The Image Manager shows images in two lists; the left list summarises all image assets in your solution grouped by their image name (1) and the right list shows all image densities for that image asset (2).
You can use the search box (3) at the top of the left list to locate image assets by name and then click on an image asset for a preview and a summary of its file size, width and height (4):
If you need to add a new image asset to your solution, click on the Import Image Asset button to open the Image Import Wizard:
The Image Manager also includes several actions for each image asset and image file; simply right click on any image!
In the action menu, we can delete that image asset (removing all densities of an asset in a solution), reveal an image in Finder or in the Project Pad, copy the name or file path to the clipboard and more:
You may even notice that there is an action item named Optimise...
Optimising Image Assets
One of the cooler parts of the Image Manager is the Optimise feature; this nifty feature uses TinyPNG to optimise your image assets, significantly reducing the size of your applications image assets.
To use image optimisation you'll need a TinyPNG API key; head on over to https://tinypng.com/developers and grab your API key there.
When you have an API key, go to the Visual Studio menu in the top menu bar and choose Preferences. Browse to the Settings area under MFractor section, enter your API key into the TinyPNG API Key field and then click Ok to save the API key.
Now we are ready to optimise!
Open the image manager and then right click on any image asset to open the action menu. Select Optimise to start optimisation on that file or image asset group:
After a short time, MFractor presents you with a summary of the optimisation task; image optimisation can reduce the size of each image by up to 70%!
Using The Image Manager With XAML
When you are working in XAML, the Image Manager can provide extra assistance in locating and using image resources.
If you have the image manager open while you are editing a XAML attribute that accepts an ImageSource, the image manager show you a preview of the image resource you have selected in the code completion window, enabling you to visually choose your image from XAML.
You can even drag and drop any image asset directly into your XAML file.
Summary
The Image Manager is a boon for Xamarin developers; you can now explore, manage, import, delete and optimise your mobile app's images from one place!
As a Professional only feature, you will need an MFractor Professional license to use the Image Manager. For just $200 AUD, less than a dollar a day, the Image Manager is a worthy addition to your Xamarin toolbelt.