
Visual Studio for Mac: Become a Productivity Pro
Despite continued advancement and innovation in the IDE space, the bottom line is that IDEs are a productivity tool. As a software developer, the value of an IDE is directly related to how much using the tool increases your productivity. Subsequently, when we make decisions about how to improve Visual Studio for Mac, your productivity is always at the forefront. With that in mind, I want to share with you my favorite time-savers within the IDE that help boost my productivity, and I hope they boost yours as well.
Add Custom Tools
Custom tools are a super powerful feature of Visual Studio for Mac that allow you to add any executable or command line tool to your IDE for easy access and usage. Not only can you add the tool to the Tools menu within Visual Studio for Mac, you can also assign a hotkey to quickly launch the tool.
One tool that I simply can’t live without is Azure Data Studio, it is a lightweight SQL management client that allows me to perform SQL commands from my Mac to a SQL server either hosted in Azure or locally (such as within a Docker container on macOS). To add Azure Data Studio to your IDE, simply open Tools > Edit Custom Tools and click “Add”. Here is my configuration for Azure Data Studio:
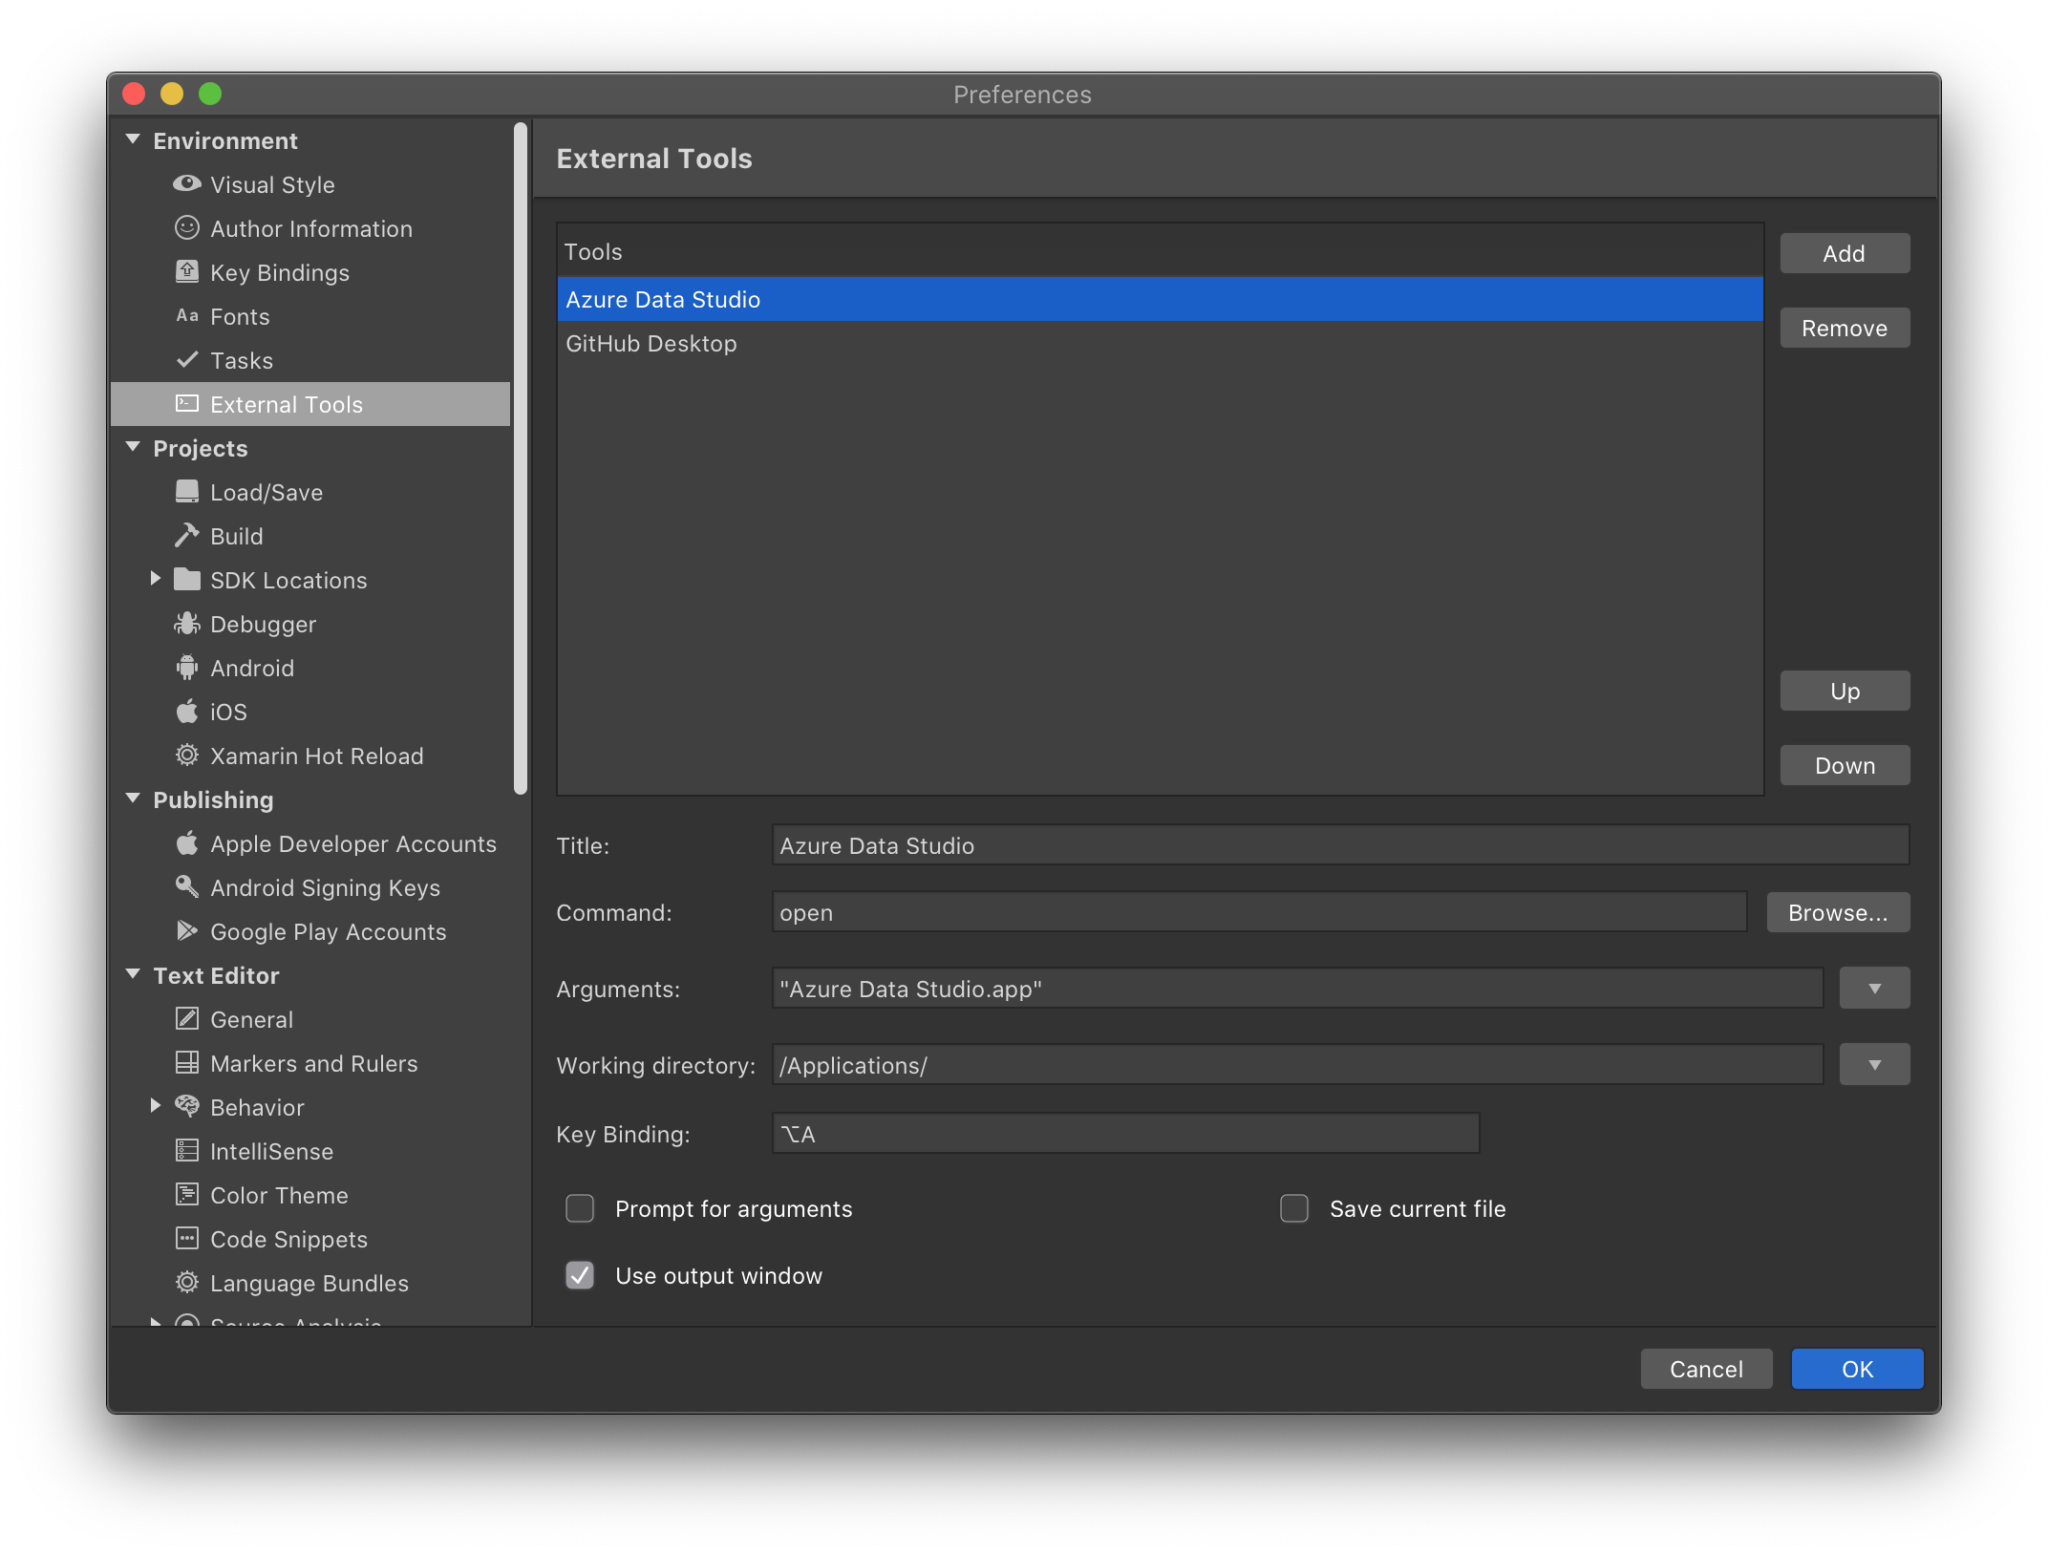
There are a few things to point out here, the first being the command. Since the Custom Tools process issues what is essentially a command line call, we want the command to be “open”, as that is the macOS command for launching an application. From there, we want the Argument to be the name of the .app bundle, extension included. Finally, we want to set the working directory, so the “open” command knows where to find the application bundle.
I also set a Key Binding so I can quickly access the greatness that is the Azure Data Studio. In my case, I used “option-a”, but any key combination not already used elsewhere in the IDE works.

Be an editing expert
The next productivity booster I find super useful is to take full advantage of the advanced features in the editor. From multi-caret editing to emoji support, the editor in Visual Studio for Mac offers a bunch of productivity enhancements that make editing code faster, more fluid and more functional. The two features I want to show off today are multi-caret editing and show import items. Both enhancements are focused on improving your productivity, so let’s look at how they work.
There are two approaches for enabling multi-caret mode. The first is via the keyboard, the other being the mouse. In the below example, I used the keyboard command “option-shift-.” to insert the next matching caret. This will add a caret at the next line with a matching value each time you press the command. You can also use “option-control-click” to manually place carets with the mouse, or “command-shift-drag” to do a block selection with the mouse.
In multi-caret edit mode, you can edit multiple lines at the same time with the same content. Once you’ve used it, you will find yourself unable to live without it!
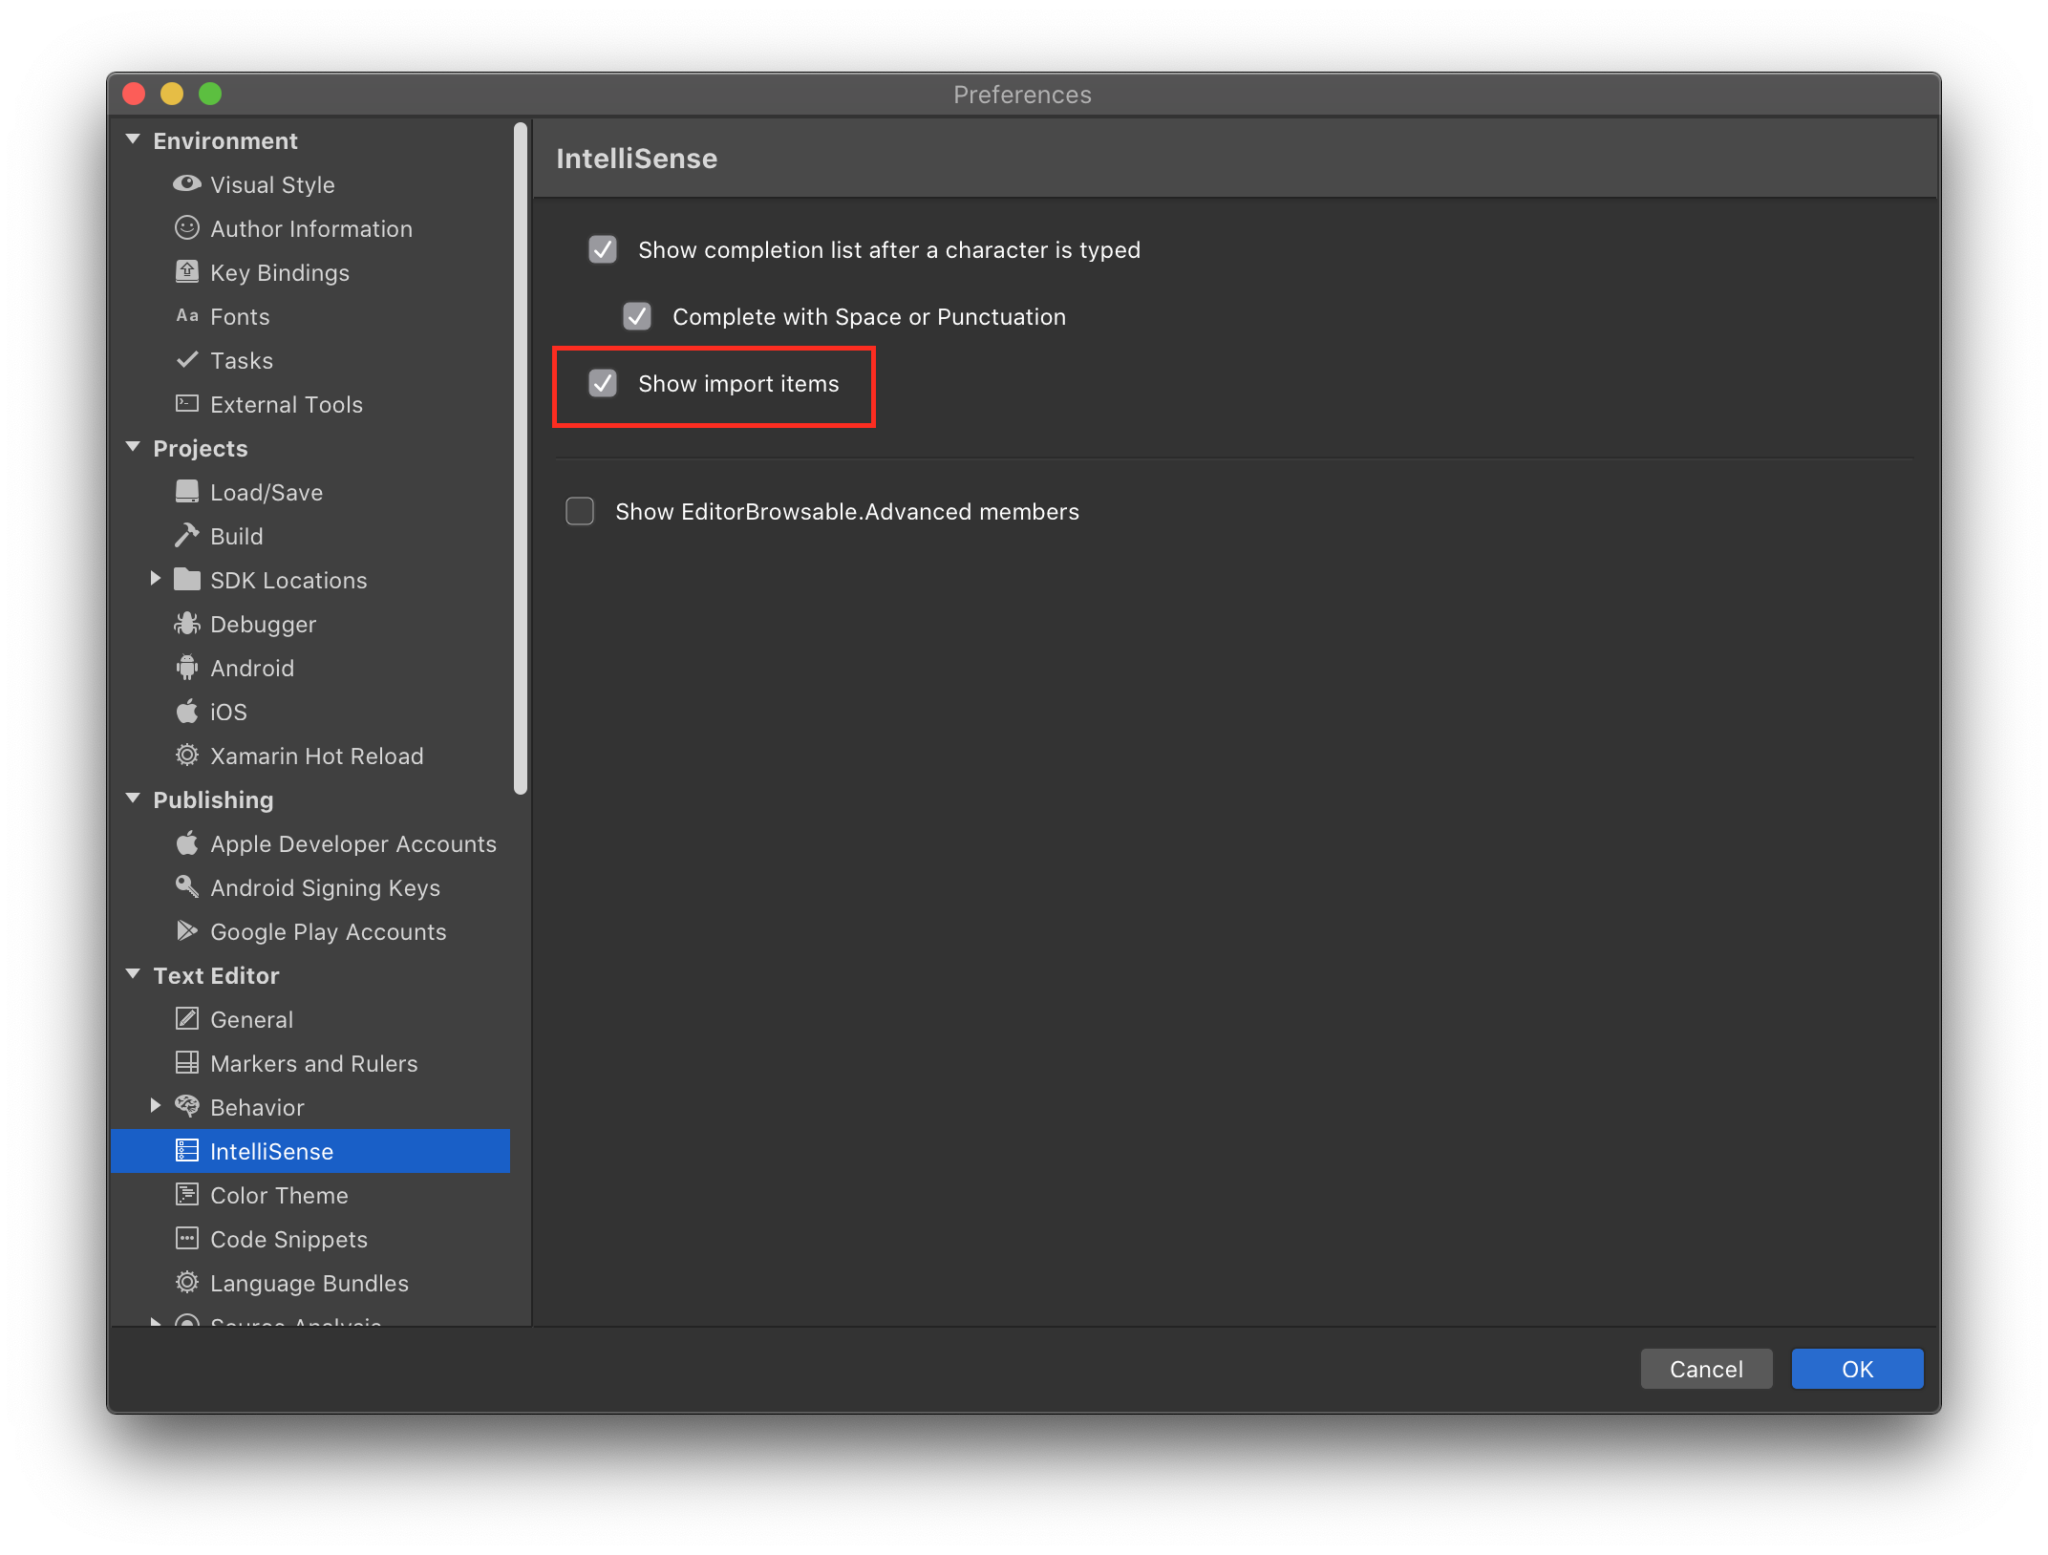
The next editor feature isn’t technically an editor feature, but a feature of IntelliSense: the ability to show completions from namespaces not yet imported and then import them automatically. This is better known as the “Show Import Items” feature, and it is amazing. Start by enabling “Show Import Items” in Visual Studio for Mac via Visual Studio > Preferences > Text Editor > IntelliSense and checking the box corresponding with “Show Import Items”
Now, as you type, the IntelliSense list will not only show completions from libraries you’ve already imported, but also from those which are available to import. In the below example, I try to create a DataTable, and IntelliSense proves the completion. IntelliSense also tells me that System.Data needs to be imported. If I complete that suggestion, not only does the completion finish but System.Data is imported as a Using statement in the file header.
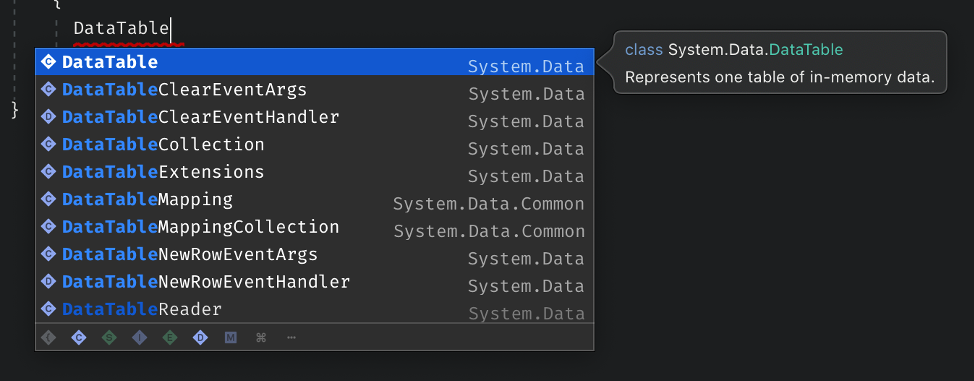
This is another huge time saver that I’ve come to rely on. Not only does it save me having to scroll up, add my using statement, scroll back down and continue where I left off, but it also helps me remember exactly which namespace needs to be imported 😂.
Don’t let NuGets manage you!
In the past, managing NuGet packages across a solution in Visual Studio for Mac was admittedly a less than seamless experience. You had to manually manage NuGet packages for each project, even if each project used the exact same NuGet package. If you’ve worked within solutions with numerous projects, you know how time consuming that can be, but luckily that reality is no more! With the new NuGet package manager in Visual Studio for Mac, you can quickly manage NuGet packages for the entire solution, from one window. In the example below, I want to add a package to two of my three projects. No big deal.Simply select those projects and away you go!
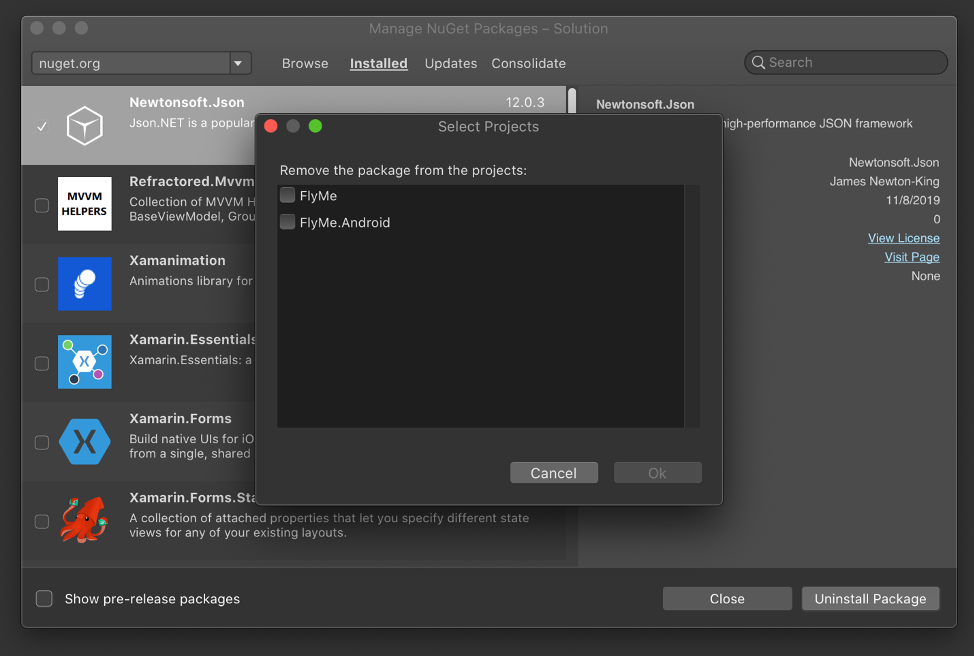
Removing packages is just as easy: all you need to do is click on the “Installed”, find the package you want to remove and click “Uninstall Package” and you will be greeted with a window letting you select which projects you want to remove the package from. Notice that only projects that currently contain the package are listed, as opposed to every project in your solution.
I really hope that you found this post useful. I love sharing tips that have helped me become more productive and hope they will help you be more productive as well. After-all, at their core, IDEs are productivity tools. If you are interested in testing out the latest preview of Visual Studio for Mac, make sure you’ve downloaded and installed Visual Studio 2019 for Mac, then switch to the Preview channel.
As always, if you have any feedback on this, or any, version of Visual Studio for Mac, we invite you to leave them in the comments below this post or to reach out to us on Twitter at @VisualStudioMac. If you run into issues while using Visual Studio for Mac, you can use Report a Problem to notify the team. In addition to product issues, we also welcome your feature suggestions on the Visual Studio Developer Community website.
 Light
Light Dark
Dark
2 comments
How to enable vertical tabs in Visual Studio for Mac?
Hey! We do not support vertical tabs at this time, but please vote and follow the following Developer Community feature request for updates: https://developercommunity.visualstudio.com/idea/661378/allow-to-have-vertical-tabs-in-texteditor.html
Thanks!