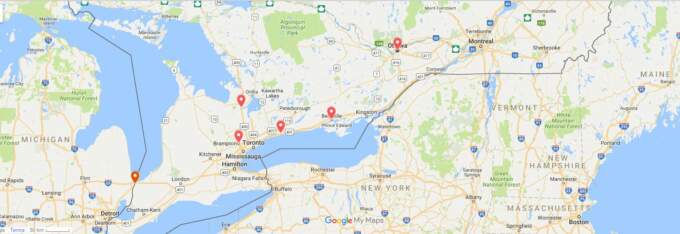
Google Map with no plugin for your Craft CMS website
In this tutorial I will show how to create a simple google map without using plugins and that will allow your client to update the pin location themselves.
No Plugins Necessary
One of my philosophies when building websites is to use as few plugins as possible. Sometimes a plugin is necessary, such as building a store locator with Smart Map. However other times it's overkill for a feature that you can easily build for yourself using native functionality. This tutorial is aimed at Craft CMS but could easily be modified to work with any CMS.
Let's Get Started
You'll need a google maps api key, go here, create your key and save it to use later in the project. You'll also need to create fields that will enable your client to update the address and pin location on the map. If you prefer you could hard code the address, but I like the added flexibility it gives clients. The fields you need are:
- Google Maps API Key - text
- Map Zoom Level - dropdown with options 1-20
- Street Address - text
- City - text
- Province - text
- Country - text
- Postal Code
Or you could use the excellent field manager plugin (available for Craft 2 & 3) and import the fields from this json file.
The Html is really simple. All you need is a div with an id of Map. I also added a responsive-embed class that comes with Foundation which will ensure that the map is resizes correctly at mobile.
<div id="map" class="google-map">
<div class="responsive-embed">
</div><!-- /.responsive-embed -->
</div><!-- /#map.google-map -->
You'll also need to explicitly set a height in CSS to ensure the map displays correctly He's my CSS:
#map {
min-height: 450px;
width: 100%;
}
The Javascript
At the bottom of your page template add a new block called "block bodyJs" and ensure that you have that block added to your layout template. This will ensure that all the javascript is called only on the page with the map.
Next up I'll break up the javascript into easy to consume bits and at the end put it all together into one easy copy & paste bit for you to use.
Initialize the map
Here we pull in the custom fields for the address and this is used for geolocation and placing the pin. Below that we create the map and place it in our div ID of "map" and control the zoom level of the map with the custom field added earlier. In the styles section you can add or remove various map features: see the docs here. The map in the hero image at the top of the page is grey scale as requested by the client and that is controlled with the setting of saturation -100
function initMap() {
var address = '{{ entry.streetAddress }},+{{ entry.city }},+{{ entry.provinceOrState }},+{{ entry.country }}';
var map = new google.maps.Map(document.getElementById('map'), {
mapTypeId: google.maps.MapTypeId.TERRAIN,
zoom: {{ entry.mapZoomLevel }},
styles: [
{
featureType: 'all',
stylers: [{"saturation": -100}]
}
]
});
The Info Window
It's always good to include the info window so you can show details about the location. First we add the content that goes into the info window and this can include any number of custom fields or html. For readability I've concatenated it into different strings. Below the copy you init the content so it appears on the map.
// this content goes in the info window
var contentString = '<div id="content">'+
'<h1 id="mapHeading">{{ siteName }}</h1>'+
'<div id="infoContent">'+
'<address>{{ entry.streetAddress}}, <br>{{ entry.city }}, {{ entry.provinceOrState }} {{ entry.postalCode }} </address>'+
'<a class="directions" href="https://www.google.com/maps/place/'+ address +'">Get Directions</a>'+
'</div>';
// init infowindow
var infowindow = new google.maps.InfoWindow({
content: contentString
});
The end of the javascript pulls it all together and places the marker. Here you can add a custom pin instead of using the default google maps one. It's always nice to have your logo or icon in the pin. Add a relative link to the image and your all good.
Notice the last line has your googlemaps api key. You can hard code this here or use a field and have your client add in their api key. This will only be necessary if your client needs to go to a paid plan due to large number of hits. Most clients won't need that.
function(results, status) {
if(status == google.maps.GeocoderStatus.OK) {
new google.maps.Marker({
position: results[0].geometry.location,
map: map
});
map.setCenter(results[0].geometry.location);
// add marker to map
var marker = new google.maps.Marker({
position: results[0].geometry.location,
map: map,
icon: '/assets/images/sparks-map-icon.png'
});
// open infowindow
marker.addListener('click', function() {
infowindow.open(map, marker);
});
}
});
}
</script>
<script async defer src="https://maps.googleapis.com/maps/api/js?key={{ entry.googleMapsApiKey }}&callback=initMap"
type="text/javascript"></script>
Javascript - all together
Here is the javascript all in one block so it's easy to copy & paste.
<script>
function initMap() {
var address = '{{ entry.streetAddress }},+{{ entry.city }},+{{ entry.provinceOrState }},+{{ entry.country }}';
var map = new google.maps.Map(document.getElementById('map'), {
mapTypeId: google.maps.MapTypeId.TERRAIN,
zoom: {{ entry.mapZoomLevel }},
styles: [
{
featureType: 'all',
stylers: [{"saturation": -100}]
}
]
});
// this content goes in the info window
var contentString = '<div id="content">'+
'<h1 id="mapHeading">{{ siteName }}</h1>'+
'<div id="infoContent">'+
'<address>{{ entry.streetAddress}}, <br>{{ entry.city }}, {{ entry.provinceOrState }} {{ entry.postalCode }} </address>'+
'<a class="directions" href="https://www.google.com/maps/place/'+ address +'">Get Directions</a>'+
'</div>';
// init infowindow
var infowindow = new google.maps.InfoWindow({
content: contentString
});
var geocoder = new google.maps.Geocoder();
geocoder.geocode({
'address': address
},
function(results, status) {
if(status == google.maps.GeocoderStatus.OK) {
new google.maps.Marker({
position: results[0].geometry.location,
map: map
});
map.setCenter(results[0].geometry.location);
// add marker to map
var marker = new google.maps.Marker({
position: results[0].geometry.location,
map: map,
icon: '/assets/images/sparks-map-icon.png'
});
// open infowindow
marker.addListener('click', function() {
infowindow.open(map, marker);
});
}
});
}
</script>
<script async defer src="https://maps.googleapis.com/maps/api/js?key={{ entry.googleMapsApiKey }}&callback=initMap"
type="text/javascript"></script>
Do you need help with this or something similar? let's work together.


