Chameleon on iOS: Getting Started
Learn how you can use the Chameleon framework to easily create, update, and manage your app’s color scheme – even if you’re not a graphic designer! By Keegan Rush.
Colors are beautiful! They’re all around us — even in our apps. But adding colors to your app can be difficult to manage; some may work together, while others may not. Even worse, if you select the wrong color combinations, your app’s visual elements may be difficult to see. That’s where Chameleon steps in!
Chameleon is a color management framework that makes it easy to add a splash of color to your app. In this tutorial, you’ll learn how to use Chameleon to do the following:
- Differentiate your UI with Chameleon’s hand-picked color palette
- Create just the right random colors
- Use hex codes to create
UIColors - Theme your entire app based on your favorite color
- Generate color schemes on the fly
- Ensure that your labels are always visible by using contrasting colors
- Keep all the status bar icons visible by contrasting them against their background
Getting Started
The starter project, HomeSplash, is an interior design app. You can paint things, like furniture, different colors to see how they’d look in your living room (ARKit integration still coming!). Use the Download Materials button at the top or bottom of this tutorial to download the starter project.
Once downloaded, open the starter project in Xcode using HomeSplash.xcworkspace, and give it a build and run. Tap one of the furniture items, and you’ll see the color picker. Select a color, and watch as it’s painted onto your living room set.

Take a look at the project and you’ll see that it consists of two view controllers:
- ViewController.swift: The root view controller containing the image views for the furniture
- ColorPickerViewController.swift: The palette of different colors that update the root view controller when selected
It also includes a utility class that paints an image with a color using Core Image, ImagePainter.swift. You don’t need to worry about this class now.
I know what you’re thinking! For an app about color, it’s pretty bland at the moment. But don’t worry, you’re about to liven things up.
Here’s what you’ll be doing to spruce it up:
- Change the
UIKitcolors to the sparkly Chameleon color palette - Apply different colors to different items based on color schemes
- Lighten or darken the painted furniture with a stepper control
- Generate random colors for when you’re not feeling too artistic
- Update the entire app’s theme to the selected color by using global theming
Building the color picker
One look at Chameleon’s API and you’ll notice plenty of references to flat colors. This raises the question:
What Are Flat Colors?
Flat colors, often referred to as solid colors, are generally regarded as colors with little to no gradient or changes in hue. They also have no transparency; their Alpha values are set to 1.0. In the context of Chameleon, whenever a method uses the term flat color, it’s referring to Chameleon’s Flat Color Palette.
Source: https://github.com/ViccAlexander/Chameleon

The Flat Color Palette is a collection of 24 hand-picked colors in two shades, which gives you a total of 48 colors. When Chameleon talks about generating a flat color, it generates one from that palette.
Adding Flat Colors to the Picker
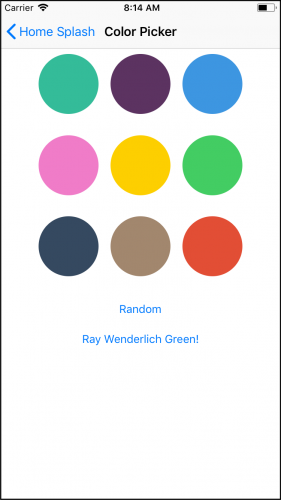
Open Main.storyboard and locate the Color Picker Scene.

Each of the different-colored squares represent the colors that the user can select. Right now, they’re the stock-standard UIKit colors. All of the colors are set in the storyboard, so if you want to play around with the different Flat Colors there, you need to add the Chameleon Storyboard Add-On.
Download the Chameleon Palette, which you can find on Chameleon’s GitHub page. This will allow you to access the Chameleon colors from Interface Builder.
Once downloaded, open it, and then run the Palette Installer.pkg.

You may get a security warning when running the Palette Installer. Read through the warning, and then allow the installation in your Mac’s Security and Privacy settings if you’re happy.

Choose Open Anyway and make your way through the installer.
Once the installation is complete, restart Xcode and open Main.storyboard.
In the Color Picker Scene, click on one of the Color Views and show the Attributes inspector.

Click on the dropdown next to the Background property, and select Other… from the list. You’ll be presented with a color picker.

Click on the Color Palettes tab (third from the left), and you’ll see the Color View’s color selected in the Apple Color Palette. This is the default color palette that you use when using the standard colors such as UIColor.green.
Open the Color Palette dropdown, and you’ll see there are quite a few more palettes from which to choose, including the newly-added Chameleon Color Palette. Select it to see all of the beautiful new crayons you just added to your color arsenal! :]

Select some of your favorite flat colors and apply them to the nine Color Views in the storyboard. Build and run the app, and you’ll see the colors you choose from the palette.
So many new colors at your disposal!
UIKit colors. They’re all declared as extensions on UIColor, with color names starting with flat:
let flatMint = UIColor.flatMint
let flatMintDark = UIColor.flatMintDark
let flatMint = UIColor.flatMint
let flatMintDark = UIColor.flatMintDark
Random Colors
The usual way to generate random colors is to pass random values to UIColor.init(red:green:blue:). Following this approach, it’s common to end up with a collection of colors that don’t fit well together.
With Chameleon, finding the perfect random color is easier because it’s a little less random. :] Take the following, for example:
// A random color from the Flat Color Palette
let randomFlatColor = UIColor.randomFlat

// A random color from the 24 light shades of the Flat Color Palette
let randomLightFlatColor = UIColor(randomFlatColorOf: .light)

// A random color from an array
let myFavoriteColors = [UIColor.red, UIColor.flatGreen, UIColor(white: 0.5, alpha: 1.0)]
let randomColorFromArray = UIColor(randomColorIn: myFavoriteColors)

// A random color from the Flat Color Palette except for those in the array
let reds = [UIColor.flatRed, UIColor.flatRedDark]
let random = UIColor(randomFlatColorExcludingColorsIn: reds)
You can see that most of the methods and properties return a color from the Flat Color Palette. The only exception is UIColor(randomColorIn:), which returns one of the colors passed into it.