
Taking portraits at wide apertures and consistently nailing focus is is not an easy task. In fact, it’s a skill that must be practiced in order to master it. However, an aspect not often discussed in regards to capturing sharp images has nothing to do with the lens used or the f-stop. Here is the ultimate guide to capturing tack sharp images at wide apertures.
GEAR
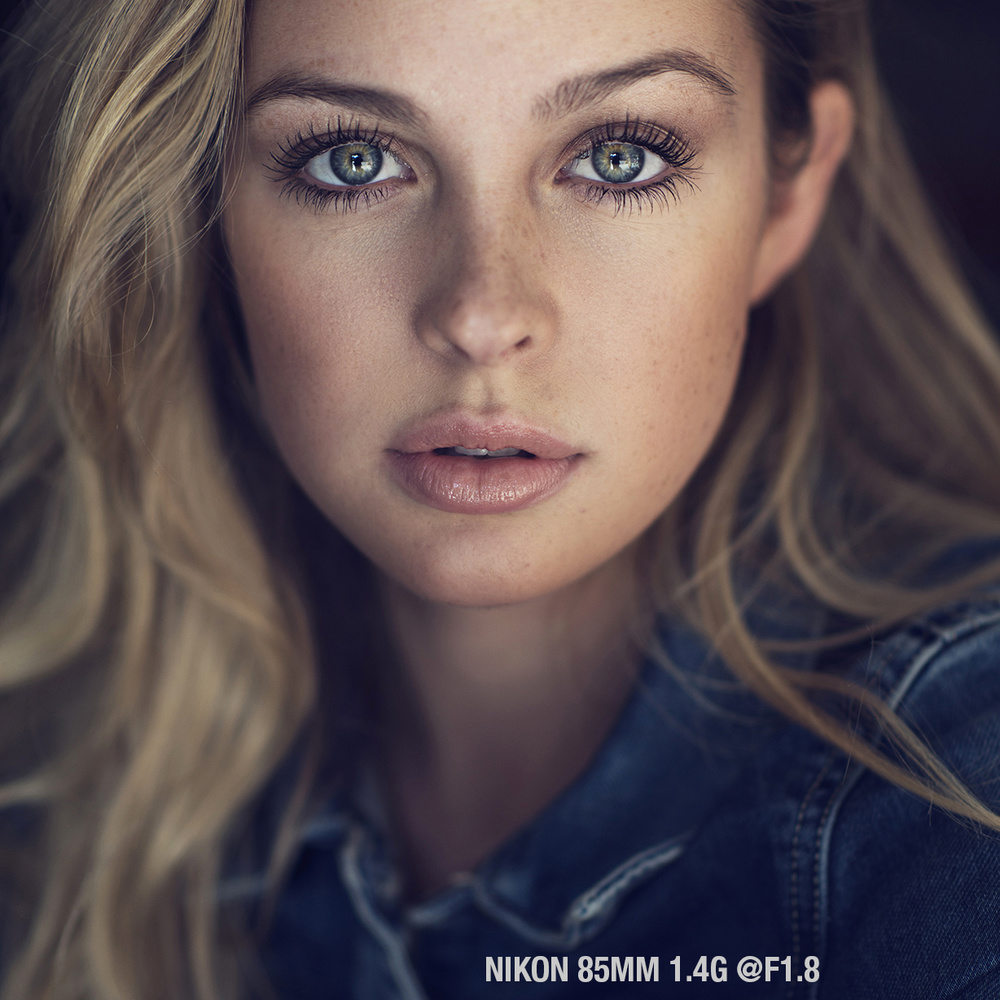
Since gear is the first thing that often comes to mind, I’d like to quickly take a moment to discuss it and get it out of the way. While this may seem contradictory to what I’ve said in the past, it’s important to make note of the fact that expensive gear does not mean creating amazing images. However, in the particular case of shooting wide, higher end gear is beneficial to achieving sharp results. The reason for this is, a lens like the Nikon 85mm 1.4g has better glass than the consumer version (85mm 1.8). Higher quality glass/elements produces higher quality/sharper images when shot with the widest f-stop. The focus on these $2k lenses are spot on and the fall off in focus will turn you on. With lower end lenses, the images will be slightly soft at the widest apertures. Cheaper glass will need to be stopped down to produce sharp images.

WHAT NEEDS TO BE IN FOCUS
When shooting, the subject’s eyes should be the primary focus. Use the single focus point setting and always place it on the eye closest to the camera. To reiterate, shoot only the eye closest to you, not the nose and definitely not the shirt. The reason why focusing on the eye is the most important is simply for the most cliche of reasons: the eyes are the window to the soul. When viewing an image, it is natural to hone in on the subject’s eyes. If that is not in focus, the power of the image is lessened.
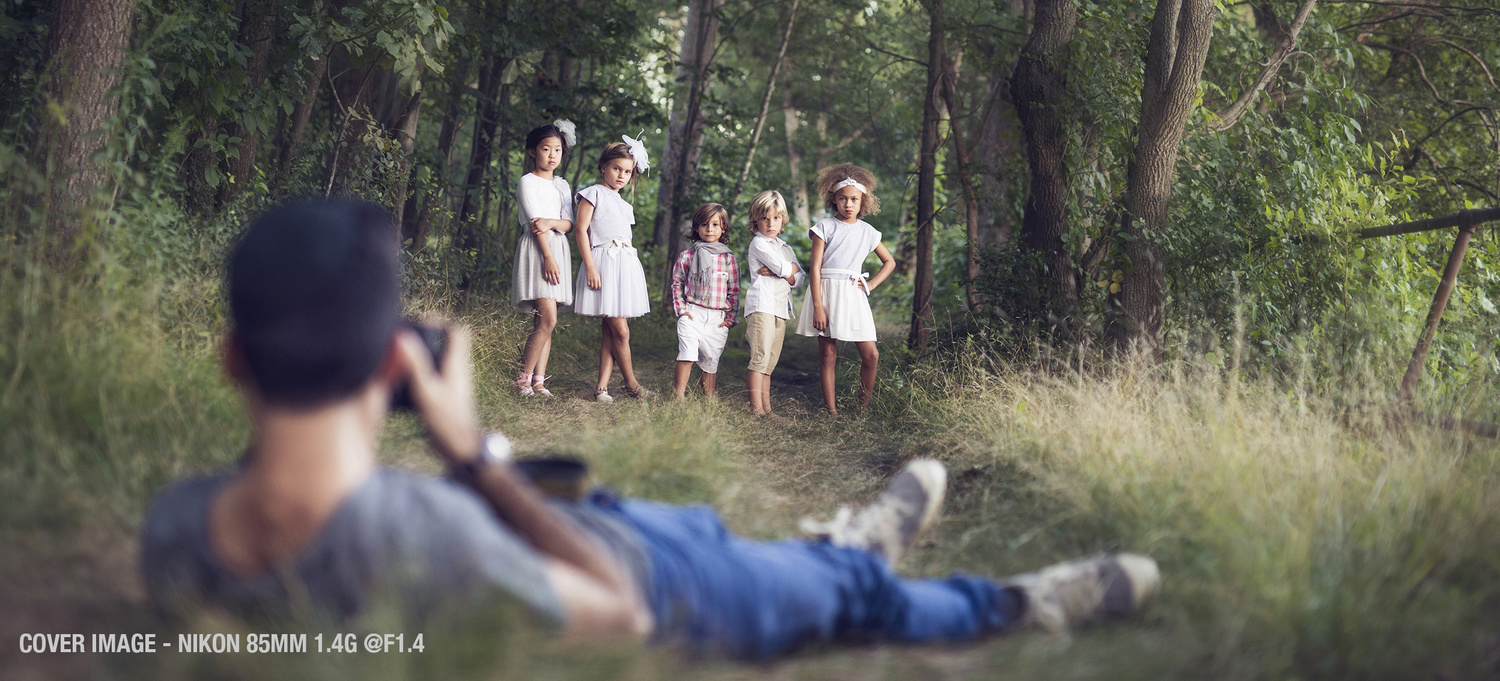
Some people tend to focus and then recompose their image. This may work when shooting at f5.6+ but it definitely does not work when shooting at f1.6. Moving the camera even slightly at 1.6 will render the eyes out of focus. If the subject is moving and you are shooting super wide, I have found that the best thing to do is walk at the same pace as them. Granted, only 1/10 of the images captured will be useable. But the one solid image captured will be of epic proportions. It’s not easy but it’s worth it.
DEPTH OF FIELD
Understanding DOF is vital to shooting wide. The closer the camera is to the subject, the thinner the plane of focus will be (if you’re having trouble with this concept check it out on YouTube).The shallower the DOF, the more noticeable it is if the eye are not in focus. When shooting very closely to the subject, using the widest f-stop is not recommended since the DOF is so thin. Chances are, both eyes will not be in focus and it will be distracting. Being far enough away from the subject means shooting completely wide and having their entire body in focus. It’s important to keep in mind that focus works by how far the subject is from the sensor of the camera. With this knowledge, placing multiple people at an equal distance from the camera and have them all in focus.
THE ILLUSION OF SHARP IMAGES
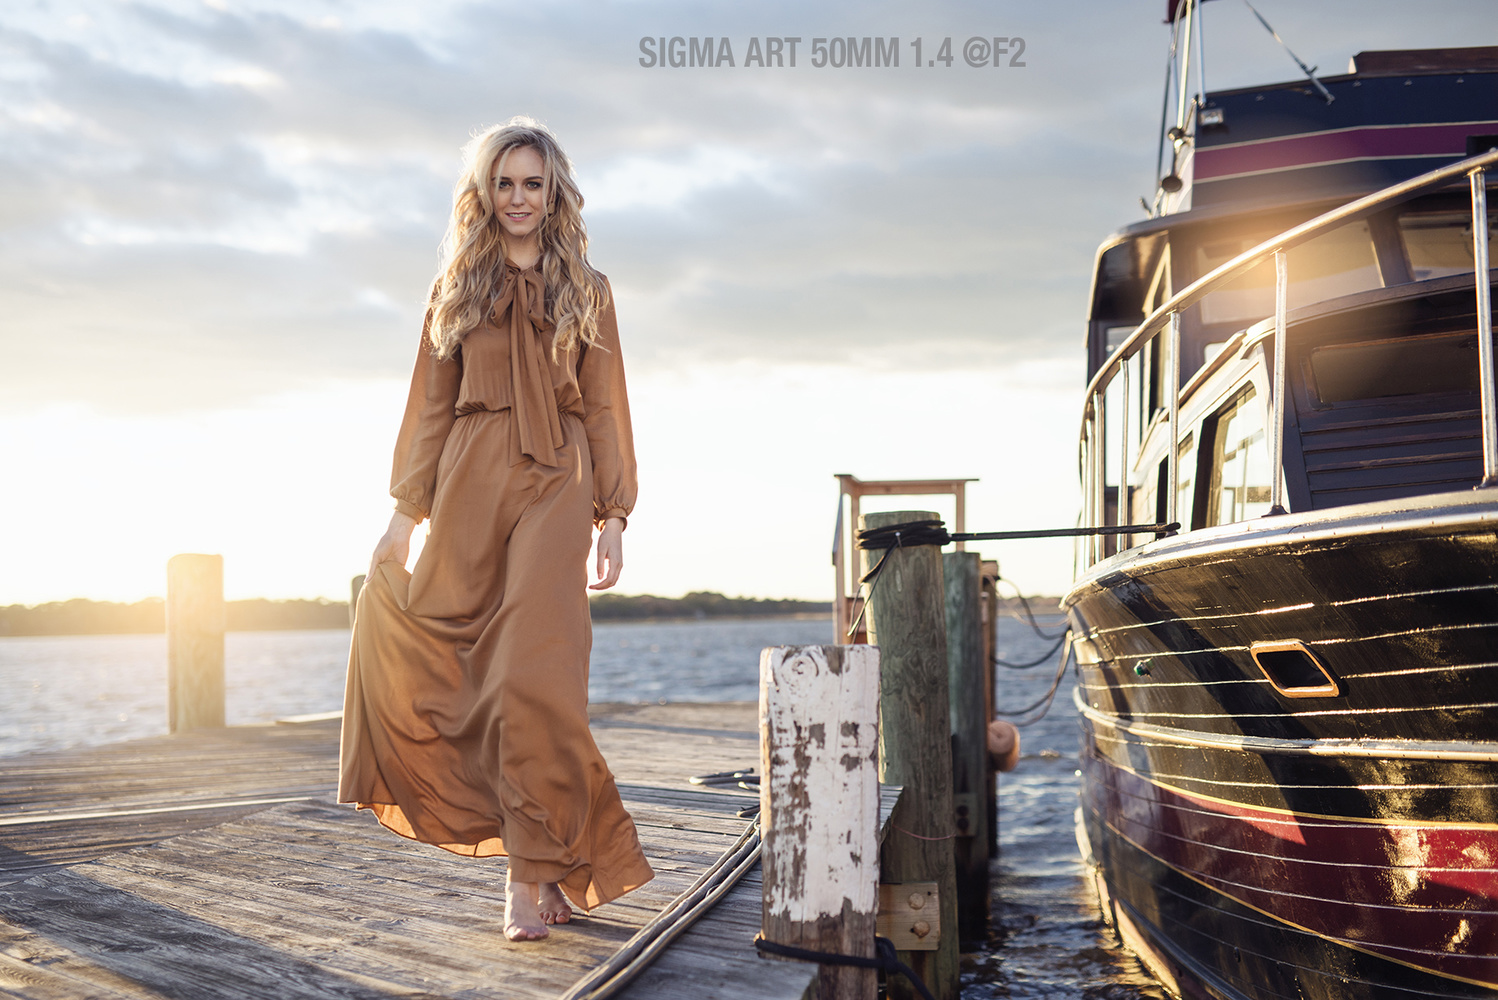
For an image to be considered sharp, it needs to have contrast. Proper lighting leads to the contrast necessary for the illusion of “sharp” images. If the lighting is flat the subject will not look 3-dimensional and regardless of how perfect the focus is, the image won’t look sharp. This point cannot be stressed enough. With that in mind, post processing plays an integral role in this illusion. By enhancing the contrast in the skin, eyes and clothes the image will look 10x sharper. In my one on one online workshops I tackle this entire process and explain why and how to make your images pop. This is probably the most important aspect of portrait photography often not discussed and even more often over looked. All the settings and gear in the world will not substitute understanding the illusion behind a “sharp” looking image and being aware of this allows you to shoot with one lens and nothing else and still produce mind blowing work.
You see, you need to realize that the term “sharpness” has to be understood as an illusion. A person’s eye naturally detects edges to register sharpness, and shadows and highlights in order to record the depth in a subject. In laymen’s terms, what makes something sharp is when there is a light pixel next to a dark pixel and very little grey pixels in between. When using any method of sharpening in post process, in essence all that is being done is taking these edges (the dark pixels and the light pixels) and adding contrast to it. If you were to zoom into a photo at the pixel level and use a sharpening tool, the edges will display signs of higher levels of contrast.For a more indepth understanding on this topic: The Secret to Crafting Stunningly Sharp Images
AUTO FOCUSING ISSUES
Both a camera and lenses must be properly calibrated by manufacturers in order to yield sharp images. Various factors such as manufacturer defects, sample variation, insufficient quality assurance testing/tuning and improper shipping and handling can all negatively impact autofocus precision. A lot of photographers get frustrated after spending thousands of dollars on camera equipment and not being able to get anything in focus. This is a long topic and one I perfer not to have in this article. If you're experincing calibration issues, Nasim Mansurov has a fantastic article that will help you understand and calibrate your gear properly. It can be as easy as fine tuning a lens with a simple adjustment in your camera settings.

Keep in mind that even if you follow all the steps listed above, 25% of your images will likely miss focus. You must decide if it’s worth it to shoot wide. And yes, even those who’ve been shooting wide open every day for years still don’t nail focus for large percentage of their images.


Great article Dani. Few points:
1) I've recently learned first-hand about your point with focus and recompose...it doesn't work so well when shooting at 85 1.8 and you're up relatively close. Your advice is sound here!!! This wasn't so much when I was using my 70-200.
2) For moving subjects, do you use single-point focus move the focus point over their eye and just hold down the AF-ON button for AF-C like focus?
3) The shot of your model in this article(Kim I think her name is) is just STUNNING. You and her have a lot of other great ones too but this one is close and tight!
Great work..thanks for sharing!
I'm in the middle of the same epiphany. At 1.8ish even a little rotation along a single axis could break the shot, right?
Correct.
There's always manual focus. If your subject isn't moving, the most accurate way to get them in focus is by going at it manually. Just another benefit of going mirrorless, you have the ability to zoom in digitally in your viewfinder.
You don't need a mirrorless camera though, most current DSLRs have a "live view" you can use to lock up the mirror and focus using the LCD on the back of the camera, including zooming in. There are viewfinders you can get that go over the LCD to make them usable in bright sunlight.
If you shoot exclusively with wide aperture lenses, or have a body to devote to it, you can also replace your camera's focus screen with one that is better suited to manual focus (they exaggerate OOF areas more), including ones with the split center like cameras used to all have in the pre-AF days.
Spot on. And using live view is especially critical with fast wide angle lenses (think 24mm f/1.4) because your subjects tend to be smaller and the standard phase detection focusing just isn't able to be accurate enough.
Ultimate guide? This is more like "5 things you should know before picking up your first 50 1.8".
There is nothing ultimate about this sub-par post.
And the 85 1.8G managed a score of 35 against 34 on the 1.4G.
Dani does have the worst titles for his articles, I believe the official Fstoppers term is click bait. Simon I agree with you about the lens ratings, yes premium glass is more expensive but most of that is for large elements and wider apertures.
I am glad you said that even you don't get every image sharp.. Most people don't realize that and get frustrated. Looking forward to using these tips when i get my new lens soon... Thanks for sharing
Great article Dani! Really enjoyed reading it.
Nice article. I know a shallow depth of field isn't some photographer's cup of tea, but I personally love it and try to embrace it.
Dani, this is a great article. Informative, concise, and well-written.
My question is: How can I get the framing I want at wide apertures if I can't focus and recompose? This is assuming that a single focus point does not fall where I want it to. Shoot a wider shot and then crop in post?
Also, why do I have more leeway with a 70-200 2.8 to focus and recompose? Any links/reading would be greatly appreciated.
Shooting wider and cropping is definitely a valid option when space allows and the change in perspective doesn't ruin the look you're trying to get. Chances are, if the spot you're trying to get in focus is too near the edge of the frame to hit a sensor, it's also not in the sweet spot of your lens where it is the sharpest and has the least distortion and vignetting. In this case, stepping back to shoot wider will improve your final image quality corner to corner, after the crop.
The 70-200 lens has more leeway primarily because of the subject to camera distances, as compared with say a 50mm lens. A slight recompose from far away doesn't tilt the focal plane or change the exact distance to the focus point nearly as much as it would if you were closer. f/2.8 is also more forgiving of course than f/1.8 or bigger because of the deeper DoF at similar focal lengths.
... and to add to Dani's awesome article, here's my tip #49. Take multiple shots, re-focusing each and every time. We shoot a lot of newborns in dim NYC apartments, and getting those tiny eyes in-focus at f/1.4 ain't easy. So you focus, recompose, shoot. Focus, recompose, shoot. Do this 4-5 times for every concept, and you're guaranteed at least one of them to be spot-on. Yup, you heard it here first!
BTW Dani, where is MY headshot in The Project?!?
Oh I see how it is.
This is exactly what I do when I am relying on auto-focus. It's part of the design of an auto-focus system to balance the trade-off between fast vs accurate. Most AF systems get focus lock that's close enough for f/4+, but few have the accuracy for consistent good results at wide apertures.
I am in CT as well!
For new shooters and others who come to me for advice, this seems to be the single-most common question, so thank you for putting together this article and sharing your excellent work. I'll be sure to share it going forward. The tip about only getting 1 in 10 shots or 25% (with the tips) in focus is probably the most useful. A lot of people seem to expect every shot to be in perfect focus and get very frustrated (often blaming the results on a "soft copy" of the lens) when that doesn't happen.
I shoot 90% of my portraits wide open at f/1.2 or f/1.4 and the biggest thing that's helped me is the FoCal calibration software. It's tough to use for these fast lenses, but it really helps me dial them in for sharp photos. I've also had good success with the super precision matte screens, but my current bodies (1D X and 5DIII) don't allow their use. The 1D X will fit a screen, but there's no custom function for the exposure changes and the AF markings don't match up. I have one sitting on my desk at home that I haven't tried yet, so I'll report back if the results are any good in the 1D X.
The only other tip I like to give people is, to use the articles words, the illusion of wide apertures. If you shoot up close with a longer focal length and a distant background, you can get a pretty decent shallow DOF 'look' with just about any lens.
Good points, although some people may argue of the merits of the 85mm Nikkors you mentioned. I haven't compared to two side by side myself, but there are some who had the 1.4 and swapped it out for the 1.8. YMMV.
I've used both and both are great with pretty much identical results at f1.8 and above. The 1.8 is an excellent choice if you don't need the extra light.
Had both of them and kept f1.8, if you shoot both at f1.8 the less expensive one is actually better IMO :) great lenses but the difference of 1000$ is not worth it to go with more expensive one unless you really need f1.4...
Dani,
Great article!
I bought a 50mm lens last year and have still been trying to find time to play and learn with it.
Thanks for the article.
Can we have an Ultimate Guide to Not Calling Everything An Ultimate Guide?
Especially when the 'Ultimate Guide' appears to be
- buy good lenses
- focus on eyes
- bump contrast if needed
- calibrate lenses if needed
Mind. Blown.
Also, a followup on how to stop using 'tack sharp' in every article would be sweet.
Alex why so bitter?
Sounds like someone is burnt out.... See this is why I make sure to only shoot what I love.
Hearing the same thing over and over is often the best (only) way for me new to develop a good habit. Especially when the margin for error is measured in fractions of an inch.
Hey Dani!, for the DOF part you mentioned "When shooting very closely to the subject, using the widest f-stop is not recommended since the DOF is so thin." But I'm confused with the sample photo is shot at the widest, did you also take shots at f/2 or f/2.8 as your backups just in case the 1.4 was too soft in post viewing, or did you have a tether to check?
Thanks for this article! I just bought a refurb'd 60D. In doing a little testing I noticed I have to focus under my target object to get in tack sharp. Basically, to hit the target I have to shoot under the bull's eye. I tested this with my old t3i and noticed the same thing, even with different lenses. Have you experienced your focus points not being accurate? Is this a Canon problem? Is this something you just learn about the camera and shoot accordingly or is there a fix? I know you can't adjust the focus on a 60D.
Thoughts?
Another question, I've always recomposed and yes a lot of out of focus but what do you do when you don't recompose to get the "right" composition, crop in post? I think Jared Polin would dislike this method (cropping).
That's where the multiple focus points on the camera play a part. You need to compose, move the focus points to the one closest to the subject, and then focus.
I shoot a lot on the furthest to the right focus point. I guess this means I need more focus points than what I have (Canon 6D has 11 focus points). I guess now I now have another reason to jump into a 5DmkIII
Nice read! here is my tip! ;)
Haha good one
Great read. Contrast part was my favorite.
Hey Dani, Great things to think about here.. Biggest Tip that is true to word is about ⅓ of shots don't hit the focus your looking for..
The other thing i would have mentioned, is how you hold your camera has a big impact on your focus. If you focus and move slightly, that baby is no good. Keep those Elbows
tight to your body and if able a Tripod/Monopod can help immensely.
Thank you so much for stating that not even pros dedicated to shooting wide open nail focus every time.
Now I feel that I can remove my brown paper bag from my head when reviewing my images in Lightroom.
Awesome article as usual, Dani!
If this is an "ultimate" guide, shouldn't there be some discussion about using ND filters in daylight? I find it odd that there was no mention of how to even achieve 1.4, 1.8 in sunlight or even shade. I would wager that a lot of the photos in the post were shot using a neutral density filter... yes?
Very well explained
Love the processing on these images.Hope you write an article about it!