
PRELUDE: My dear friend Martina(who's a fellow GDE in Angular & Web Tech) and I both love cats a lot. 😻 One fine day while we were talking about collaborating on something, we came up with a really crazy(but interesting) idea. The idea of creating KittyGram: A super-minimal Instagram Clone that allows uploading only Cat 🐱 Photos. 💡 Cute. Isn't it?
This is an article in a series of articles where we'll create KittyGram We'll implement KittyGram using the best front-end web framework in the world(ahem Angular ahem).
For the scope of this article, we'll mainly implement Google Sign-In and routing.
This article expects a basic understanding of Angular, Angular Material and Firebase.
I actually have a YouTube Playlist that you can refer to regarding Firebase just in case.
That being said, this article is intended for an audience with mixed experience levels. I've still added a TL;DR; below 👇🏻 as a precautionary measure, in case you're just interested in a specific section.
TL;DR;
- Don't like reading? 😵
- Project Overview 🔭
- Setting up a Firebase Project 🔥
- Setting up an Angular App 🅰
- Implementing the Angular App
- Bringing it all together with Routing 🗺
- Next Steps 👣
- Closing Notes 🎉
Don't like reading? 😵
Ah! You're just like me. 🤗 I also find it difficult to understand things just by reading them. Worry not! I've got you covered with a video implementing this App along with the explanation.
This video is a part of @PairAngular, a super awesome YouTube Channel where @Martina, and I will host more pair programming videos like the one above. Like what you see? Subscribe to the PairAngular YouTube Channel to stay in the loop for more such sessions in the future. 🙂
Project Overview 🔭
Since this is a super-minimal Instagram Clone, we'll not really focus on very specific aspects/features of Instagram. We just need a way for the user to be able to:
- Login via Google and Logout.
- Post an image of cats - CREATE.
- See cat images posted by other users and react on them(any number of times they want) - FEED.
Since in this article, we're only focusing on implementing Google Sign-In, we'll just use placeholder images for the CREATE and FEED features.
Once this part is implemented, it should look and react something like this:
As you can clearly see from the video above there are different aspects to the App.
From the UI perspective, we'll need a CreateComponent, a FeedComponent, a HeaderComponent, and a ProfileCardComponent. We'll be using Angular Material as well in here for most of these components.
From the routing perspective, we have a /create route and a /feed route. We also don't want to allow an unauthorized user to access the /create route. So we'll need to guard the /create route.
"How would we implement Google Sign-In thought?" you might ask. Handling OAuth flow, token lifecycle, and integration with Google APIs can be pretty complex.

But don't you worry about managing all those things on your own. Google has black-boxed this whole complexity and exposed it as a service that we can leverage with minimal efforts. The service is called Firebase Authentication and that's what we'll be using for this application.
Alright! So now that we have an overview of the whole application and the parts that it will have, let's start working on building this thing from scratch.
Setting up a Firebase Project 🔥
To use Firebase Authentication, we'll need to set up a Firebase Project. You'll need a Firebase Account for that which you can create by just logging in to Firebase Console with your Google Account.
Follow this short 1ish-minute video to set up the Firebase Project:
Copy and paste this config that we get somewhere. We'll be using it later.
Great! So now we have a Project Setup let's also now quickly enable Authentication. Follow the video below:
Awesome! Now we have completely set up a Firebase Project and enabled Google Sign-In on it. Let's now go ahead and set up our Angular app.
Setting up an Angular App 🅰
Let's start by creating a new Angular App. Make sure that you're using the latest version of Angular CLI for this.
Install the latest version of Angular CLI using:
npm i -g @angular/cli@latest
Once it installs, you can verify the version that you have by running ng --version:

Sweet! Now let's create a new Angular project by running: ng new KittyGram

Let's navigate to the Project folder that just got created by doing: cd KittyGram(on Windows)
Alright! Now. We can clearly see from the Project Overview section video that we'll be using Angular Material. So let's set up our Angular App to use Angular Material.
Setting up AngularMaterial:
Set up @angular/material using:
ng add @angular/material
It might ask you things like the theme you want to use, whether to set-up typography and animations or not. Just answer as per the screenshot below.

Once that's done, I'll just refactor the code a bit to suit the style that I like to generally use. It's opinionated BTW, and you don't really have to do this.
Migrate Theme paths from angular.json to styles.scss
REASON: I just don't like my angular.json to be polluted with CSS files considering that we already have a styles.scss file. So we can just import these CSS files in.
Search for the deeppurple-amber.css in angular.json and remove those URLs from there. Remove this URL:
"./node_modules/@angular/material/prebuilt-themes/deeppurple-amber.css",
You should be able to find two occurrences of this URL before the refactor. After the refactor, the styles array in your angular.json should look like this:
{
  "...": "...",
  "projects": {
    "KittyGram": {
      "...": "...",
      "architect": {
        "build": {
          "...": "...",
          "options": {
            ...
            "styles": [
              "src/styles.scss"
            ],
            ...
          },
          ...
        },
        ...
        "test": {
          ...
          "options": {
            ...
            "styles": [
              "src/styles.scss"
            ],
            ...
          }
        },
        ...
      }
    }
  },
  ...
}
Now move this URL to styles.scss. After the change your styles.scss should look something like this:
/* You can add global styles to this file, and also import other style files */

html,
body {
  height: 100%;
}
body {
  margin: 0;
  font-family: Roboto, "Helvetica Neue", sans-serif;
}

@import "~@angular/material/prebuilt-themes/deeppurple-amber.css";
Creating an AppMaterialModule:
We've already covered this in one of the past articles. So I won't go into much detail on this. Just one thing I'll do is export the BrowserAnimationsModule as well from here.
So our AppMaterialModule would look something like this:
app-material.module.ts
import { BrowserAnimationsModule } from '@angular/platform-browser/animations';
import { MatButtonModule } from '@angular/material/button';
import { MatDividerModule } from '@angular/material/divider';
import { MatIconModule } from '@angular/material/icon';
import { MatMenuModule } from '@angular/material/menu';
import { MatToolbarModule } from '@angular/material/toolbar';
import { MatTooltipModule } from '@angular/material/tooltip';
import { MatSnackBarModule } from '@angular/material/snack-bar';
import { NgModule } from '@angular/core';

@NgModule({
  exports: [
    BrowserAnimationsModule,
    MatButtonModule,
    MatDividerModule,
    MatIconModule,
    MatMenuModule,
    MatToolbarModule,
    MatTooltipModule,
    MatSnackBarModule,
  ],
})
export class AppMaterialModule {}
Next step would be to setup AngularFire.
Setting up AngularFire:
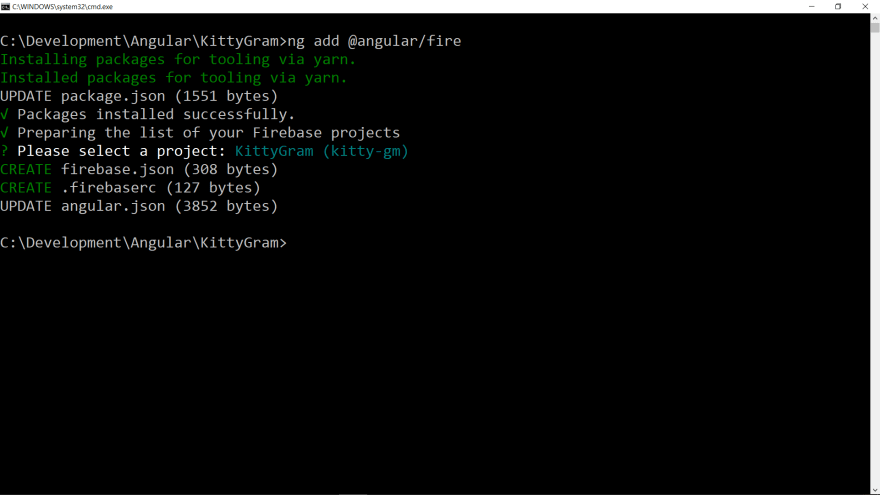
We need to use Firebase in our Angular App to enable Login. Angular has an official Firebase SDK called @angular/fire that we can use for this. So let's do that next. Set up @angular/fire using:
ng add @angular/fire
It might ask you things like permissions to collect usage data for analytics, cli-usage, and error reporting information, etc. Apart from that, it might also ask you to paste in your Authorization code for which, it would open up a pop-up screen for you to log in to your Gmail account which you used to register to Firebase.
Then depending on whether you're able to paste in the auth-code successfully or not, it might also ask you to run firebase login --reauth to do that for you.
In a successful scenario, it might ask you to select your Firebase App from the list of Firebase Projects that you've created on the Firebase Console. Something like this:
We also need the firebase JavaScript SDK. So let's install that as well using:
npm i firebase
Once that's done, we'll add a few things here and there to make it suit the style that I like to generally use. We'll start by creating an AppFirebaseModule
Creating an AppFirebaseModule:
I'll run ng g m app-firebase to generate this module. It will be created in a folder of its own. So I'll move it out of the folder and delete the empty folder.
Now when we set up a Firebase Project, we also copied the configuration somewhere. We will need it now. Let's store that config in an object named firebase in our environments.ts and environments.prod.ts files:
environment.ts
export const environment = {
  production: false,
  firebase: {
    apiKey: 'YOUR apiKey HERE',
    authDomain: 'YOUR authDomain HERE',
    databaseURL: 'YOUR databaseURL HERE',
    projectId: 'YOUR projectId HERE',
    storageBucket: 'YOUR storageBucket HERE',
    messagingSenderId: 'YOUR messagingSenderId HERE',
    appId: 'YOUR appId HERE',
    measurementId: 'YOUR measurementId HERE',
  },
};
NOTE: This config should be kept private and shouldn't be shared publicly.
Now in our AppFirebaseModule, let's set-up the AngularFire modules that we'll need for Google Sign-In.
So we'll need the AngularFireModule which we use to initialize our Firebase Project in our Angular App. And we'll need the AngularFireAuthModule which has all the helpers we'll need to login and logout.
We call the initializeApp method on our AngularFireModule and pass it the configuration stored in the environment const. And then we can expose the AngularFireModule, AngularFireAuthModule from here. In code, this would look something like this:
app-firebase.module.ts
import { AngularFireAuthModule } from '@angular/fire/auth';
import { AngularFireModule } from '@angular/fire';
import { NgModule } from '@angular/core';

import { environment } from '../environments/environment';

@NgModule({
  imports: [AngularFireModule.initializeApp(environment.firebase)],
  exports: [AngularFireModule, AngularFireAuthModule],
})
export class AppFirebaseModule {}
Now that we're done setting up both AngularMaterial and AngularFire, we can now import both AppFirebaseModule and AppMaterialModule module in our AppModule:
...
import { AppFirebaseModule } from './app-firebase.module';
import { AppMaterialModule } from './app-material.module';
...

@NgModule({
  ...
  imports: [
    ...
    AppFirebaseModule,
    AppMaterialModule,
    ...
  ],
  ...
})
export class AppModule {}
Implementing the Angular App
Implementing the Angular App is pretty straightforward. For the scope of this article, we'll need four components:
- The
HeaderComponentthat would be our Primary Navbar. This will have buttons to log in, create a post, and show the user's profile card. These buttons would be displayed conditionally based on whether the user is logged in or not. - The Profile Card Component, that will have some details about the user and a button to logout.
- The
FeedCompoentfor the/feedroute and a similarCreateComponentfor the/feedroute.
Let's create them using the following command:
ng g c components/create --module=app && ng g c components/feed --module=app && ng g c components/profile-card --module=app && ng g c components/header --module=app
This command will create these 4 components for us in a folder named components.
We just need placeholder images for CreateComponent and FeedComponent. I downloaded these images from Undraw by Katerina Limpitsouni. We can store them in the assets folder and link them in the Component Templates for:
create.component.html:
<img alt="Create Post" class="placeholder-image" src="/assets/create.png" />
feed.component.html:
<img alt="Feed" class="placeholder-image" src="/assets/feed.png">
Before we implement the remaining two Components, we need a way to make the user login and logout. AngularFire makes it really easy. It has an AngularFireAuthModule module that exposes the AngularFireAuth service that we can inject as a dependency. We can then call methods on it to login and logout.
Apart from that, this service also exposes an authState Observable that has the state data related to the currently logged-in user. So we can implement a service that exposes methods to help us login and logout, and the user$ Observable. Something as simple as this:
auth.service.ts:
import { AngularFireAuth } from '@angular/fire/auth';
import { auth } from 'firebase/app';
import { BehaviorSubject, Observable, from } from 'rxjs';
import { Injectable } from '@angular/core';
import { switchMap } from 'rxjs/operators';

@Injectable({
  providedIn: 'root',
})
export class AuthService {
  private user: BehaviorSubject<
    Observable<firebase.User>
  > = new BehaviorSubject<Observable<firebase.User>>(null);
  user$ = this.user
    .asObservable()
    .pipe(switchMap((user: Observable<firebase.User>) => user));

  constructor(private afAuth: AngularFireAuth) {
    this.user.next(this.afAuth.authState);
  }

  loginViaGoogle(): Observable<auth.UserCredential> {
    return from(this.afAuth.signInWithPopup(new auth.GoogleAuthProvider()));
  }

  logout(): Observable<void> {
    return from(this.afAuth.signOut());
  }
}
The implementation here is pretty straight forward. Please feel free to comment below if something here didn't make sense.
Great. Now we have a service that we can inject as a dependency in our HeaderComponent. The HeaderComponent will be leveraging these methods and the user$ Observable to show the options on the navbar accordingly. We'll also be subscribe ing to the Observables returned from the loginViaGoogle and logout methods to show some alert as snackbars.
And since we're doing that, we'll be using the take operator to do it so that we don't have to unsubscribe manually.
header.component.ts:
import { catchError, take } from 'rxjs/operators';
import { Component } from '@angular/core';
import { EMPTY, Observable, of } from 'rxjs';
import { MatSnackBar } from '@angular/material/snack-bar';
import { Router } from '@angular/router';

import { AuthService } from '../../services/auth/auth.service';
import { FEED } from './../../consts/routes.const';

@Component({
  selector: 'app-header',
  templateUrl: './header.component.html',
  styleUrls: ['./header.component.scss'],
})
export class HeaderComponent {
  user$: Observable<firebase.User> = this.auth.user$;

  constructor(
    private readonly auth: AuthService,
    private readonly snackBar: MatSnackBar,
    private readonly router: Router,
  ) {}

  login() {
    this.auth
      .loginViaGoogle()
      .pipe(
        take(1),
        catchError((error) => {
          this.snackBar.open(`${error.message} 😢`, 'Close', {
            duration: 4000,
          });
          return EMPTY;
        }),
      )
      .subscribe(
        (response) =>
          response &&
          this.snackBar.open(
            `Oh! You're here. I demand that you feed me, Hooman. 😾`,
            'Close',
            {
              duration: 4000,
            },
          ),
      );
  }

  logout() {
    this.auth
      .logout()
      .pipe(take(1))
      .subscribe((response) => {
        this.router.navigate([`/${FEED}`]);
        this.snackBar.open('Come back soon with treats! 😿', 'Close', {
          duration: 4000,
        });
      });
  }
}
The implementation is also pretty straightforward. We also explicitly navigate the user to the /feed route once the user logs out.
NOTE: In a real project, I would also move the snack bar messages to a const file.
For the template, if the user is logged-in, we'll show the ProfileCardComponent and the Create icon. Else we'll show the user a Login Icon.
header.component.html:
<mat-toolbar color="primary">
  <mat-toolbar-row>
    <button
      mat-button
      routerLink="/feed"
      matTooltip="🐱Gram Home">
      🐱Gram
    </button>
    <span class="spacer"></span>
    <ng-container *ngIf="user$ | async as user; else loginIcon">

      <button
        mat-icon-button
        routerLink="/create"
        matTooltip="Post a cute 🐱"
        >
        <mat-icon
          aria-hidden="false"
          aria-label="Post a cute 🐱"
          >
          cloud_upload
        </mat-icon>
      </button>

      <app-profile-card
        [user]="user"
        (logoutClick)="logout()">
      </app-profile-card>

    </ng-container>
    <ng-template #loginIcon>
      <button
        mat-icon-button
        (click)="login()"
        matTooltip="Login"
        >
        <mat-icon
          aria-hidden="false"
          aria-label="Login"
          >
          fingerprint
        </mat-icon>
      </button>
    </ng-template>
  </mat-toolbar-row>
</mat-toolbar>
As you can clearly see, we're using the ProfileCardComponent as a child component. This is a presentation component that accepts a user as an @Input property and emits an event when the user clicks the logout button as the logoutClick @Output property.
So this is how our ProfileCardComponent would look like:
profile-card.component.ts:
import { Component, EventEmitter, Input, Output } from '@angular/core';

@Component({
  selector: 'app-profile-card',
  templateUrl: './profile-card.component.html',
  styleUrls: ['./profile-card.component.scss'],
})
export class ProfileCardComponent {
  @Input() user: firebase.User;
  @Output() logoutClick: EventEmitter<null> = new EventEmitter<null>();

  logout() {
    this.logoutClick.emit();
  }
}
And the template would look something like this:
profile-card.component.html:
<button
  mat-mini-fab
  color="primary"
  class="avatar-button"
  [matMenuTriggerFor]="beforeMenu"
>
  <img
    [alt]="user.displayName"
    [src]="user.photoURL"
    class="avatar" />
</button>
<mat-menu #beforeMenu="matMenu" xPosition="before">
  <div class="profile-card">
    <img
      [alt]="user.displayName"
      [src]="user.photoURL"
      class="big-avatar" />
    <h4>{{ user.displayName }}</h4>
    <p>{{ user.email }}</p>
    <mat-divider></mat-divider>
    <button mat-stroked-button (click)="logout()">
      Sign Out
    </button>
    <mat-divider></mat-divider>
    <p class="profile-footer">
      Made with 😻 by <a href="https://twitter.com/SiddAjmera">@SiddAjmera</a>
    </p>
  </div>
</mat-menu>
Now we have all the modules, components, and the service in place. Let's bring it all together via routing.
Bringing it all together with Routing 🗺
So for this, we'll need to set up routing by configuring our AppRoutingModule. We already know that we have two routes:
- The
/feedroute would navigate the user to theFeedComponent. - The
/createroute would navigate the user to theCreateComponent.
But the /create route shouldn't be accessible by unauthorized users. In a world without AngularFire, we'd implement a CanActivate Guard to do this. But thanks to @angular/fire, we have an AngularFireAuthGuard guard that we can configure with the redirectUnauthorizedTo helper from it. Configuring this will allow us to tell Angular where to navigate unauthorized users to.
All that in code would look something like this:
app-routing.module.ts:
import {
  AngularFireAuthGuard,
  redirectUnauthorizedTo,
} from '@angular/fire/auth-guard';
import { NgModule } from '@angular/core';
import { Routes, RouterModule } from '@angular/router';

import { BASE, CREATE, FEED } from './consts/routes.const';
import { CreateComponent } from './components/create/create.component';
import { FeedComponent } from './components/feed/feed.component';

const redirectUnauthorizedToLogin = () => redirectUnauthorizedTo([FEED]);

const routes: Routes = [
  {
    path: BASE,
    redirectTo: `/${FEED}`,
    pathMatch: 'full',
  },
  {
    path: FEED,
    component: FeedComponent,
  },
  {
    path: CREATE,
    component: CreateComponent,
    canActivate: [AngularFireAuthGuard],
    data: { authGuardPipe: redirectUnauthorizedToLogin },
  },
];

@NgModule({
  imports: [RouterModule.forRoot(routes)],
  exports: [RouterModule],
})
export class AppRoutingModule {}
And that's it. Our Angular app is now ready with google sign-in and routing. 🎉✨
You can find source-code of the Project here:
 SiddAjmera
/
KittyGramAuth
SiddAjmera
/
KittyGramAuth
This respository demonstrates the authentication and authorization that we have in KittyGram
KittyGramAuth
This project was generated with Angular CLI version 9.0.5.
Development server
Run ng serve for a dev server. Navigate to http://localhost:4200/. The app will automatically reload if you change any of the source files.
Code scaffolding
Run ng generate component component-name to generate a new component. You can also use ng generate directive|pipe|service|class|guard|interface|enum|module.
Build
Run ng build to build the project. The build artifacts will be stored in the dist/ directory. Use the --prod flag for a production build.
Running unit tests
Run ng test to execute the unit tests via Karma.
Running end-to-end tests
Run ng e2e to execute the end-to-end tests via Protractor.
Further help
To get more help on the Angular CLI use ng help or go check out the Angular CLI README.
Next Steps 👣
KittyGram has a lot of features. And this is just one piece of the whole puzzle. All such greatness has humble beginnings like the one that we just build. In the next article, we'll implement the CreateComponent as a Reactive Form. We'll also implement Firebase Storage in it so that we could upload the images to a Firebase Storage Bucket. Can't wait? Here it is:

Closing Notes 🎉
And that brings us to the end of this article. Thanks for sticking around. I hope you liked it.
A big shout-out to Martina Kraus for proofreading this and collaborating with me on this project. I'm also really grateful to Akhil and Rajat for proofreading this article and providing constructive feedback to make it better.
I hope this article has taught you something new related to Angular and Firebase. If it did hit that 🧡/🦄 icon, and add it to your reading list(🔖). Also, share this article with your friends who are new to Angular and want to achieve something similar.
Also, don't forget to follow Martina right here:

Until next time then. 👋🏻
Icon Courtesy: AngularIO Press Kit | Login by lastspark from the Noun Project


Top comments (2)
Nice read.
I took the change to walk through this and I hit two problems.
In your auth.service you use a Interface
firebasewhich you never import.Also I cant find what
firebase/appis.Or did I miss something?
Ah! Thanks for pointing that out. We need to also install firebase.
npm i firebaseshould fix it. 🙂