
Xcode 9, introduced at WWDC 2017 contains a plethora of new features, from it’s new editor to the inclusion of Xcode Server, and even changes to Asset Catalogs that improve image handling and the ability to add color assets. With this new release, Apple has paid a lot of attention to every developer’s favorite pastime: Provisioning.
Last year with Xcode 8, Apple unveiled a revamped provisioning setup that included the ability to automatically sign and manage provisioning profiles, entitlements, and certificates. It did this by collecting all of those signing assets automatically, without any intervention by the user.
With Xcode 9, Apple has taken this a step further by building automatic signing into the xcodebuild CLI tool that powers Xcode, Xcode Server, other Continuous Integration (CI) servers, and custom build scripts that developers may have created. This new change means that xcodebuild can automatically manage your signing assets by downloading or generating new ones as needed.
This automatic process works fantastically well for small teams and teams that rely on Xcode Server for CI building and testing; however, it can throw a monkey wrench into the mix for more complex projects with multiple CI layers, multiple distribution methods. If you work with multiple team members who might not have developer portal access to the project, then this automatic process will not work either.
Fortunately, in Xcode 9, Apple has revamped the provisioning setup to be more friendly for development teams that need the additional flexibility with their signing flow. In this post, we’ll take a look at these changes, how you can integrate them into your own projects for better manual signing, and how you can use the changes to automatically request missing assets from team members when you are manually signing.
Enforcing Manual provisioning
Apple has introduced a new project-level or target-level setting that you can enable to force the project to target to use manual signing. The new setting is under the “Signing” header and it’s called “Code Sign Style.” This can be toggled to a value of “Automatic” or “Manual.”
Apple does recommend that this value is toggled on and off in the General tab by checking or unchecking the “Automatically manage signing,” but it can also be toggled through a script using the Build Setting value.

With “Manual” set, Xcode will no longer offer to fix issues, and when you sign an archive and prepare to upload it to the store, Xcode’s Organizer will no longer ask you to select a team to sign with, since it knows you’re in manual signing mode. This does mean that you’ll be required to create your own signing assets (provisioning profile, certificate, and entitlements). Check out our article on manual provisioning to learn more about the provisioning process.
Picking a provisioning profile from the developer portal
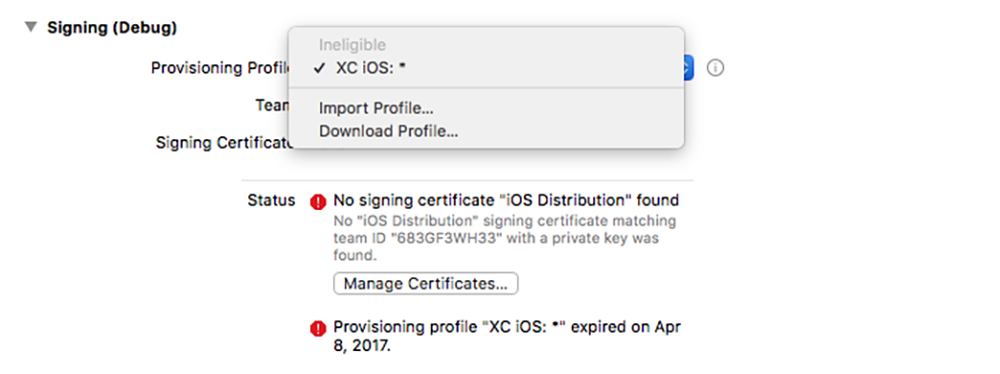
In the “General” tab for a manually signed target, you now have a section per-scheme that can be configured with the provisioning profile using a new Drop-down menu that gives the option to Download or Import a profile.
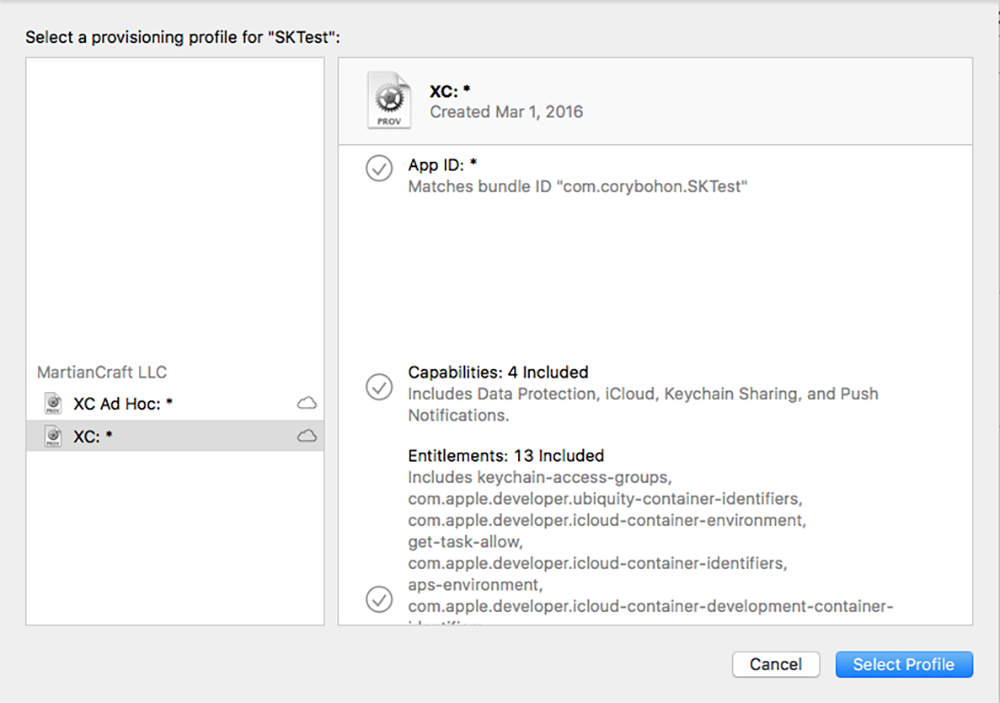
Selecting the “Download Profile” option displays all of the compatible provisioning profiles from each developer account assigned to your Apple ID. The profiles listed here are only profiles that are guaranteed to work with the bundle identifier for the target you’re signing. Clicking a profile, then clicking “Select Profile” will download the profile from your developer account portal, or in the case it’s already on your system will assign it to the target’s scheme (The cloud icon beside the profile name in the sidebar denotes that it will be downloaded from the provisioning portal).
Requesting missing certificates (wait, I thought this was manual?)
In the provisioning profile selector, there’s a new way to pick certificates right from the “General” tab for the target as well. Simply select the “Manage Certificates…” button under the “Signing Certificate” section for the scheme you wish to configure signing for.
Again, just like profiles, this section will show certificates that will work with the current configuration, and it will show certificates that are on your system, or ones that have been registered in the provisioning portal, but are owned by someone else.
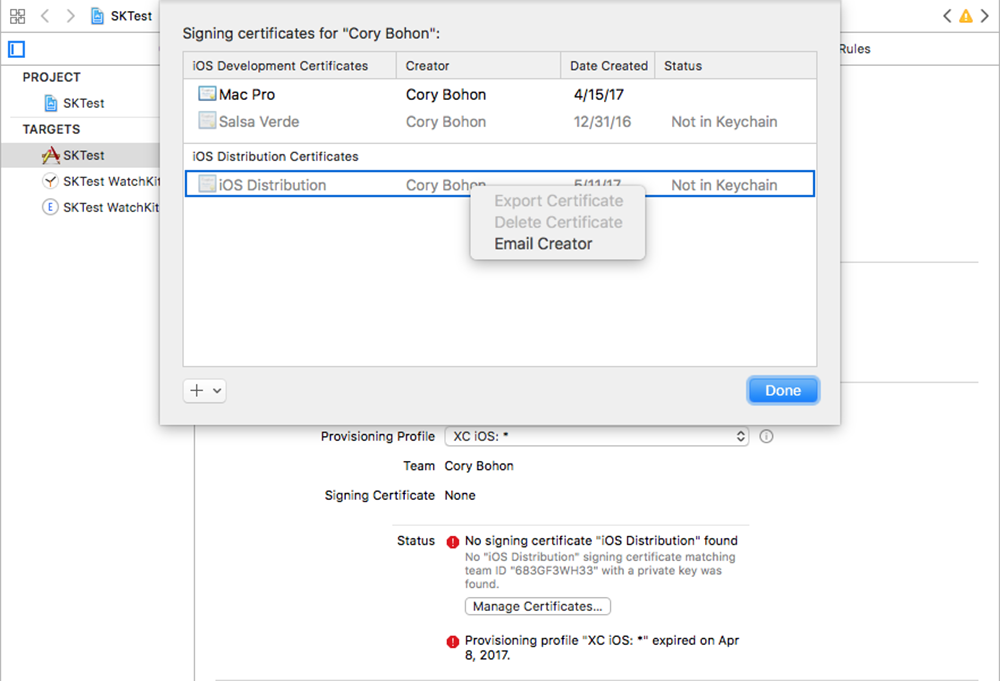
In the case that the certificate is owned by someone else and not on your system, you can request access to the certificate from the creator by right-clicking on the desired certificate and selecting “Email Creator.” This action will compose a new email to the creator using the email address assigned to the creator’s developer account.
Even though you are in manual mode, there is another nice feature right from this same configuration sheet: You can create new certificates without ever visiting the provisioning portal, but you remain in control. Selecting the “+” button in the lower left-hand side of the sheet lets you create either a new development certificate or a new distribution certificate. Xcode will go ahead and automatically create it, and assign it as a signing certificate to the target’s scheme you’re editing.
This nice feature means that you can have the best of both worlds while remaining in manual signing mode, but with Xcode allowing full control over the provisioning settings.

