
iOS 13 introduced dark mode, and it has taken mobile app design world by storm. Making app designers produce multiple experiences for their users. Android users have been enjoying this nifty feature for some time (to some extent, based on phone manufacturers). Android Q, however, has a dedicated dark mode option that brings dark mode front and center in Android as well. Fortunately, it is rather simple to add dark mode support to our Xamarin apps, as we will discover in this post. Or simply opt-out of it all together.
Xamarin.Forms
First, let us setup the resources for shared UI. We will have two sets of Resource Dictionaries, one for Light theme and one for Dark. This also mean that we must not hard-code any resource that we want to dynamically change. So, we will set the resources in a resource dictionary and use it as DynamicResource.
<Label TextColor="{DynamicResource TitleColor}">Themes ☀️/🌙

Create a ResourceDictionary for Light theme, ☀️
<ResourceDictionary ...
    x:Class="Themer.Styles.LightTheme">
    <Color x:Key="BackgroundColor">#FFe0e0e0</Color>
    <Style x:Key="Title" TargetType="Label">
        <Setter Property="TextColor"
            Value="{StaticResource TextPrimaryColor}"/>
        <Setter Property="FontSize" Value="Large"/>
    </Style>
</ResourceDictionary>
and one for Dark theme 🌙
<ResourceDictionary ...
    x:Class="Themer.Styles.DarkTheme">
    <Color x:Key="BackgroundColor">#FF000000</Color>
    <Style x:Key="Title" TargetType="Label">
        <Setter Property="TextColor"
            Value="{StaticResource TextPrimaryColor}"/>
        <Setter Property="FontSize" Value="Large"/>
    </Style>
</ResourceDictionary>
In App.xaml, we will set a default theme, it may look something like this,
<Application.Resources>
    <ResourceDictionary Source="/LightTheme.xaml" />
</Application.Resources>
or in the code behind,
App.Current.Resources = new LightTheme();To keep track of current theme, we add a property in our App class,
public Theme AppTheme { get; set; }where Theme is an enum,
public enum Theme { Light, Dark }This should be enough for getting started. Now that we have the two themes ready, let’s get to the platforms.
iOS

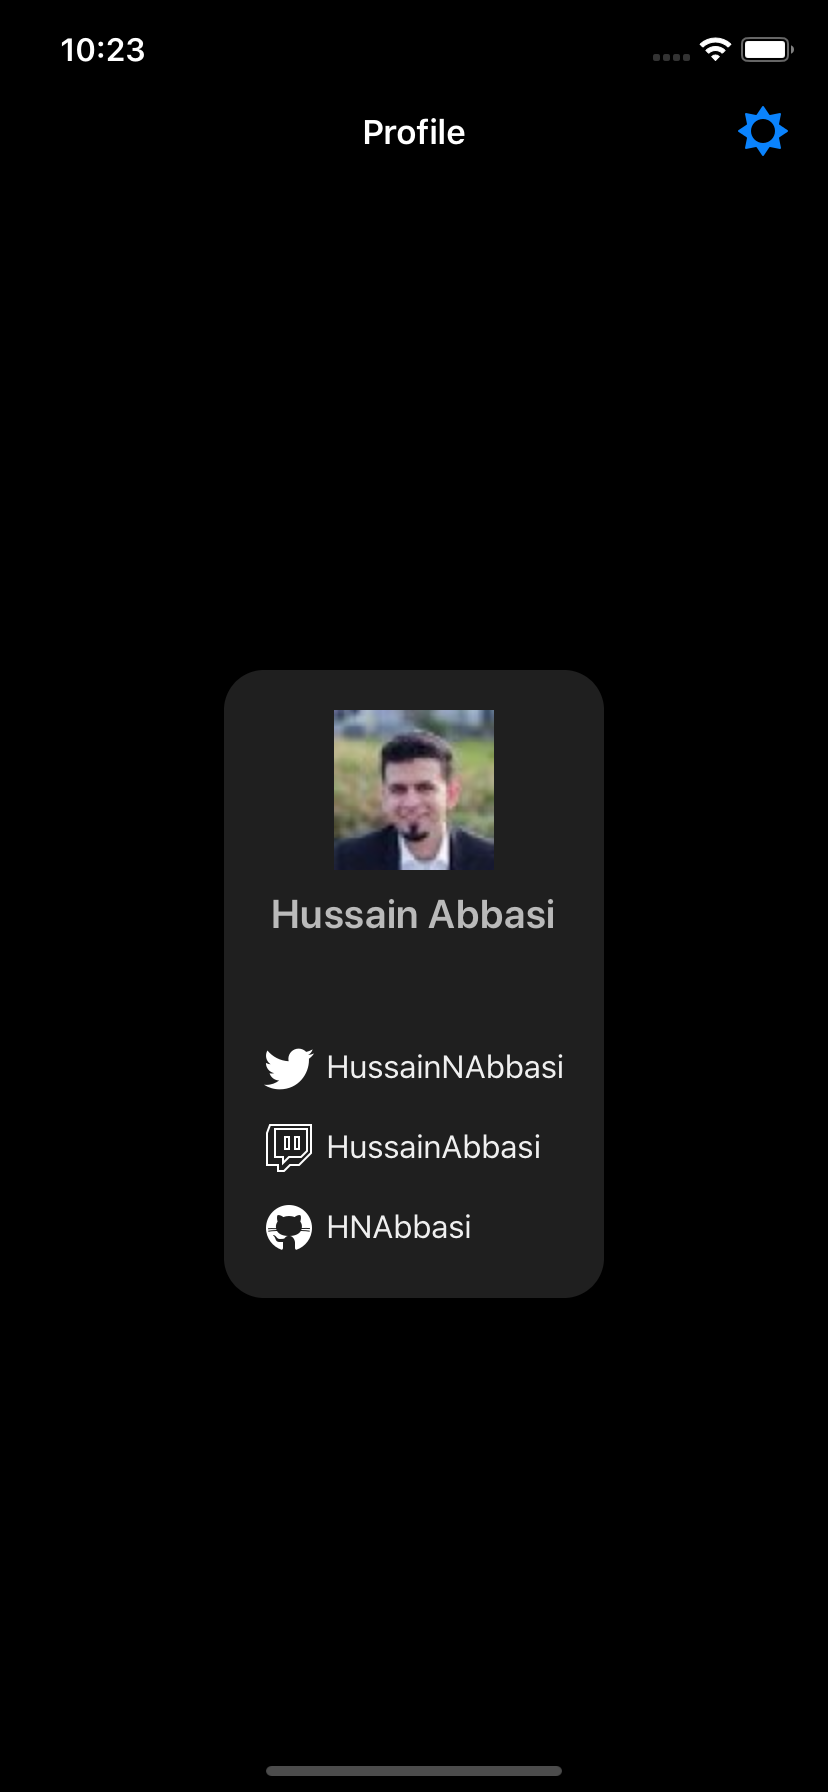
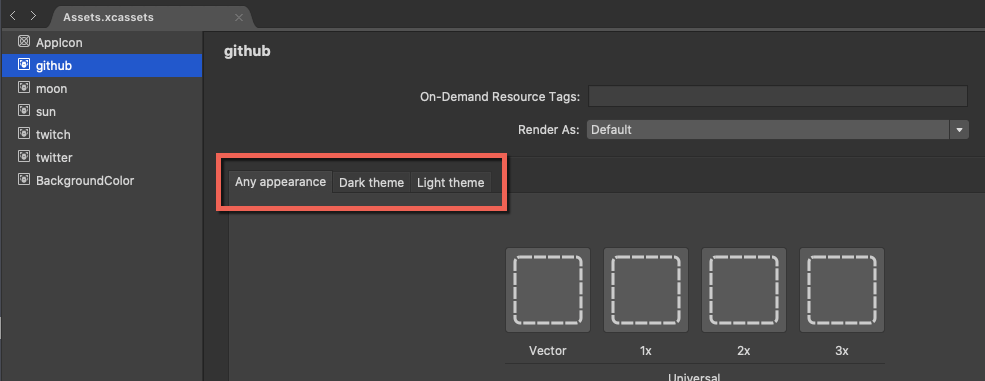
To support normal (light) and dark mode, Xcode 11+ provides options under Assets.xcassets to set resources such as Colors, Images, Icons, etc. in light mode, dark mode and any mode (the default option). This makes is simple to set colors and icons in iOS and based on mode change, the resources are automatically loaded by the OS.
We can subscribe to mode changes in our current ViewController by overriding the TraitCollectionDidChange method. We can get to this callback via our platform using a custom PageRenderer.
public override void TraitCollectionDidChange(UITraitCollection previousTraitCollection)
{
    base.TraitCollectionDidChange(previousTraitCollection);
    // Mode changed, do something.
}
Now that we are subscribed to mode changes, we can reflect theme changes in the shared code of Xamarin.Forms application by updating App.Current.Resources to the desired theme ResourceDictionary.
public override void TraitCollectionDidChange(UITraitCollection previousTraitCollection)
{
    base.TraitCollectionDidChange(previousTraitCollection);

    if (TraitCollection.UserInterfaceStyle != previousTraitCollection.UserInterfaceStyle)
        SetAppTheme();
}

void SetAppTheme()
{
    if (TraitCollection.UserInterfaceStyle == UIUserInterfaceStyle.Dark)
    {
        // set the resource dictionary
        App.Current.Resources = new DarkTheme();

        // track current theme
        App.AppTheme = Theme.Dark;
    }
    else
    {
        App.Current.Resources = new LightTheme();
        App.AppTheme = Theme.Light;
    }
}
And that’s it. As the trait (mode) changes, our app will reflect the change immediately, as intended.
Android 🤖
Android introduced the UiModeManager to handle day and night mode in API 8. In Android Q, there is a dedicated Dark mode which uses UiMode flags.
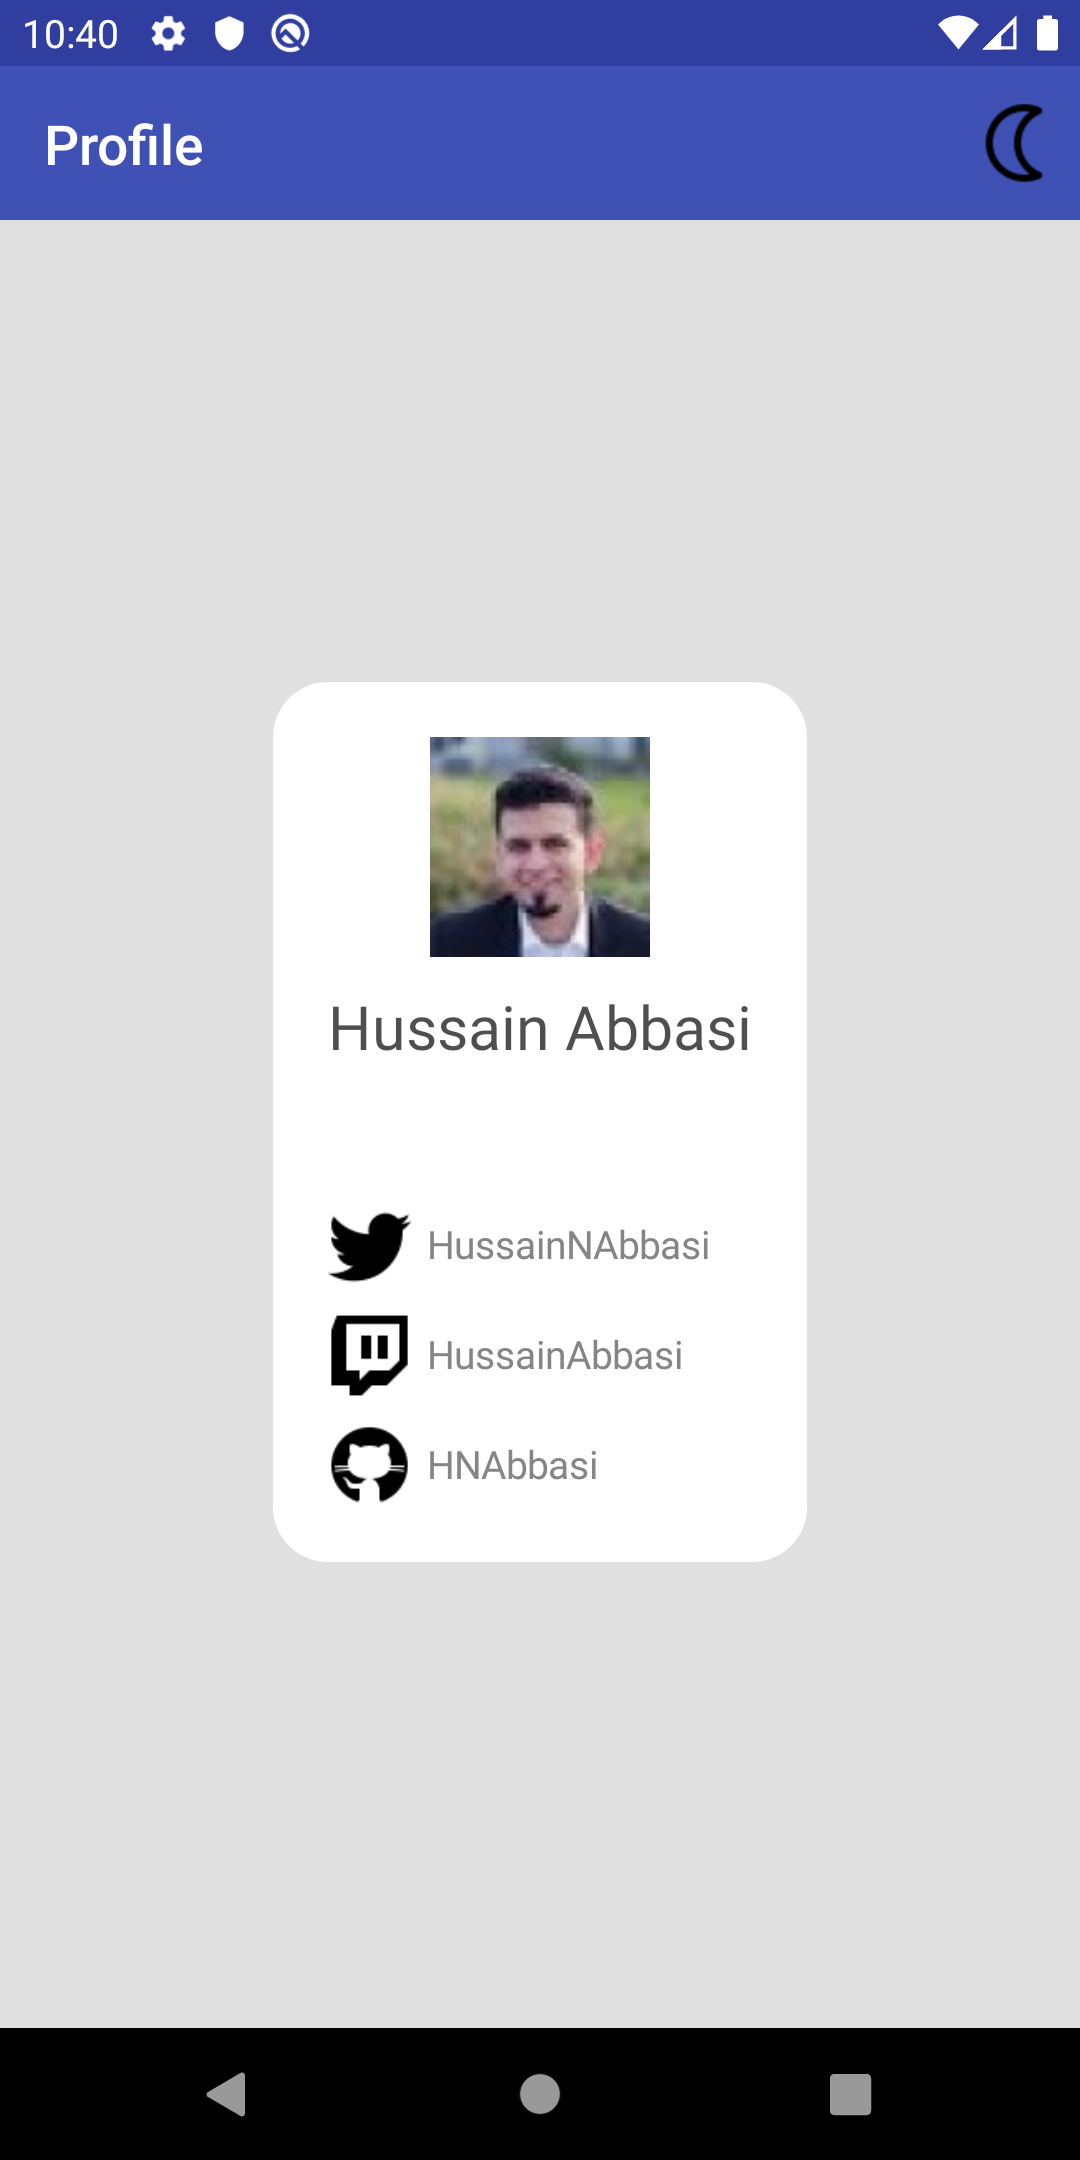

To support dark (night) mode in Android, we need to manually set things up. It is as easy as 1, 2, 3.
1 Update Theme (style.xml)
To elegantly switch styles, we need to update our base theme to use Theme.AppCompat.DayNight.
<style name="MainTheme" parent="Theme.AppCompat.DayNight">
</style>
2 Create -night Resources

As mentioned, the OS will look for these identifiers to locate resources. So, we will create a drawable-night (or any other folder that holds our drawables, images and icons, etc.). We will also create a values-night folder that will hold our dark/night theme style and colors.
In our example, we have images for light and dark mode, so we placed them in the appropriate folders.
Note: Images and icon names should be the same so they can be found when you ask for “github” or “github.png” for instance.
Back to styles, since we now have two theme (style) files, we will have both of them inherit from Theme.AppCompat.DayNight. Behind the scene, this theme is implemented as this,
Resources/values/style.xml:
<style name="Theme.AppCompat.DayNight"
    parent="Theme.AppCompat.Light">
</style>Resources/values-night/style.xml:
<style name="Theme.AppCompat.DayNight"
    parent="Theme.AppCompat">
</style>
Subsequently, we can have different colors list for each theme,
Resources/values/colors.xml:
<resources>
    <color name="launcher_background">#FFFFFF</color>
    <color name="colorPrimary">#3F51B5</color>
    <color name="colorPrimaryDark">#303F9F</color>
    <color name="colorAccent">#FF4081</color>
</resources>Resources/values-night/colors.xml:
<resources>
    <color name="launcher_background">#000000</color>
    <color name="colorPrimary">#BB86FC</color>
    <color name="colorPrimaryDark">#8858c8</color>
    <color name="colorAccent">#03DAC5</color>
</resources>
and simply use the colors list in our theme,
<style name="MainTheme" parent="Theme.AppCompat.DayNight"
    <item name="colorPrimary">@color/colorPrimary</item>
    <item name="colorPrimaryDark">@color/colorPrimaryDark</item>
    <item name="colorAccent">@color/colorAccent</item>
</style>
3 Apply Theme
Now that we have the OS configurations setup, we need to update our shared code of the Xamarin.Forms application. To do so, we simply set the App.Current.Resources to desired theme ResourceDictionary in our MainActivity. This is much simpler than iOS where we had to create a PageRenderer. When the OS changes UiMode, it will recreate the activity and the Set Theme() method will propagate the change to our Xamarin.Forms views,
protected override void OnCreate(Bundle savedInstanceState)
{
    . . .
    LoadApplication(new App());
    SetAppTheme();
}

void SetAppTheme()
{
    if (Resources.Configuration.UiMode.HasFlag(UiMode.NightYes))
        SetTheme(Themer.Theme.Dark);
    else
        SetTheme(Themer.Theme.Light);
}

void SetTheme(Theme mode)
{
    if (mode == Themer.Theme.Dark)
    {
        if (App.AppTheme == Themer.Theme.Dark)
            return;
        App.Current.Resources = new DarkTheme();
    }
    else
    {
        if (App.AppTheme != Themer.Theme.Dark)
            return;
        App.Current.Resources = new LightTheme();
    }
    App.AppTheme = mode;
}
And that is it for Android.
Opt-Out of Dark Mode
If your app is not ready to support dark mode just yet, fear not.
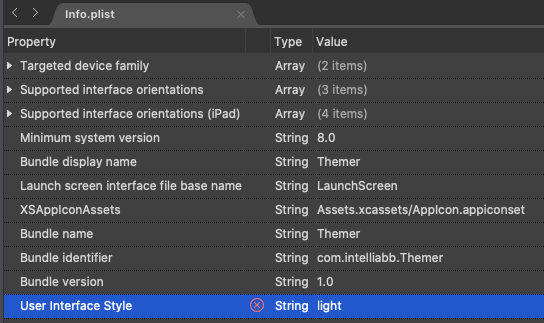
For iOS, you can set UIUserInterfaceStyle property in info.plist to light. This will ignore any trait changes and your app will work as normal (always light mode).
For Android, if you are not using the Theme.AppCompat.DayNight theme, and do not have resources (folders) with -night identifier, you don’t have to change anything. Your app will work as normal in always light mode.
Note: On Android, you can choose to disable dark mode on selective views by setting
android:forceDarkAllowed.
In-App Dark Mode
If we want to allow our users to set light or dark mode in the app regardless of the OS preference, we can do that by simple setting the resources as we did earlier. What changes is that we need to now store the current theme in preferences to persist across launches.
On iOS, override the UI style in your AppDelegate by setting the Window.OverrideUserInterfaceStyle flag,
Window.OverrideUserInterfaceStyle = UIUserInterfaceStyle.Dark;On Android, manually set local night mode in your MainActivity,
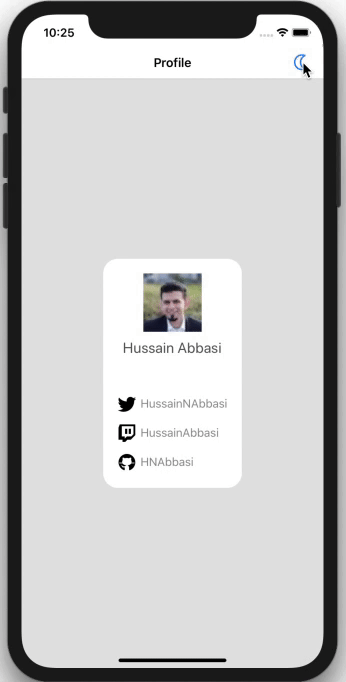
Delegate.SetLocalNightMode(AppCompatDelegate.ModeNightNo);Check out the Themer GitHub repo to see an example.
Enjoy! 🤗
Resources
GitHub Repo: Themer (https://github.com/hnabbasi/Themer)
Read more at DayNight — Adding a dark theme to your app
Banner illustration by Prakhar Neel Sharma

Can you set the light and dark resources for iOS in Visual Studio on Windows?
void SetAppTheme()
{
if (Resources.Configuration.UiMode.HasFlag(UiMode.NightYes))
SetTheme(Themer.Theme.Dark);
else
SetTheme(Themer.Theme.Light);
}
Themer is application name or nuget ?
It is the name of the sample app.
There is an error in the code on github (also in the Android code shown above). In the SetTheme() function in the Android PageRender.cs file, if mode == Dark, then the next line should be checking for Light but it is checking for Dark. iOS version was correct. Correct code is:
I followed your post and it worked perfectly in iOS. On Android, the background and text colors worked, but the icons were not changing when the mode switched. I had to shut down the app and restarted it to see the icon changed. What could be causing that?