Using Custom Fonts In Xamarin.Forms
Learn to use MFractors font importer to add new font assets to your Android and iOS apps in seconds.
Custom fonts are one of the back-bones of modern app development. They are critical to a business's branding and icon fonts like FontAwesome or Ionicons are increasingly used as a replacement for image icons.
In Xamarin.Forms, we include the font asset into each platform project and use the FontFamily property to apply the fonts in XAML.
But first, how does each platform handle font assets?
- iOS: Fonts are placed in the Resources folder with the
BundleResourcebuild action. We also add a<string>entry underUIAppFontsin the projects Info.plist. - Android: Fonts are placed in the Assets folder with the
AndroidAssetbuild action.
This process involves lots of manual work, we copy the font into each project, set up the plist entry and then have to figure out how to use the font in our XAML!
MFractor simplifies this with the Font Importer, a handy tool that adds the new font in each project, creates any Info.plist entries and also generates the font lookup XAML!
This article focuses on using MFractors font importer to add new fonts to our app; manually adding fonts to a Xamarin project is well and truly covered by many other community blog posts.
Adding A Font
Let's get started by opening the Font Importer.
Under the MFractor top menu, select Import and then Font to open the font importer. Alternatively, you can right-click on an Android or iOS project in the project pad and choose Import -> Font.
For this tutorial, please download and extract Dancing Script Regular as this is the font that we add to our app.
First, we need to load our font into the Font Importer. Click on the Choose Font button in the top right of the dialogue and browse to the location of the Dancing Script Regular font and double click it. This will load your font into the font importer.
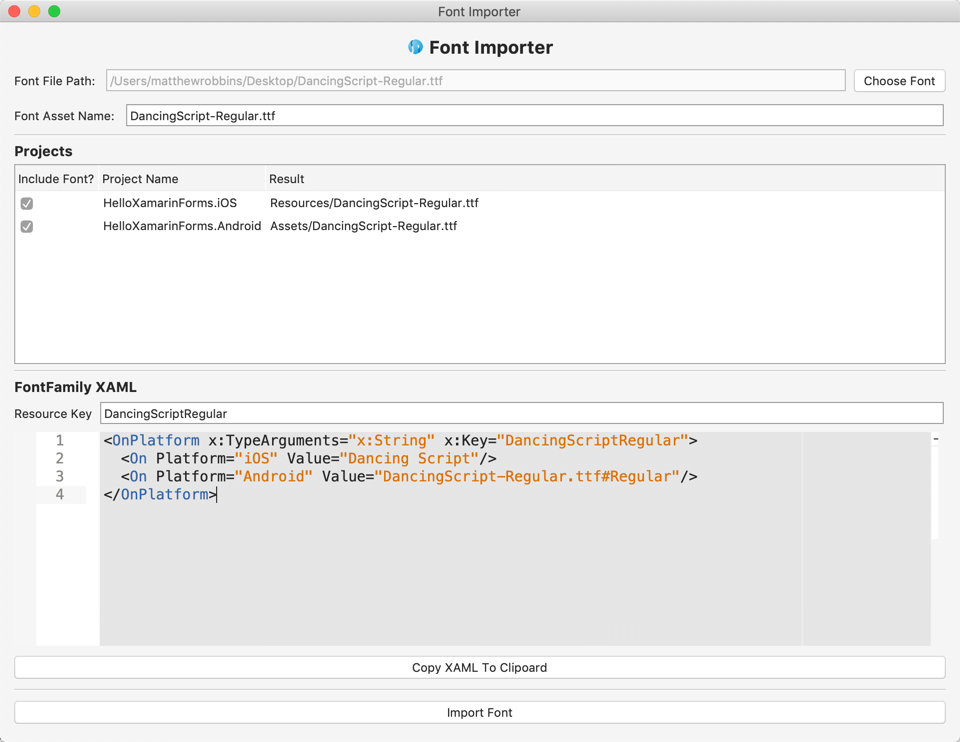
You should see something like this:
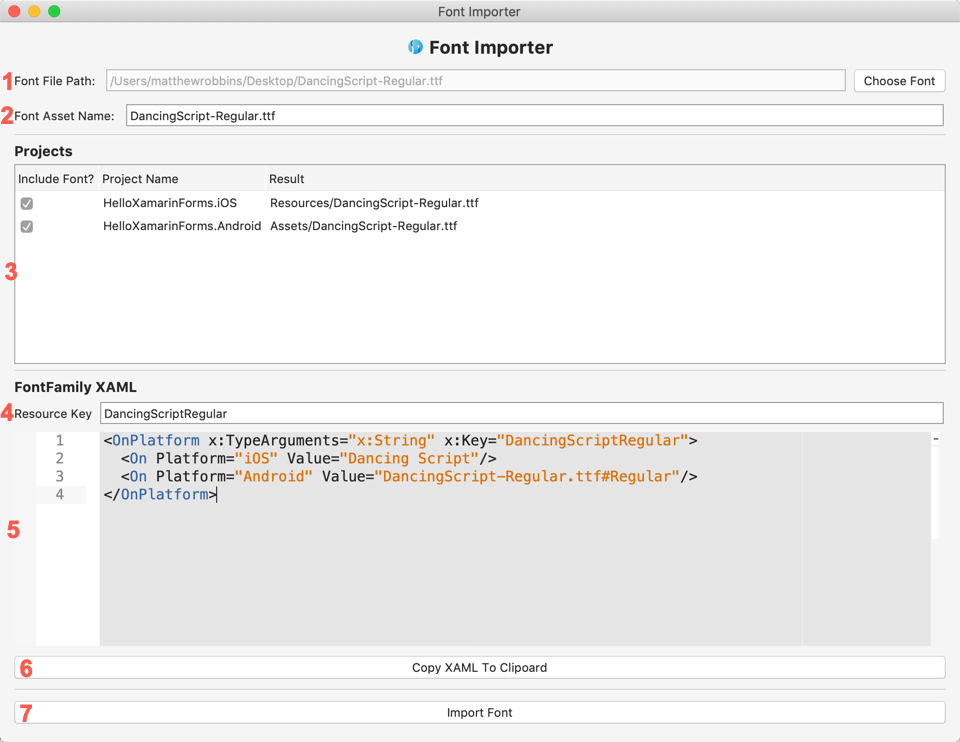
Let's examine the Font Importer and what each part of the tool does:
- The source font file. In our case,
DancingScript-Regular.ttf. - What the new font asset should be named when it's added to the projects; we can also include a folder path here.
- The projects that the font should be added to.
- The resource key to use when we look up the font in our XAML. By default, this is the full name of the font with whitespace removed.
- The preview of the
OnPlatformcode to use to apply the font to aFontFamily. This code is what we place into our App.xaml to then apply our font onto Labels, Buttons etc. - The Copy XAML To Clipboard button copies the FontFamily XAML code into the clipboard.
- Imports the font into the selected projects.
When we use the importer, the new font will be included in each of our projects and have any necessary infrastructure code configured. For Android projects, the font is placed under the Assets folder. For iOS projects, the font is placed under the Resources folder and has a UIAppFonts entry added to the Info.plist.
Click on the Import button to add DancingScript-Regular to the Android and iOS projects.
Using A Font
Now that we have imported our font, let's apply it to some text!
When we clicked Import in the Font Importer, MFractor copied the OnPlatform lookup code to the clipboard, ready for use in our App.xaml.
Open up your projects App.xaml and paste the code into it's resource dictionary:
App.xaml
<OnPlatform x:TypeArguments="x:String" x:Key="DancingScriptRegular">
  <On Platform="iOS" Value="Dancing Script"/>
  <On Platform="Android" Value="DancingScript-Regular.ttf#Regular"/>
</OnPlatform>
This creates a new resource that we can apply to FontFamly using a StaticResource expression.
For example, we use the following code to apply the Dancing Script font to a label:
<Label Text="Lorem Ipsum"
       FontFamily="{StaticResource DancingScriptRegular}"
       FontSize="Large"/>
This is the end result:
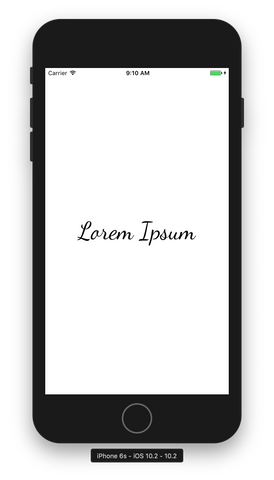
There you go, a custom font added into our app in a few easy steps!
Summary
By using the Font Importer, adding new font assets into our Xamarin applications is a lot easier! MFractor automatically adds the font and sets up the Info.plist entry in any iOS projects... it even creates the XAML FontFamily code!
The Font Importer is available in MFractor Professional and is a fantastic tool to make your Xamarin development even easier.
Want to try out the font importer? Email me at matthew@mfractor.com to request a trial of MFractor Professional.
Mar 05, 2020 • Posted by Mike
It would be better if we could simpily set all control to the custom font in a easy way, not one by one.
Mar 05, 2020 • Posted by Mike
It would be better if there is some easy way to make all control display the custome font.