

From developer to developer, I would like to start this article by asking some questions:
1⃣ Have you ever experienced that you want to show the progress of the design of a screen and for this you need to add test data to the XAML so that the user can see the results, right?
2⃣ So after you convinced the user then you have to delete all that data to add the method by which we can consume the real data?
3⃣ Have you ever thought about how long this process takes?
So, it’s very likely that you answer positively to all the previous questions. And keep calm, that’s normal! ? But the good thing is that we can always improve! It’s for this reason that in this post we will be learning how to use Design Time Data with the XAML Previewer.
But first, let’s clarify the following points
✔ What exactly do the Design Time data?
Design time data through the Visual Studio previewer window help us to add test data to our XAML without it actually being shown when the application is running. For example, we can have a label with a test Text property assigned as “Good Morning” and we also can have the same property with “Hello people!” as value for when we run the app, making this easier and faster our development time for the construction of the UI.
It requires a minimum version of Xamarin.Forms 3.6.
✔ How can I active my Previewer window?
➖Locate in your XAML
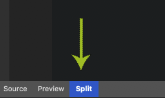
➖In the bar below, you will see a division that says split, click there and done ! Too easy! ?
Let’s start!!! ?
The first thing we have to do, is to add the following namespaces to our XAML:
⚠ Currently when creating your XAML, these lines are added to your page automatically.
As you saw, the last line we added was ignorable=“d”. The prefix “d” has the same access to properties, events and other elements from the control.
We can also define test controls such as buttons, labels , images, virtually any control you need!

And done!!! Our test data is implemented in our XAML! ?
Advantages ✍
? You have a “data structure” intended only for testing, so you have a cleaner code.
? Adding this test data will not affect the data you will see when you run the application.
? You can easily identify with the prefix “d” the information and controls which were added for testing purposes.
Thanks for reading!!! 

Spanish post: https://medium.com/@reyes.leomaris/mostrando-datos-en-tiempo-de-dise%C3%B1o-con-xaml-previewer-36f7ac60ad95
References: https://channel9.msdn.com/Shows/XamarinShow/XamarinForms-101-Design-Time-Data


1 thought on “Showing Design Time Data with XAML Previewer”