Choosing the right platform for deploying your application is often a tough choice, especially if it involves a business that needs to pay attention to the way it spends its funds. When dealing with an ASP.NET application, Microsoft Azure is probably the go-to option, given that it’s part of the Microsoft world. Even though a large part of the process is automated, there are still problems that can arise.
The article walks through the creation and deployment of an ASP.NET Core web application; I will also mention a few ways to troubleshoot your web application. If you are only in the deployment part, you can skip right to it, as it will be applicable regardless of the project that you are working with.
The tools that will be used for this tutorial are:
- Visual Studio 2017
- Microsoft SQL Server
- Microsoft Azure
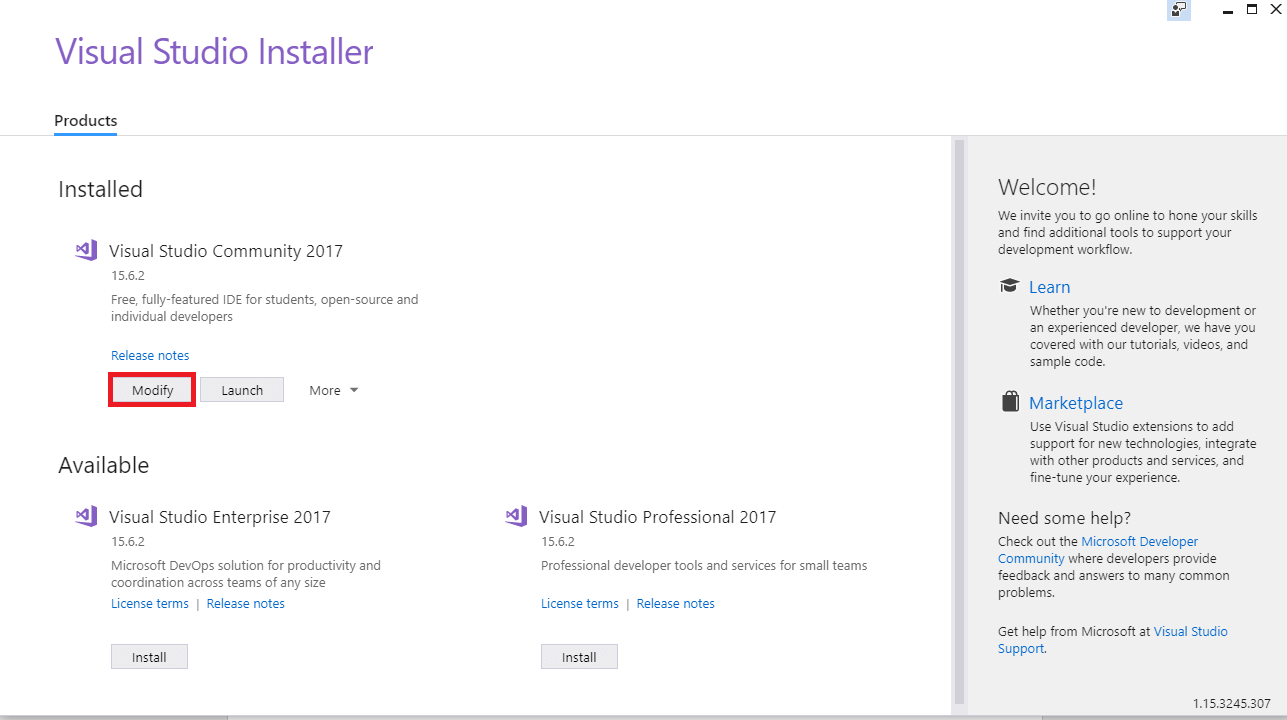
To make sure that you can follow each step of the article, open Visual Studio Installer from Tools Get Tools and Features…. Click on Modify.
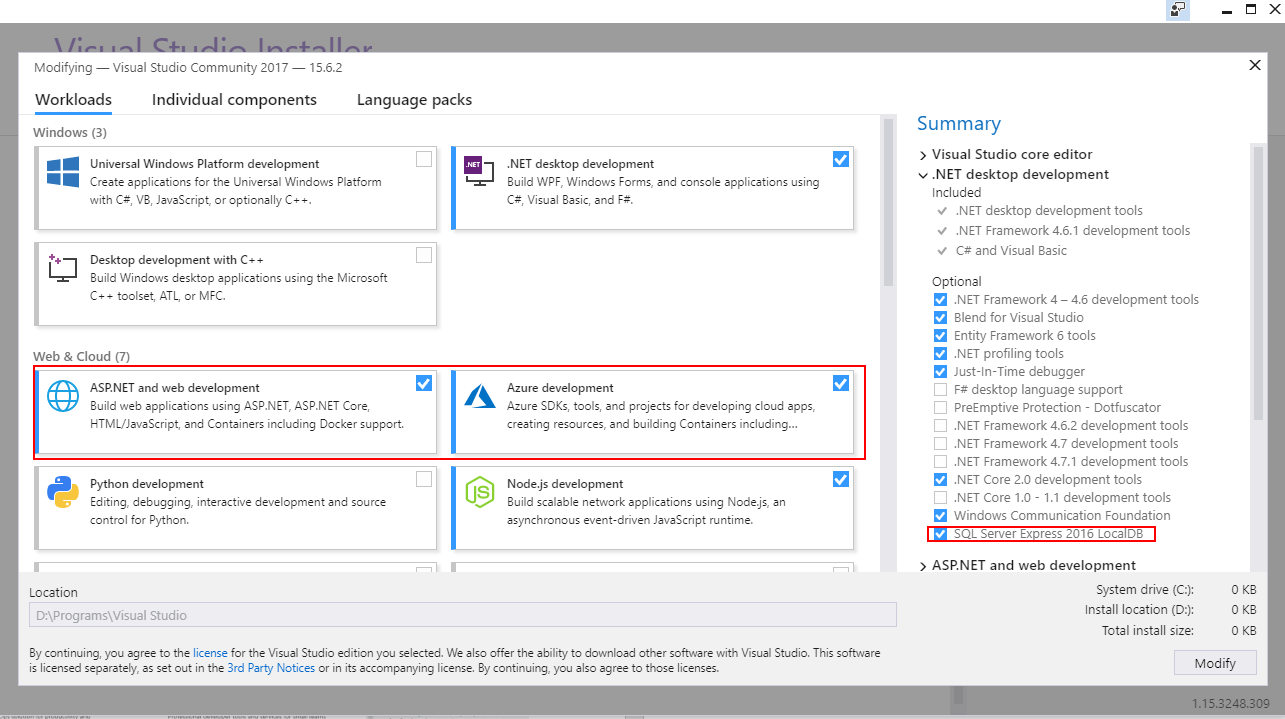
Install the ASP.NET and web development and the Azure development workloads.
Creating the Application
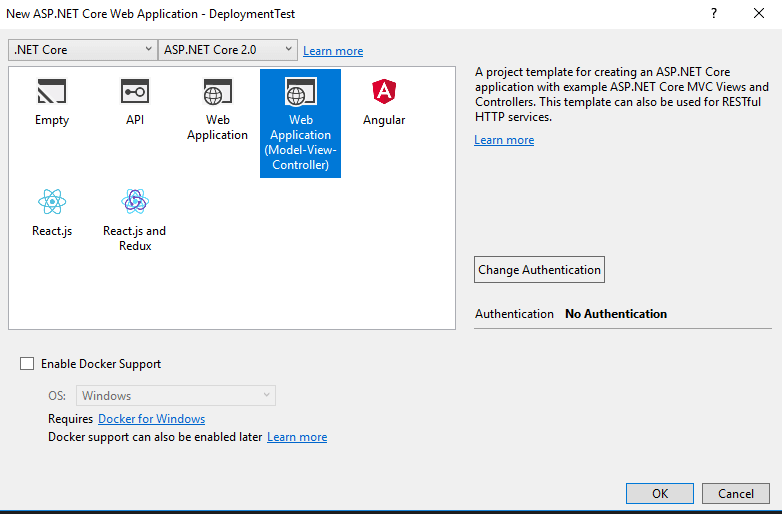
After getting all the prerequisites in place, create a new ASP.NET Core Web Application project in Visual Studio.
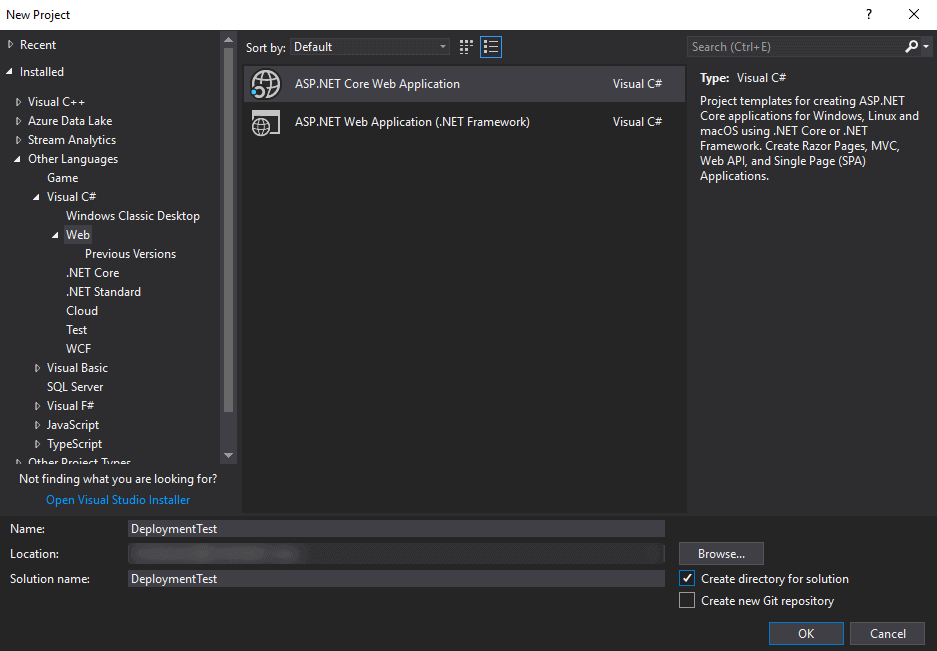
For this tutorial, I will create an MVC application; however, the same deployment process can be used for any other web application type.
Create a new class in the Models folder and call it Appointment. This model class will be used to demonstrate the database functionality with Entity Framework.
|
1 2 3 4 5 6 7 |
public class Appointment { [Key] public int Id { get; set; } public string PersonName { get; set; } public DateTime Date { get; set; } } |
Creating and Connecting to the Database
Before creating any actions or views, take care of the database. During this tutorial, two databases will be used: a local one, during the development process, and an Azure database, for the published application. Visual Studio provides an easy way for changing from the local database to the remote one during the deployment process, so there is absolutely no reason to use the same database. This will allow any changes to be performed locally, without affecting the live application in any way.
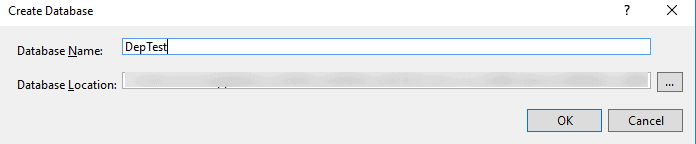
Click on the View menu and choose SQL Server Object Explorer. Under SQL Server, choose your local server and create a new database.
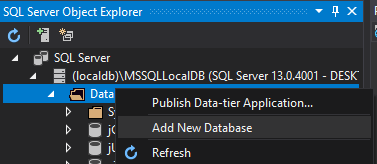
Name it DepTest, for this tutorial.
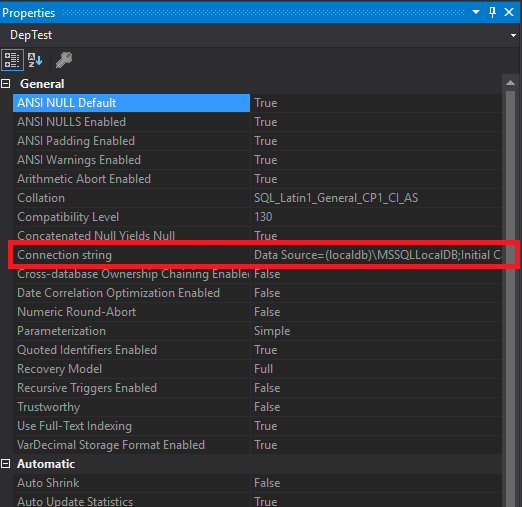
To get the connection string for the database that you just created, right click on it and choose Properties and copy the Connection string value from the new window that opened.
Next, open the appsettings.json file and add a ConnectionStrings field, so it looks something like this:
|
1 2 3 4 5 6 7 8 9 10 11 |
{ "ConnectionStrings": { "TestDatabase": "Data Source=(localdb)\\MSSQLLocalDB;Initial Catalog=DepTest;Integrated Security=True;Connect Timeout=30;Encrypt=False;TrustServerCertificate=True;ApplicationIntent=ReadWrite;MultiSubnetFailover=False", }, "Logging": { "IncludeScopes": false, "LogLevel": { "Default": "Warning" } } } |
With the database set up, it is time to properly connect it with the model. Right click the project in the Solution Explorer and choose Manage NuGet Packages…. Go to Browse and search for EntityFrameworkCore and ConfigurationManager. Install them by clicking on the Install button on the right.


Entity Framework will be used for migrating the models to database tables, while the Configuration Manager package will allow you to access the connection string from the JSON file that was edited earlier.
The first step is to create a new folder in the project, called Data. In this folder, create a new class called TestDBContext. This class will facilitate the communication with the database, by extending the DbContext class:
|
1 2 3 4 5 6 7 8 |
public class TestDBContext : DbContext { public TestDBContext(DbContextOptions<TestDBContext> options) : base(options) { } public DbSet<Appointment> Appointments { get; set; } } |
The constructor takes a DbContextOptions object as a parameter, which will be automatically injected, as you will see when creating the controllers. Apart from the constructor, add a DbSet property that allows queries to be performed on the appointment records.
To connect this context with the connection string and inject them in the controllers, open the Startup.cs file and add the following lines in the ConfigureServices method:
|
1 2 3 4 5 |
public void ConfigureServices(IServiceCollection services) { services.AddMvc(); services.AddDbContext<TestDBContext>(options => options.UseSqlServer(Configuration.GetConnectionString("TestDBContext"))); } |
The next step is to create a migration, which is the way Entity Framework applies changes to the database schema, based on your models. To do this, go to the View menu and choose Package Manager Console, from the Other windows submenu. There are two commands that you need to run:
- Add-Migration to create the migration; name it InitialMigration or something similar.
- Update-Database to apply the pending migrations to the database.
Creating the Views
The first step towards displaying database data in the views is to inject the context class into the controller. Open the HomeController class and add the following lines:
|
1 2 3 4 5 |
private TestDBContext _db; public HomeController(TestDBContext db) { _db = db; } |
Next, delete the Index.cshtml file from the Views->Home folder. For simplicity, you will use the HomeController that was automatically created; alternatively, you can create a new controller for the appointments.
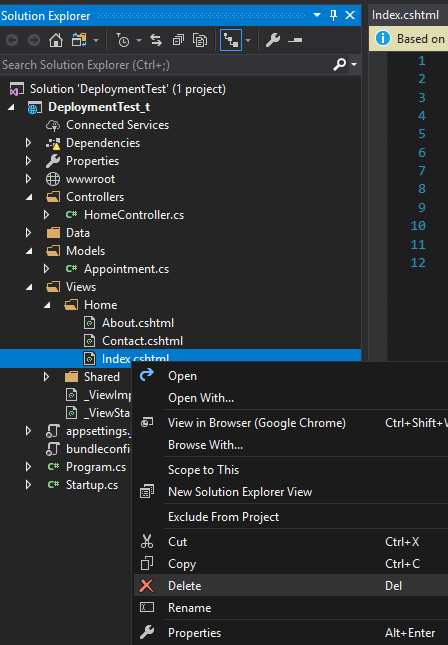
After deleting the index file, open the HomeController and right click on Add View….
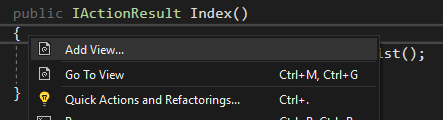
Keep the same name but change the Template to List and the Model to Appointment.

Change the Index method to look like the following, so that the existing appointments will be sent to the view.
|
1 2 3 4 5 |
public IActionResult Index() { var appointments = _db.Appointments.ToList(); return View(appointments); } |
Apart from the List view, add a Create view, so adding new Appointment objects to the database becomes an easy task. First, add the following two actions to the HomeController:
|
1 2 3 4 5 6 7 8 9 10 11 12 |
[HttpGet] public IActionResult Create() { return View(); } [HttpPost] public IActionResult Create(Appointment model) { _db.Appointments.Add(model); _db.SaveChanges(); return RedirectToAction("Index"); } |
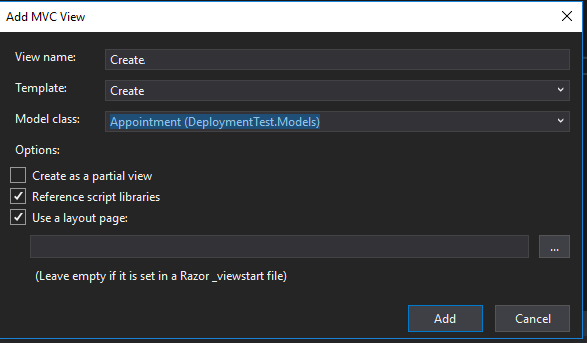
The two actions should have the same name; the first one will only accept GET requests and will return the HTML page, while the second one will only accept POST requests and will send the input data to the database. Right click on the first method and add a view, the same way as earlier. Choose the same Model but change the Template to Create.
Since the Id of the appointment is automatically generated by the database, delete the following part of the code:
|
1 2 3 4 5 |
<div class="form-group"> <<strong>label</strong> <strong>asp-for</strong>="Id" class="control-label"></<strong>label</strong>> <<strong>input</strong> <strong>asp-for</strong>="Id" class="form-control" /> <<strong>span</strong> <strong>asp-validation-for</strong>="Id" class="text-danger"></<strong>span</strong>> </div> |
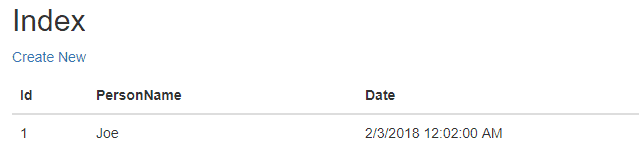
You can now run the application and add data into it by using the Create new button on the index page.
Deploying the Application
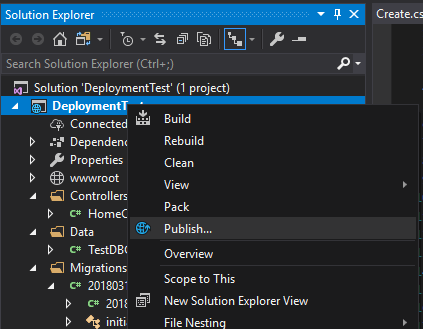
To deploy your application to Azure, you first need an Azure account. You can do that for free here. After that is set up, right click on the project in Visual Studio and choose Publish.
After that, have the Create new option selected, and press Publish.
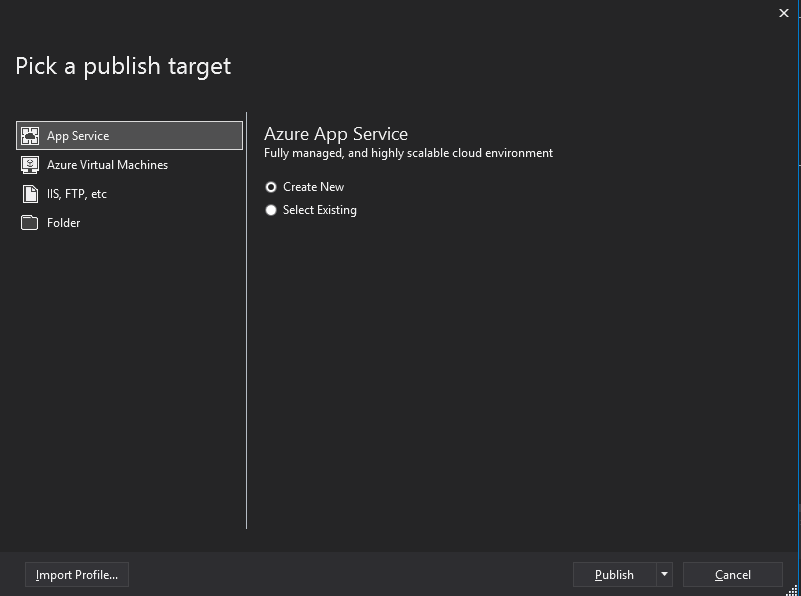
In the top-right corner, you have the option to login to your Azure account. Do that if your account uses a different e-mail than the one you are logged in with on Visual Studio. Apart from that, create a new resource group by pressing the New link near the Resource Group box.
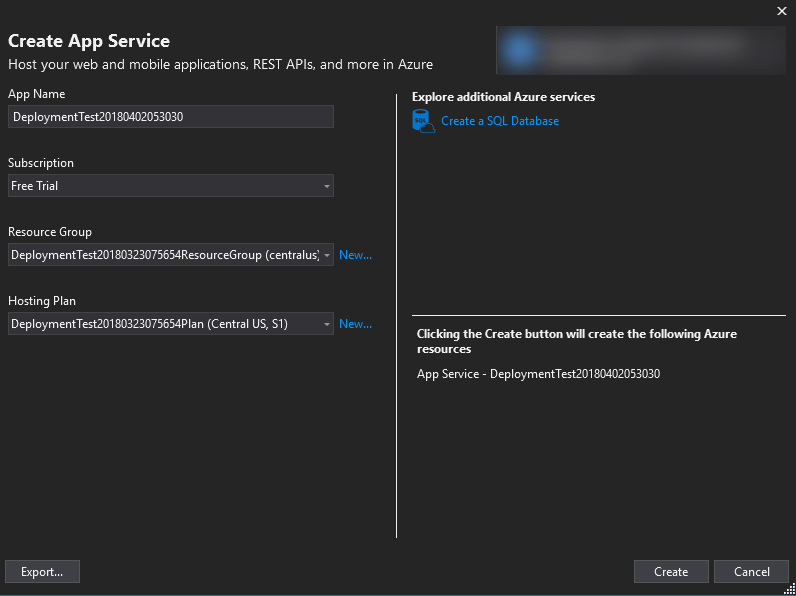
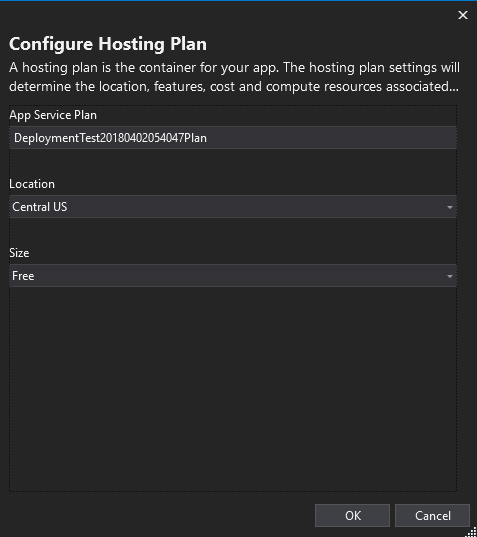
While Azure gives you some credit to begin with, you can opt to not use it by creating a new hosting plan and choosing the Free option:
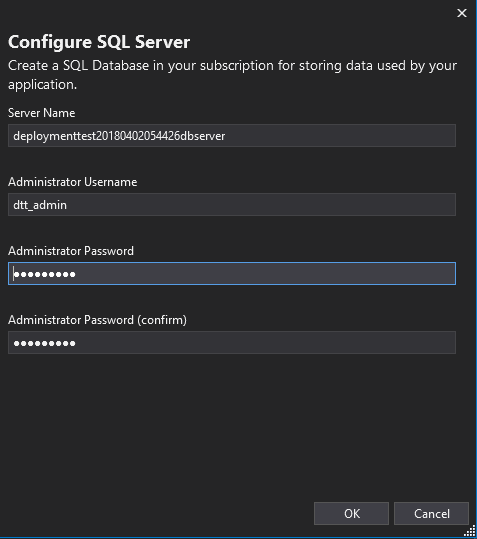
Do not click the Create button yet, as it is also necessary to create a database on Azure. Click on Create a SQL Database on the right part of the window and fill in the form.
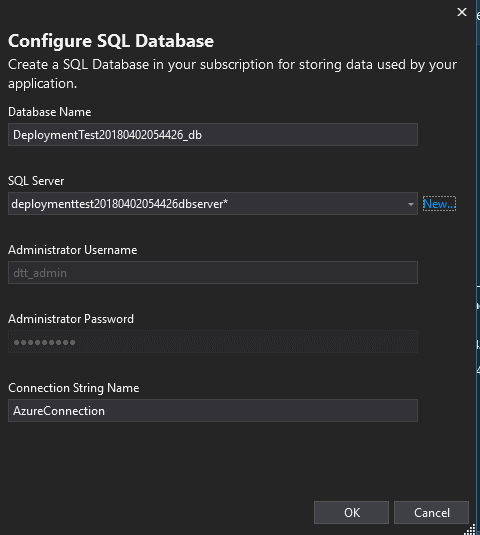
The username and password should be automatically filled in after creating a new SQL server, by clicking on the New… link:
After this, click the Create button; the process might take a couple of minutes, but the web application will launch automatically in your default browser. However, you will get an SQL Exception at this point. The reason for that is that you have not applied the migrations from the local database to the Azure database.
Applying Migrations to the Remote Database
This section demonstrates two ways to create the new objects on the Azure database.
By Using a Migration Script
The easiest way to apply the local database schema to the remote database is to generate the SQL script and then run in on the remote SQL server. To do this, run the Script-Migration command in the Package Manager Console. This is what the generated script should look like:
|
1 2 3 4 5 6 7 8 9 10 11 12 13 14 15 16 17 18 19 |
IF OBJECT_ID(N'__EFMigrationsHistory') IS NULL BEGIN CREATE TABLE [__EFMigrationsHistory] ( [MigrationId] nvarchar(150) NOT NULL, [ProductVersion] nvarchar(32) NOT NULL, CONSTRAINT [PK___EFMigrationsHistory] PRIMARY KEY ([MigrationId]) ); END; GO CREATE TABLE [Appointments] ( [Id] int NOT NULL IDENTITY, [Date] datetime2 NOT NULL, [PersonName] nvarchar(max) NULL, CONSTRAINT [PK_Appointments] PRIMARY KEY ([Id]) ); GO INSERT INTO [__EFMigrationsHistory] ([MigrationId], [ProductVersion]) VALUES (N'20180405165725_Initial', N'2.0.2-rtm-10011'); GO |
Back to the SQL Server Object Explorer that was used earlier, right click on the SQL Server and choose Add SQL Server. This time, expand the Azure list and choose the remote database that you just created. Right click on it, choose New Query and copy the generated script. Click the green button to run the script.
By Automatically Applying When Publishing the Application
If you have previously developed web applications using the .NET framework, you might have expected an ‘Apply migrations’ option in the publishing settings. To achieve this with .NET Core, another dependency is needed: Microsoft.EntityFrameworkCore.Tools.DotNet. Currently, it is not possible to install this package through the NuGet manager, even though it is listed when searched for. The workaround is to right click the project in the Solution Explorer and choose Edit DeploymentTest.csproj. Add the following lines:
|
1 2 |
<ItemGroup> <DotNetCliToolReference Include="Microsoft.EntityFrameworkCore.Tools.DotNet" Version="2.0.2" /> |
Since this has to be done manually, it also means that you should check the latest version of the package and fill that value in for the Version attribute. You can find the latest version by right clicking the project, choosing Manage NuGet Packages and searching by the full name.
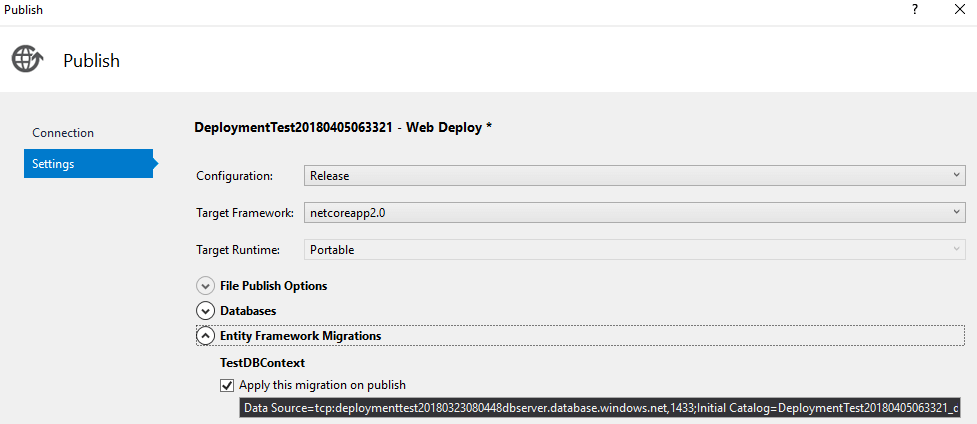
After adding the dependency, right click on the project, choose Publish and click on the Settings link.

Under the Settings tab, there should now be a section called Entity Framework Migrations, with a checkbox that allows automatically applying the migrations to a database, every time the application is published.
Obtaining Detailed Error Messages
While working with remote system components, it’s sometimes painful to detect and solve errors. Features that work locally might create troubles after deployment.
By default, a published web application will have a customErrors flag set to On, which means that any exception message thrown by the application will not be displayed. This is a security measure that prevents users from having access to your code or database structure. However, this is not very helpful for testing purposes.
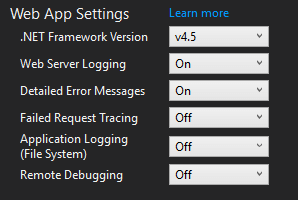
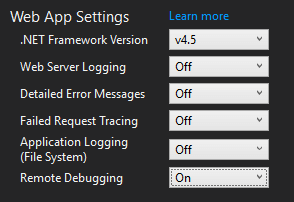
The first step in order to obtain useful error messages is to open the Server Explorer view under Views->Other windows and expand the Azure item until you see your web application. Right click on it and choose View settings. You can see that there is a Detailed Error Message option, which you have to turn on.
The second step is to expand the Files section from the Server Explorer and to open the Web.config file. Search for the system.web tag and add the following line:
|
1 2 3 4 5 |
<system.web> <compilation targetFramework="4.6.1" /> <httpRuntime targetFramework="4.6.1" /> <customErrors mode="Off"/> </system.web> |
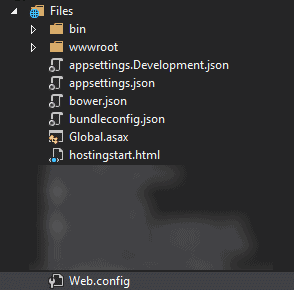
Save the file and close it. You do not have to republish the application, since the changes were made remotely, but you will have to add this line again if you deploy the application again.
Remote Debugging
Remote debugging is a way to use the debugging tools offered by Visual Studio, such as breakpoints, on a remote application.
If the information offered by the error messages is not enough to solve the problems, there is the option of debugging the application remotely. Since this process is significantly slower than the debugging performed locally, it is a good idea to try replicating the errors on your local machine. If this process is not successful either, resort to remote debugging.
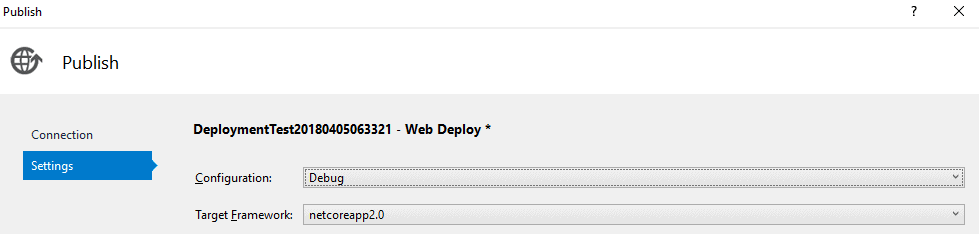
First of all, right click on the project in the Solution Explorer and choose Publish again. Click the Settings link and go to the Settings tab. Change the Configuration to Debug, press Save and then press the Publish button to update the application.
After doing this, open the Server Explorer view again and expand the Azure item until you see your web application. Right click on it and choose View settings. Turn the Remote Debugging option on.
After that, right click on the application in the Server Explorer again and choose Attach Debugger. You will now have all the debugging tools that Visual Studio offers; any breakpoints in your code will be triggered when they are hit from the remote application. Make sure to always publish your most recent code before debugging. Make sure to change the Configuration back to Release after finishing the debugging process, since this will make it run significantly slower.
Conclusion
In this article, I have covered the basics of creating, deploying and debugging an ASP.NET Core application on Azure. There are alternatives to some parts of the process, but I tried to present the easiest way that I found after researching the matter.
Azure offers so much configuration options that you might also need to do a heavy amount of research before making certain decisions. If you are migrating from .NET Framework to .NET Core, you should also keep in mind that there are some differences that might give you headaches. Don’t hesitate to reach out to the community for these, as there are probably many people experiencing the same issues.
Load comments