Using the Git Deployer that comes with Blitz 3, you can now set up Craft CMS to automatically deploy to Netlify Edge (the super-charged CDN). The entire process takes around 20 minutes, excluding DNS propagation time.
In this article, we will set up craftcodingchallenge.com, a real-world Craft CMS site, to deploy to Netlify. Most of the site is static except for a few pages that use Blitz’s dynamic content tags. Additionally, there is a page on the site containing a form that allows visitors to submit a solution, so we’ll need to route such requests through to Craft CMS which we can do using Netlify’s proxying feature.

This form submits to the Guest Entries Craft CMS plugin. To ensure that the form has a dynamic endpoint to submit to, we’ll use the following subdomains for each of our sites:
- www.craftcodingchallenge.com for the static Netlify site.
- cms.craftcodingchallenge.com for the dynamic Craft CMS site.
Using a
wwwsubdomain has some advantages over using “naked” or “apex” domains (domains that have no subdomain at all).
Blitz 3 comes with a Git Deployer which is the recommended way of deploying full websites, including images and other static assets, to Netlify. To use it, Git must be installed in our local development environment or on the web server.
A Netlify Deployer also exists for Blitz and uses Netlify’s API to upload zipped files to your site. It is quicker and easier to set up, however, the Git Deployer is more reliable and offers functionality that is useful when deploying sites.
1. Create a Git repository #
To use the Git Deployer, we’ll first need to create a new Git repository in one of the Git providers that Netlify supports: GitHub, GitLab or Bitbucket. This repository will contain the site that is ultimately deployed to Netlify’s edge nodes. We can make it a private repository and for the sake of simplicity, name it static.craftcodingchallenge.com.
Next, we need to clone the Git repository to the server in the environment in which Craft is running (either a local development environment or on a remote web server). It is important to clone the repository using a HTTPS URL and not SSH.

We clone the repository with a simple Git command, providing the URL:
git clone https://github.com/putyourlightson/static.craftcodingchallenge.com
If this is a private repository then we will need to manually insert a valid username into the URL before cloning (a password may also be requested):
git clone https://[email protected]/putyourlightson/static.craftcodingchallenge.com
By cloning the repository into the same folder that contains our Craft folder, we end up with the following folder structure:
-home
  --user
    ---cms.craftcodingchallenge.com
    ---static.craftcodingchallenge.com
2. Create a Netlify site #
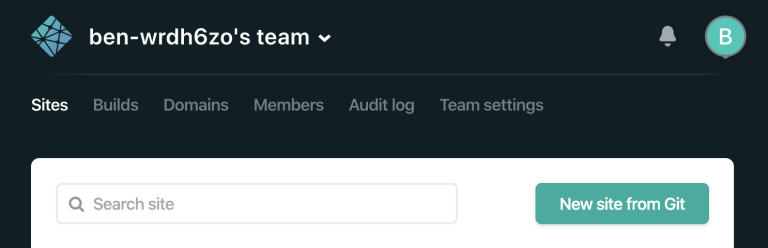
We’ll need to create a Netlify account if we don’t already have one and then click on the New Site from Git button.
We select the Git provider that we used to create the Git repo in step 1.

If this our first time connecting Netlify to the Git provider then we will need to authorize the Netlify app.

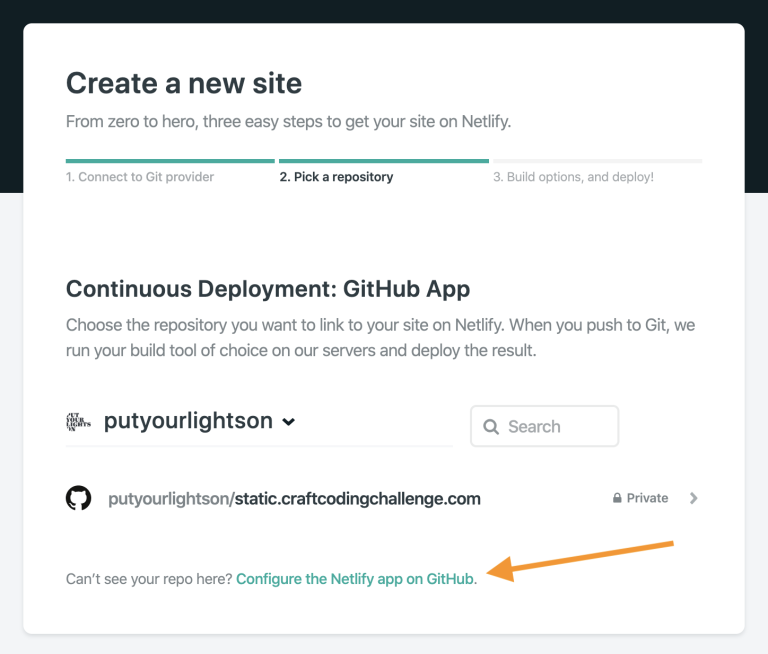
Once authorized, we can choose which repository to link to our site on Netlify. By default, Netlify will not yet have access to the repositories in our account so we may need to configure the Netlify app, granting the necessary access.
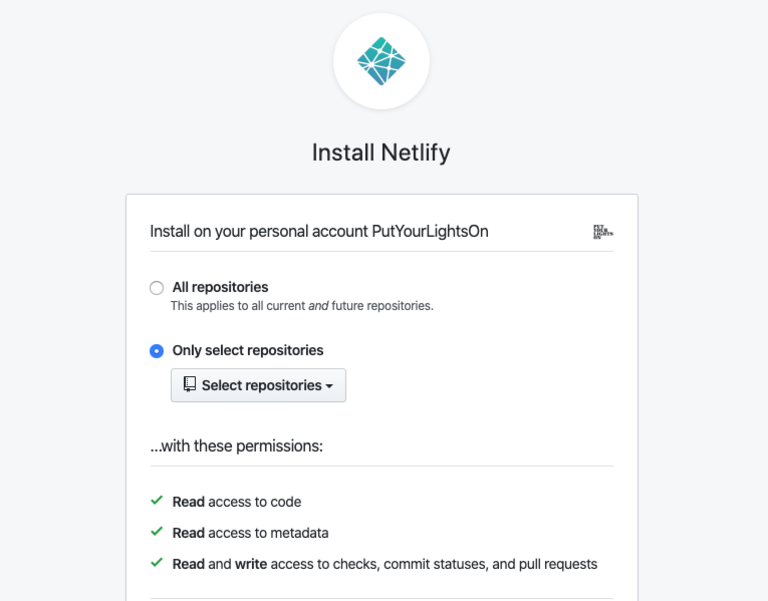
On this screen, we can either grant access to All repositories or Only select repositories. If we select the latter then we can grant access to only the repository that we want to deploy to Netlify.
Next, we can select the repository to deploy to Netlify and tweak any settings before clicking on Deploy site.

This will kick off the deployment process and after a few moments, we are presented with a confirmation message that our site was deployed and is available at a randomly generated vanity URL (romantic-hawking-3d396d in our case, how did they know?!).

Our Netlify site is now live at that vanity URL and we can go ahead and commit an index.html file to the Git repository to see how quick and easy Netlify makes the process of deploying the site.
We will, of course, want to set up a custom domain for our site. The Netlify docs explain the process of assigning a domain to a site rather well. In our case, since the domain name is already registered elsewhere, we delegate our domain to Netlify by changing the nameservers for the domain name to those provided by Netlify (there are alternative options to doing this).

Before changing the nameservers, it is a good idea to copy all existing records to Netlify DNS to ensure that everything continues working as we change providers. In our case, we create an A record for the subdomain cms.craftcodingchallenge.com that points to the IP address of the web server that hosts the Craft CMS site (a DigitalOcean server).

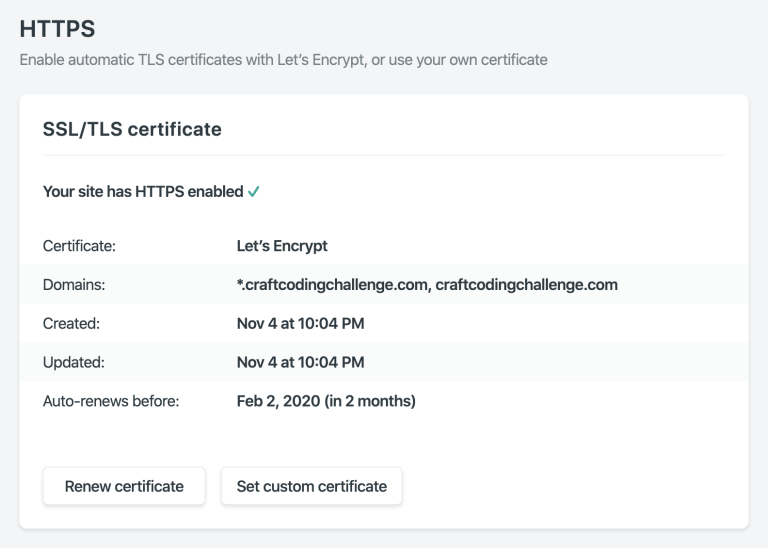
Netlify automatically provisions a Let’s Encrypt SSL certificate to secure the site with HTTPS. The certificate will conveniently be renewed automatically before expiring.
An important next step is to set up proxying of the Netlify site to the dynamic Craft CMS site. This will proxy any pages not found in the Netlify site, including form submissions, to the same URI at the cms subdomain. This means that if the URL www.domain.com/my/page is not found on the Netlify site, Netlify will make a request to cms.domain.com/my/page in the background and output the response to the user. The user doesn’t know what just happened as no redirect takes place in the browser. This additionally allows us to deploy only part of our site to Netlify, and the pages that we don’t deploy will still work through proxying.
Netlify provides two options for achieving this, a _redirects file and a configuration file. Proxying is simply a matter of creating a _redirects file in the root of the Git repository containing the following:
#- Proxy any page not found to the cms subdomain
/* https://cms.craftcodingchallenge.com/:splat 200
3. Connect Blitz to the repo #
The final step is to connect Blitz to the Git repository we cloned in the first step. To do this, we first need to set up a Personal Access Token in our Git provider account which we will use instead of a password. A Personal Access Token is a more secure (and portable) version of a password, and can be created in the account settings of GitHub, GitLab and Bitbucket.
Once we have a token, we enter the path to the repository, optionally specifying a branch and remote if different than the default values, in the Remote Deployment tab of the Blitz plugin settings. We can update the commit message (using twig tags if we want) as well as enter the remaining fields before saving the settings. If there are any problems connecting to the repository then we will receive a warning. In addition to seeing warnings on the plugin settings page, they will also be logged to storage/logs/blitz.log.

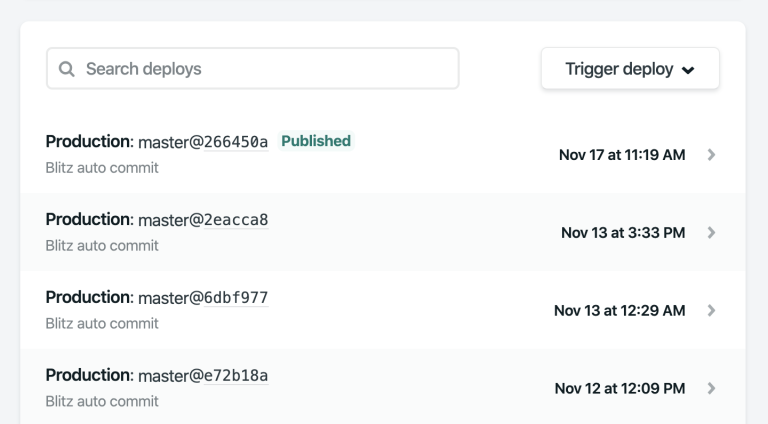
When Blitz is connected, we can already create our first deploy by clicking on Deploy to Remote in Utilities → Blitz Cache. To warm the cache first, we’ll use the Warm Cache utility. This will then instantly deploy all of our site’s cached pages to the Netlify site. Since we’ve walked through the entire process together, you’ll notice that there’s no magic here!!
4. Considerations #
Site URLs #
Since we are now dealing with a static www subdomain and a dynamic cms subdomain, we need to consider how site URLs will be generated by Craft. To ensure that the site continues to work as expected even without caching, we set the primary site URL to the dynamic subdomain cms.craftcodingchallenge.com.
To make our site portable, we avoid using absolute URLs and instead use relative URIs wherever possible, including the base URL for volumes. Rather than using siteUrl and url() in our templates, we’ll use / and uri():
<a href="/">Home</a>
<a href="/{{ entry.uri }}/">{{ entry.title }}</a>
Note that by default Netlify adds a trailing slash to the end of URLs, so it is good practice to follow this pattern with internal links (assuming we leave the pretty URLs option enabled).
Assets #
Our site will likely have assets, and if they are stored on the web server then we will want to deploy them to Netlify in addition to our pages. We can do this by adding a console command to recursively copy the assets folder from the Craft web folder to the root of the repository in the Commands Before field. This command will be run before each remote deploy, and since we are using Git, only assets that have been modified will actually end up being deployed.
cp -r ~/cms.craftcodingchallenge.com/web/assets ~/static.craftcodingchallenge.com/assets;

Netlify is Vast #
This article takes a single approach to deploying a Craft site to Netlify, however there are multiple ways of achieving the same result. Netlify is vast, and can do much much more than what we have explored here. Luckily for us, the Netlify docs are well written and thorough. If you’re not quite ready to read the documentation then you can learn everything you need to know in 59 minutes from this excellent devMode podcast.
