The URL scheme is an interesting feature provided by the iOS SDK that allows developers to launch system apps and third-party apps through URLs. For example, let’s say your app displays a phone number, and you want to make a call whenever a user taps that number. You can use a specific URL scheme to launch the built-in phone app and dial the number automatically. Similarly, you can use another URL scheme to launch the Message app for sending an SMS. Additionally, you can create a custom URL scheme for your own app so that other applications can launch your app via a URL. You’ll see what I mean in a minute.
As usual, we will build an app to demonstrate the use of URL schemes. We will reuse the QR code reader app that was built in the previous chapter. If you haven’t read the QR code tutorial, go back and read it before continuing on.
So far, the demo app is capable of decoding a QR code and displaying the decoded message on screen. In this chapter, we’ll make it even better. When the QR code is decoded, the app will launch the corresponding app based on the type of the URL.
To start with, first download the QRCodeReader app. If you compile and run the app, you’ll have a simple QR code reader app. Note that the app only works on a real iOS device.
Sample QR Codes
Here I include some sample QR codes that you can use to test the app. Alternatively, you can create your QR code using online services like www.qrcode-monkey.com. Open the demo app and point your device’s camera at one of the codes. You should see the decoded message.

Using URL Schemes
For most of the built-in applications, Apple provides support for URL schemes. For instance, you use the mailto scheme to open the Mail app (e.g. mailto:[email protected]) or the tel scheme to initiate a phone call (e.g. tel://743234028). To open an application with a custom URL scheme, all you need to do is call the open(_:options:completionHandler:) method of the UIApplication class. Here is the line of code:
|
1 |
UIApplication.shared.open(url, options: [:], completionHandler: nil) |
Now, we will modify the demo app to open the corresponding app when a QR code is decoded. Open the Xcode project and select the QRScannerController.swift file. Add a helper method called launchApp in the class:
|
1 2 3 4 5 6 7 8 9 10 11 12 13 14 15 16 17 18 |
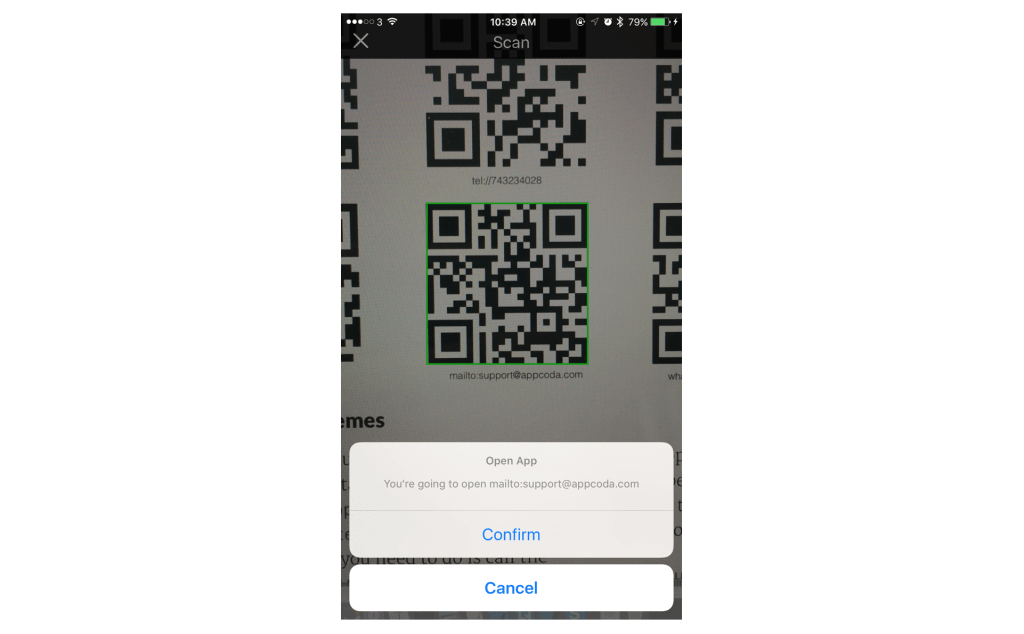
func launchApp(decodedURL: String) { let alertPrompt = UIAlertController(title: "Open App", message: "You're going to open \(decodedURL)", preferredStyle: .actionSheet) let confirmAction = UIAlertAction(title: "Confirm", style: UIAlertActionStyle.default, handler: { (action) -> Void in if let url = URL(string: decodedURL) { if UIApplication.shared.canOpenURL(url) { UIApplication.shared.open(url, options: [:], completionHandler: nil) } } }) let cancelAction = UIAlertAction(title: "Cancel", style: UIAlertActionStyle.cancel, handler: nil) alertPrompt.addAction(confirmAction) alertPrompt.addAction(cancelAction) present(alertPrompt, animated: true, completion: nil) } |
The launchApp method takes in a URL decoded from the QR code and creates an alert prompt. If the user taps the Confirm button, the app then creates an URL object and opens it accordingly. iOS will then open the corresponding app based on the given URL.
In the metadataOutput method, which is called when a QR code is detected, insert a line of code to call the launchApp method:
|
1 |
launchApp(decodedURL: metadataObj.stringValue!) |
Place the above line of code right after:
|
1 |
messageLabel.text = metadataObj.stringValue |
Now compile and run the app. Point your device’s camera at one of the sample QR codes (e.g. tel://743234028). The app will prompt you with an action sheet when the QR code is decoded. Once you tap the Confirm button, it opens the Phone app and initiates the call.
But there is a minor issue with the current app. If you look into the console, you should find the following warning:
|
1 2 |
2017-12-12 12:52:05.343934+0800 QRCodeReader[33092:8714123] Warning: Attempt to present <UIAlertController: 0x10282dc00> on <QRCodeReader.QRScannerController: 0x107213aa0> while a presentation is in progress! |
The launchApp method is called every time when a barcode or QR code is scanned. So the app may present another UIAlertController when there is already a UIAlertController presented. To resolve the issue, we have to check if the app has presented a UIAlertController object before calling the present(_:animated:completion:) method.
In iOS, when you present a view controller modally using the present(_:animated:completion:) method, the presented view controller is stored in the presentedViewController property of the current view controller. For example, when the QRScannerController object calls the present(_:animated:completion:) method to present the UIAlertController object, the presentedViewController property is set to the UIAlertController object. When the UIAlertController object is dismissed, the presentedViewController property will be set to nil.
With this property, it is quite easy for us to fix the warning issue. All you need to do is to put the following code at the beginning of the launchApp method:
|
1 2 3 |
if presentedViewController != nil { return } |
We simply check if the property is set to a specific view controller, and present the UIAlertController object only if there is no presented view controller. Now run the app again. The warning should go away.
One thing you may notice is that the app cannot open these two URLs:
fb://feedwhatsapp://send?text=Hello!
These URLs are known as custom URL schemes created by third-party apps. For iOS 9 and later, the app is not able to open these custom URLs. Apple has made a small change to the handling of URL scheme, specifically for the canOpenURL() method. If the URL scheme is not registered in the whitelist, the method returns false. If you refer to the console messages, you should see the error like this:
|
1 |
2017-12-12 12:58:26.771183+0800 QRCodeReader[33113:8719488] -canOpenURL: failed for URL: "fb://feed" - error: "This app is not allowed to query for scheme fb" |
This explains why the app cannot open Facebook and Whatsapp even it can decode their URLs. We will discuss more about custom URL scheme in the next section and show you how to workaround this issue.
Creating Your Custom URL Scheme
In the sample QR codes, I included two QR codes from third party apps:
- Facebook –
fb://feed - Whatsapp –
whatsapp://send?text=Hello!
The first URL is used to open the news feed of the user’s Facebook app. The other URL is for sending a text message using Whatsapp. Interestingly, Apple allows developers to create their own URLs for communicating between apps. Let’s see how we can add a custom URL to our QR Reader app.
We’re going to create another app called TextReader. This app serves as a receiver app that defines a custom URL and accepts a text message from other apps. The custom URL will look like this:
|
1 2 |
textreader://Hello! |
When an app (e.g. QR Code Reader) launches the URL, iOS will open the TextReader app and pass it the Hello! message. In Xcode, create a new project using the Single View Application template and name it TextReader. Once the project is created, expand the Supporting Files folder in the project navigator and select Info.plist. Right click any blank areaU and select Add Row to create a new key.
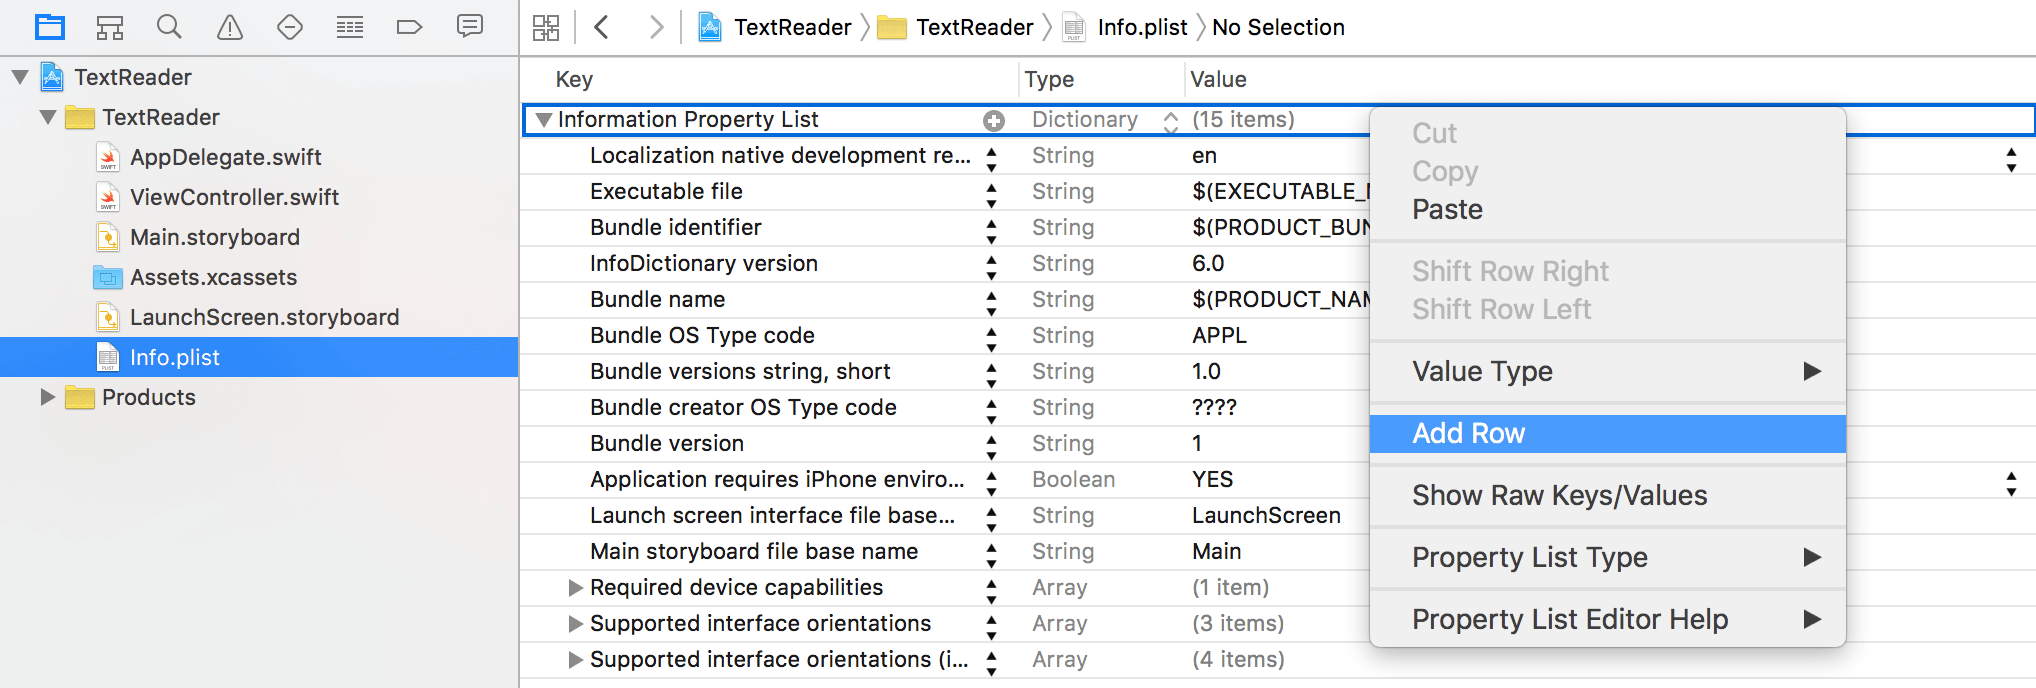
You’ll be prompted to select a key from a drop-down menu. Scroll to the bottom and select URL types. This creates an array item. You can further click the disclosure icon (i.e. triangle) to expand it. Next, select Item 0. Click the disclosure icon next to the item and expand it to show the URL identifier line. Double-click the value field to fill in your identifier. Typically, you set the value to be the same as the bundle ID (e.g. com.appcoda.TextReader).
Next, right click on Item 0 and select Add Row from the context menu. In the dropdown menu, select URL Schemes to add the item.
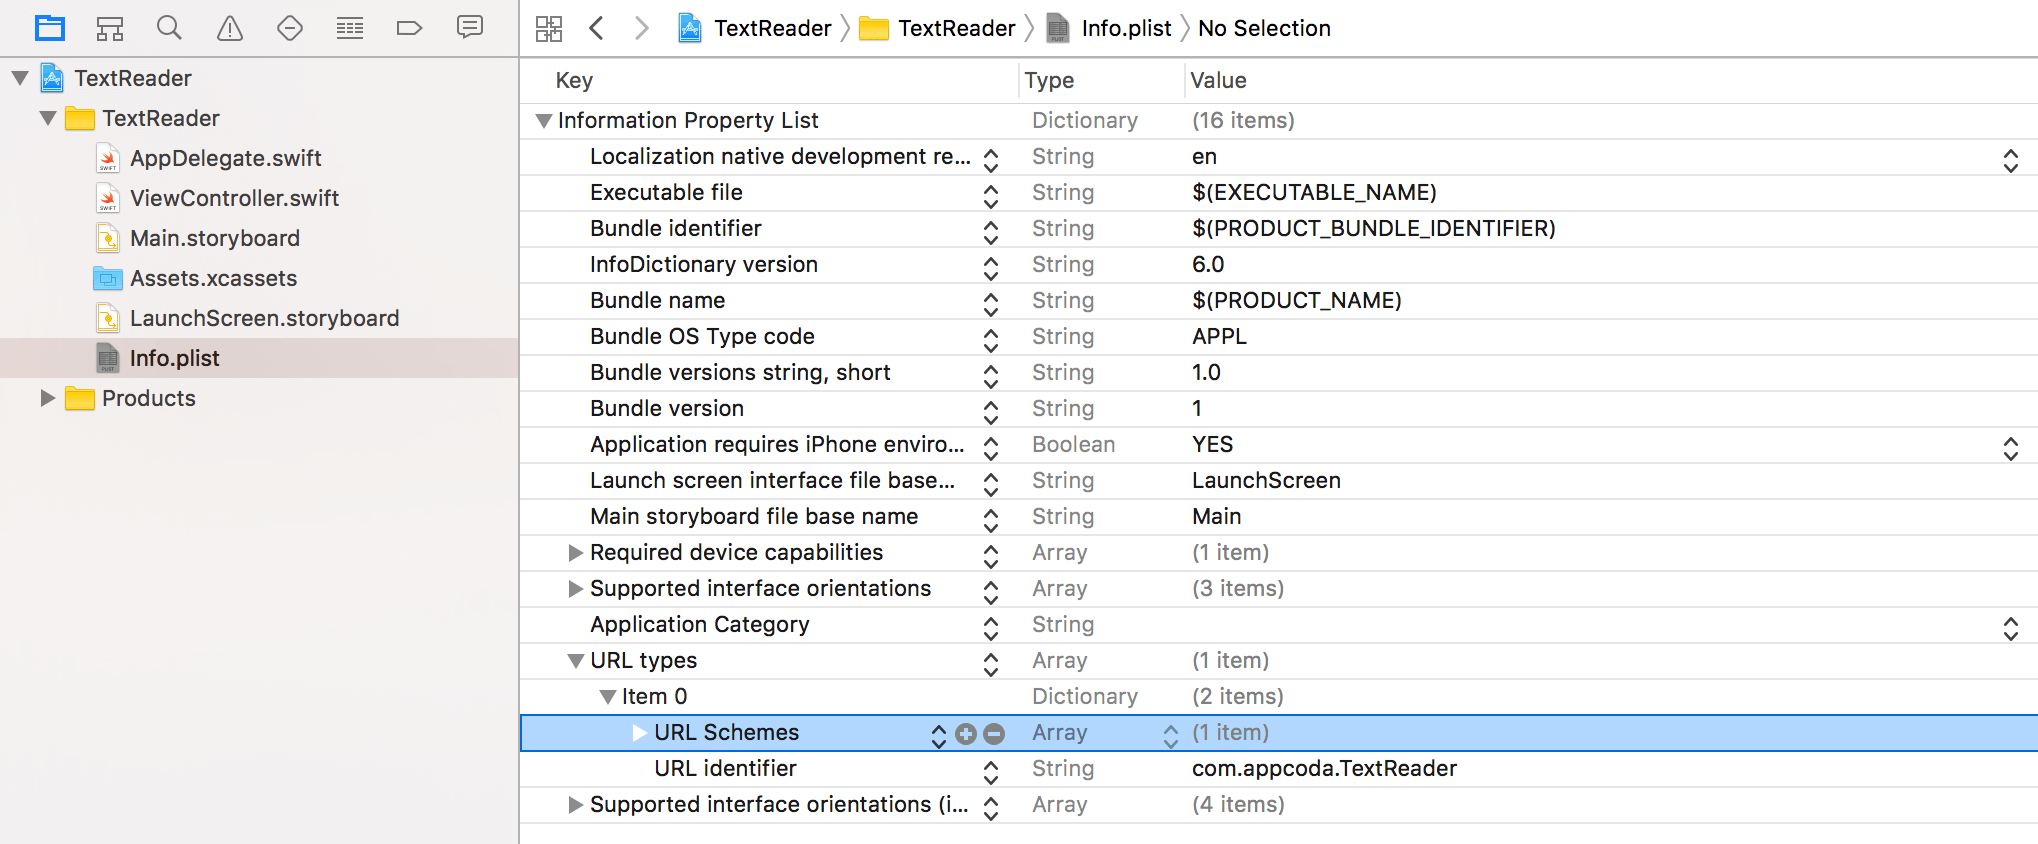
Again, click the disclosure icon of URL Schemes to expand the item. Double click the value box of Item 0 and key in textreader. If you’ve followed the procedures correctly, your URL types settings should look like this:

That’s it. We have configured a custom URL scheme in the TextReader app. Now the app accepts the URL in the form of textreader://<message>. We still need to write a few lines of code such that it knows what to do when another app launches the custom URL (e.g. textreader://Hello!).
As you know, the AppDelegate class implements the UIApplicationDelegate protocol. The method defined in the protocol gives you a chance to interact with important events during the lifetime of your app.
If there is a Open a URL event sent to your app, the system calls the application(_:open:options:) method of the app delegate. Therefore, you’ll need to implement the method in order to respond to the launch of the custom URL.
|
1 2 |
optional func application(_ app: UIApplication, open url: URL, options: [UIApplicationOpenURLOptionsKey : Any] = [:]) -> Bool |
Open AppDelegate.swift and insert the following code to implement the method:
|
1 2 3 4 5 6 7 8 9 10 11 |
func application(_ app: UIApplication, open url: URL, options: [UIApplicationOpenURLOptionsKey : Any] = [:]) -> Bool { let message = url.host?.removingPercentEncoding let alertController = UIAlertController(title: "Incoming Message", message: message, preferredStyle: .alert) let okAction = UIAlertAction(title: "OK", style: UIAlertActionStyle.default, handler: nil) alertController.addAction(okAction) window?.rootViewController?.present(alertController, animated: true, completion: nil) return true } |
From the arguments of the application(_:open:options:) method, you can get the URL resource to open. For instance, if another app launches textreader://Hello!, then the URL will be embedded in the URL object. The first line of code extracts the message by using the host property of the URL structure.
URLs can only contain ASCII characters, spaces are not allowed. For characters outside the ASCII character set, they should be encoded using URL encoding. URL encoding replaces unsafe ASCII characters with a % followed by two hexadecimal digits and a space with %20. For example, “Hello World!” is encoded to Hello%20World! The removingPercentEncoding method is used to decode the message by removing the URL percent encoding. The rest of the code is very straightforward. We instantiate a UIAlertController and present the message on screen.
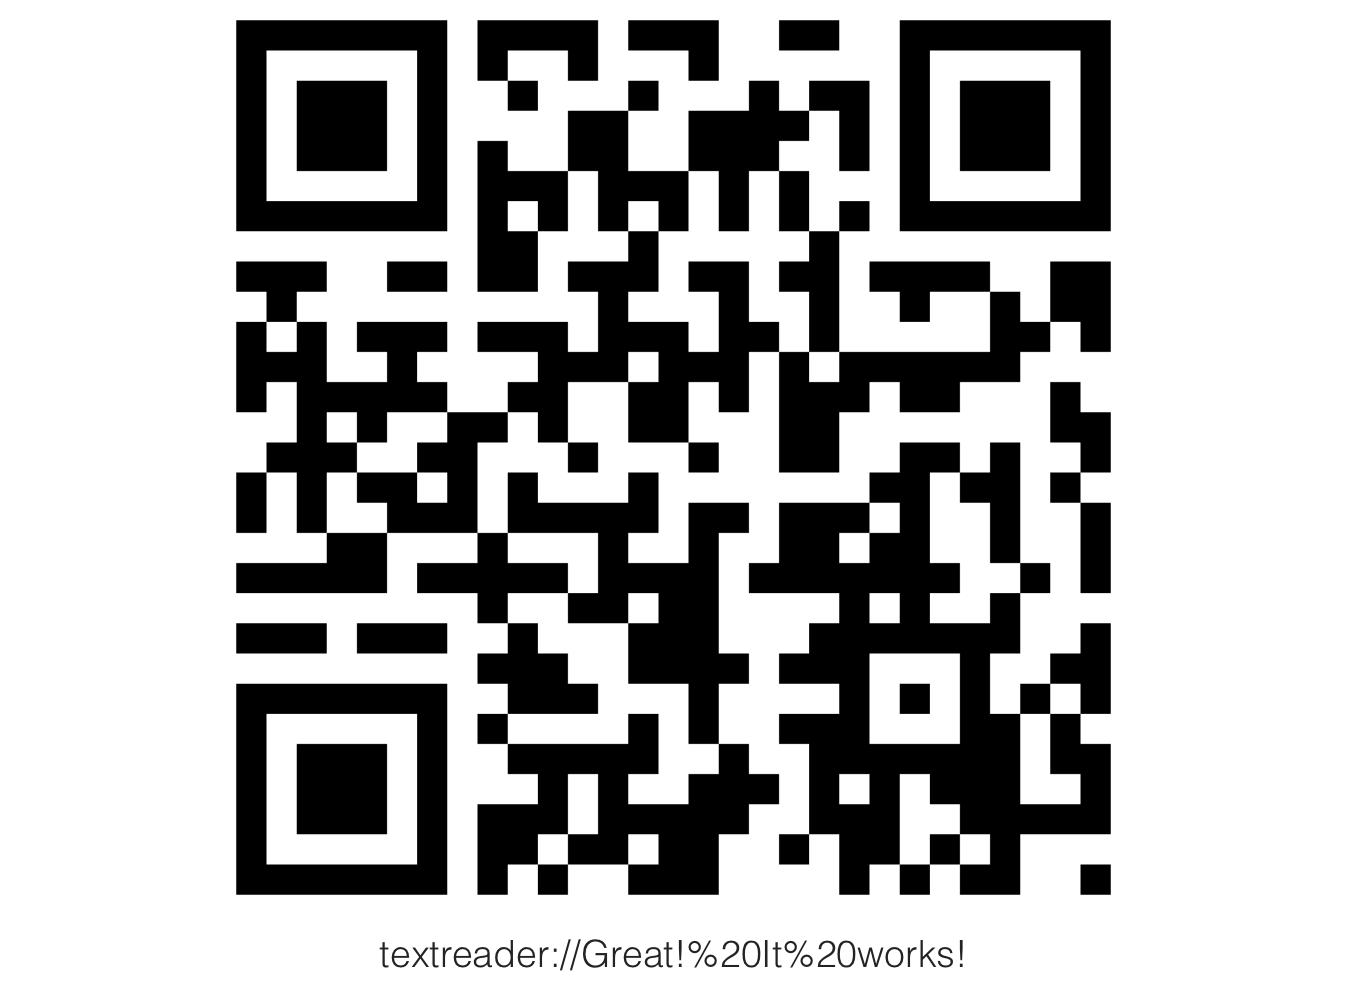
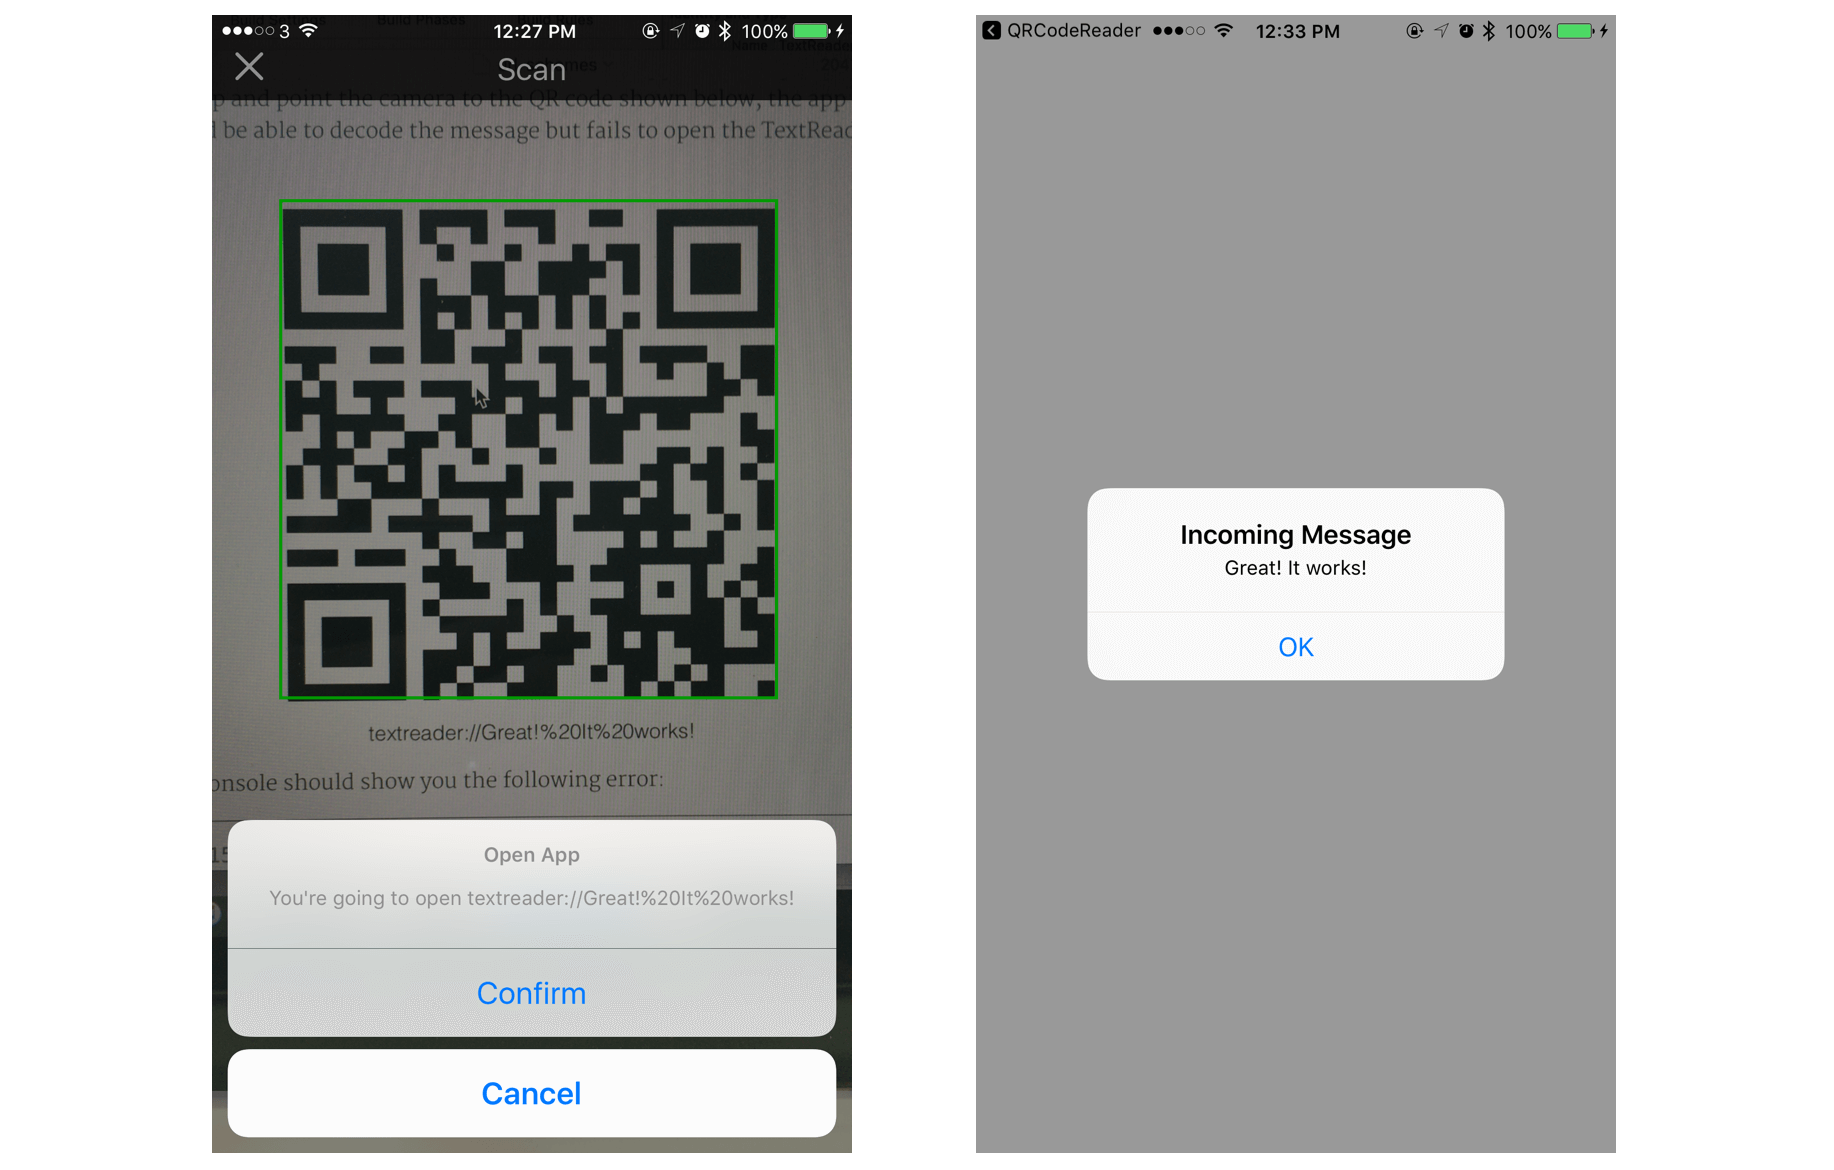
If you compile and run the app, you should see a blank screen. That’s normal because the TextReader app is triggered by another app using the custom URL. You have two ways to test the app. You can open mobile Safari and enter textreader://Great!%20It%20works! in the address bar – you’ll be prompted to open the TextReader app. Once confirmed, the system should redirect you to the TextReader app and displays the Great! It works! message.
Alternatively, you can use the QR Code Reader app for testing. If you open the app and point the camera to the QR code shown below, the app should be able to decode the message but fails to open the TextReader app.
The console should show you the following error:
|
1 2 |
2017-12-12 13:28:52.795789+0800 QRCodeReader[33176:8736098] -canOpenURL: failed for URL: "textreader://Great!%20It%20works!" - error: "This app is not allowed to query for scheme textreader" |
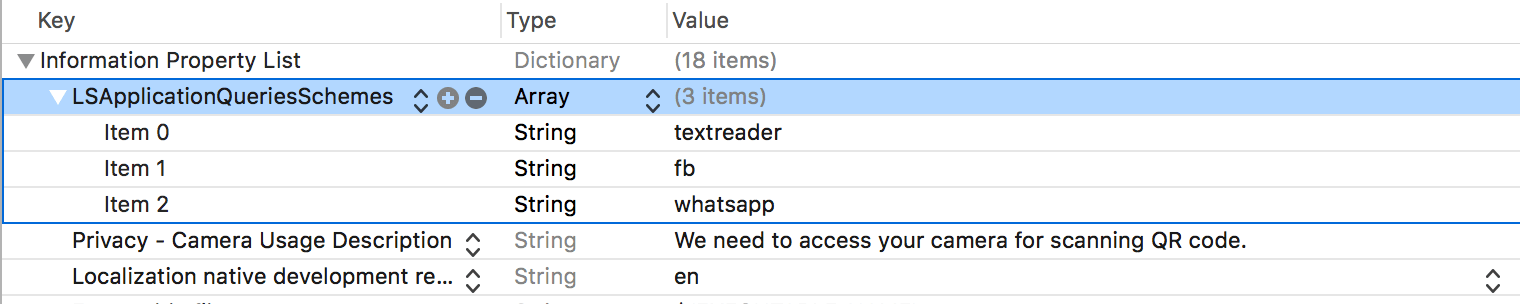
As explained earlier, Apple has made some changes to the canOpenURL method since iOS 9. You have to register the custom URL schemes before the method returns true. To register a custom scheme, open Info.plist of the QRReaderDemo project and add a new key named LSApplicationQueriesSchemes. Set the type to Array and add the following items:
- textreader
- fb
Once you’ve made the change, test the QR Reader app again. Point to a QR code with a custom URL scheme (e.g. textreader). The app should be able to launch the corresponding app.
Furthermore, if you scan the QR code of the Facebook scheme or Whatsapp scheme, the app should now be able to launch the Facebook/Whatsapp app accordingly.

Founder of AppCoda. Author of multiple iOS programming books including Beginning iOS Programming with Swift and Mastering SwiftUI. iOS App Developer and Blogger. Follow me at Facebook, Twitter and Google+.