If you want to check the process for Angular 6 check my previous article: https://medium.com/@ismapro/first-steps-with-angular-cli-and-angular-material-5a90406e9a4
Angular has come a long way since version 2, and now with more libraries, and tools to help with the development is even easier to start developing applications with it. In this guide I will go step by step on how to build an angular application using the Angular-cli (command line tool), and Angular Material.
If you come from previous versions of angular give a look to this page: https://update.angular.io/ where you can see the steps to upgrade to the latest version. (or in between from 2 to 6 for example).
Requirements
- NodeJs (v10.9.0 or greater)
Preparing the Environment
Angular development makes heavy use of the angular-cli and everything begins installing it globally:
npm install @angular/cli -g
Once installed, check that everything is working with the following command:
ng --version
And you will see something similar to:

If you don’t see any errors and the ASCII art is shown everything should be working correctly, now lets create the application, for it lets execute the “ng new” command with the name of the application:
ng new angular-first-steps
It will ask you if you want to add routing, type “No” or simply the letter “n”, because we want to keep it simple for now, and then it will ask you for the stylesheet format, you can move with the keyboard arrow keys, and pick “SCSS”, we well need it for the material theming later on.

you can skip the selection process using the following flags “routing” and “styles”:
ng new angular-first-steps --routing=false --style=scss
for more details about the ng new flags check: https://github.com/angular/angular-cli/wiki/new
The angular-cli will take care of the initial configuration and installation of the dependencies. So now you can go to the project folder:
cd angular-first-steps
And start the application with:
ng serve
Then your application will show the building process, and finally, something similar to:

You can now go to your browser and go to the following address to check it
http://localhost:4200
It should look like this:
Adding angular material
Great now that we are sure the application loaded, you can stop it pressing “Ctrl + c” in the console you are running it, so we can add Angular Material to our application through the schematics.
ng add @angular/material
And make sure you select the following options for the questions.

The first question will ask if you want to use one of the pre-built themes or use your own, in this case we are going to create our own theme.
The second question is to enable the gesture recognition particularly helpful for mobile applications, for this HammerJS will be added to the list of libraries in the package.json and in the application configuration.
Finally the last question is if you want to enable the angular default animations, lets leave it so we can have the full functionality for now.
For more information about the Angular material installation you can check Getting Started Angular Material
Now open your favorite IDE or Text Editor in the application folder, I recommend to use VS Code, to open it from the terminal in the current location just execute:
code .
Once the IDE opens, navigate to the “styles.scss”
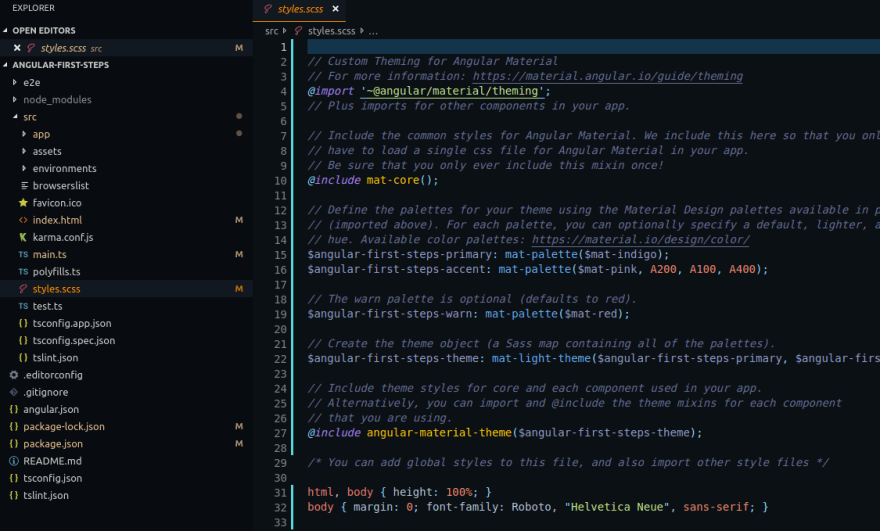
Here you can see the main configuration parts for the theme, and you will have the inline comments which will help you understanding each step.
If you want to know more about material theming and palettes look at the following link.
The color system
*The Material Design color system can be used to create a color theme that reflects your brand or style. Color usage and…*material.io
Adding Material Components
In your IDE navigate to the file “src/app/app.module.ts”, and import the following modules:
import { MatInputModule, MatButtonModule, MatSelectModule, MatIconModule } from '@angular/material';
import { FormsModule } from '@angular/forms';
And then add them to the imports array:
imports: [
    BrowserModule,
    BrowserAnimationsModule,
    FormsModule,
    MatInputModule,
    MatButtonModule,
    MatSelectModule,
    MatIconModule
  ],
Each component that you want to use requires you to import the respective module of it, you can check the Angular Material documentation to know the name of the Module for each component, usually at the top of their API section.

The next step is to add some components, so go to “src/app/app.component.html” and add the following code:
Each one of the components had specific properties some of them are:
input field, that needs to be inside of the “mat-form-field”, the [(ngModel)] is to make the two-way binding with the variable title **that it’s also present in the **h1.
mat-icon, where you can change the icon by simply setting the inner text with any of the icons that are provided, you can find the icon list in here https://material.io/icons/
raised button, a normal button with a shadow effect.
The select is loading a list of items and creating some options from them, the list of items is declared in the class.
Navigate to the file “src/app/app.component.ts” and make sure the variables title, selectedValue, and items, are defined like in the following gist.
You can check a full list of available components with code examples, and api definition in the following page: https://material.angular.io/components
Running the application
So now you have Angular and Angular material, is time to add some components and see them live, for this first go to the terminal and run application.
ng serve
or you can use the flag — open to open your default browser:
ng serve --open

Amazing! You now have an Angular Application with some Material components. But as you might imagine there are still a lot components to learn and configuration that can make your experience developing applications even better, for that I can recommend you to go to the following links:
I have created a repository with the full code for the application: https://github.com/ismaproco/angular-first-steps


Top comments (2)
Great work Ismael, I liked your post.
Thanks for sharing your knowledge with us.
Thanks for the insight.
Good work