This article was peer reviewed by Edwin Reynoso, Tim Severien and Divy Tolia. Thanks to all of SitePoint’s peer reviewers for making SitePoint content the best it can be!
In the past, cross-platform software development often meant writing the same application in different languages for different operating systems. As you can imagine, this was a difficult situation for project managers, developers and customers alike.
Then, in 2011, Roger Wang introduced something called Node-Webkit. Node-Webkit (which has since been renamed to NW.js) is a combination of Node.js and an embedded WebKit browser which allows developers to use web technologies (i.e. HTML, CSS and JavaScript) to develop native apps. Yes, that’s right! We get to write native apps, using all the goodies that are supported in our modern browsers. For example, CSS3 animations, WebGL, WebRTC, video, audio, and plenty more can all be incorporated into a native application.
In this tutorial, I am going to demonstrate how to harness the power of NW.js to make a tabbed browser, which can be deployed on all major operating systems. As ever, the code for this tutorial can be found on our GitHub repo.
Initial Setup
As the name suggests, NW.js is based on Node, so you’ll need to have that installed on your operating system. We’ll also be making use of npm (the Node Package Manager). If you need help getting either of these things set up, then check out our tutorial: A Beginner’s Guide to npm.
Next we’ll need a folder for our project:
mkdir sitepoint-browser && cd sitepoint-browser
We’ll also need some dependencies that should be installed globally (namely, Yeoman, Grunt and Bower):
npm install -g yo grunt bower
Of these, Yeoman (AKA Yo) is a tool to scaffold everyday projects dynamically, thereby avoiding the hurdles of always having to create reusable project structures manually. Grunt is a task runner which Yeoman uses. It also uses npm and Bower to install required dependencies.
Next, we’ll install Yo’s generator-wean. You can either do this globally or locally. Here I’ll do it globally:
npm install -g generator-wean
NW.js itself has a handful of generators but generator-wean (authored by me) comes bundled with ExpressJS and AngularJS which eases the stress of installing and configuring them. WEAN stands for Webkit, Express, Angular and Node just like the popular MEAN.
Now our skeleton app can be generated with one command:
yo wean
Yo is an interactive guy and the generator will ask you some questions in order to assist in making a project that best suits what you want. Here you can just accept the defaults.
Folder Structure
The folder structure will look like so:
.
├── app
│   ├── app.js
│   ├── index.html
│   ├── public
│   │   ├── css
│   │   │   └── app.css
│   │   ├── js
│   │   │   └── app.js
│   │   ├── libs
│   │   │   ├── angular
│   │   │   ├── bootstrap
│   │   │   └── jquery
│   │   └── partials
│   │       └── header.html
│   ├── routes
│   │   └── index.js
│   └── views
│       └── index.ejs
├── node_modules
├── bower.json
├── Gruntfile.js
├── package.json
└── README.md
For this project, we are interested primarily in the contents of the public directory. The generator will have filled these files with a bunch of boilerplate (a very simple Angular app), but we will be addressing that as we go.
We can now run the skeleton app using:
grunt run or just grunt
This command can be used at any point in the app development to preview changes. It executes the NW.js project which in turns uses Express for routing just as you would when making a web application. This is a good example of how we can use Node modules in NW.js by injecting them in the app/index.html after initializing.
NW.js also has developer tools and toolbars where we can find controls to refresh, debug, inspect, log, etc just as we do when building a web application in Chrome. You can access these by clicking the hamburger icon in the skeleton app.
Dealing With the UI
The most important aspect of this tutorial is to be able to surf the internet from our native application. The webview and iframe tags are perfect candidates for our plan. The webview tag is effective but quite new to the game as it was only recently added to NW.js. The iframe tag, however has been around since HTML 4 and has wide support. We will use it because it is well-known to most developers.
Bootstrap will serve as the base for our UI. We will use a custom bootstrap theme named Slate from Bootswatch. Download Slate and place it in app/public/css/bootstrap.css.
For our icons, we will make use of Font Awesome. From the project root run:
bower install --save fontawesome
This will download Font Awesome to our libs folder just like other bower dependencies. This is because we specify the following line in the .bowerrc file in our project root (the default is otherwise bower_components).
{
  "directory" : "app/public/libs"
}
Fortunately, Bootstrap will handle most of the UI tasks but we need to tweak some of the components and contents to actually make a browser that looks good. To achieve this, we will write some simple and short CSS and place it in app/public/css/app.css:
html,
.tab-content,
.tab-pane,
body > div {
  height: 100%;
}

iframe {
  background: white;
}

.controls {
  position: fixed;
  top: 10px;
  right: 8px;
}

.controls > i {
  padding: 0 3px;
}

.controls > i:last-child {
  color: red;
}

.controls > i:hover {
  color: white;
  cursor: pointer;
}

.close-tab:hover {
  color: red;
  cursor: pointer;
}
The html, body, tab-content and tab-pane height are set to 100% to ensure that regardless of the size of our browser app, the content should fill up the height of the window. By default, width is 100% so there is no need to explicitly specify it. We also give a minimal style to our browser controls which we will be seeing in a while.
To make sure all our CSS files are loaded, copy the following into the head section of app/views/index.ejs. This should replace the two style sheets that are already there.
<link rel="stylesheet" href="css/bootstrap.css">
<link rel="stylesheet" href="libs/font-awesome/css/font-awesome.css">
<link rel="stylesheet" href="css/app.css">
Installing Our Dependencies
As mentioned, my WEAN generator comes bundled with AngularJS, which we will be making use of for our browser app. We will also be making use of Bootstrap’s tabs component to display our browser’s tabs. There is however a known problem when trying to bring in the Bootstrap JavaScript components into an Angular project, which is why the Angular team created Angular Bootstrap UI.
Let’s add that to our project. From the root directory run:
bower install --save angular-bootstrap
AngularJS is good with security and places restrictions on things considered potentially harmful. At some point in our app, we will have to sanitize our HTML and stop Angular from throwing errors when it encounters trusted HTML being injected into our code. A module that handles this kind of situation is ngSanitize (which we will soon encounter). This too should be installed using Bower:
bower install --save angular-sanitize
If you are asked by Bower to chose a version of the library, select the one which resolves to angular#1.4.6.
Just as we have done with our CSS files, let’s include the JS dependencies before the body closing tag in app/views/index.ejs:
<html ng-app="browser">
  ...
  <body ng-controller="main">
    <script src="libs/jquery/dist/jquery.min.js"></script>
    <script src="libs/angular/angular.js"></script>
    <script src="libs/angular-sanitize/angular-sanitize.js"></script>
    <script src="libs/angular-bootstrap/ui-bootstrap-tpls.js"></script>
    <script src="js/app.js"></script>
  </body>
</html>
Notice that the ng-app attribute has been set to browser and the ng-controller attribute has been set to main. Now would also be a good time to clear out the rest of the boilerplate code.
The final thing to do in the way of setup is to inject the dependencies we just downloaded into our Angular app app/public/js/app.js:
angular.module('browser', ['ui.bootstrap', 'ngSanitize'])
  .controller('main', function(){});
At this point we have a skeleton of the app. Our CSS files (both library and custom) have been installed and/or created. The JavaScript files along with their dependencies have also been made available and added to the app. If you run grunt at this point, you should see is a blank window. Exciting, huh?
Now, all that is left in the development process is to flesh out the remaining part of the mark-up and create the behavior in the app.js.
The Markup
NW.js uses HTML for its views. We have already created one with the generator (app/views/index.ejs) and loaded some files into it. We now need to add the markup that will help us launch web pages in our native app.
<uib-tabset>
  <iframe-tab tabs="tabs">
  </iframe-tab>
</uib-tabset>
The uib-tabset tag is an Angular directive provided by the Angular Bootstrap UI library to help implement a tabs component, while iframe-tab will be created in our app to customize Bootstrap’s UI tab directive to suit us. The iframeTab directive will be configured using the tabs scope which appears as an attribute on the iframe-tab tag.
Implementing the Directive
Tabbed browsers like Chrome and Firefox are easier to navigate and boost users’ productivity. Our own browser should not be left out. In the app/public/js/app.js file we will create a minimal directive to implement tabbing.
.directive('iframeTab', function () {
  return {
    restrict: 'E',
    scope: {
      tabs: '='
    },
    replace: true,
    template: '<uib-tab ng-repeat="tab in tabs" active="tab.active">' +
    '<uib-tab-heading>{{tab.url}} <i class="fa fa-times close-tab"' +
    'ng-click="closeTab($index)"></i></uib-tab-heading>' +
    '<iframe src="{{trustSrc(tab.url)}}"' +
    'style="width:100%; height:100%" nwdisable nwfaketop></iframe>' +
    '</uib-tab>'
  };
})
What we are doing here is creating a reusable template that can be created dynamically using Angular. The trustSrc() method on the iframe src attribute will be created in our controller.
Explaining how directives work in Angular is beyond the scope of this article. If you’re in need of a refresher, check out: A Practical Guide to AngularJS Directives.
Some Supporting Services
Angular uses services for code organization, reusability, communicating with APIs and the sharing of logic between its controllers. We need to make three for ourselves: one (prompt) to use prompts to get URL inputs and the other two (GUI and Window) to communicate with NW.js’ GUI and Window APIs so that we can create custom minimize, full-screen and close buttons:
.factory("prompt", function ($window, $q) {
  function prompt(message, defaultValue) {
    var defer = $q.defer();
    var response = $window.prompt(message, defaultValue);
    if (response === null) {
      defer.reject();
    } else {
      defer.resolve(response);
    }
    return (defer.promise);
  }
  return (prompt);
})
.factory('GUI', function () {
  return require('nw.gui');
})
.factory('Window', function (GUI) {
  return GUI.Window.get();
});
The Controller at Last
The controller, just as the name goes, will control the flow of data in the application. We will inject the following dependencies: $scope, $sce (a service that provides Strict Contextual Escaping services to AngularJS), prompt, Window (the two services we created above).
.controller('main', function ($scope, $sce, prompt, Window) {
  //implementation here
})
We will first create a method to trust a resource URL (which we already implemented in the directive):
$scope.trustSrc = function (src) {
  return $sce.trustAsResourceUrl(src);
}
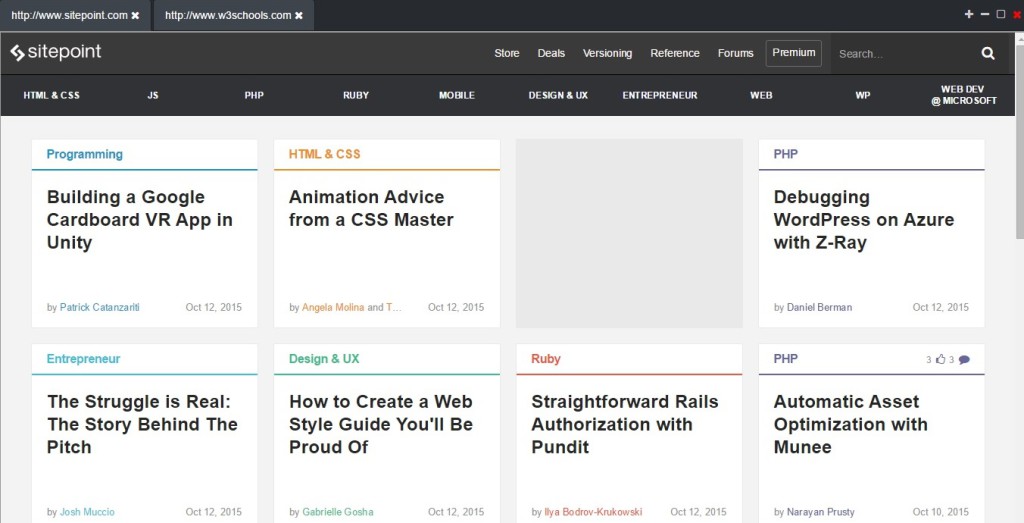
It would be awesome to make SitePoint our home page, so we will create an array of tabs for our directive to loop through with SitePoint’s URL as the first value.
$scope.tabs = [
  {
    url: 'https://www.sitepoint.com/'
  }
];
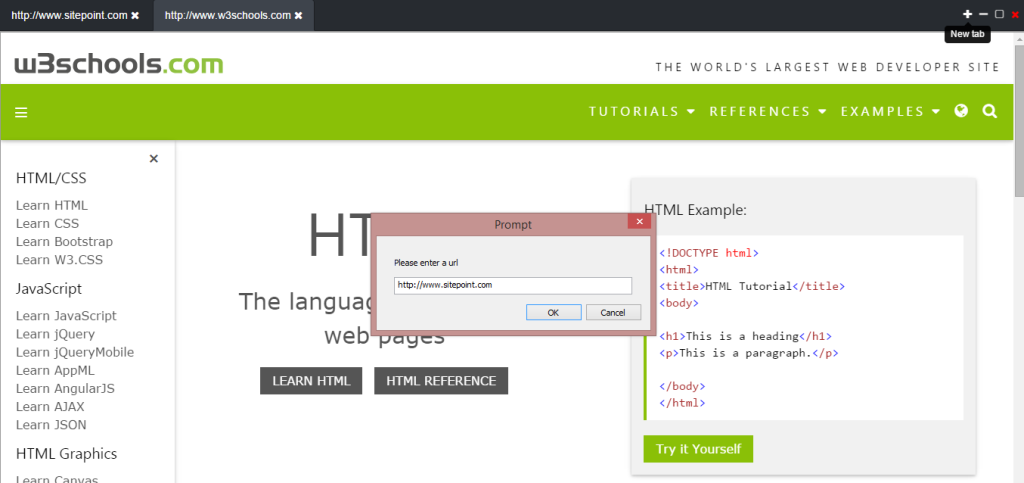
We can now launch new tabs using the prompt service to get the URL from the user. We set the active attribute to true, so that the new tab receives focus:
$scope.newTab = function () {
  prompt("Please enter a url", "http://www.sitepoint.com")
  .then(function (url) {
    var tab = {url: url, active:true}
    $scope.tabs.push(tab);
  },
  function () {
    alert("Error opening site!");
  });
};
Closing tabs involves using the Array#splice function to remove values from the tabs’ array as seen below:
$scope.closeTab = function (index) {
  $scope.tabs.splice(index, 1);
};
The rest of the controller is used to add behavior to the controls which are for minimizing, enabling/disabling fullscreen and closing the window:
$scope.minimize = function () {
  Window.minimize();
};
$scope.toggleKioskMode = function () {
  Window.toggleKioskMode();
};
$scope.close = function () {
  Window.close();
};
We have yet to add these controls to the markup even though we have added the implementation. So let us do that now (in app/views/index.ejs):
<div class="controls">
   <i class="fa fa-plus" tooltip-placement="bottom"
   uib-tooltip="New tab" ng-click="newTab()"></i>
   <i class="fa fa-minus" ng-click="minimize()"></i>
   <i class="fa fa-square-o" ng-click="toggleKioskMode()"></i>
   <i class="fa fa-times" ng-click="close()"></i>
<div>
And that’s it! You can now launch the browser using the grunt command from the terminal.
Building for Platforms
If you cast your mind back to the start of the article, I mentioned that it is possible to deploy a NW.js app on all major operating systems. There are extensive instructions on how to do this on the NW.js project page, or you could use generator-wean’s pre-configured build task (which I will now demonstrate).
Running grunt build from the project root will build the app for the OS it was built on, whereas grunt build:all will build for all platforms. The command grunt build:{platform} (eg grunt build:mac ) will build for a specific OS. Possible options are win, osx, linux32, linux64. For more information, please refer to generator-wean readme.
By way of an example, if you are on a 64-bit Linux system and run:
grunt build
This will generate a builds/test/linux64 directory which contains an executable, corresponding to the name of your project.
Conclusion
With that I hope to have demonstrated not just the power of NW.js, but the power of web technologies in making native applications. We did not just learn how to make a native browser, but we also saw NW.js, Yeoman and other tools in play. Don’t forget, the source code for this tutorial is on GitHub — I encourage you to download it and experiment.
Are you using NW.js? Do you think that it can mount a serious challenge to native applications? I’d love to hear your thoughts in the comments below.
Frequently Asked Questions (FAQs) about Node-Webkit and AngularJS
What is the main difference between Node.js and AngularJS?
Node.js and AngularJS are both JavaScript-based technologies, but they serve different purposes. Node.js is a runtime environment that allows JavaScript to be run on the server side, while AngularJS is a client-side framework used for building dynamic web applications. Node.js is ideal for creating scalable and efficient server-side applications, while AngularJS excels at creating single-page applications with rich, interactive features.
How can I use Node.js with AngularJS?
Node.js and AngularJS can be used together to create a full-stack JavaScript application. Node.js can be used to create the server-side part of the application, handling tasks such as database operations, file I/O, and network communication. AngularJS, on the other hand, can be used to create the client-side part of the application, providing a dynamic and interactive user interface.
What is Node-Webkit and how does it relate to AngularJS?
Node-Webkit is a tool that allows you to create desktop applications using web technologies like HTML, CSS, and JavaScript. It combines the Node.js runtime with the Chromium web browser, allowing you to use Node.js modules directly in the browser. This means you can use AngularJS to create the user interface for your Node-Webkit application, just like you would for a regular web application.
Can I build desktop applications using JavaScript and Node-Webkit?
Yes, you can build desktop applications using JavaScript and Node-Webkit. Node-Webkit allows you to use web technologies to create desktop applications, meaning you can use JavaScript, along with HTML and CSS, to create the user interface for your application. You can also use Node.js modules directly in the browser, giving you access to powerful features like file I/O and network communication.
What are the advantages of using Node.js over AngularJS, and vice versa?
The main advantage of Node.js over AngularJS is its ability to handle server-side tasks, such as database operations, file I/O, and network communication. This makes it ideal for creating scalable and efficient server-side applications. On the other hand, the main advantage of AngularJS over Node.js is its ability to create dynamic and interactive user interfaces, making it ideal for creating single-page applications.
How can I get started with Node-Webkit?
To get started with Node-Webkit, you first need to download and install it. Once you’ve done that, you can create a new project by creating a package.json file and a main HTML file. The package.json file is used to specify the main HTML file and other settings for your application, while the main HTML file is where you write your application’s user interface.
Can I use other JavaScript frameworks with Node-Webkit?
Yes, you can use other JavaScript frameworks with Node-Webkit. Node-Webkit allows you to use any JavaScript framework that can run in the browser, including frameworks like React, Vue.js, and Ember.js. This gives you a lot of flexibility when it comes to choosing the right tools for your application.
What are some common use cases for Node-Webkit?
Node-Webkit is commonly used to create desktop applications that need to use web technologies. This includes applications like text editors, music players, and photo editors. It’s also used to create applications that need to interact with the file system or the network, thanks to its integration with Node.js.
How does Node-Webkit compare to other tools for creating desktop applications?
Node-Webkit compares favorably to other tools for creating desktop applications. Its main advantage is its ability to use web technologies, which makes it easier for web developers to transition to desktop application development. It also integrates with Node.js, giving it access to powerful features like file I/O and network communication.
What are some challenges I might face when using Node-Webkit and AngularJS together?
One challenge you might face when using Node-Webkit and AngularJS together is managing the communication between the server-side and client-side parts of your application. This can be especially tricky if you’re not familiar with full-stack JavaScript development. However, with careful planning and good use of Node.js and AngularJS’s features, you can overcome this challenge.
 Christian Nwamba
I have passion for instructing computers and understanding their language and would die to remain a computer programmer in my next life. I really love to write about code at http://coolandcodes.com and scotch.io